
Wheat Berry and Bean Salad
March 6, 2013 § 2 Comments
The only on-the-package-recipe you should ever make is Nestle Toll House Chocolate Chip Cookies. Truly. It’s a proven recipe and makes a darned-good cookie, a cookie you will experience from the first years of your life to your last. It’ll even be served at your wake. Every other recipe found on a package—whether it’s a box of Velveeta or a fancy grain—should be embarked upon with hesitation and doubt. A dingy full of doubt.
I love what wheat berries do for me for breakfast. I’ve also included them in bread recipes and sprinkled them on a green salad. So when I grabbed my bag of Bob’s Red Mill Wheat Berries and noticed the Wheat Berry & White Been Salad recipe on the back I thought, “Why not try something new today?” “New,” I am reminded now, means a learning experience and not necessarily a guarantee of something awesome.
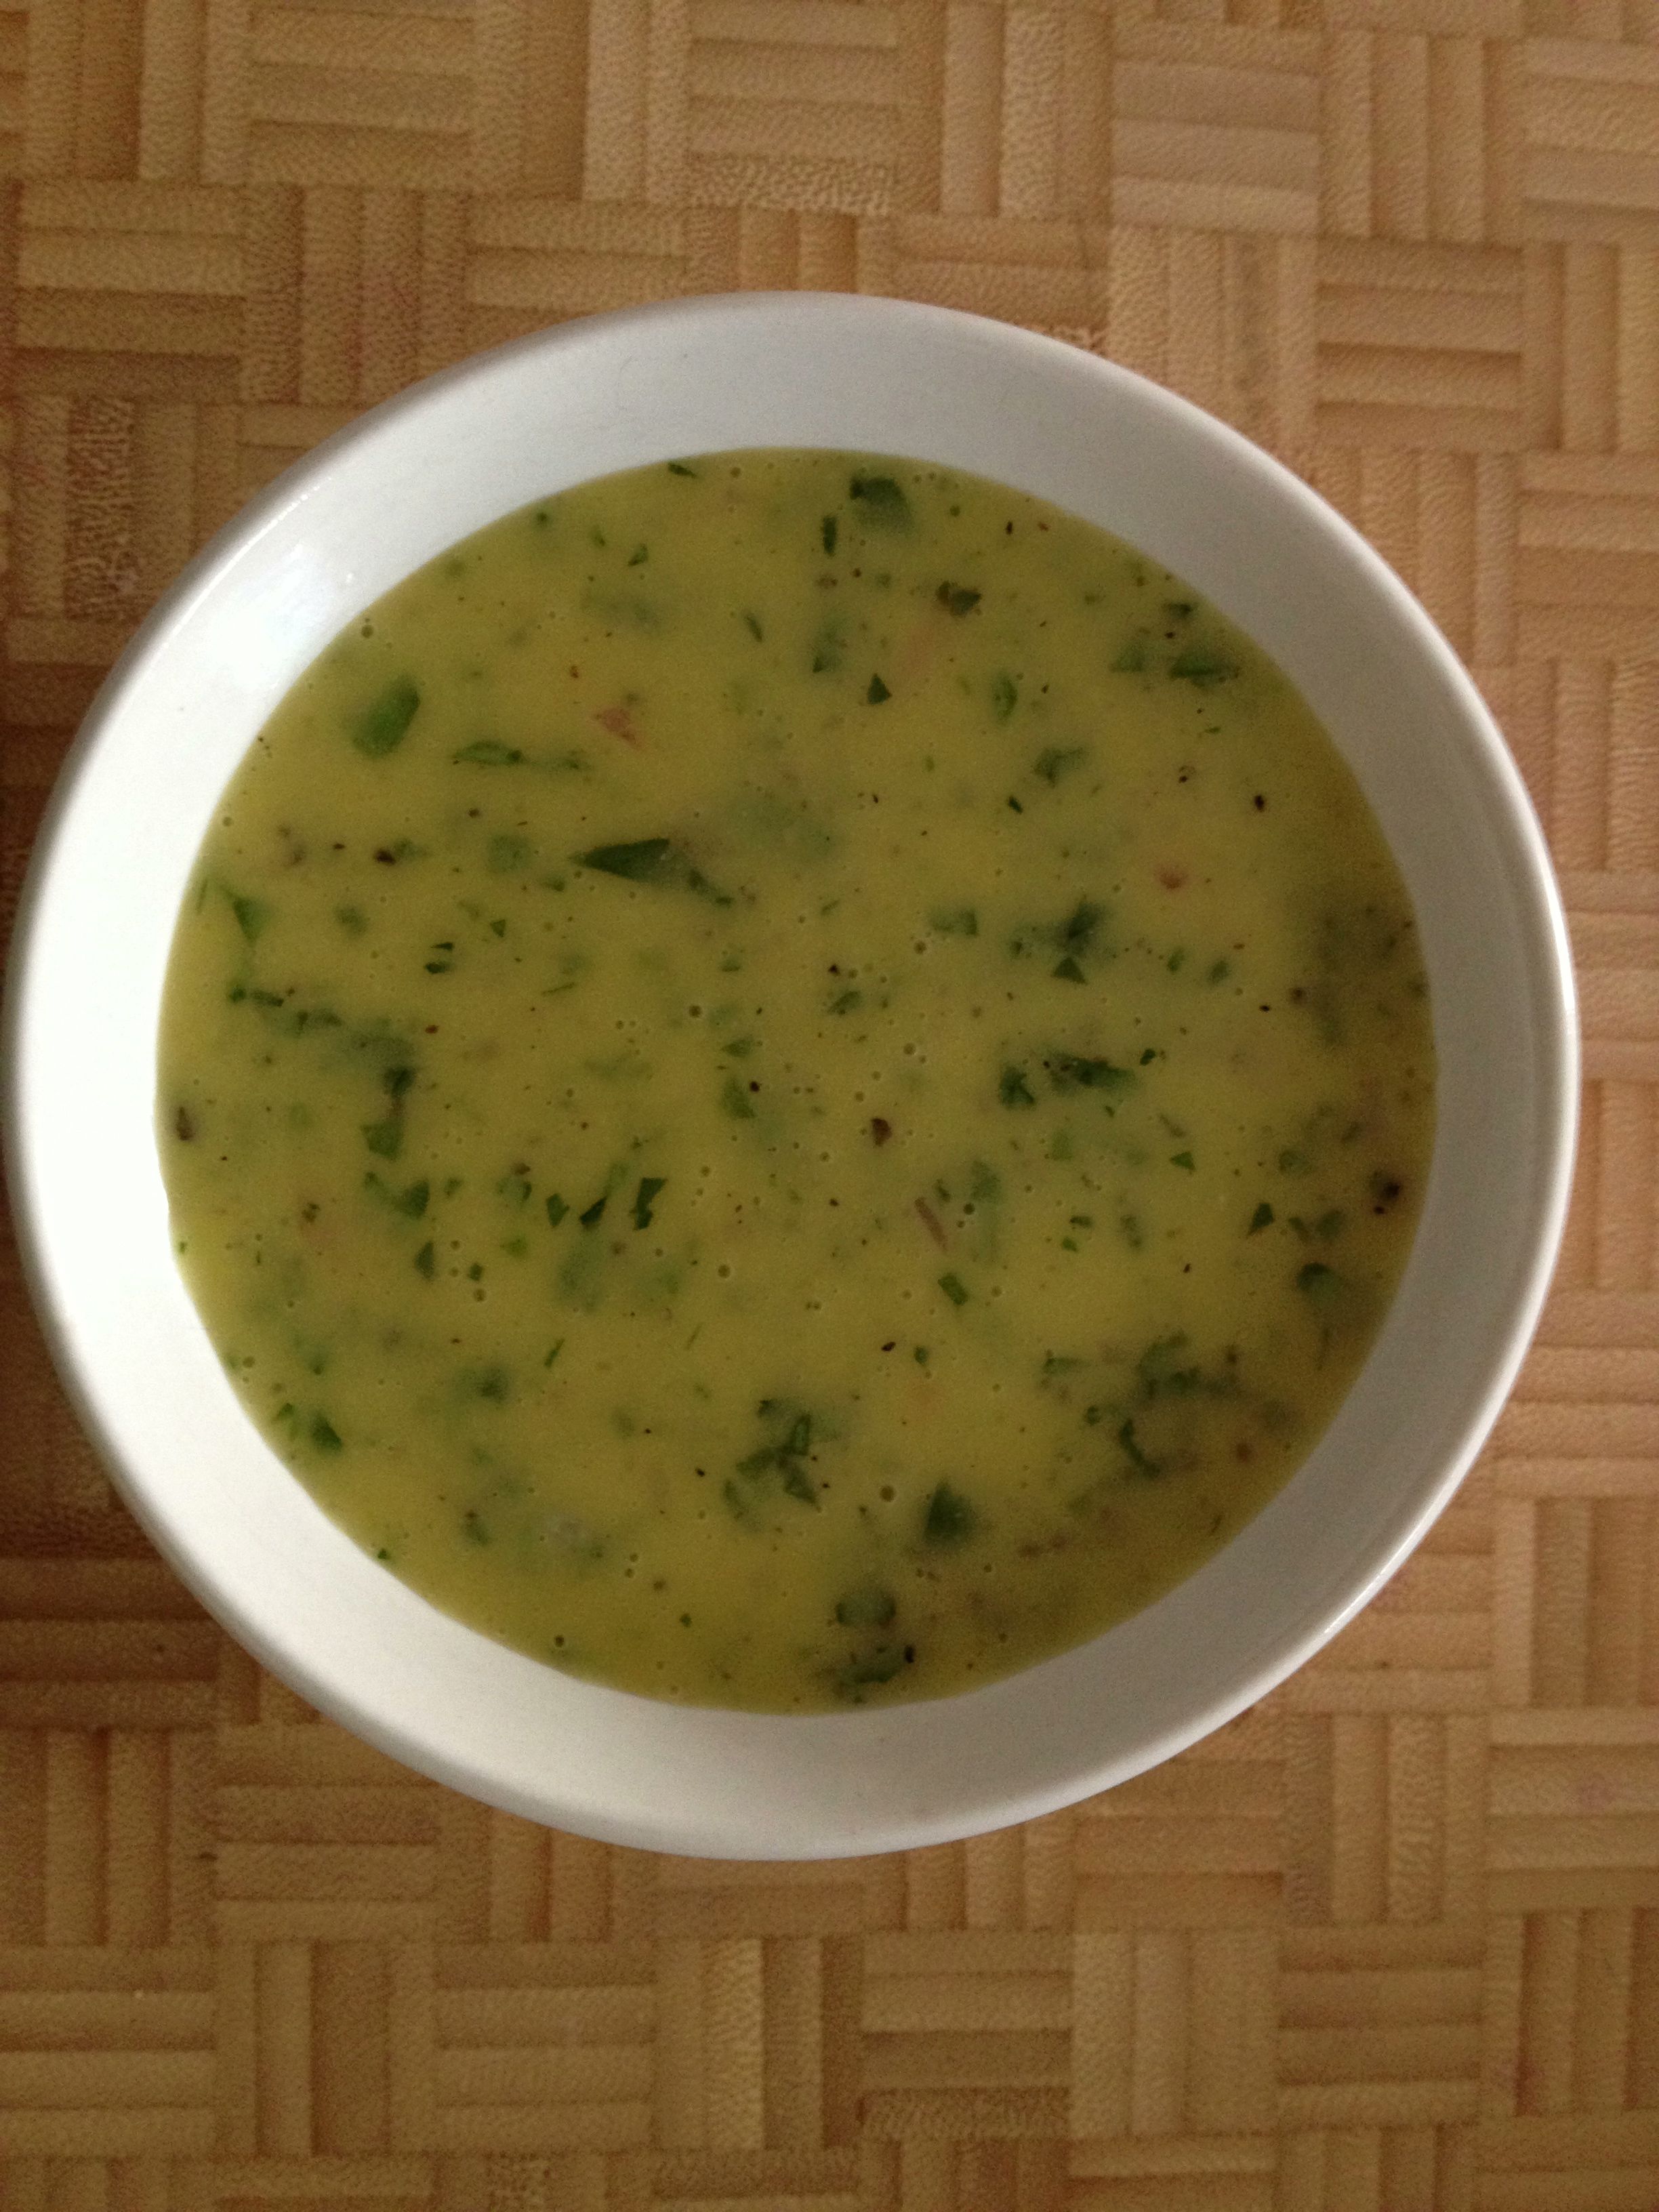
The salad is simple—wheat berries, white beans (I used chickpeas I had on hand), scallions, celery and tomato with a vinaigrette. The vinaigrette is what I regret here. Following the recipe as I did, the ratio of vinaigrette to salad ingredients was way too much. It was more of a thick soup than a salad because it was so heavily dressed. I had to fill out the salad somehow.

A little too overdressed for my liking.
Reconstructive salad making ensued. Wheat berries went from 1 cup to about 1 3/4 cup (all of what I had just cooked). I had no more chick peas, and no more lentils, which are my usual go-to filler for salads like this. Bulgar would have been too fine of a texture to add into the salad. In the end I cooked up a batch of black beans and added to the soupy salad until it was soupy no more. I must have added close to 2 cups, no kidding.
Wheat Berry and Bean Salad (adapted from Bob’s Red Mill) 
Salad:
1 cup cooked wheat berries
1 cup chick peas
2 cups black beans (or some sort of bean or lentil)
1/2 cup scallions, chopped
1/2 cup celery, diced (makes for a nice crunch)
1/2 cup cherry tomatoes, quartered
Vinaigrette:1/2 cup olive oil
2 tbs. lemon juice (about 1/2 lemon)
2 tbs. white wine vinegar
2 tbs. chopped parsley
1 tbs. honey mustard
2 tbs. minced shallot
1/4 tsp. kosher salt
1/4. tsp. black pepper (or 5-6 grinds from a pepper mill)
1. Mix the vinaigrette ingredients together. I chose to emulsify with an immersion blender. I then added the vinaigrette to the bottom of a large bowl.
wheat berry salad vinaigrette
2. Add the salad ingredients to the vinaigrette and combine. If it looks overdressed to you, add something to it! Soggy salad is not something you should put up with, really and truly.
3. The recipe says to chill overnight to blend the flavors. Perhaps over that period the beans and berries are supposed to soak up some of the vinaigrette? I didn’t want to leave it to chance. Serving suggestion is to serve on a bed of leaf lettuce. Again, I didn’t want my greens to be soaked, so the additional beans were necessary.
Eat and enjoy—and let me know what you think about the amount of vinaigrette here, please! Too much? Not enough? Just right in a Mamma Bear sort of way? Comments are not just appreciated—they’re anxiously awaited!
Red Pepper Hummus
February 26, 2013 § 4 Comments
We haven’t bought a can of beans in, oh gosh…I’d say six months. This weekend we used our last stray can of black beans for a chili—and I remember moving to our new house with it and packing it away on an upper kitchen shelf. Cooking up dried beans in a pressure cooker is super easy and super cheap, and here’s the bonus: You get several cups of flavorful bean broth to add to whatever dish needs a little tasty liquid. (See how easy it is here.)
And if we’re cooking up our own beans, we might as well make our own favorite bean-based spread, right? I’m speaking of hummus, of course, made with those funny looking little chickpeas (aka garbanzo beans). I’ve written about hummus here before, but after making several batches of the stuff, I was left disappointed. Too thick. I wanted the creaminess you’d find in the off-the-shelf brands.
Jennifer found the solution—or very nearly—with a recipe from The New Moosewood Cookbook. Not completely creamy as we had hoped, she adjusted and tasted and made batch after batch until finally, she made the perfect consistency. The secret? Adding in some of that aforementioned bean broth and reducing the amount of tahini. Oh, and adding in a roasted red pepper.
Red Pepper Hummus (adapted from The New Moosewood Cookbook)

red pepper hummus
- 2-3 cloves garlic, sliced
- large handful parsley
- 2 scallions, chopped into 1-in. pieces
- 3 cups cooked chickpeas (nearly a 1-lb. bag of dry beans cooked, reserve cooking liquid)
- 4 tbs. tahini
- Juice of one lemon juice (or more, depending on said lemon’s juiciness)
- 3/4-1 tsp. salt
- 1/2 tsp. cumin
- 1/4 – 1/2 sumac to taste (optional if you can find it at your local Middle Eastern grocer)
- 1/4 tsp. paprika
- 1 red pepper, roasted at 425F for 30 min., cooled and skin removed, and cut into strips
1. In a food processor combine the garlic, parsley and scallions, and whir up into a mince.
2. Add chickpeas, tahini, lemon and salt. Puree into a paste.
3. Add the cumin, sumac and paprika as you add some of that reserved bean cooking liquid—try about 1/4 cup—and process. Add more liquid by the tablespoon until you find the consistency right for you. Careful with the sumac—you may like just a tad, so taste before adding any more than a 1/4 tsp.
4. Add the red pepper at the very end and pulse the food processor until it breaks down the red pepper. We’re not looking for a completely pureeing of the pepper. We just want it broken down into bits.
It’s great on a chip, on this awesome cracker we made last week, or—my favorite use—schmeared on a Roasted Eggplant on Whole Wheat Sandwich.
Pressure Cooker Basics
March 12, 2012 § 15 Comments
And boy do I mean basics. I’m not a pressure-cooker expert—far from it. But I’m writing this because:
- My friend Katherine hinted that she’s always been a little uneasy using pressure cookers, and perhaps a Dainty tutorial was called for (um, Katherine, you’re a DOCTOR, and likely have had your hands elbow-deep IN people or delivered babies – my lord, if you can do that …)
- Pressure cookers are totally useful kitchen tools—they can cook some long-cooking bean or stew or hunk of meat in much less time. Who doesn’t need to shave some time off the cooking process without totally bailing and ordering take-out? If I can help spread pressure-cooker love to just one more person, then my mission is done (well, not done but I’d certainly feel good about it).
- I just pressure-cooked a pot of chickpeas, and since I need something to post about, why not this?
Again, I am sooo noooot a pressure-cooker expert. These are just some quick tips and bare-minimum suggestions from someone who was once afraid of the device and is now totally cool with its use.
Completely forget the stories your Mom or Grandma told you each summer … the story about their pressure cookers explosively losing their lids as their batch of homemade tomato sauce was being sealed and canned for winter. Sauce everywhere, they said, and you didn’t believe a word until Mom redid her kitchen and they moved the stove and found the tomato splatter evidence. THAT’S. NOT. GOING. TO. HAPPEN. Not nowadays. Not with a) today’s technology and b) today’s litigious society. A lid explodes, a child gets hurt … that can’t happen.
Spend the money. Buy a good, reputable brand. Jennifer bought a Kuhn-Rikon. It’s Swiss. And you know those Swiss.

Kuhn-Rikon pressure cooker
Read the manual. Seriously, do it.
Get a specialty cookbook with pressure-cooker recipes. We have Pressure Perfect by Lorna Sass. It’s very useful.
The gasket is important. It fits in the inner lip of the lid and helps create a seal within which the air pressure can increase. A damaged gasket? A missing gasket? No seal.

Make a match. Most lids fit on the pressure cooker pot in a certain way and require a certain action. Ours requires that the arrow on the lid match with the arrow on the pot handle, and with those matched up, you then twist and lid into a LOCKED position. With the lid locked, it’s not going anywhere.


Twist the lid on.

It hisses. When the pressure inside the pot increases to a high level, it will start hissing. Putting my “I’m not an expert” hat on, I believe the hissing happens when the pressure inside is too great, and the hissing is the “I’m too pressurized!” value releasing the excess pressure. The hissing is also a noise that reminds you, “Oh, right, I gotta turn the temperature down now.”
Leave it be. When your beans or stew or whatnot is done, just turn the heat off and let the pressure come down naturally. There will be some sort of indicator on your lid that will tell you when that happens (more of an explanation below). The steam within the sealed pot is SUPER heated and can severely burn you. So, take your time opening the lid and always open the lid AWAY from you. IF YOU MUST open the lid soon, you can place the sealed pot under running water to help bring the temperature and the pressure down. Again, the indicator on the lid will tell you when they’ve come down.
By way of example, here’s a simple recipe for cooking dried beans of any kind, and we used chickpeas.
Basic Beans in Aromatic Broth (based on the Pressure Perfect recipe)
- 1 lb. dried beans (in this case, chickpeas), rinsed and with bad beans removed
- 9 cups water
- 1 tsp kosher salt
- 1 tbs oil (helps prevent foaming)
- 2-4 cloves of garlic, leave skin on
- 2 bay leaves
- 1 large carrot
- 1 large celery
- Leek greens (if you have them)
-Add all ingredients in a 6-qt. or larger pressure cooker. Lock the lid according to your manual.

Everyone in the pool!
-Turn the heat on high and bring the pressure within the cooker to high. AS AN EXAMPLE, high pressure is indicated on our Kuhn-Rikon when two red bars appear.

The two red bars indicate high pressure has been reached.
-Turn heat down so it’s just hot enough to maintain the pressure at high. In our case, we turn our gas from high down to just between “2” and “lo.” That works perfectly.
-Maintain high heat for the number of minutes indicated in your pressure cooker book for that specific bean. For chickpeas, that would be 28-30 minutes for a firm bean (for stews and such) and up to 35 for a softer chickpea that would be used in purees such as hummus.
-When the timer goes off, you can let the pressure come down naturally (15-20 minutes or so) or put it under cool running water until the pressure comes down. TILT the lid away from you no matter what. You gotta be careful.

Chickpeas in their broth after about 28 minutes at high pressure followed by about 20 minutes on a natural cool-down.
-Try a few. Too firm? Hard, in fact? Put the lid in place, lock it, and bring it up to pressure again for between 1-5 minutes, depending on how firm you think they are. Go through the same depressurizing process.
-Look at that! You made beans!!
-Lorna suggests that if you have the time, let the beans cool in their liquid. That way they will complete the cooking process. Meanwhile, remove the carrot, celery, bay leaves and garlic, and discard.
-When you are ready to drain, you should totally reserve that cooking liquid. It’s ideal as a water or veggie stock replacement in soups or stews. So, put a colander over a bowl to catch the brothy goodness.

Reserve the tasty liquid and use it as a replacement for water or stock in soups and stews.
Still on the fence about using a pressure cooker? Leave a comment below and let me know where you stand!
Moroccan Chickpea Stew
March 1, 2012 § 9 Comments
If you don’t like cumin, step away. You’ve made up your mind about the spice, and no amount of my praising it will change the way your taste buds feel. So, I’ll see you another day, okay?
But you cumin fans, lean in a bit closer—I have something to tell you. This stew … it’s awesome. Awesome as in delicious. Really. Super. Delicious. And it’s all due to the cumin.
It being from Bon Appetit may explain why it’s so delectable. Theirs is a meaty version. I’m sure the addition of chicken thighs is nothing but fabulous. I didn’t have them on hand—plus I’m doing a no-meat kinda thing currently. Still, this rocks with out the cluck factor.
Ingredients
- 4 tbs olive oil, divided

Chickpea Stew ala Bon Appetit
- 2 skinless, boneless chicken thighs—optional
- 1 medium sweet onion, sliced
- Kosher salt
- 3 large garlic cloves, minced
- 2 tbs ground cumin—yes, that much
- 2 tbs tomato paste
- 3/4 tsp crushed red pepper flakes
- 2 bay leaves
- 2 15-ounce cans chickpeas, rinsed, drained OR 1 lb. dry chickpeas cooked to firm
- 1/2 cup chopped drained roasted red peppers from a jar (I just roasted a whole large red pepper myself)
- 2 tbs (or more) fresh lemon juice
- country-style bread
- 3 tbs coarsely chopped flat-leaf parsley

-IF you’re going the chicken route, heat 2 tbs of the oil in a Dutch oven over medium-high heat. Season chicken with salt; add to pot and cook, turning once, until browned, 8–10 minutes. Transfer to a plate.
-IF you’re not using chicken, heat 2 tbs of oil to medium low, add onion and garlic, and saute for 5-6 minutes or until onions become translucent. Add cumin, tomato paste and red pepper flakes; stir until a smooth paste forms, about 1 minute.
-IF using chicken, add it back into the pot along with bay leaves and 4 cups water and dislodge any of the brown chicken bits that might be on the bottom of the pot.
-Just a quick note: I used dry chickpeas and cooked them in a pressure cooker with 9 cups water, kosher salt, a celery stalk, a carrot, 2 bay leaves and 3 whole garlic cloves for 28 minutes. When I drained the chickpeas, I reserved the liquid and used that in place of 4 cups water. Mmmmm … more flavor.
-Bring everything in the pot to a boil; reduce heat to medium-low and simmer, uncovered, with occasional stirring. IF using chicken, let it simmer until chicken is tender (20 minutes). Sans chicken, 10 minutes is enough to get the flavors to meld.
-Transfer chicken to a plate (if it’s in there). Add chickpeas to pot and bring to a simmer and cook for 5 minutes. Shred your chicken off the bone and add it in there. Otherwise, skip it. Add in the red peppers and stir in remaining 2 tbs of oil (but only if you want – you don’t need to).
-Don’t skip this part: Give it a taste. Good, right? Yummy power-packed cumin flavor. Okay, now add in 2 tbs of lemon juice (or about half a lemon). Let it simmer for a minute. Now give it another taste? Better, huh? Yup, that lemon is a major major plus here. Adjust seasonings with salt and maybe more lemon if you think it needs it.
-Serving: Bon Appetit says to cube crusty bread, put it in an individual bowl, and ladle the stew on top. DO NOT even attempt. All you get is soggy bread. Bleck. But DO enjoy a nice slice alongside, dipping it to your liking. Oh, and sprinkle some parsley on top, too.
Good, good stewy stuff. There’s no room for cumin haters here.
A second try at hummus
February 17, 2012 § 3 Comments
“Second” is the key word here.
The first attempt was not documented by Dainty. You can guess the reason. Not that great. Boring. Thick. Spackle-like. Did I say tasteless? And it was surprising, too, since it was a Moosewood recipe.
Live and learn. And when it comes to reliable recipes for basic stuff, I have learned to turn to Alton Brown.
I’ve also learned that recipes are not brought down from on high by Moses—they are flexible. And I’ve become way more willing to be flexible with them. And I certainly had to in this case. It turns out that when using the amount of chickpeas the recipe calls for, I had to double the amount of liquids, too, in order to get it to a consistency I preferred. No more hummus spackle for me.
The recipe calls for 1 lb. of dry chickpeas soaked and brought back to edibleness. Jennifer had pressure-cooked a batch on Sunday—adding some carrot, celery and bay leaf—to add to a curry dish we had earlier in the week. But we had lots leftover. Hummus, I thought. Perfect.
But as I’m making the hummus—and it’s not the consistency of typical hummus—I’m thinking … Hmmm, maybe the recipe is wrong or I have way too many chickpeas here.
That said, I’m revising Alton’s recipe a bit.
Ingredients 
- 1 lb. dry chickpeas, prepared as directed on the bag (it’s not the equivalent of canned chickpeas, keep that in mind!)
- 2 cloves garlic
- 1.5 tsp kosher salt
- 5 tbs freshly squeezed lemon juice – or more to taste
- 1/2 cup water*
- 1/3 cup tahini
- 1/2 cup evoo*
- powdered sumac or paprika
- salt and pepper
*these were the ingredients I had to double for a smoother, less spackle-like consistency
1. Whir up the chickpeas, garlic and salt in a food processor for 20-30 seconds. Scrape down the sides and whir it up again for about the same time.
2. Scrape sides. Add lemon juice and water. Whir it up again for 30 seconds.
3. Scrape sides. Add tahini and do it again.
4. With food processor running, drizzle in olive oil – not the entire thing, though. Stop and scrape when you’ve added 3/4 of it, check the consistency, add 4 good-sized pinches of salt, a half-dozen grinds of fresh black pepper, some shakes of sumac if you have it or some paprika, and whir it up again, adding the rest of the oil if you need it. You may need more oil, so go for it. Remember to adjust seasonings if you do. It’s okay to add a pinch and grind and shake here and there. Be moderate.
5. Enjoy it on a chip.

hummus with the consistency just the way I like it
For some reason, when I taste this it reminds me of egg salad. And I think that’s because of the pepper. If you despise egg salad, don’t judge—that was just my memory playing tricks on me. It’s perfectly tasty hummus, and my guinea pigs agree.
By the way, this recipe makes the perfect amount if the 5th Battalion is coming over, or if you’re having a party. Seriously, way too much for just having around the house.
Enjoy. And if you have comments, there’s a big box below just waiting for you.
Vegetarian Chili with a touch of chocolate
February 6, 2012 § 2 Comments
Chocolate. I knew I’d hook you with that ingredient. And yes, there really is chocolate in this version. Two types of chocolate, actually. But first …
Vegetarian … yeah, vegetarian. We’re pretty much completely meat-free now. Seafood being the exception. And chicken stock, although we have been doing a good job of keeping ourselves supplied with homemade vegetable and seafood stocks. The reason for ditching the fowl – the last remaining terrestrial flesh I ate – was simple. I just don’t trust where it comes from and what’s in it. Sure, I could purchase meat from Whole Foods or a retailer that sources only organic and local foods. News alert: That stuff is expensive.
Local fish and seafood is, too. I get that. But somehow I feel the seafood is a better value for the protein we get. And we use it all—from tip to tail (or claw). And we enjoy being members of our local Community-Supported Fisheries. I guess that’s a big part of it, too—it makes us feel good to support the local folks who definitely could use our dollars.
Okay, back on track. We’re talkin’ veggie chili here. I wish I could take credit for this but I can’t. This is one of Jennifer’s signature dishes (one of many). I have made it now and then, but she does it justice. And Jennifer, if you see anything wrong with the recipe, please correct me in the comments section.

Vegetarian chili with a touch of chocolate - we added green beans in place of the corn (we were out!).

Vegetarian chili, two minutes later.
Ingredients
- 1 tbs oil (olive will do)
- 1 large onion, chopped
- 2 clove garlic, chopped
- 2 peppers, whatever color you prefer but red is nice
- 2 jalapeno peppers, minced (seeds removed if you don’t like it so spicy)
- 1 bag of frozen soy crumbles
- 1 28-oz. can of whole chopped tomatoes (or whole tomatoes that you squish with your hands)
- 1 15-oz. can of red kidney beans
- 1 15-oz. can of black beans
- 1 cup (or small can) of whole kernel corn
- 1 tbs chili powder
- 1 tbs cocoa powder
- 1 tbs lime juice
- 1 tbs cumin
- 2 tsp dried oregano
- 1 small block (2 oz?) of Baker’s semi-sweet chocolate
- 2 tbs chopped cilantro
- salt and pepper to taste
1. In a large pot or Dutch oven, heat oil to medium and add chopped onion and garlic. Saute until translucent.
2. Add both types of peppers and cook until tender – about 5 minutes. Add the bag of frozen soy crumbles just so it thaws out a bit before adding other ingredients. It’ll take just a couple of minutes.
3. Add the tomatoes, beans, corn, chili powder, cocoa powder, lime juice, cumin and oregano—and a general sprinkle of salt— stir thoroughly, and let it come to a boil. Turn heat down a bit and let it simmer for about 30 minutes. During that time it will thicken a bit.
4. Add in the 2-oz. block of chocolate and stir it around, helping it to melt and incorporate into the chili. Add the cilantro, season to taste with salt and pepper.
Serve with a dollop of sour cream, Greek yogurt, guacamole, grated cheese or straight up. Give it a taste. Good, right? And you know that flavor that’s right on the edge of being familiar? It’s the chocolate. Serve it to guests and when they ask what that ingredient is, don’t tell them. It’ll be our secret.
Some notes:
1. Feel free to soak and use dried beans of any kind. I would use 1 cup of two different types of dried beans—we’ve used pinto, cranberry, garbanzo.
2. Want to speed up the cooking? Use a pressure cooker. It’ll shave off 10-15 minutes from the simmering time.
Homegrown Food Challenge—Days 6 & 7
October 21, 2011 § Leave a comment
No, we did not whither away and die from lack of food after Day 5 of our Homegrown Food Challenge. We survived quite nicely, thank you very much. I’ve just not been … well … in the blogging mood, I guess. If you’re a blogger, you’re pickin’ up what I’m puttin’ down. Hey, it happens. I’m back on track now, though, no worries.
Breakfast:
Day 6—it was all the way back last Saturday. I had promised we’d kick it up a bit with something for breakfast that was more interesting than yogurt. And we did—omelets! Not an omelet, per se, but more of a flat egg. That’s what my mom called them when I was growing up. It’s just two eggs, slightly beaten and NOTHING added to the eggs, as you would were you making omelets. Just a straight ol’ egg. We added in some local goat cheese and diced homegrown tomato right at the last second, folded and called it breakfast. A slice or two of toasted homemade bread made it a filling meal.

Lunch:
After, Jennifer took off for the weekend to attend to some business, leaving me to fend for myself. Lunch was … honestly, I can’t remember. Must have been the last of the grilled eggplant paninni … yum … By the way, that post was way popular. Way. Popular.
Dinner:
Dinner was when I got creative on Day 6. Earlier in the week I had cooked up some homegrown Vermont cranberry beans. Used the pressure cooker, actually, and the process yielded some terrific bean broth. Add some homegrown leeks, homegrown carrots, and a neighbor’s small bunch of homegrown celery, and it’s the beginning of soup! I added to that the leftover Vermont cranberry beans, some leftover homegrown/homemade tomato sauce, a fading homegrown zucchini and a couple of locally grown potatoes—along with salt, pepper, homegrown oregano and sage. Soup and bread for dinner—the end of a great gardening day.

Day 7
Our weeklong Homegrown Food Challenge ended not with a big banquet ala Julie and Julia, but on a much more common, everyday note. Plans for going out with a bang—lasagna of homemade pasta, homegrown broccoli, eggplant and kale—faded with the afternoon. Instead we hunkered down, ate our soup and toasted our accomplishment with the last of the local beer.
Next year … I truly wonder what that will bring.
Homegrown Food Challenge—Day 4
October 15, 2011 § 1 Comment
Day 4 … halfway through our week of eating and drinking stuff as homegrown and as local as possible. How’s it going? Great. In fact, we might have too much food. Well, we’ll make it to the end, definitely.
Okay, I had promised some scintillating breakfasts. Not happening on Day 4. The morning meal, to me, is utilitarian. I know, that’s the wrong way to think about it. You’re supposed to eat breakfast like a king, lunch like a queen and dinner like a pauper. Or something like that. I honestly don’t have the stomach for breakfast until, say, 9 am.
Day 4 was a whole two days ago. Let’s see if I can remember what we had.
Breakfast:
Flat Black coffee. Maine’s Own Organic Milk. And honestly, I may have had an apple. I know it wasn’t much. I was kinda busy and on a role with things, work-wise. Sometimes that happens. Kids, eat your breakfast and don’t be like Auntie Dainty.
Lunch:
Lunch … I have to say what I made for lunch was the best thing ever constructed out of two pieces of bread. Seriously. Some cookbook-writing chef is going to see my delicious creation and will put it front and center in his/her lunch options.

It’s a grilled eggplant and tomato paninni with smoky mayo. Recall the smoky mayo originally topped the broiled bluefish on Day 2. Imagine that spread not-too-thinly on two slices of homemade sourdoughish bread. And remember the eggplant on the grilled pizza from Day 3? Lay a couple of those grilled eggplant slices down on top. Add some sliced tomato, top with another mayo-slathered slice of bread. Put a bit of olive oil in a hot cast iron pan. Lay down the sammies. And add some wait to make them “pressed sandwiches.” In this case, I used a very heavy Dutch oven. Grill both sides to a nice crispness. Smoky mayo+grilled eggplant=the world’s perfect pairing. I wanted to share it with everyone and no one all at once.
Dinner:
We still had two bluefish fillets in the fridge from our Cape Ann Fresh Catch share on Tuesday. We did another round of Broiled Bluefish with Smoky Mayo since it was so good on Day 2. And we had a small side salad. See those beans on top? Vermont Cranberry Beans – the best homegrown beans. Ever.

That was it for Day 4. We won’t tell you if we finish the remaining Topsfield Fair-made kettle corn. We’ll let you think on that.
Pressure Cooking Black Beans
September 20, 2011 § 3 Comments
You’re going to think I’m a bit crazy, but I actually really like this two-thirds vegan kick I’m on. Now, let me clarify:

Buy the dry - dried black beans are easy as pie to cook up and enjoy in 30 minutes.
1a. Two-thirds vegan means two meals out of three meals each day are non-dairy, non-poultry, non-animal products. Not even a boiled egg on my lunchtime salad – and I love a good boiled egg, too.
1b. What about snacks, you ask? What am I gonna do, eat a meat stick? Almonds, an apple, hummus and chips if I feel the need.
2. I first mentioned the two-thirds vegan thing back in … was it March? April? Lest you think I’m Superwoman, I need to inform you that I haven’t been two-thirds vegan all the time. Vacations don’t count. Weekends away don’t count. And sometimes that boiled egg would find its way onto of my salad. And, last week … I had a whole mess o’ Old Bay-seasoned wings on my business trip to Baltimore. The only wings I’ll eat, and the only town I eat them in. There are rules about being two-thirds vegan, and I make them up as I go along.
3. And sometimes, you go away for the weekend and someone makes you a three-egg omelet. With mozzarella. And lobster. Just be sure there’s a veggie burger in your near future.
BUT! It’s a new season. And I have a renewed interest in sticking to the vegan thing. At least two-thirds of the time.
BUT! I need more protein. That’s what a recent doctor visit and blood test suggested. So, here come the beans, which are an excellent source of protein and fiber awesomely tasty food. Rather than stocking up on cans upon cans of beans – they add salt and calcium chloride, which, by the way IS a salt! – we buy the dry. Oooo … I like the way that sounds, “buy the dry.” Plus, they are cheaper (I’m showing my frugal side).
Dry beans are NOT a pain in the ass to work with. It’s easy. If Dainty can do it, so can you. And you don’t have to wait around 24 hours while your beans soak, etc. etc. Invest in a pressure cooker and your beans will be done in 30 minutes, and that includes 5 minutes of prep time.
The recipe we use comes from Pressure Perfect by Lorna Sass. (Oooo … sassy.) Hey, meat lovers, there’s a roast chicken on the cover! That’ll assure you Lorna has added something for everyone inside. There are a bunch of bean recipes included – the one we use is for black beans with soft tortillas. We use just the first half of the recipe and add our own seasonings depending on what we’re using the beans for. Here, I’ll just go through the first process and produce a batch of pressure-cooked beans.
Ingredients
- 4-6 cups water (depending on how much bean broth you want)
- 1.5 cups dried black beans, pick over to remove icky ones, small pebbles, etc. and rinse
- 1 small onion
- 4 cloves, peeled and roughly chopped
- 1 TBS oil (apparently it prevents or controls foaming)
- 1/2 tsp salt
-Combine everything in a 4 qt. pressure cooker.
-Lock the lid in place. If you’re like me, you’ll do it three or four times, making absolutely sure the lid is on and won’t fly off. Seriously though, when it’s locked, it’s locked. No hardhat needed.
-Bring the pressure cooker to high pressure over high heat. READ YOUR PRESSURE COOKER INSTRUCTIONS! It will tell you how you can tell when it has reached high pressure. For our Fagor pressure cooker, high pressure is indicated when two red lines are visible.
-When it has reached high pressure, turn down the heat to a temp that will maintain that high pressure. For ours and on our gas stove, that means at a point between “lo” and “2”.
-Let the beans bubble away in there for 25 minutes. Then turn off the heat. Let them sit there as is – don’t open the lid! – and let the pressure come down naturally. READ your cooker instructions to find out how you can tell on your device.
-When the pressure has come down, open the lid AWAY from you. You don’t want to get a face full of super-heated steam, right? Always always always be careful.
-The beans should be tender. If not, lock it up, stick ’em back on the heat and cook for another couple of minutes. Repeat the heat coming down and all that.
What you have now are several cups of firm yet tender beans in broth. If you used 6 cups of water, you are halfway on the path to making a black bean soup. If you used 4 cups of water, you have a bit less broth. Letting it sit, the beans and broth will thicken slightly but not much.
We use 4 cups of water, and after the beans are pressure cooked, we typically add a touch more salt, some pepper, several shakes of red pepper and a diced small tomato. We then serve it over a bowl of rice. We’ve added other things, as well – roasted sweet potato, butternut squash, for example.

We add a touch of salt, pepper, red pepper flakes and diced tomatoes to our black beans.
If you have any suggestions for what to add in to the black beans, I’d love your suggestions. We need to keep up the variety. Please leave your comments below!
Vermont Cranberry Bean Salad
August 31, 2011 § 3 Comments
When I was a kid, my father would get a little stir crazy in winter and he’d do the worst thing a man with a 1-acre garden could do: Sit for hours with the Johnny’s Select Seed catalog. Fathers don’t get giddy as a rule, but I swear my dad would get as giddy as any school girl when the … um, somewhat large and heavy … box arrived. Sure, some of the seeds were for the farm: Seeds for 100 combined acres of broccoli, cabbage, cauliflower and pumpkins are a bit heavy. But then there were the items destined for our garden. Corn. Watermelon. Tomatoes. Peppers. Cucumbers. Zucchini. Squash. Yum. Yum.
But then … then there were the despised seeds: Peas and lima beans. And I swear, every single seed of those two crops came up and produced a bounty. Bleck and ugh … I really don’t like peas and lima beans. Really. Don’t. Like.
The worst part, really, and I don’t know how many of you can relate … the worst part was having to help my mother shell the bushels and bushels of pods these horrid plants would produce. You know how big a bushel is, right? It’s a lot. And now picture lots of lots. And having to take one lima bean pod or one pea pod, slicing it down lengthwise with your thumb nail, and then cajoling each pea or bean out of its home with said finger and into a pan. Pans and pans and pans of peas and beans. And Mom would blanch these mounds and mounds of peas and beans, put them into little plastic baggies, put the baggies in boxes, put the boxes in the freezers (yes, we had multiple freezers to store multiple upon multiple boxes), and then those boxes would come out of the freezer in the deepest, darkest of winter and end up on our plates. And then after dinner Dad would get out his Johnny’s Select Seed catalog and order more for the coming spring …
I really hate peas and lima beans. Really.
What did I find myself doing yesterday pre-lunch during my vacation? Shelling beans. Not a bushel, thankfully; just a gallon ziplock’s worth. The beans in question we grew in our garden this summer. No, not peas and not limas.They are Vermont cranberry beans. Beautiful pink and red speckly things. Gorgeous, really. No, I didn’t snap a pic pre-cooking. Sorry. But yes, we grew them this year—my garden plot neighbor has been growing them for years and loves loves loves them. Easy to grow. I’d tell you more about how to grow them except … well, okay, I’ll tell you. Sow the seeds about 2 inches apart in a row. Water. They will emerge. They’ll keep growing if you keep watering. I can’t even recall if I had to fertilize. It’s seriously that easy, people.
And the process at the other end of the line is just as simple, and way way way delicious. So very not a lima bean.

Vermont cranberry bean salad
Vermont Cranberry Bean Salad from Epicurious.com)
Serves 4
- 1 1/2 pounds fresh cranberry beans in pods
- 2 tablespoons salt
- 1/4 cup evoo
- 1 to 2 tablespoons fresh lemon juice, or to taste
- 2 tablespoons chopped fresh parsley or basil leaves
- ground black pepper
– Shell beans and place in a saucepan of boiling salted water. Salt the water! That way the beans really take in the flavor.Unfortunately, the boiling spoils the beans’ beautiful coloration.
– Boil the beans until they are tender. If all of your beans are picked at the same stage, they should all come along at the same time. Mine, not so lucky. To get the “more done” or more dry beans to a tender stage, the more fresh beans got a tad over-mushy. But, I kinda liked the variety within the dish.
– Drain beans and transfer to a bowl. While beans are still warm, toss with remaining ingredients and season with salt, if needed. Serve still warm for a fabulous flavor, or at room temperature.
I could eat this for days. And luckily, there’s a bunch more beans ripening when we get home.
