
Pressure Cooker Basics
March 12, 2012 § 15 Comments
And boy do I mean basics. I’m not a pressure-cooker expert—far from it. But I’m writing this because:
- My friend Katherine hinted that she’s always been a little uneasy using pressure cookers, and perhaps a Dainty tutorial was called for (um, Katherine, you’re a DOCTOR, and likely have had your hands elbow-deep IN people or delivered babies – my lord, if you can do that …)
- Pressure cookers are totally useful kitchen tools—they can cook some long-cooking bean or stew or hunk of meat in much less time. Who doesn’t need to shave some time off the cooking process without totally bailing and ordering take-out? If I can help spread pressure-cooker love to just one more person, then my mission is done (well, not done but I’d certainly feel good about it).
- I just pressure-cooked a pot of chickpeas, and since I need something to post about, why not this?
Again, I am sooo noooot a pressure-cooker expert. These are just some quick tips and bare-minimum suggestions from someone who was once afraid of the device and is now totally cool with its use.
Completely forget the stories your Mom or Grandma told you each summer … the story about their pressure cookers explosively losing their lids as their batch of homemade tomato sauce was being sealed and canned for winter. Sauce everywhere, they said, and you didn’t believe a word until Mom redid her kitchen and they moved the stove and found the tomato splatter evidence. THAT’S. NOT. GOING. TO. HAPPEN. Not nowadays. Not with a) today’s technology and b) today’s litigious society. A lid explodes, a child gets hurt … that can’t happen.
Spend the money. Buy a good, reputable brand. Jennifer bought a Kuhn-Rikon. It’s Swiss. And you know those Swiss.

Kuhn-Rikon pressure cooker
Read the manual. Seriously, do it.
Get a specialty cookbook with pressure-cooker recipes. We have Pressure Perfect by Lorna Sass. It’s very useful.
The gasket is important. It fits in the inner lip of the lid and helps create a seal within which the air pressure can increase. A damaged gasket? A missing gasket? No seal.

Make a match. Most lids fit on the pressure cooker pot in a certain way and require a certain action. Ours requires that the arrow on the lid match with the arrow on the pot handle, and with those matched up, you then twist and lid into a LOCKED position. With the lid locked, it’s not going anywhere.


Twist the lid on.

It hisses. When the pressure inside the pot increases to a high level, it will start hissing. Putting my “I’m not an expert” hat on, I believe the hissing happens when the pressure inside is too great, and the hissing is the “I’m too pressurized!” value releasing the excess pressure. The hissing is also a noise that reminds you, “Oh, right, I gotta turn the temperature down now.”
Leave it be. When your beans or stew or whatnot is done, just turn the heat off and let the pressure come down naturally. There will be some sort of indicator on your lid that will tell you when that happens (more of an explanation below). The steam within the sealed pot is SUPER heated and can severely burn you. So, take your time opening the lid and always open the lid AWAY from you. IF YOU MUST open the lid soon, you can place the sealed pot under running water to help bring the temperature and the pressure down. Again, the indicator on the lid will tell you when they’ve come down.
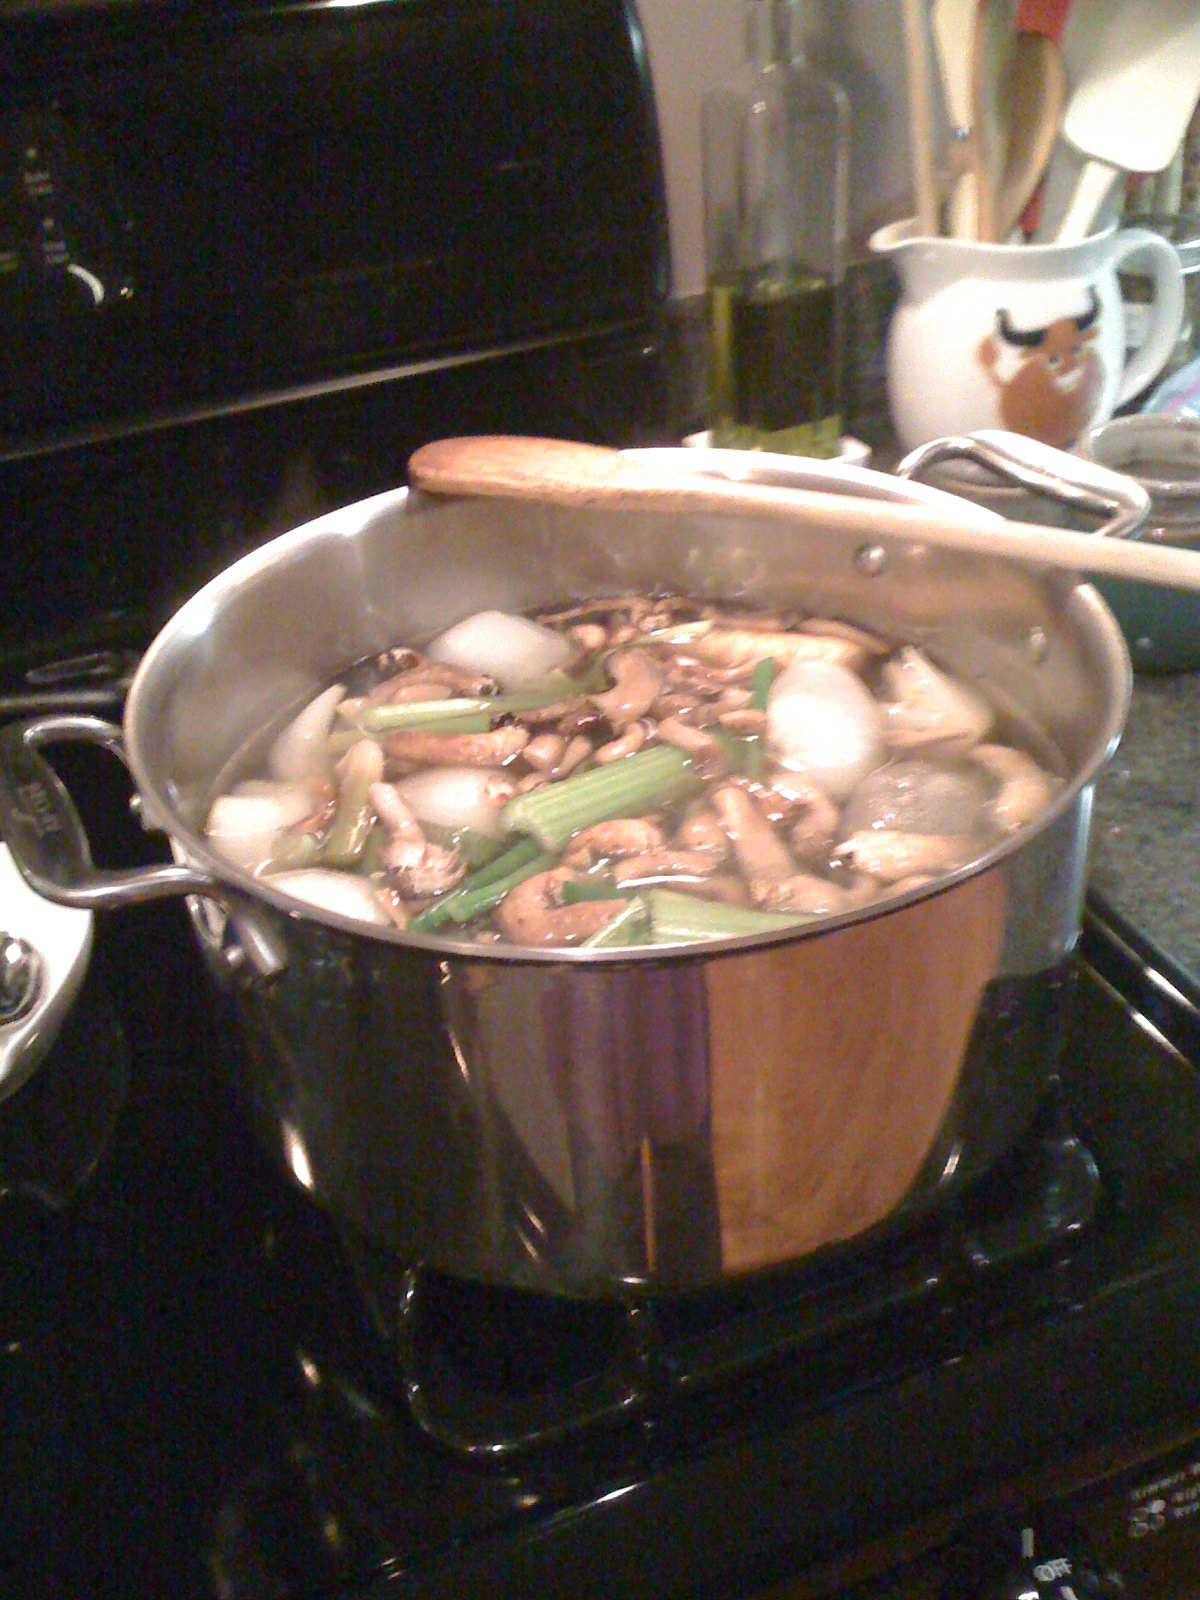
By way of example, here’s a simple recipe for cooking dried beans of any kind, and we used chickpeas.
Basic Beans in Aromatic Broth (based on the Pressure Perfect recipe)
- 1 lb. dried beans (in this case, chickpeas), rinsed and with bad beans removed
- 9 cups water
- 1 tsp kosher salt
- 1 tbs oil (helps prevent foaming)
- 2-4 cloves of garlic, leave skin on
- 2 bay leaves
- 1 large carrot
- 1 large celery
- Leek greens (if you have them)
-Add all ingredients in a 6-qt. or larger pressure cooker. Lock the lid according to your manual.

Everyone in the pool!
-Turn the heat on high and bring the pressure within the cooker to high. AS AN EXAMPLE, high pressure is indicated on our Kuhn-Rikon when two red bars appear.

The two red bars indicate high pressure has been reached.
-Turn heat down so it’s just hot enough to maintain the pressure at high. In our case, we turn our gas from high down to just between “2” and “lo.” That works perfectly.
-Maintain high heat for the number of minutes indicated in your pressure cooker book for that specific bean. For chickpeas, that would be 28-30 minutes for a firm bean (for stews and such) and up to 35 for a softer chickpea that would be used in purees such as hummus.
-When the timer goes off, you can let the pressure come down naturally (15-20 minutes or so) or put it under cool running water until the pressure comes down. TILT the lid away from you no matter what. You gotta be careful.

Chickpeas in their broth after about 28 minutes at high pressure followed by about 20 minutes on a natural cool-down.
-Try a few. Too firm? Hard, in fact? Put the lid in place, lock it, and bring it up to pressure again for between 1-5 minutes, depending on how firm you think they are. Go through the same depressurizing process.
-Look at that! You made beans!!
-Lorna suggests that if you have the time, let the beans cool in their liquid. That way they will complete the cooking process. Meanwhile, remove the carrot, celery, bay leaves and garlic, and discard.
-When you are ready to drain, you should totally reserve that cooking liquid. It’s ideal as a water or veggie stock replacement in soups or stews. So, put a colander over a bowl to catch the brothy goodness.

Reserve the tasty liquid and use it as a replacement for water or stock in soups and stews.
Still on the fence about using a pressure cooker? Leave a comment below and let me know where you stand!
Pasta Dough: It’s Easier Than You Think
August 10, 2011 § 6 Comments
Mmmm … fresh pasta.

Fresh linguini - the flour lightly dusts the pasta, keeping it from sticking together.
Have you ever had it? I mean fresh pasta. The kind someone has just made right there in the room. Not the stuff you buy in the refrigerated section of your local grocer. Okay, so that’s not dry pasta—but it’s not fresh fresh either.
What? Are you saying, “I don’t have time for that … “? Or, “Oh, that’s soooo complicated …”? It’s not. If you liked to make mud pies as a kid (and who didn’t?), then you can make fresh pasta.
Of course, I say this not having made fresh pasta myself. Jennifer is the pasta maker in our household. And she makes it look easy. She says it’s because it is easy. She first made it in a cooking class last year, and the technique below is from that class. The recipe comes from The Food Network’s Anne Burrell.
Try it. The only way you can screw it up is by making a horrible sauce.
Homemade Pasta Dough (from Anne Burrell)
- 1 pound all-purpose flour (get yourself a kitchen scale!)
- 4 whole eggs plus 1 yolk
- 1/4 cup evoo
- kosher salt – about 1 Tbs
- 1-2 Tbs water or more
-Set yourself up on a clean and dry work surface with plenty of room. Pile the dry ingredients (flour and salt) right on the work surface, and create a hole or well in the flour, making a doughnut-shaped ring about 8 inches wide.
-Crack all of the eggs and the individual yolk (I always do this in a separate bowl to catch the occasional shell) and add these to the well along with the wet ingredients—olive oil and water.
-Use a fork to beat the wet ingredients together. Then, you’re going to pull in the flour bit by bit into the egg mixture. I say bit by bit because you don’t want to pull too much of the flour into the center and break the ring’s side walls. Then your egg leaks out and it’s a big mess. As soon as the egg mixture has enough flour in it is no longer runny, you can put aside the fork and get your hands in there. Your hands are the best tools to combine everything completely.

Incorporating the flour into the egg mixture
-When the mixture is completely combined, it’s time to start kneading the dough. Use your muscles! Get the heels of your palms in there push the dough away from you, stretching it but not tearing it. Push, fold, turn. Push, fold, turn. Put your weight into it, girl! Your goal is to create a dough that feels smooth and looks smooth. Warning: Eat an energy bar beforehand because you’re going to be kneading for 15-20 minutes. No kidding. But doing this by hand is the best way.

Knead it, girl!
-When you start thinking that perhaps you’re done, take a knife and slice the dough in half. Look at the inside of the dough—does it have small bubbles in it? Yes? Then keep kneading. You want the dough to be smooth throughout.

-Wrap the dough in plastic wrap and let it rest for 1 hour. Put it in the fridge until you’re ready to use, or use it right away.
What next? Get rolling! Usually this is done with a pasta roller. There are ones you can attach to your counter and crank by hand. We have one that fits on our Kitchen-Aid and turns automatically—so much easier. Either way, what you want to do is cut that ball of dough into quarters or eighths, pat it into a bit of a square shape of even thickness, add a touch of flour to make it less sticky, and run it through the pasta roller starting on the thickest setting—usually the number 7. Roll it through twice, then take it down one thickness, and so on, patting it with flour now and then. We usually go down pretty thin, usually to a number 2. As it gets thinner, it gets looonger. We usually cut it in half to make it more manageable, especially if you are cranking the roller by hand.
Going through the roller you end up with a flat sheet. Perfect for making lasagna or raviolis. Or, take that sheet and run it through the spaghetti or linguini cutter (an add-on that usually comes with the roller). Separate the noodles, lay them on a platter, sprinkle with dusting of flour, and toss to prevent sticking. Do one flat sheet at a time this way, each time dusting with flour.
And to cook, all you have to do is drop that pasta in boiling water for 2 minutes, max.
Now, that’s great pasta.
Roasted Butternut Squash Soup
February 16, 2011 § 2 Comments
I’m taking this time while getting an oil change to tell you about this AMAZING soup. This soup is so friggin’ easy and so friggin’ good, you’re gonna scream with the pain of realizing how dumb you’ve been for not making it before. That’s exactly what we did. Actually, we slapped ourselves.
Before I move on, I’m gonna give credit where credit is due. What’s that Mexican show on the Food Network? Mexican Made Easy or something? With the cute bubbly Mexican gal. She cooked up something similar one Saturday morning. In her case, it had a chipotle cream somethin’ somethin’ added at the end. Not needed, especially if you’re hoping to limit unnecessary calories.
Ingredients
- 1 medium-large butternut squash (2-3 lbs)
- olive oil
- salt/pepper
- 2 medium-large carrots
- 1 large stalk celery
- 1 small-medium sweet onion
- 4+ cups vegetable or chicken stock
-Heat oven to 400F.
-Cut squash in half lengthwise. Leave seeds and such in for now. Sprinkle a bit of olive oil over each half and rub in. Season each half with a pinch of kosher salt and a twist of fresh cracked pepper. Bake in oven for 30 minutes or until knife inserts into squash easily. Remove from oven. Let sit until it’s cool enough to handle.

Roasted butternut squash - roasted goodness
-Meanwhile, chop onion, carrot and celery into 1/2-inch pieces. In a 4-quart pot, season vegetables and saute in about 1 tbs olive oil until they start to loosen up a bit – 5 minutes or so.
-When squash is cool enough to handle, scrape the squash from the skin and add to the vegetables. Add enough veggie stock or chicken stock to cover everything. It usually takes about 4-5 cups. Bring to a boil. Turn heat down and simmer for about 30 minutes.

All the goodness cooks together.
-When time’s up, get our your trusty immersion blender and whir away until it ‘s nice and smooth.

Taste that? Good, uh? It’s sweet and savory. Rich and deep. And all that flavor from just those few ingredients. Yup, you and we have been missing out on some serious goodness. Don’t worry, we all feel really stupid about now.
Cast Iron Pans Can Save Your Life …
January 20, 2011 § 5 Comments
… and other reasons why you must have them in your kitchen.
It’s a bold statement, but a true one. Cast iron pans can save your life.
My 10-in. cast iron skillet sits on my stove top nearly at all times. Contractor turned into creep? Burglar breaking in? I know where to reach and how to swing that 5.25-pound flat-sided piece of smackdown. Advantage: Dainty Dot.
Self-defense is, of course, not their only use. Properly seasoned (I’ll get to that later), they are “the original non-stick pans” that don’t make you wonder about your health if you take a gouge out of the bottom. And, cleaning is a breeze. Really. Their heft, non-stick surface and easy cleaning make them must-have tools in the kitchen. Here’s a sampling of how we use them in our kitchen:
- pan-sear fish without it sticking to the pan
- sauteeing, gentle steaming, frying etc on the stove top
- roasting veggies in the oven
- baking cornbread and croutons in the oven
- toasting nuts
- weighing down things, e.g. putting one or two cast irons on top of a pile of salted eggplant to coax out water
- turn it upside down over a flame to create a griddle surface! (admittedly, I’ve never done that – yet)
One friend used her cast iron skillet to create a rodent crime scene, but let’s not go there …
Maintaining Cast Iron: Get Over It, It’s Not That Difficult Dude
So, we know cast iron pans are the Clydesdales of the kitchen. What, you don’t want to “go to all that work” of maintaining them? Let’s say for a minute that you have taken the wuss’s way out and have purchased a “pre-seasoned” cast iron pan. You’ve cooked with it for the first time. Now it’s time for clean-up. Here’s what you do:
- With a bit of water, use a detergent-free scrubby or brush to clean off any debris in the pan. NO DETERGENT. The cast iron’s essentially non-stick surface allows all the excess oils and bits to dislodge easily.
- Put the cast iron pan on a burner. Turn it to high. And watch the pan. The water left in the pan will evaporate. When all the water is gone – every last drop – turn the burner off.
- Now, add a couple of drops of vegetable oil to the pan. Using a paper towel, spread that oil over the inner surface of the pan nice and good.
- You’re done.
A couple of things. No detergent: That’s because the detergent will begin to break down the oils that are used to season the pan. You’ll wreck your non-stick surface that you (or the factory) have worked so hard to create. Let all water in the pan evaporate: Otherwise, your cast iron pan will rust. Bleck. Use vegetable oil, as opposed to olive oil, which might be tempting if you keep a bottle of it ready by your stove. I believe veg oil has a higher smoke point. Whatever it is, the olive oil will smoke way more easily on this VERY HOT pan. And it’ll smell god-awful.
Think of the pan as your pet. You’re not going to NOT feed Fluffy because you didn’t feel like it, right? Because Fluffy is NOT going to let you get away with that. Neither is your pan. If you don’t care for it properly, it’s not going to work for you properly. It won’t poop on your pillow like Fluffy would, but your cast iron will revolt and leave rust spots either in itself or on the bottom of your sink. So, take the two minutes it asks for to make the pan clean and happy.
Starting With a Virgin Pan
If you buy a regular-old non-seasoned cast iron pan, you’ll need to give it a seasoning treatment before you start cooking with it. But it’s simple, and usually the instructions come with the cast iron. Rub a thin coat of vegetable oil over the pan’s entire surface – inside and out. Put it on a rack in a 325F-350F oven. Put a baking sheet on a rack under it to catch any drips. Leave it in there an hour or so. Take it out. Let it cool. Bingo.
Rust. Crap.
IF an intruder has come into your home and used your handy cast iron skillet to cook a meal and then washed it out with detergent or left it to rust in the sink (because I know you would never do that), the pan’s life isn’t over. You can rescue it with some steel wool, some elbow grease, and a few cuss words. If the pan is in HORRIBLE shape, you may want to rub it down with oil and pop it in the oven to bake on its own for an hour. Otherwise, a good rust-scrubbing and routine seasoning should do the trick.
Our Own Cast Iron
What I love about cast iron is that brand doesn’t really matter. Lodge is the It brand for cast iron. And I’m sure it’s awesome. But my set of three cast iron pans (10-in, 8-in, 6-in) were purchased as a gift for me by my mother back in 1991 from Caldor for $17. Not $170. Just $17. And I’ve used them pretty much every day since. Caldor doesn’t even exist today, dude! But the pans live on.
We also “found” a set of cast iron in an old rented apartment a few years back—those were OLD and very well-seasoned. And an old girlfriend bought me an 8-in. Lodge. I never use it. The handle – at just 4.5 inches long – is too short to get good leverage on holding the pan easily. My Caldor 8-incher has a 5.5-in. handle. Much better.
All told, we have two 10-inchers that are in constant use, four 8-inchers (anyone want that Lodge pan?) and one 6-incher that is ideal for toasting nuts on the stove top. And a 5-quart cast iron Dutch oven.
What NOT to Cook In Cast Iron
Eggs. Definitely. Your pan will smell like eggs for days. Not sure why the smell – and taste, even – lingers. It just oozes into the pan’s pours. Plus, scrambled eggs are the only things I’ve seen stick to cast iron. Stay. Away.
Tomato sauces or soups. The acids in the sauce will begin to eat away at the pan’s seasoned surface. It’s not horrible, it can be fixed. But save yourself the trouble and use another implement.
That’s why you keep those way-more-expensive All-Clads around, after all.
