
Roasted Eggplant on Toasted Pita
March 26, 2013 § Leave a comment
Ah, an over-stuffed pita sandwich…yum.
Who am I kidding!? When have I ever stuffed a pita and have it NOT break apart on me? Never. Ever. And once it breaks, it’s just all downhill from there. Your fingers get full of hummus. Whatever dressing you’ve put on the sandwich runs down your wrist into your sleeve. It’s no good, stuffing a pita.
Better to use pita like a sandwich bread.
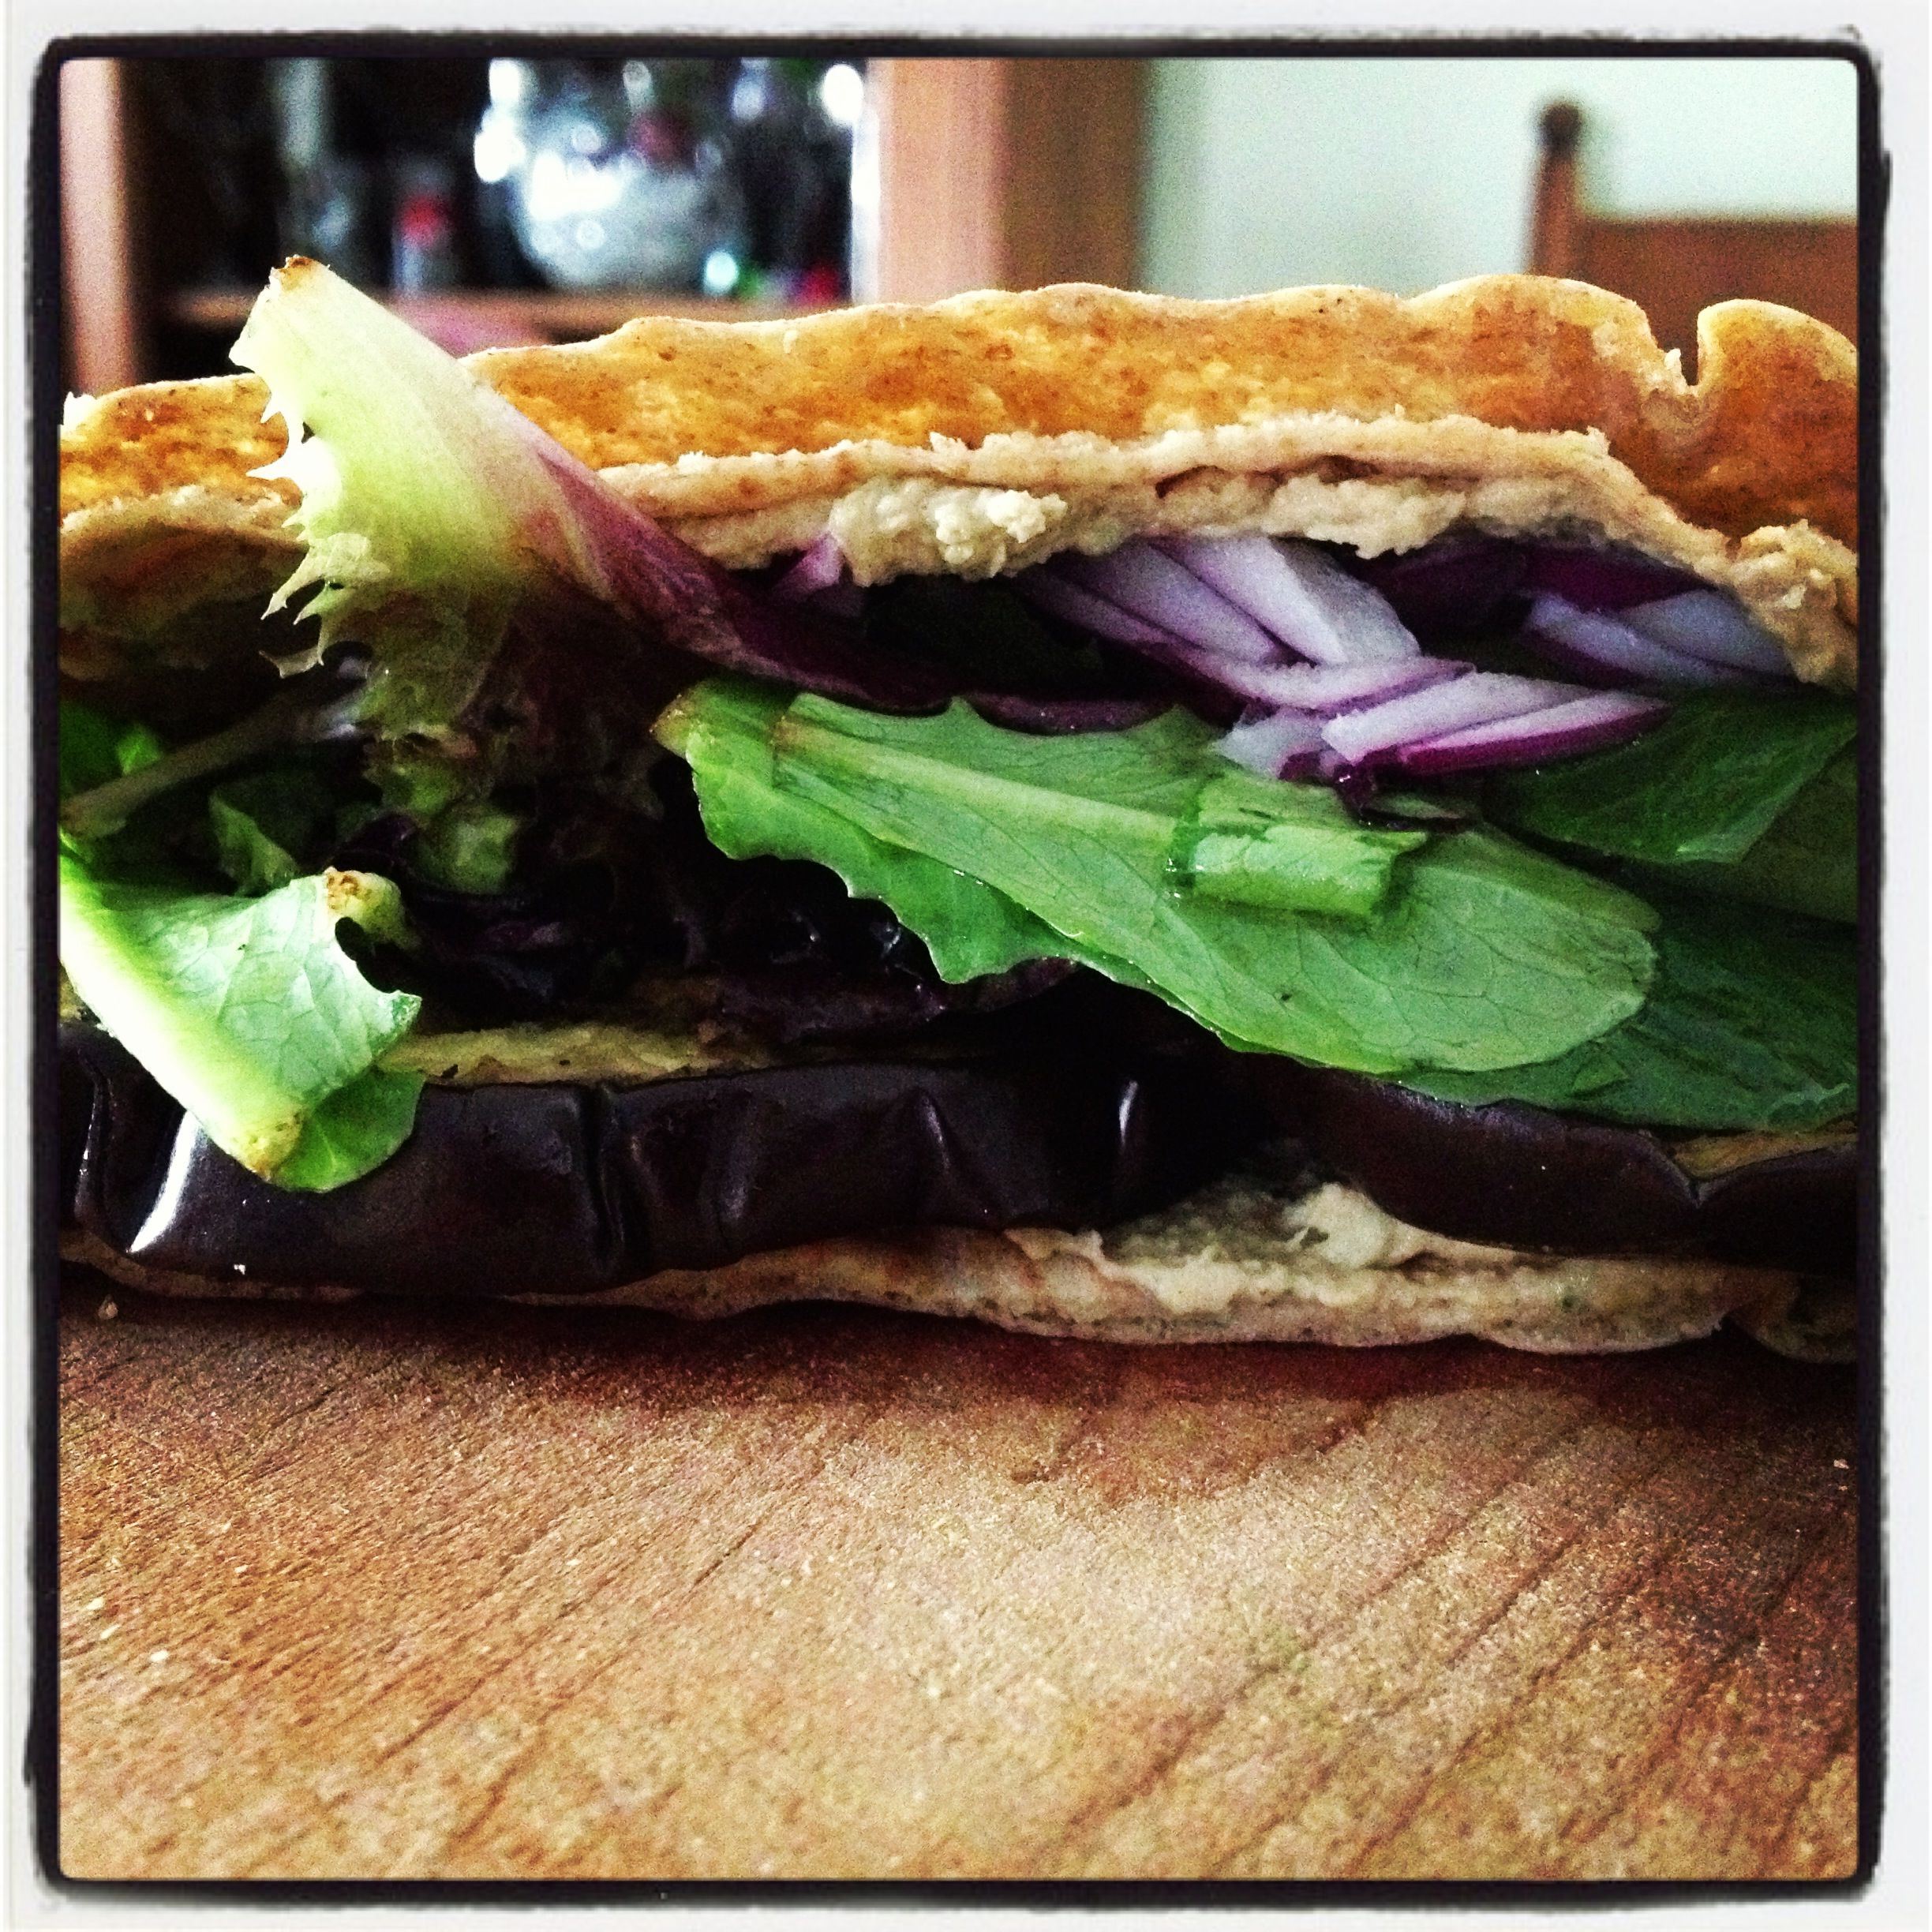
Roasted eggplant and hummus on toasted pita
That’s exactly what I did for lunch yesterday. Toasted pita cut into two half moons, each spread with Red Pepper Hummus, some roasted eggplant, and some greens lightly dressed with Lemony Vinaigrette. After chowing down, I realized the Fiery Onion Relish may have been a fun thing to have as a topping, too.
Maybe I’ll try that for today’s lunch.
Roasted Eggplant on Whole Wheat Baguette
February 21, 2013 § 3 Comments
The way I understand it, Paula Deen’s first food-for-money venture was preparing bagged lunches for the locals, which her sons  would then deliver. What those lunches were, I do not know. I imagine a typical lunch included a sandwich (or sammy). Maybe some chips. And there had to have been a decadent, butter-loaded dessert in that bag, too.
Anyone who follows me on Instagram has seen what I concoct for my own lunches, usually from leftovers or stuff just sitting in the veggie bowl. The Sweet Potato Sandwich has become a standby. The Salad Pizza is still one of my proudest moments. Avocados and boiled eggs smeared on toast are regulars, as well.
My latest sammy, Roasted Eggplant on Whole Wheat, has got me thinking about Paula Deen and her bagged-lunch business. This sammy, I’m tellin’ you, it’s good. Real good. People would want to eat it. And they might even pay real money for it—and for me to make and deliver it. Is something like this even feasible here in Boston? And I’m sure there’s some proper and official channels to go through to make sure I’m not serving thoroughly rotten food, too. I mean, someone’s got to make sure the cats and I are wearing hair nets, right?
The thought is on my mind. Who knows, maybe I’ll even give it a try, “underground catering” style (I didn’t really say that, if anyone official is reading this). Meanwhile I’ll keep putting various spreads and veg and cheese and such onto different sorts of breads and doughs. Keep up with them on Instagram and let me know which ones appeal to you most.
Roasted Eggplant on Whole Wheat Baguette
It’s simple, really:
Slice an eggplant into 1/2-in. slices. Place on a sheet pan. Sprinkle each slice with some olive oil, using a brush to spread it over the surface. Eggplants are like sponges—they soak up a lot of oil. That’s why it’s important to brush. Then sprinkle each slice with kosher salt, and give each slice a small twist from the pepper mill. Put in a 420F oven for about 20 min. Remove from oven and let cool. You’ll have extras—always a good thing.
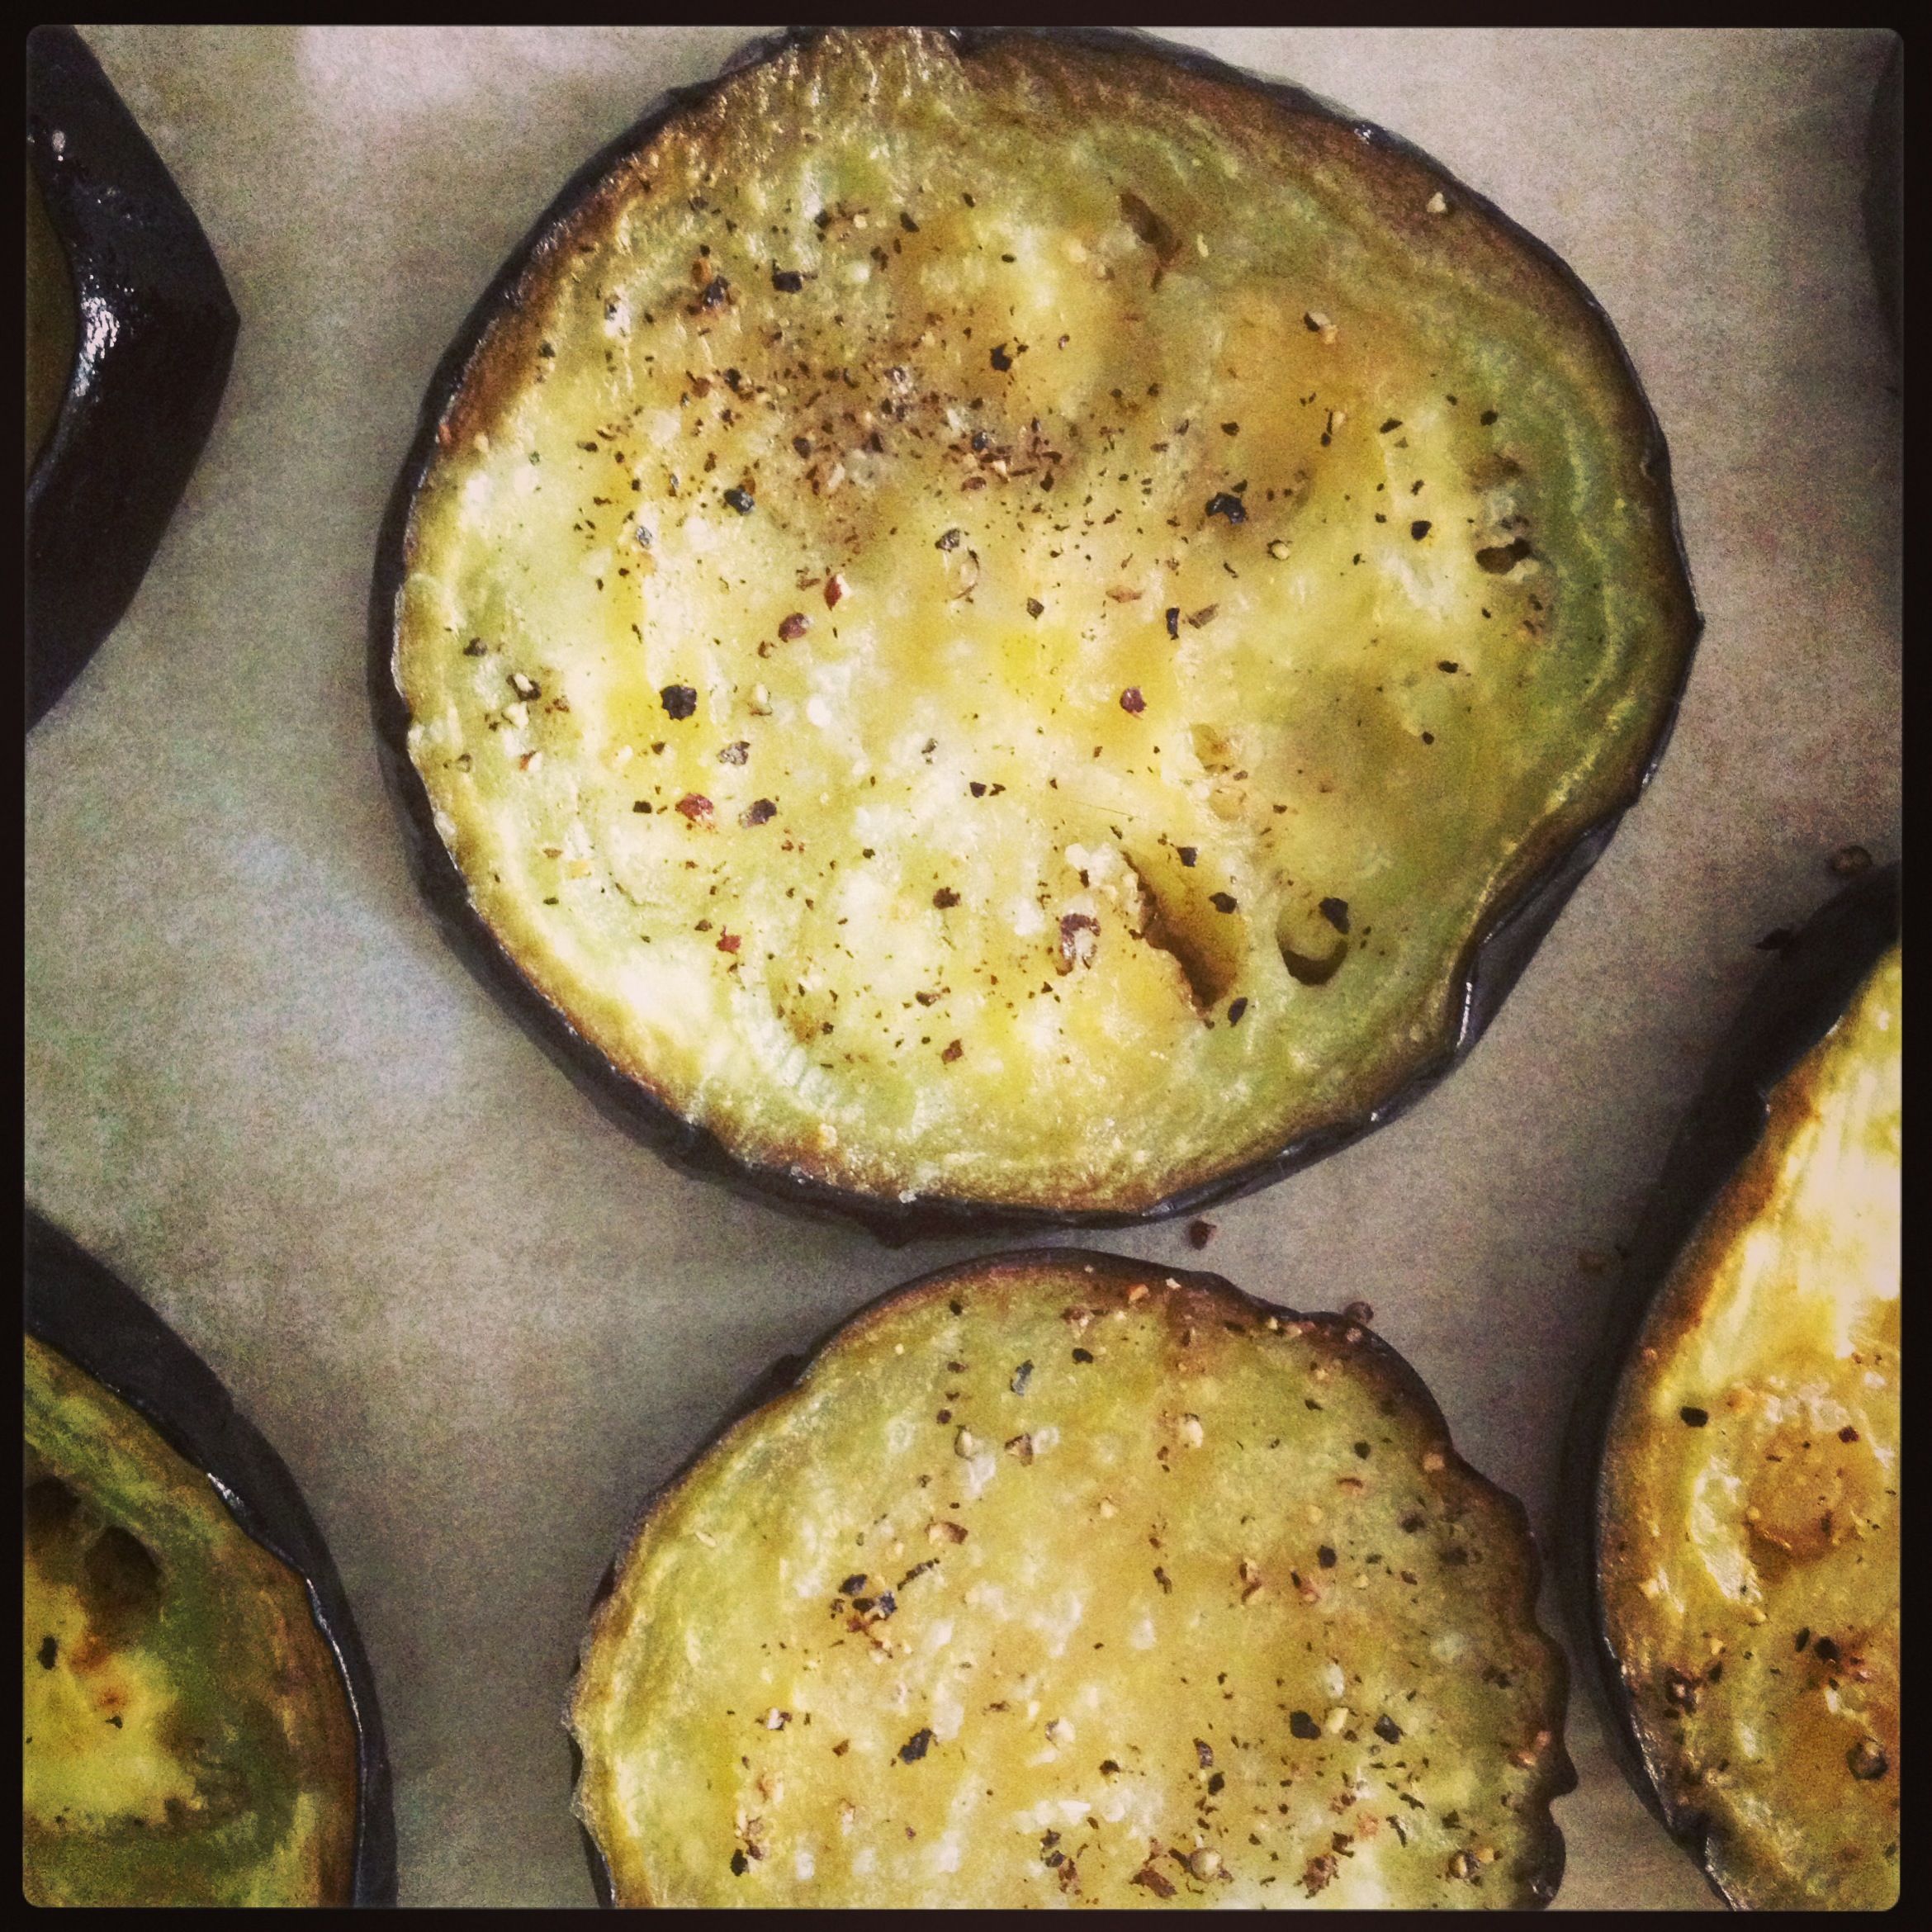
Roasted eggplant
If I’m roasting, why not throw a red pepper in there, too, right? Slice lengthwise, cutting in two, and remove seeds and pith. Flatten each half as best as possible. Find room on the sheet pan in amongst the eggplant. The peppers will take about 5-8 minutes longer than the eggplant—look for it to be dark around the edges. When done, place the halves into a small bowl and cover with plastic wrap. Remove from bowl 10 minutes later and peel off the skin.
Take a segment of homemade Whole Wheat Baguette (recipe is coming, I promise) and slice lengthwise.

Smear one side with homemade red pepper hummus (courtesy of Jennifer!).
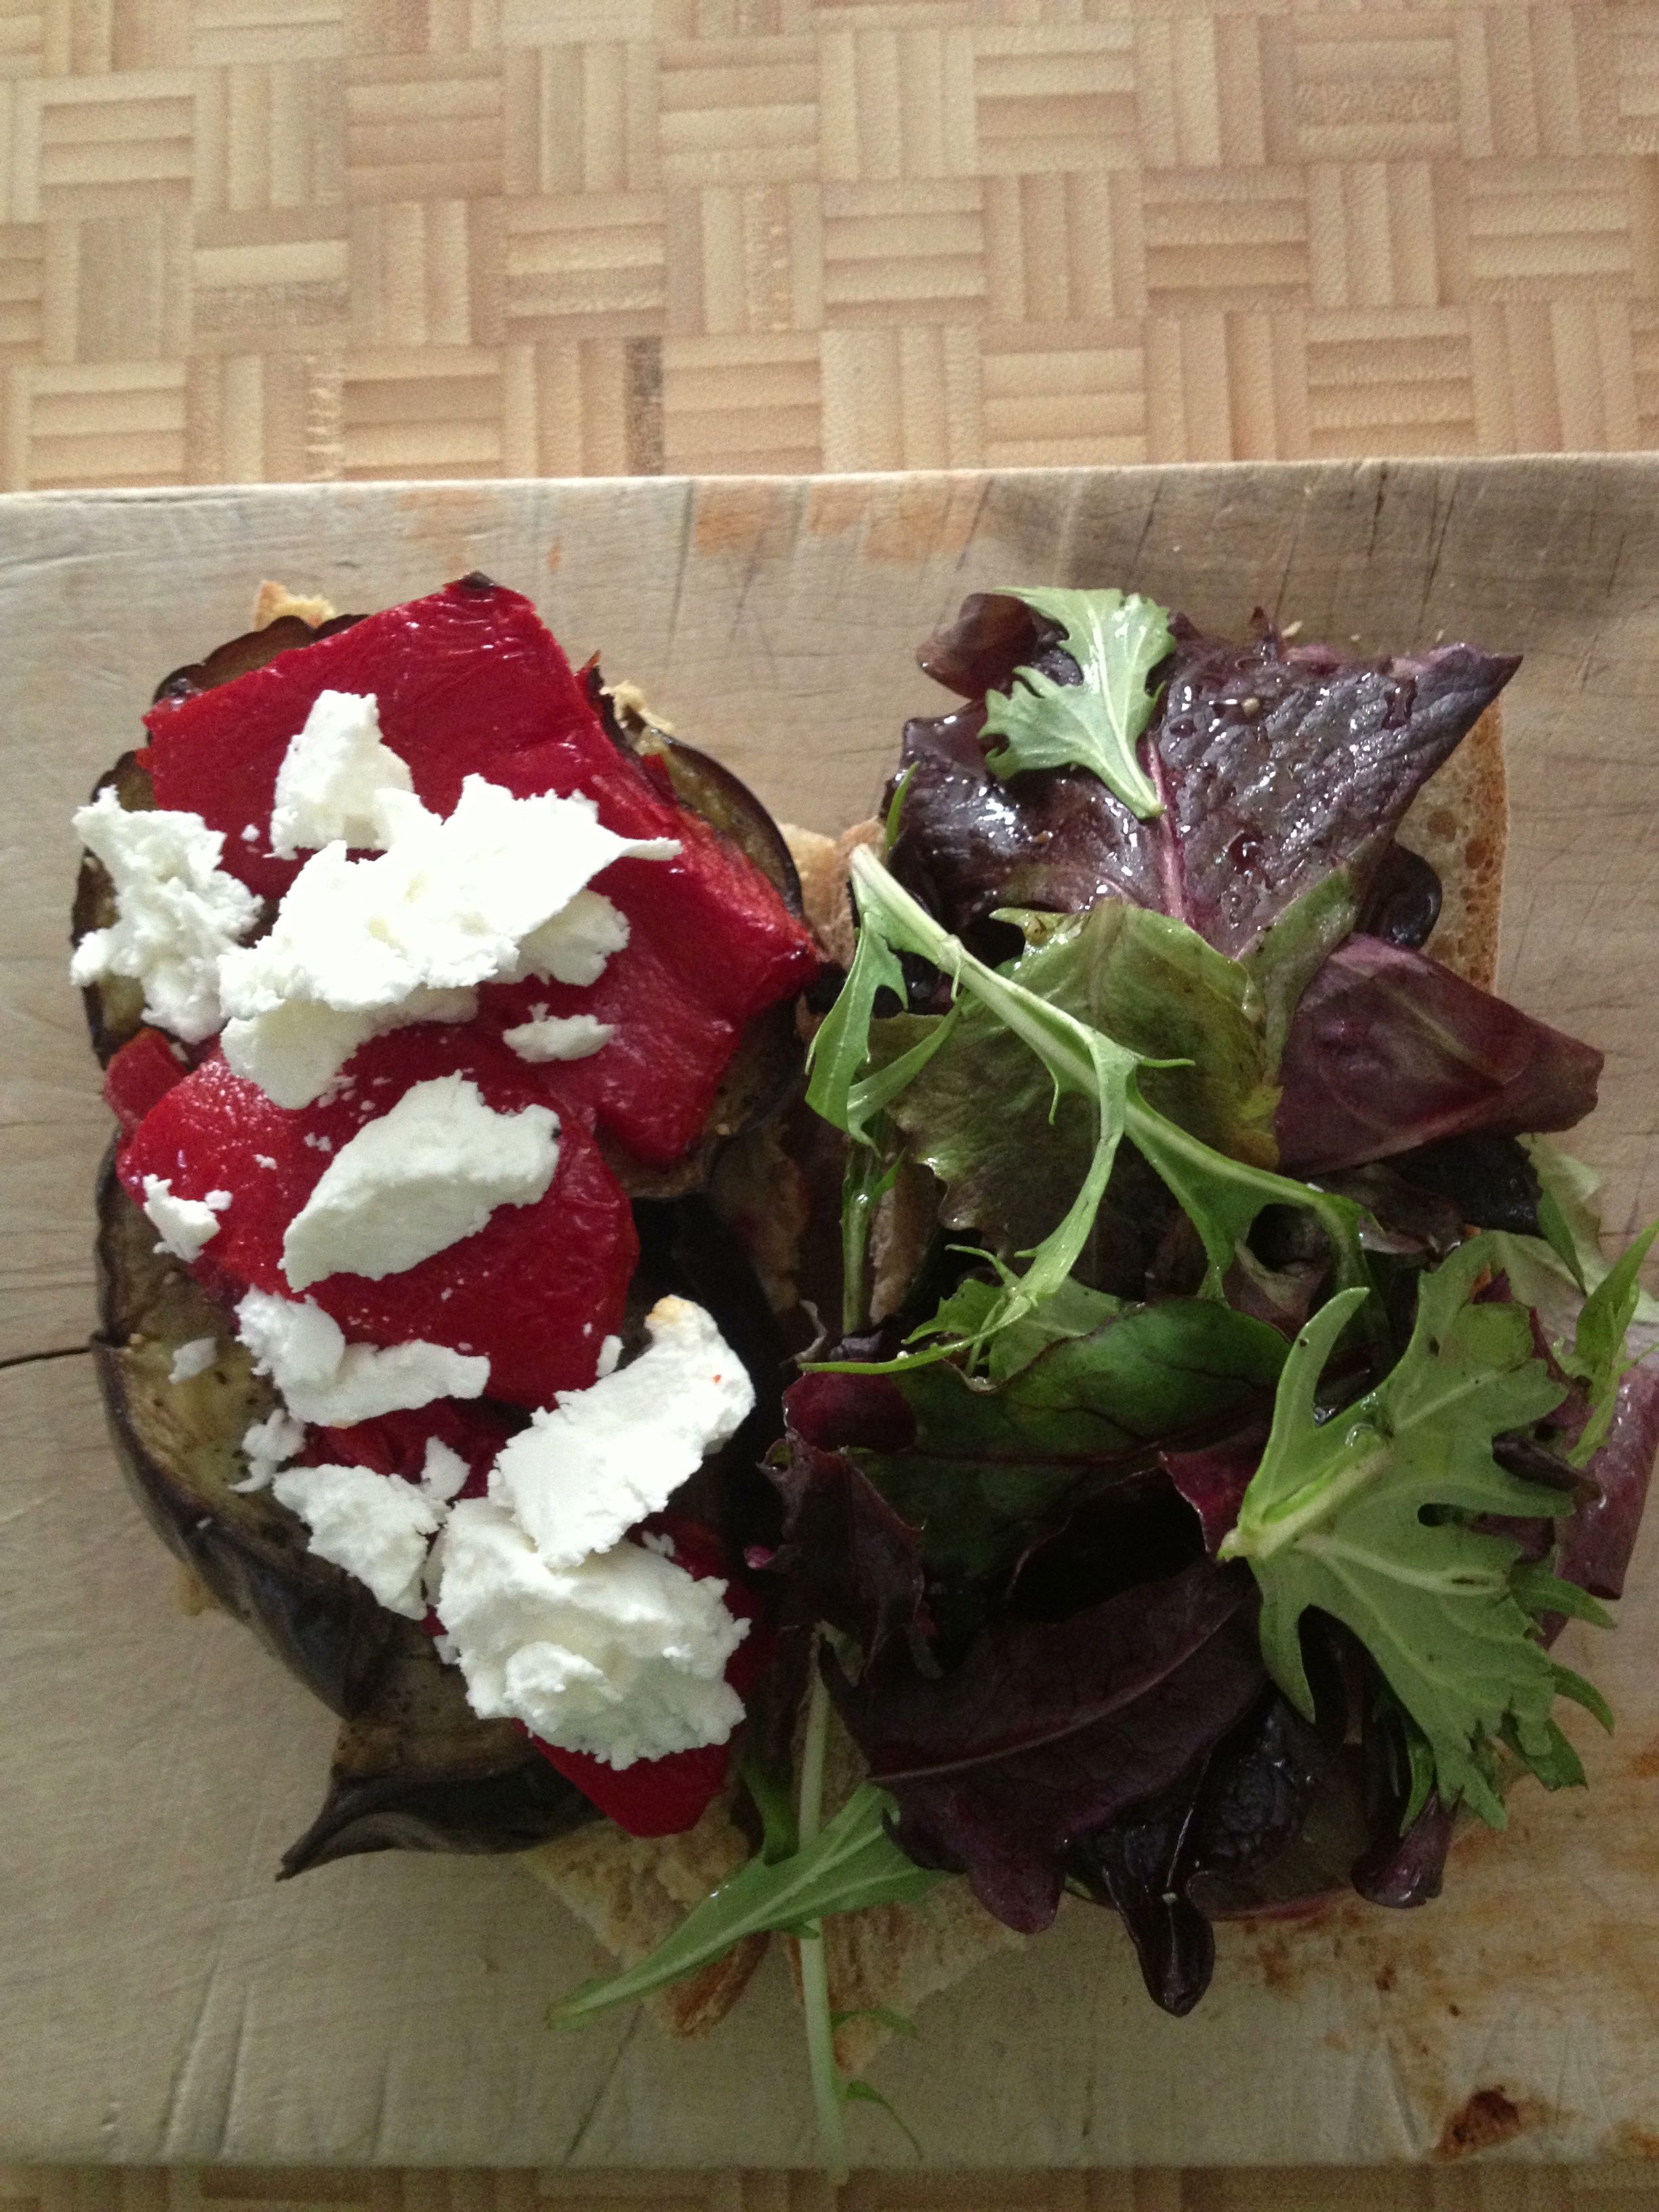
Top with however many slices of roasted eggplant you can fit on there. You may have to cut them in half and pretend it’s a puzzle.
Top the eggplant with roasted red pepper.
And top the pepper with goat cheese. What’s not good about anything I just mentioned? Really?
On the other side of the baguette, lay down some baby salad greens lightly dressed with something. I used Lemony Vinaigrette, which is always in a jar at the ready for good times.
Put one half on top of the other. Warning: Goat cheese crumbles may try to escape. That’s ok—they won’t get far.
Proceed to eat. Enjoy.
My question to you is this: Do you want to eat this? And how much would you pay to have it made for you? Add a pear and a cookie and you’ve got yourself a lunch.
Homegrown Food Challenge—Day 3
October 14, 2011 § 1 Comment
Day 3 on the Homegrown Food Challenge and no fish heads were lopped off on this particular day. But the grill did get lit, and that’s always a fun thing. Here’s how our day progressed.
Breakfast:
Starting to look very familiar. Flat Black coffee with Maine’s Own Organic Milk. Stonyfield yogurt with local apple, honey and a crumbled Effie’s oatcake. We’ll get a bit more creative with breakfast on the weekend, no worries.
Lunch:
Jennifer and I both had big salads with local stuff, similar to the one I had for lunch on Day 2. Local lettuce and red pepper, pickled beets, homemade dressing, etc etc. I even made some homemade croutons from homemade bread.
Dinner:
This is where the grill gets lit—finally! We cranked it up for some pizza made with homemade pizza dough. Two pizzas are usually enough to take care of dinner plus give us enough for lunch the following day.

Pizza #1: Homemade sauce using slightly green homegrown tomatoes (similar to the roasted cherry tomato sauce I make), grilled eggplant (from farmers market) and locally made mozzarella.

Pizza #2: Homemade pesto using homegrown basil, grilled eggplant, roasted red pepper (from farmers market) and caramelized homegrown leeks.
Can’t have pizza without beer, right? We had some Whale’s Tale Pale Ale from Cisco Brewers on Nantucket. Pretty tasty stuff!
As I am two days behind in posting, I can hint at what awaits you for Day 4: One of the most fabulous creations to ever have been sandwiched between two pieces of bread. Think I over-exaggerate? Oh. No.
Roasted Romanesco
October 12, 2011 § 2 Comments
I love funky-looking things. Especially vegetables. Remember my experiment with growing kohlrabi?
Romanesco is a a funky-looking thing. And when I had a choice between broccoli and romanesco, I jumped on it.
It’s a bit like broccoli, taste-wise. Look-wise, though, it would be what Escher would paint/draw if he took the vegetable route with his art.

Am I right or what?
Now, the thing about romanesco is that a good portion of it is stem. If you cut off the stem portion and leave just the florets, you’ll be left with not so much. Eat the stem, people. It’s tasty.
What to do with romanesco? Well, when I see the Brassica genus, I think roasting. And that’s exactly what I did.
Roasted Romanesco
- 1 head romanesco, separated into individual stem-florets or clumps of smaller florets.
- 2 Tbs. olive oil
- salt and pepper
-Heat oven to 425F.
-If any of your romanesco sections look particularly large, feel free to cut them in half. Place romanesco sections in a big bowl. Douse with the olive oil. Sprinkle two or three large pinches of kosher salt on top (depending on the romanesco’s size) and give it a couple turns from a pepper grinder. Toss.
-Spread romanesco onto a rimmed baking sheet and pop in the oven for about 23-25 minutes or until they develop a nice brown char and a fork can just be inserted.
Finally, a new item to share space with broccoli and cauliflower in the winter months.
Roasted Vegetable Lasagna
August 14, 2011 § 1 Comment
Sometimes … sometimes I just want to eat bad things. Good-tasting things but bad for you, or your waistline. Fried chicken. Wings. A big drippy pulled-pork sandwich. A pile o’pasta.
But if it’s homemade, I hear, it’s half as much calories, conveniently. At least that’s what I tell myself. And if it has vegetables in it, well … then it’s downright a health food.
So that makes our roasted vegetable lasagna not only calorie-free but good for you, too. And the best thing about this recipe is it’s a combination of three previous posts. Brilliant!
Recipe
- Roasted vegetables of your choice
- Homemade pasta
- Roasted cherry tomato sauce
- 1 lb. ricotta cheese
- 1/2 lb. chard
- 1 tsp nutmeg
- 3 balls of fresh mozzarella, thinly sliced.
- One rectangular casserole dish, what are they, 8×13?
NOTE: If you’re not making your own pasta … and really, you don’t have to … buy the lasagna sheets that you don’t have to pre-boil. A few cents more, but really, the convenience is worth it.
-Our roasted vegetables of choice for this lasagna are yellow squash. We sliced it into 1/4-in. slices, lengthwise. Glug of evoo, salt and pepper, and roast at 425F for 6 minutes each side.When done, set aside.
-Roasted cherry tomato sauce – just as the recipe says. You may want to puree it.
-Homemade pasta … prepare just as the recipe says. Make the sheets to fit half the width of the pan.
We have the sauce, the pasta, the veggies. Oh, wait – one more vegetable.
-Chard. Stem it and then steam it for 1 minute, 2 minutes max. Let it cool. Squeeze the water out of it. And chop. Set aside.
-Put the ricotta into a medium bowl. Add the chopped chard, nutmeg and a pinch of salt and combine. That’s your cheese filling.
Now it’s time to assemble! It’s all about layers. Get the layers, get the lasagna.
-Lay down a thin layer of sauce. Then top with two lengths of pasta sheets. If you crank out the pasta as you go, you can cut the pasta to the correct length. Top the pasta with some roasted vegetables. For the squash, we fit 4-5 lengths of squash per layer.
-Next, spread some of the ricotta – as much as you’d like – over the veggie layer. Dot with slices of mozzarella. A little cheese, a lotta cheese – whatever you want.
-Add another layer – sauce, pasta, veggies, cheeses. You can make as many layers as you have ingredients for. Three or four is typical. Just keep going until you fill the dish and have absolutely no more room.
-When you are done layering, you’re going to top with a layer of pasta, then a thin coating of sauce. Then top with as much mozzarella cheese as you like. And a dusting of parmesan, too. Done!

-Cover with aluminum foil. Pop into a 375F oven for 25 minutes. Remove foil and cook for another 15ish, or until the sauce and cheese are bubbling.
-Let it sit for 10 minutes.
Try not to make a pig of yourself at the dinner table. Really, you’re better than that.
Roasted Cherry Tomato Sauce
August 14, 2011 § 5 Comments
I’m telling you, some gardening years are better than others. A string of spectacular harvest sseasons from my small urban plot have made this summer a “meh” – that’s on a scale from “it sucks” to “this is freakin’ amazing.”
My cherry tomatoes—I’m not thrilled with them. They’re growing okay. I just don’t like the fruit. Too big. Too thick-skinned. And the flavor fell flat. Cherries are supposed to poppable, add a brightness to a salad. These? Meh.
When life gives you lemons, right?
So, these cherry tomatoes went straight into sauce. Roasting brings out the sweetness they lack when just sitting on your salad.
Step 1: Put about 2-3 lbs. cherry tomatoes in a cast iron skillet. Add a couple of tablespoons evoo, sprinkle with kosher salt and give it a couple of turns of fresh ground pepper.

Cherry tomatoes seasoned and waiting to be popped into a 425F oven.
Pop it into a 425F oven for about 40 min. or until the tomato skins start bursting and the liquid starts bubbling. Let it bubble along for a total time of about 1 hour.

Cherry tomatoes after an hour of roasting
Step 2: Your gonna get lots of juice from the tomatoes, and you want to let it cook off. And you also want the flavor of the tomatoes come through more and get the sauce a bit thicker. So, take the skillet out of the oven and put it on the stove top over a low flame. Add 2-3 cloves of crushed garlic. Add some herbage; whatever you like. Fresh thyme or basil. Will it top a pizza? Add some chopped fresh oregano. 2Tbs is about right. Taste it for seasoning and add salt/pepper if you need to. And cook loooow and sloooooow. How long? Until enough liquid has cooked out to get the sauce to the thickness you like. In my case, 2 hours.

After two hours simmering on the stove top.
How easy was that? You might find it still a bit too chunky to spread on a pizza or spoon onto layers of lasagna. Whir it up in a blender or use an immersion blender if you like.
And how sweet is this, uh? You may never go back to plum tomatoes for sauce again.
Beets: From Seeds to Roasted
August 2, 2011 § 1 Comment
I love me some beets. Love love love.
I know beet love is not a universal thing. I don’t belittle that. There are reasons to not like them. Sometimes there’s a metallic dirt after-taste. They can stain your hands—and cutting boards and dish towels—like you just murdered someone and stored them in the freezer. Then there’s that whole … nah, I’m not gonna go there.
My first beet love was a dish an old roommate would make in summer. Fresh, julienned beets with minced garlic, evoo and balsamic. Had a real nice crunch. Tasty, but only if you’re not dating someone.
Jennifer has an awesome beet soup – that’s my second beet love. It has the kitchen sink in it, too. I don’t want to hold out on you, but when the next beet harvest comes along, it’ll go up on Dainty. That okay?
My daily beet love goes out to the roasted variety. Simple. Delicious. And really quite beautiful.
New to Dainty!
Yeah for new! I’m including growing instructions. Yup, that’s what I said. This urban farmer is going to show that you—yes, you, city kid!— can take some seeds, grow them, and put them on your tasty table.
Growing Beets
What you’ll need: Beet seeds. A patch of soil/dirt, or a big, wide, deep container. Some way to water them.
Step 1: Beets can take cool weather. And hot weather, too. Another reason to love them. Get out in the garden early in spring—Aprilish for New England peeps—to sow your seeds. OR, start some seeds in early- to mid-August (ahem, NOW!).
Step 2: Beets’ big bulbousness develops underground, in case you didn’t know. It helps if your soil (I never called it dirt, but you know what I mean) isn’t rock hard. Is your soil like cement? Then go to the DIY store and buy a bag of “garden soil,” spread it on top of your “dirt,” and dig it in with a shovel or hoe. Sounds like work … it is! Don’t worry, it doesn’t take long.
Step 3: Beet seeds. Never beet “seedlings” because root vegetables (like beets and carrots) don’t like to be moved once they begin to grow. So, get yourself some. There’s all different types. Choose whichever tickles your tastebuds.
Step 4: Sow the seeds according to the seed packet instructions. Here’s a tip: Plant them in several rows maybe 6 in. apart and in a chess board-type pattern. You can squeeze more in the space that way.
Step 5: Water the seeds in … gently. And keep the soil moist as they germinate.
Step 6: Now, you’re going to wait weeks and weeks … watering and even fertilizing with an all-purpose fertilizer (go to the store and ask for it – you’ll get something good). Your seedlings may be too close together. And when that happens, the beets under the ground kind of grow into each other. It’s ok to sacrifice some of the smaller seedlings. If one seedling is too close to another, just pull it up and discard.
Just a warning: If you spot something on your beet leaves that look like random squiggly lines, you’ve got a pest called Leafminer. These little guys tunnel between the top and bottom of the leaf surface. Crazy! They are the bane of my spring garden—because they also love spinach and chard. If you spot a leaf with these markings, remove it … from the entire garden! Put it in the trash. Do not compost. You want these suckers dead and gone far away. You’ll eat those beet tops later … or the chard or the spinach. You don’t want these guys getting to it first, do you? If you are so inclined, look along the squiggly line and you just might be able to spot the white-ish larva. It’s really gross. Okay, on second thought, don’t look.
Step 7: As your beets get bigger—yay, how awesome is that?!—they may push themselves a bit above ground. Just lightly cover with some surrounding soil to keep the beet covered. Don’t want it to get sunburned, right?
Step 8: Harvest! Pull those beets up whenever you want. You can get a good idea of the size by taking your finger and going around the top of the beet under the soil. After a few months you’ll have small beets that will be good for pickling. Three months, and you’ll get a decent beet—the size you’ll see at a market. Don’t go for massive. No one needs massive beets.

Beets! and chard, too.
Step 9: Time to roast!
Roasted Beets
- beets, 3-4
- olive oil
- course salt, pepper
-Set oven to 425F. Cut off a 1 ft. length of aluminum foil, place in a cast iron pan.
-Wash beets. Cut off tops just above beet. Reserve beet tops for … well, you can saute them for pasta or as a side dish …
-Arrange beets on the foil. Glug olive oil on top of each beet – don’t need a whole lot. Sprinkle with salt and a turn of pepper. Fold foil around the beets so they are snug in the packet. You’ll want the moisture to stay inside.

Beets oiled and seasoned
-Slide into the oven. Cook 45-60 minutes, depending on the size of the beets. When are they done? When you can just insert a paring knife deep into its heart.
-When the knife slides in, remove the pan. Let cool until the beets can be handled. Actually, just wait until they are room temp. The skins of beet will be soooo much easier to remove when they are completely cool. And then just rub off the skins! For a cool visual, you can keep the short tops on the beet and rub the rest of the skin away if you want.

Beets, cooling.
What to do next? Store in sealed container in the fridge for 3-4 days. Cube or slice and eat with salads. Goat cheese is in love with beets, too, so be sure to pair them whenever you can.

Naked beets, ready to be sliced or cubed. How beautiful!

Roasted beets are fabulous on a salad.
