
Whole Wheat Baguette
February 28, 2013 § 2 Comments
If we run out of crackers, I make Crackers. If we run out of hummus, I make Jennifer make Red Pepper Hummus. And if we run out of bread, I make bread. It’s just what we do. We make things. Bread included.
Bread is work. There’s the mixing and the kneading and the proofing and the punching and the second proofing and the loaf shaping. It’s up-to-your-elbows-in-dough kinda work—the type of work that gives you strong-as-oxen forearms.
Until a rather vigorous episode of dough kneading a few years ago set off some rather painful carpal tunnel symptoms, I kneaded all dough by hand. Then by necessity I had my Kitchen-Aid mixer and its dough attachment take over. And now, thanks to Mark Bittman, I’m letting the food processor do all that work.
It’s odd—almost sacrilegious—to think that a machine with a sharp spinning blade can make a soft and smooth clump of dough rather than a bowlful of shredded sticky flour. But it does. And while I was once skeptical and hesitant to come under the no-knead tent, I have entered, heard the word, and am now a food-pro convert. Halleluiah.
Mark Bittman, the New York Times‘ food guy, included the following recipe in the Feb. 3 NYT Sunday Magazine. It’s actually what he calls “not quite whole grain,” and I agree, but there is enough wheat flour in there to give it that nice flavor and chew. What I really like about this is the hands-off nature of the recipe. The first step takes no more than 3 minutes, then you’re free for the next 3 hours while the dough rises. The most work comes during the baguette shaping process. And quite honestly, if you want to learn how to shape a baguette, search for it on YouTube.
In all, you’ll have lovely baguettes in a little over 4 hours—and with very little effort. Throw some flour in your hair to make it look like hard work.

dry ingredients in bowl of food processor

dough comes together in food processor after about a minute
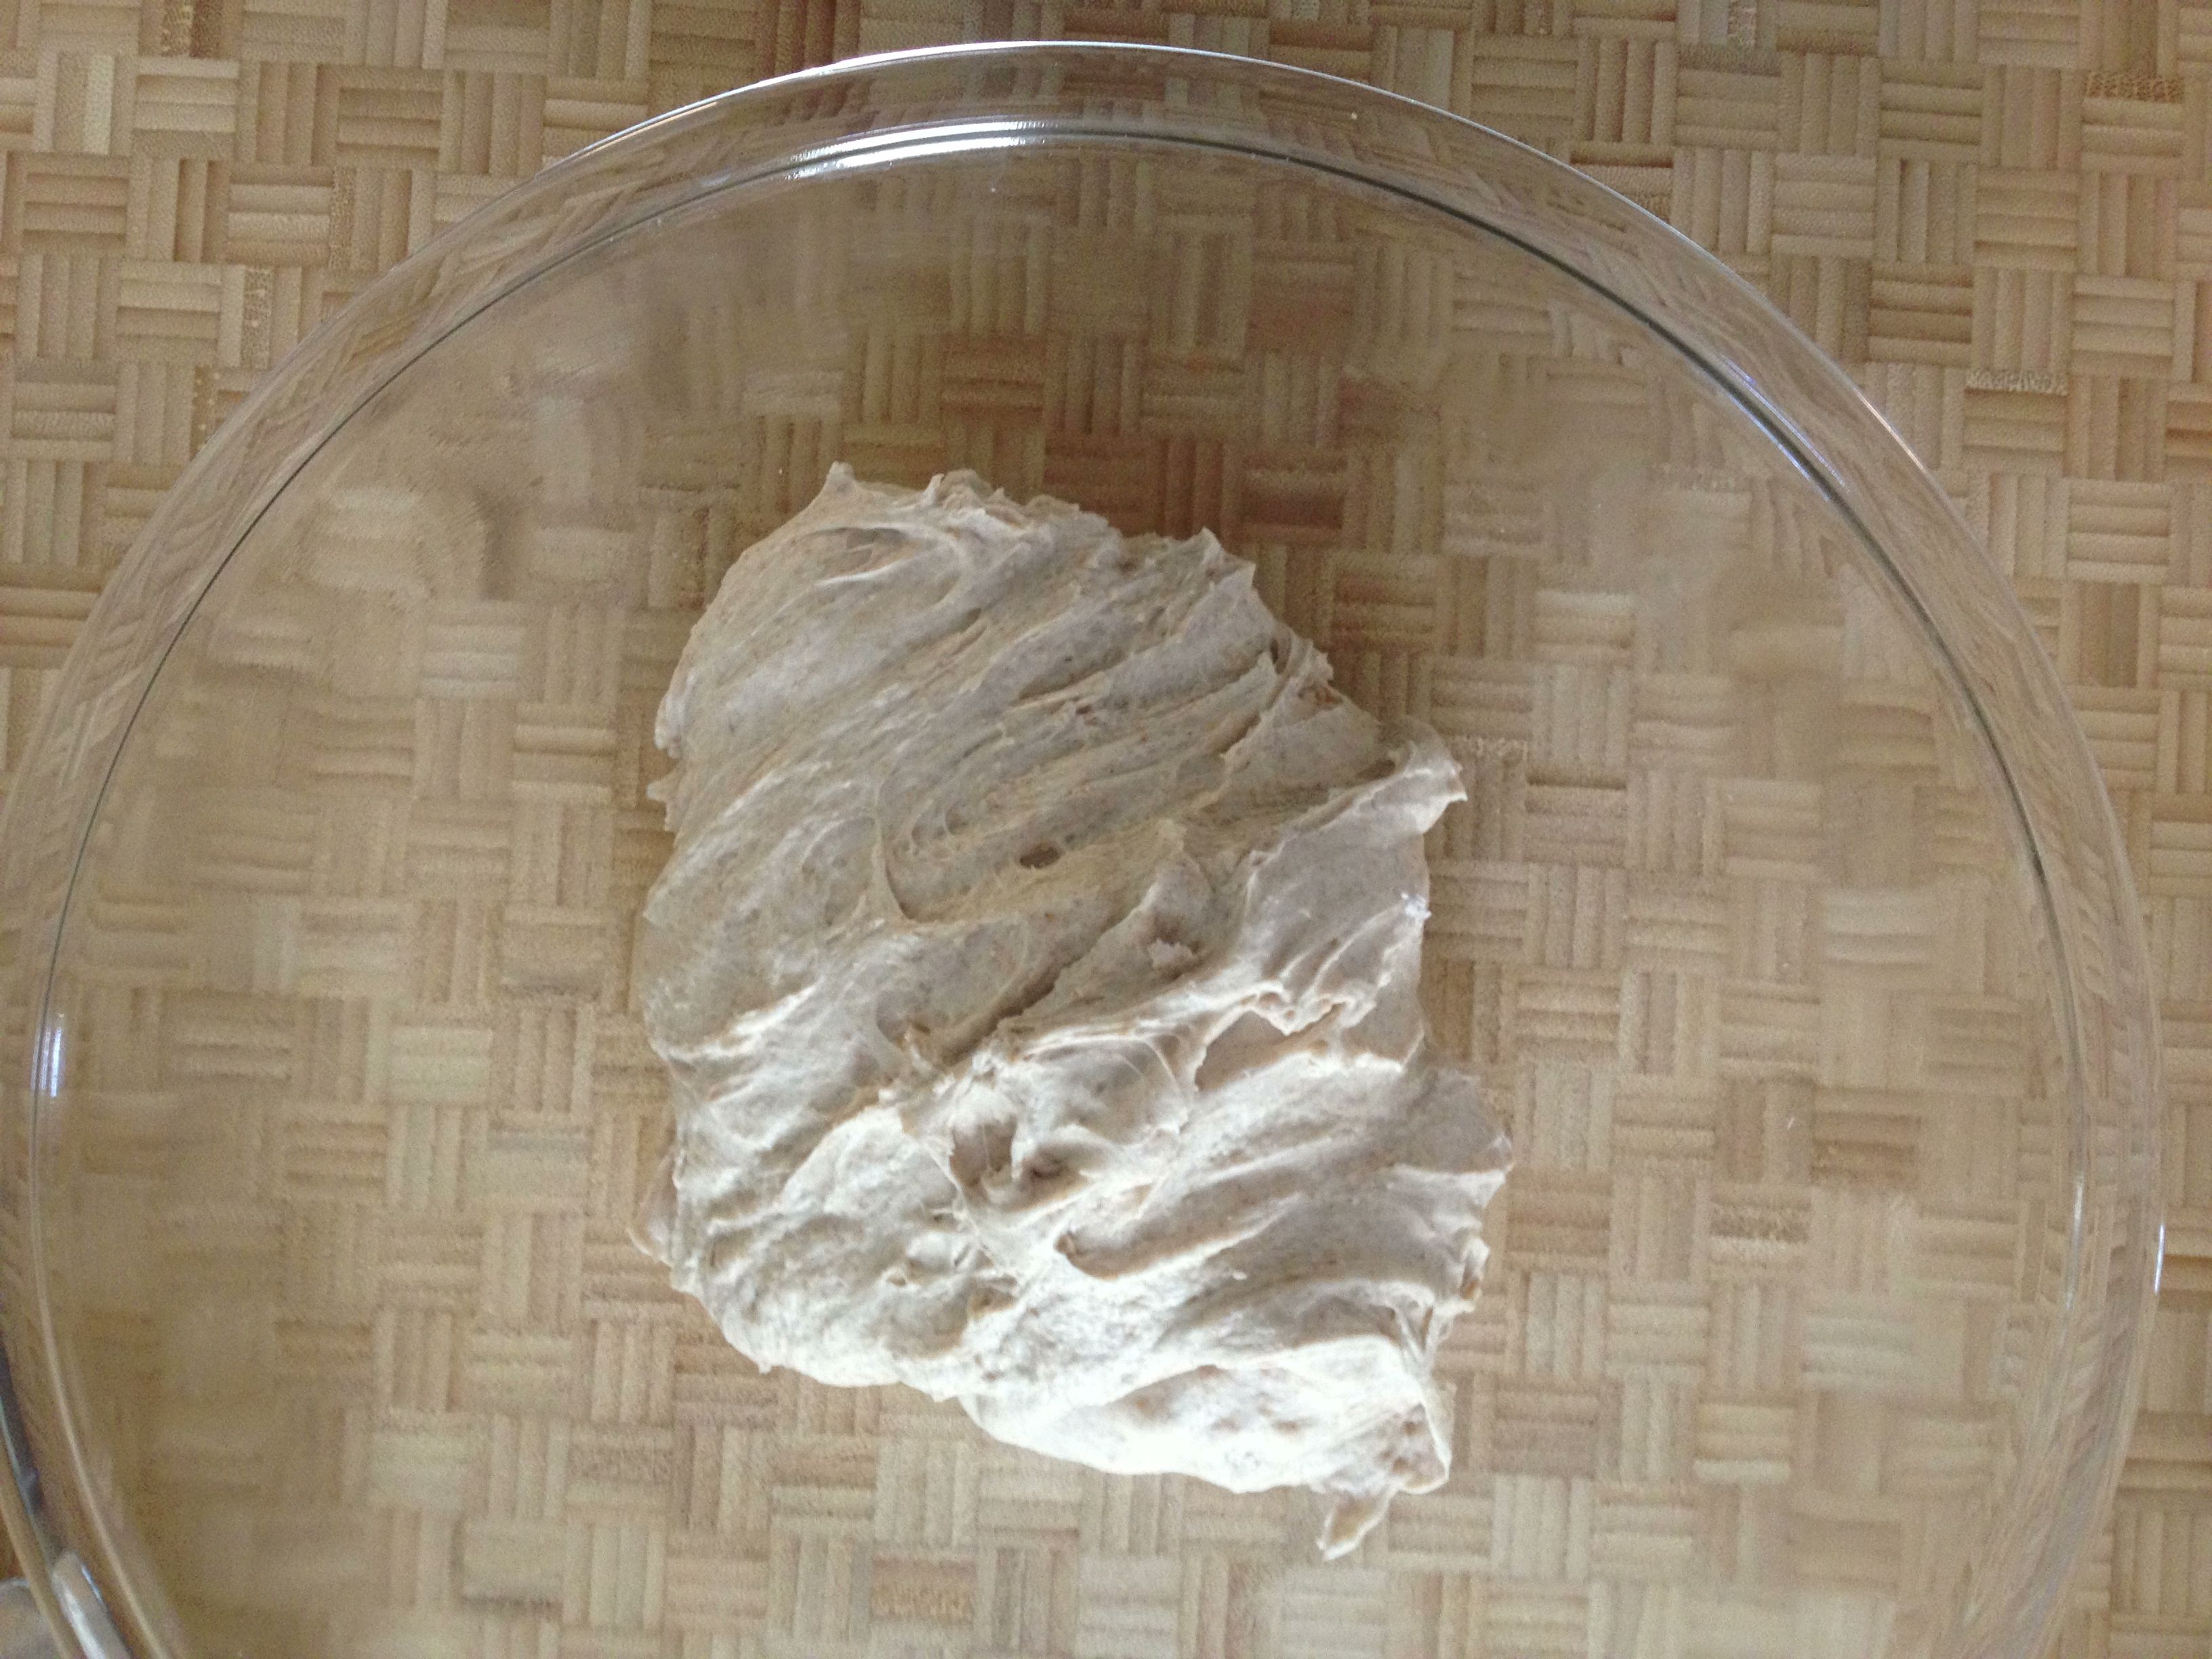
dough turned out into lightly oiled bowl, ready to rise

dough rises about this much after 3 hours
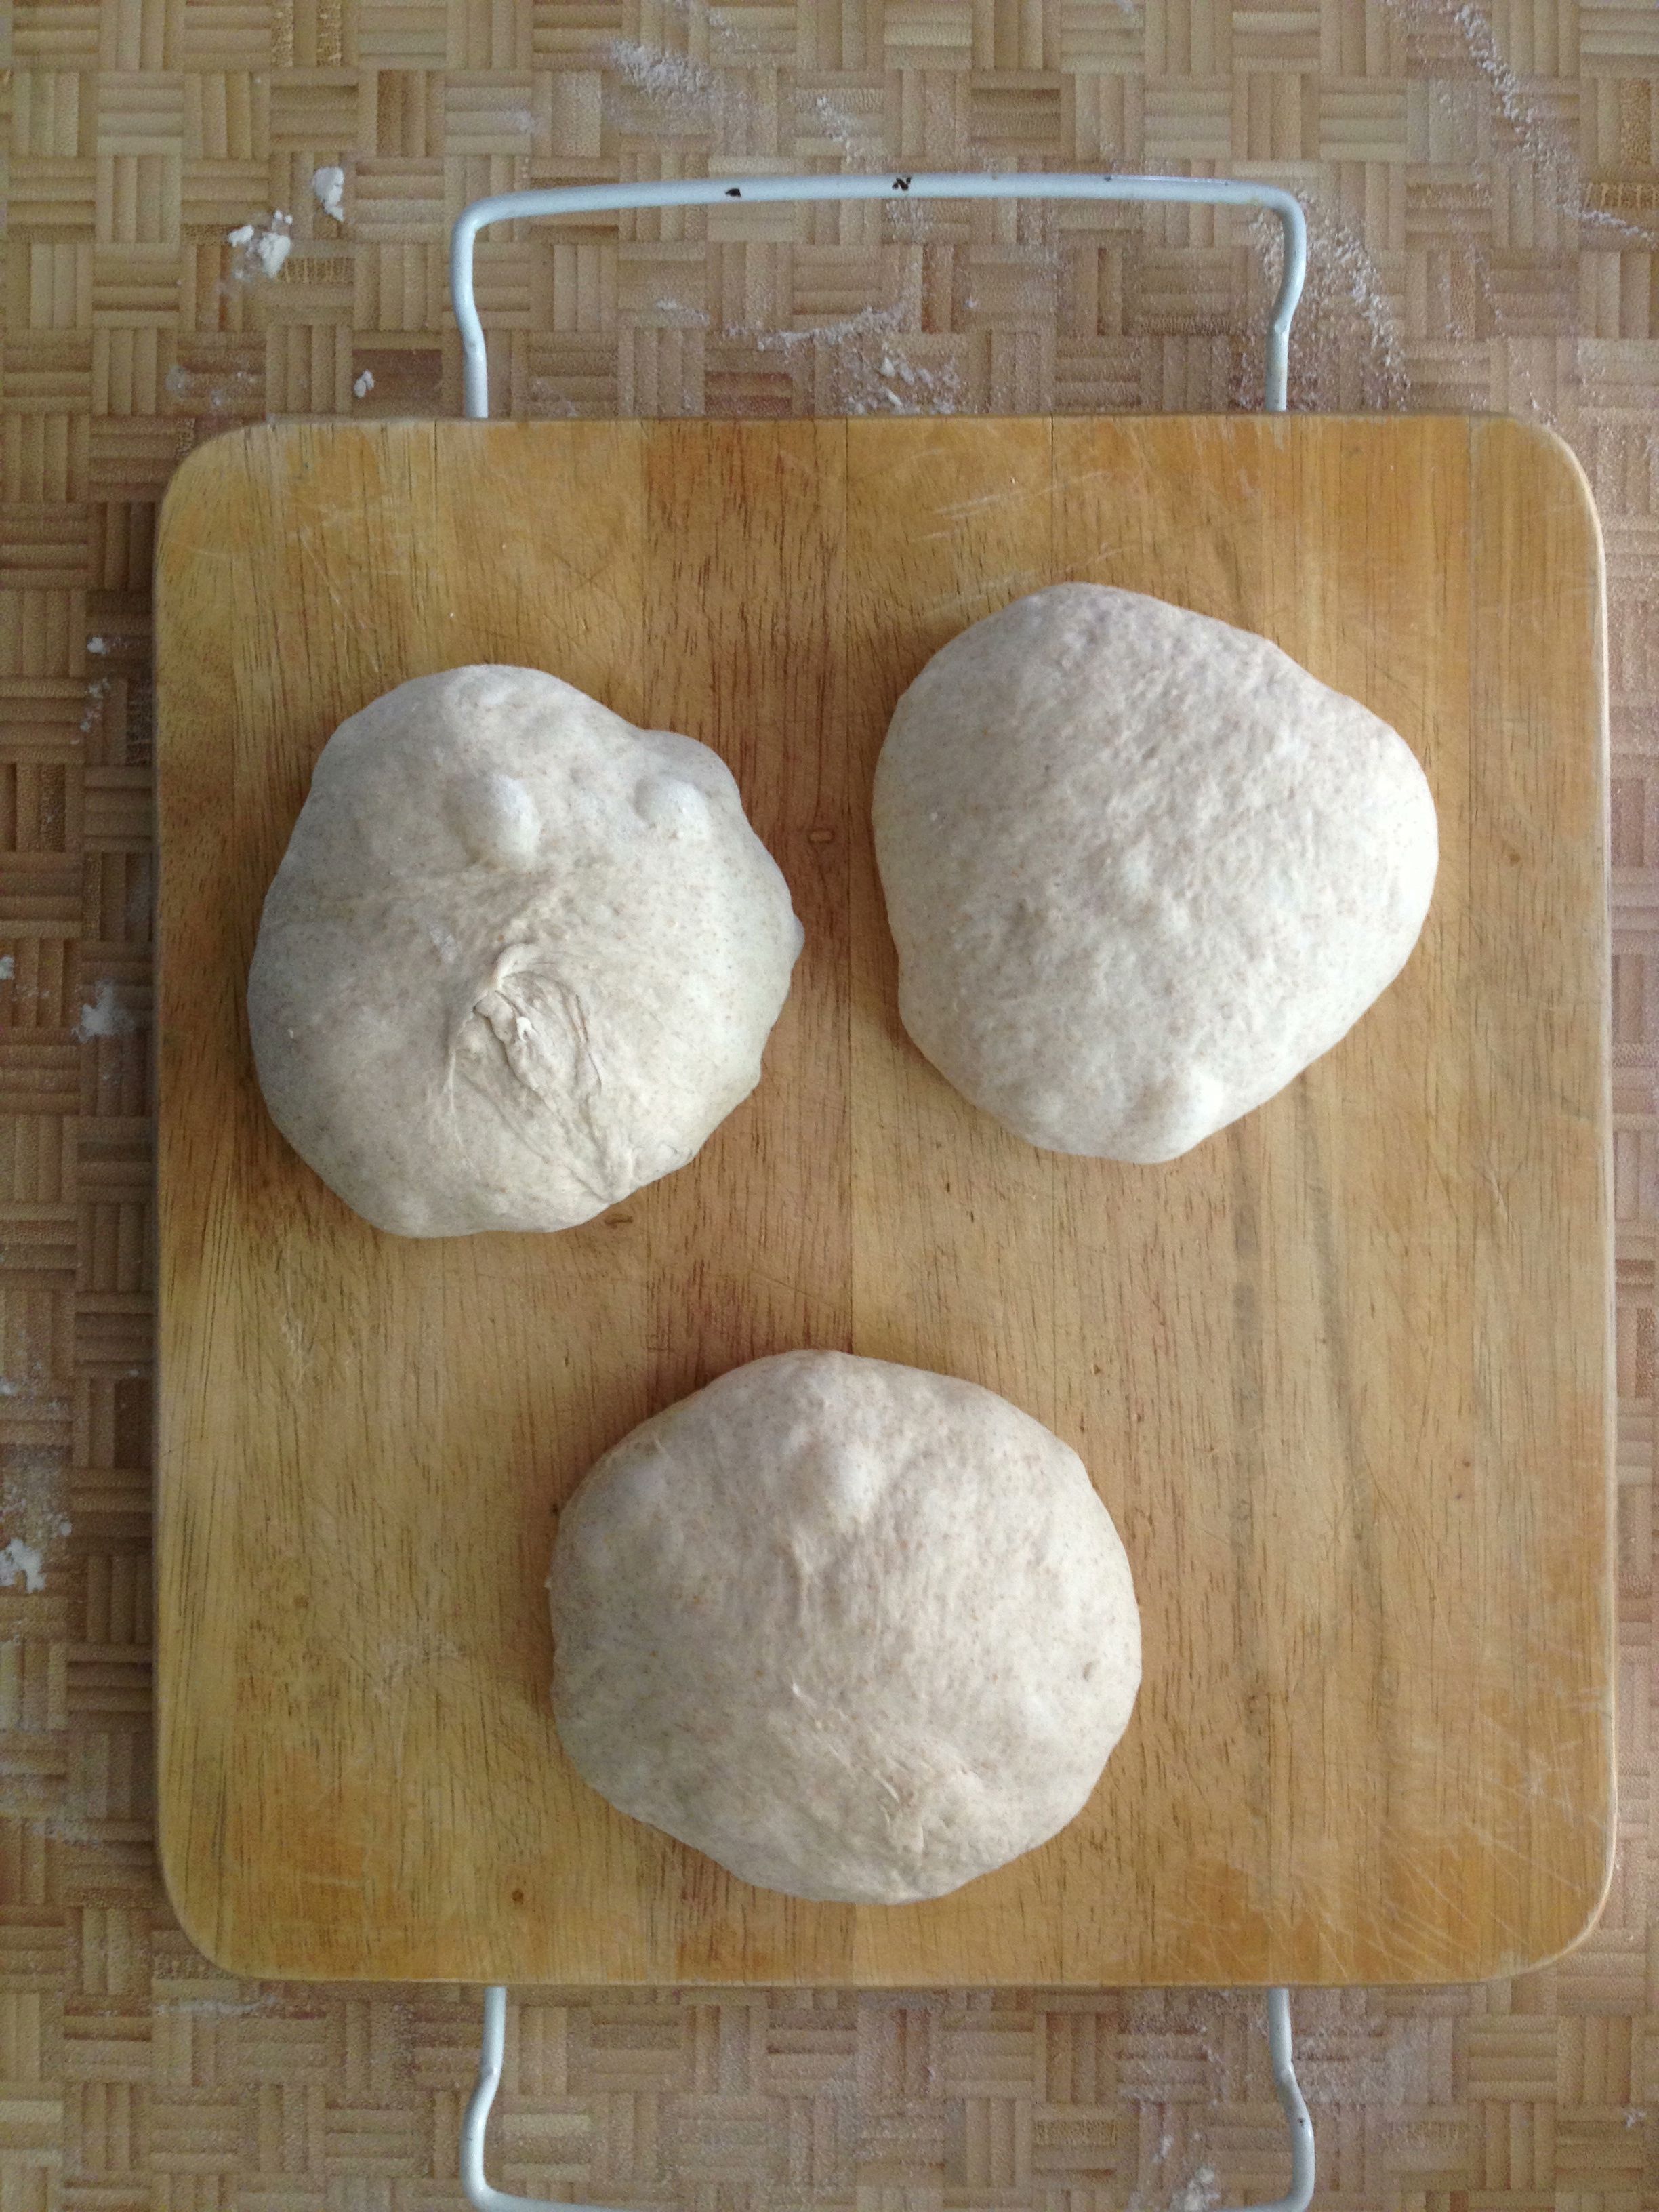
after turning the risen dough out onto a lightly floured surface, cut into three segments and roll into a tight ball
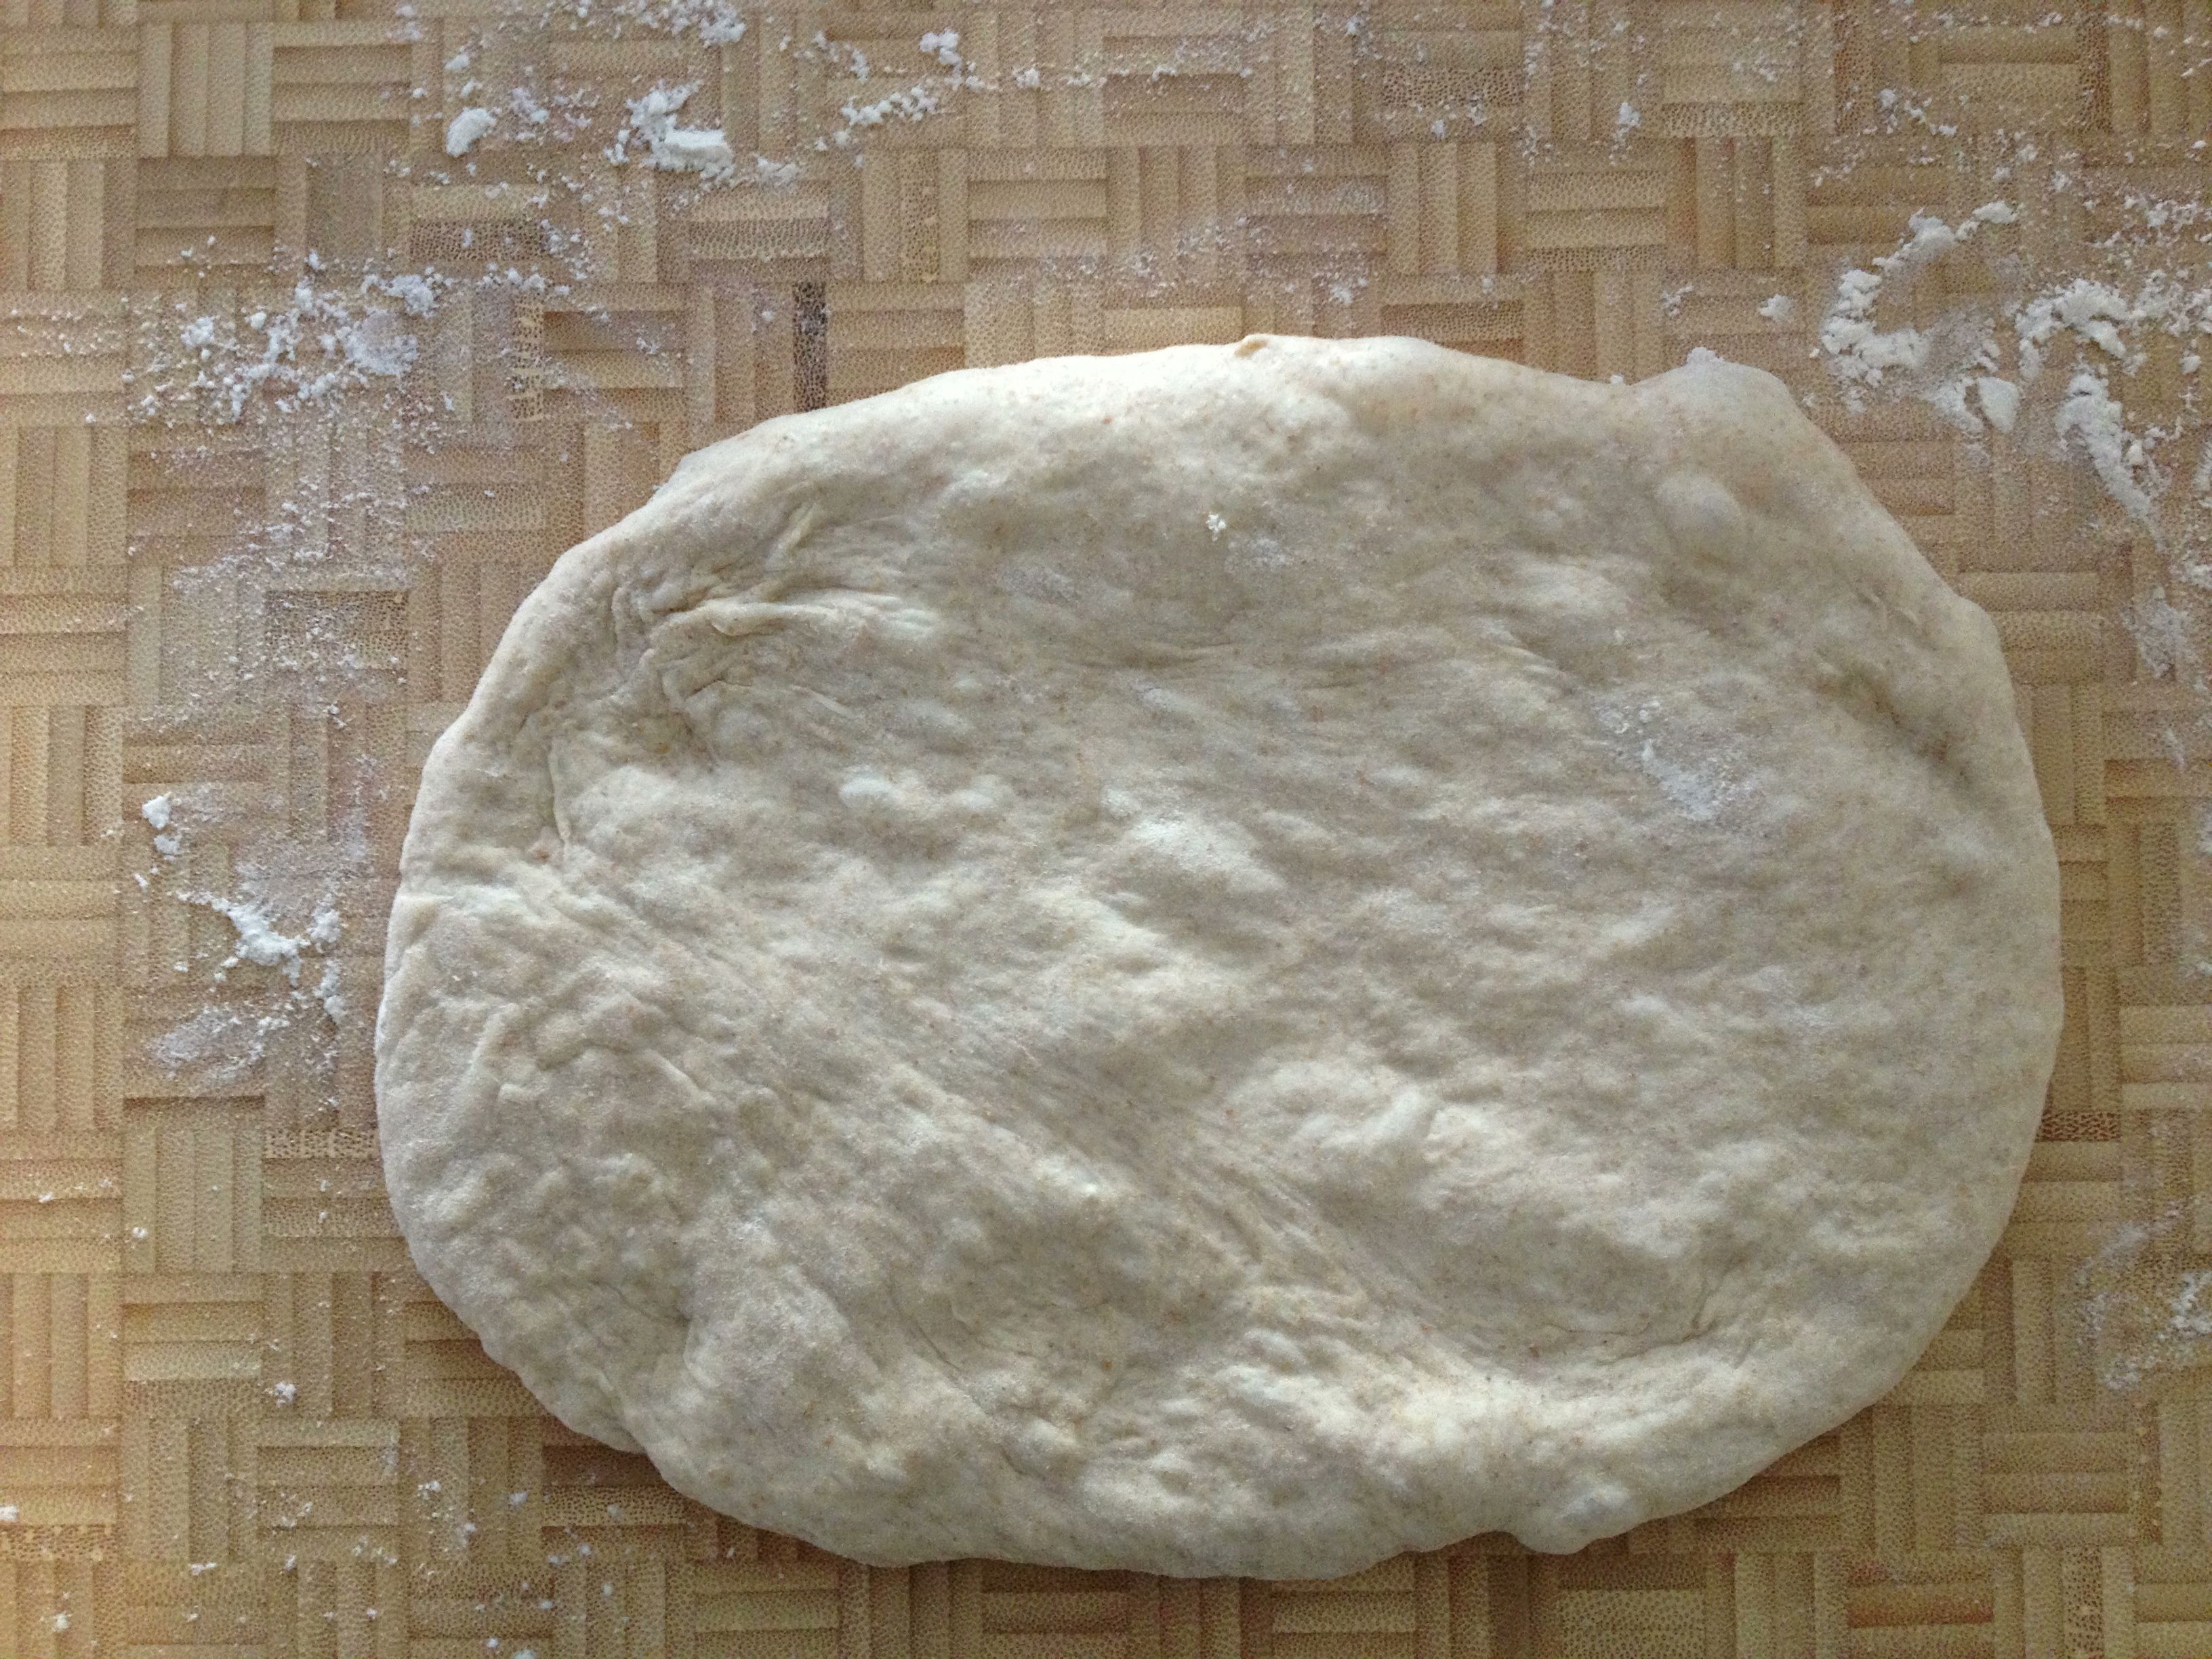
form the dough ball into the best rectangle you can get

fold the bottom side up toward the center

then fold the top down to create something that looks like an envelope

fold length of dough down about a third and press the seam to seal – and repeat.

set formed loaves into stiff canvas to help them keep their shape while they rise another 30 minutes.

fresh out of the oven! okay, so they are odd shaped. embrace the odd.
Whole Wheat Baguette (from Mark Bittman, New York Times Sunday Magazine, Feb. 10, ’13)
100 g. whole wheat flour
400 g. all-purpose flour + some
10 g. kosher salt
6 g. instant yeast
water
1. Combine dry ingredients in a food processor. Turn machine on and while it’s whirring, add about 1.5 cups of water slowly over a 30-sec. period. Keep machine running for another 45 sec. or so. Dough will be held together nicely and tacky, not wet. Turn dough into a large bowl (I lightly oil mine just in case), cover with plastic wrap, and let it rise. It should take 2-3 hours. I let it go for the whole 3 hours and it’s risen quite nicely.
2. Turn the dough out onto a minimally floured surface, pat lightly, and cut into 3 equal pieces. Recipe says to form into a log, but I form into small round boules. Cover with a tea towel (or plastic wrap) and let it sit for 20 minutes.
3. Now shape each dough round into a baguette. I am SO not the expert at this but … This is how I do it:
-pat dough into a rectangle, kinda the size of a small 8.5×5 notebook. The following will work best if the corners are as square as possible (yes, getting dough to be exactly square is impossible but give it your best try).
-Position the long side down. Fold the bottom end up about a 1/3 of the way, and then fold the top end down over it so it looks like an envelope. Take the heel of your hand or your thumb and press and seal that seam together. Lightly flatten the dough.
-Next, fold the top down about a 1/3 of the way and seal the seam again. Lightly flatten. Repeat this process another two to three times.
-Starting from the center of the dough, place your hands over the top of the dough and slowly and lightly roll the dough up and down, pressing outward to lengthen it. Don’t go all that far. The longer it is, the thinner it is. And … that’s it.
4. Once the baguette is formed, put the baguettes into something like a baguette pan. Or, use a lightly floured swatch of canvas (or a heavy tea towel) and shape the canvas around the long sides of each baguette. You want the canvas to cradle the dough and help keep the dough’s shape. Let the dough rise for about 30 minutes.
5. Meanwhile, get your oven heated to at least 450F (Bittman’s recipe says 465F, but my oven only goes to 450F). A few minutes before the dough is ready to go in the oven, open the oven door and spray some water around the side walls and close it back up. Just before putting the loaves in, put them on a piece of parchment on a sheet pan and slash the tops with quick movements of a very sharp knife. Slide it in the oven, give the loaves a quick squirt with was water and close the door. Repeat the squirting with water about a minute later. Keep them in the oven for about 25-30 minutes, or until the loaf sounds hollow when you thump the bottom of it with your thumb. Cool on a wire rack.
Now, why are we spraying with water? To create a bit of moisture in the oven and around the loaves. This moisture helps to create that light and crisp exterior on the loaf. It works, so give it a go.
You likely have your own favorite bread recipe. Let me know what it is in the comments below.
Half Whole Wheat Bread
January 11, 2011 § Leave a comment
It’s about time I bake some bread, wouldn’t you say?
It’s a lazy-dozen days into the Year of Ellen Baking and flour hasn’t yet been sprinkled on the kitchen counter. I rolled out of bed this morning and decided to remedy that. Measuring cups and the mixer were in use within 15 minutes of my alarm going off.
It’s not like I have a lot of time to make bread today. The pile of work on my desktop is pretty steep. Making a poolish (a dough starter) and then going through the hours of rising and deflating and proofing and on and on – the protocols for my most flavorful breads – just isn’t in the day’s agenda.
Luckily, I have a quick, one-rise recipe I keep in my back pocket and pull out when time is tight. I found the recipe at Principia Gastronomica last summer. Easy enough to remember. Easy enough to prepare. Easy enough to adjust.
Here’s the ingredient list:
- 3 cups flour
- 1 tsp fast-acting/instant yeast add straight to the flour (I increase by 1/3 tsp – not sure why but it works!)
- 2 tsp salt (I use kosher)
- About a cup of warm water (your finger should feel comfy when inserted into it)
The thing I like about this recipe is that the blogger had suggested to add whatever proportion of flours you wish – all white, half white/half wheat, some spelt – whatever. Just make it 3 cups flour. Baking isn’t known for it’s flexibility; quite the opposite in fact. I like the freedom to try my own thing.
I vacillate between a strict 50/50 white-whole wheat ratio and one where I use 1.75 cups of whole wheat (King Arthur Flour’s whole wheat, which is on the fine side of wheat flours). Today’s bread is the latter.
Don’t have time to make bread in the morning? Dainty Dot does it this way:
- Mix flour(s), yeast, salt in bowl of Kitchen-Aid mixer. Attach a paddle (oiled with Pam or something like that) and secure bowl to mixer.

My must-have tools for bread baking
- While mixer is on low, add about a cup of warm water. When dough becomes shaggy (less than a minute), stop mixer, take off paddle (clean off dough that sticks and put back in bowl) and attach oiled (with Pam etc) dough hook.

Less than a minute after adding warm water to the dry ingredients, the mixture becomes a shaggy mass.
- Why I oil paddle/hook: Makes it easier to clean dough off paddle, and helps prevent dough from creeping up to top of hook. Alton Brown’s suggestion, not my own genius, unfortunately.
- With hook now on, turn mixer of medium low. Let the hook and dough do their thing. IF the dough is looking a tad dry – if it looks like that dryness would hurt if you were a lump of developing dough – I add squigges of warm water ’til it softens up a bit.
- If dough does creep up the hook, stop the mixer and adjust dough downward.
- After about 5 minutes, the dough should look like it’s swollen just a tad and look a bit like a soft baby’s bum. At this point, take out the dough and put into an oiled (or Pammed) bowl. I like to put my in a large (2 quart-sized) plastic measurer with markings. That way you can tell how much the dough has risen. Next, cover the container with plastic wrap. Put in a warm draft-free space.

Dough ready to rise.
- Warm? In January? I’m a frugal gal myself. My house is nowhere above 68F at any time between August and June. How the heck do I find a warm space that’ll make my baby snuggly and happy? Here’s the trick: Boil a cup of water in the microwave. Put the dough bowl in the microwave with the just-boiled water. Close door. You’ll have a warmish space for the next hour or so as the water releases heat as it cools down.
- The original recipe says to let the dough rise an hour or so. I take mine a but further – up to two hours. The dough is likely to double in that time.

D'oh! It's doubled!
- Spill the somewhat-puffy dough onto a lightly floured surface. The light pull of your hands on the dough coaxing it out of the container is pretty much enough handling to count toward a light “punch down.” You don’t want to let too much of that air out – this is a one-rise dough, after all.
- Actually, you can even skip the “lightly floured surface.” Why? This is a dry dough – a quick dip of your fingertips in some flour is more than enough to prevent the dough from sticking to your fingers. And, in this next step you actually want the tackiness of your surface to work in your favor.
- Pull in all sides of the dough into the middle of a round ball. Try your best to pinch them all into one spot. Top should be a smooth rounded surface, and the bottom should look like puckered lips.

Pull in all the side of the mass of dough into the center and try to pinch together. I admit, I pinched one more time after this photo.
- Next, put the ball bottom side down. Put both hands on either side of the ball, cupping it from the top, and rotate the ball under your hands – kinda pushing up with your left while pulling down with your right. The tackiness of a flourless work surface pulls the dough taut. And, it helps in drawing in those “puckered lips” and sealing it closed as best as possible. Do the push-me, pull-you thing about 10-20 times. When the “skin” of the ball starts to pull very very tight, STOP!

Pushing/pulling the dough in a clockwise direction seals the dough together on its bottom. Pretty cool!
- Put the dough ball on a sheet pan lined with parchment paper that has been lightly sprinkled with corn meal. Cover with that plastic wrap you used previously (waste not, want not, right?). Let it sit while the oven warms up to about 420F (recipe says 425F but my oven runs a bit hot). In fact, I’ll let it sit for up to 1/2 hour.

The dough sits for up to a half hour before heading into the oven.
- Five minutes before you’re ready to put the dough into the oven, throw in some ice cubes. This creates steam, and a humid, steamy oven helps create a nice crunchy crust.
- Right before inserting the dough into the oven do these two things: 1) slash the top of the dough lightly with a quick movement. This slashing will help prevent the crust from breaking haphazardly elsewhere as the dough expands. The dough is gonna split regardless – pre-slashing is like a controlled split. 2) Spritz the loaf 4-5 times with a water spritzer-thingy. Again, this helps create a crunchy crust. But I don’t go crazy trying to control the crust, not like I would if I were making French bread or a sourdough. This is a quick-and-easy bread recipe – the crust is what it is. I’m good with that.

Slash!
- The recipe calls for the bread to bake about 40 minutes. Because my oven runs a bit hot, I take it to 35 minutes and then check its status. Check for doneness by thumping your thumb against the bottom of the loaf. If it sounds hollow, it’s time to set it free from the oven. What’s a hollow loaf of bread sound like? Good question. And I suggest you take a loaf out at 30 minutes, give it a good thump, and remember what that sounds like, and then keep comparing thumps every couple of minutes. Eventually the bread will be done and you’ll note the difference in sound. Well, that’s how I did it, anyway.
- Let it sit on a cooling rack for a while so it can finish cooking completely inside. If you can keep your hands off it, that is.
Using this recipe, I made a loaf of half-whole wheat bread 5.5 inches wide and weighing approximately 1 lb. 6.5 oz. in less than 4 hours. Fresh. Bread. Fast. Yum.

From flour to bread in under four hours - ya! And with minimal hands-on work, too.
