
A Healthy, Fruit-filled Cookie
June 11, 2013 § 1 Comment
Oh, and chocolate, too. There’s dark chocolate in these healthy cookies.
I was recently charged with finding a healthy cookie recipe for a gathering of friends. Healthy, but tasty. And a real cookie, not something that was just pretending to be a treat, something “cookie” in name only. And usually when I try to find a healthy alternative to a traditionally loaded-with-bad-stuff recipe, I turn to The Moosewood Cookbook. In this case, the Moosewood let me down.
But not Ellie Krieger. Ellie had (still has?) a Food Network show, Healthy Appetite, all about healthy cooking. When the Moosewood lets me down or becomes a little too earthy-crunchy-granola-ey, I turn to Ellie. And in this healthy cookie recipes, she totally did not disappoint.
First, I’m not a dietician. Is this recipe healthy? I’m taking Ellie’s word on it. But I can tell you it’s not loaded with a ton of butter, shortening, oil, cholesterol, and sugar. Some, but not a lot. There’s applesauce! There’s egg whites! Plus it has dried fruit – and I think we all agree fruit is a pretty good-for-you thing to eat. As for the dark chocolate, I think we’ve all heard reports about how it’s actually a good thing in small amounts.
Not only are they healthy, they are incredibly tasty. Incredibly. I’ve made four batches in the last week and there’s more on the way.
Healthy Cookies (aka Kitchen Sink Cookies) via Ellie Krieger’s Healthy Appetite
Note: The recipe says it makes 18-20 cookies. Don’t believe it.
Ingredients
2 tbs unsalted butter, softened
2 tbs canola oil
1/3 cup light brown sugar
1/4 cup applesauce
1 egg white
1 tsp vanilla
2/3 cup whole-wheat pastry flour
1/2 cup oatmeal
1/4 tsp salt
1/4 tsp ground cinnamon
1/2 cup chopped dried fruit (Ellie recommends cherries and apricots. I used a dried berry blend from Trader Joe’s)
1/4 cup lightly toasted walnuts
2 oz. dark chocolate, cut into chunks
1. Preheat oven to 375 F.
2. Combine butter, oil and brown sugar in the bowl of a mixer. Mix on high speed. Stop occasionally to scrape down bowl. Mix until mixture is light and fluffy, about 2 minutes. Add applesauce, egg white and vanilla, mix to combine. Add flour, oatmeal, salt and cinnamon and mix just until just combined. Add dried fruit, walnuts and chocolate and mix to combine.
3. Prepare a baking sheet by spraying with a light cooking spray OR use sheets of parchment. Scoop out 1 tbs of cookie dough at a time and roll into balls. (I used a small-sized ice cream scoop that’s a tad bit bigger than 1 tbs). Place 2-inches apart on the baking sheet. Press cookies down with the palm of your hand to flatten slightly (less butter = less spread). I advise you flour your palm a bit because the dough will stick.
4. Bake for 12 to 14 minutes, or until lightly browned but still soft. Remove and cool on racks.
You’ll find that 1 tbs doesn’t make a big enough cookie. You’ll want HUGE cookies because they are incredibly good. But then, the larger the healthy cookie the less healthy it is, right? Let’s just disregard that logic for now.
Homemade Pita Bread
April 25, 2013 § Leave a comment
I had a horrible experience, an embarrassing experience, a humility-inducing experience with homemade bread about 20 years ago. It was a “loaf” of rye bread that more accurately could be called an anvil. It defied some law of physics in how something so small could become so dense.
I swore off baking yeast breads for … oh, I’d say 15 years. And then, I let the embarrassment go. I’m a different person, I said. I can make different bread. I can make bread and be successful at it.
I’ve made a bunch of different bread overs the last five years or so. Various takes on wheat, white, whole grain, pizza, focaccia, sourdough—made with my very own sourdough starter! And it’s all turned out pretty tasty, too. I admit I need to work on my loaf shaping, but that will come with practice.
There’s one recipe for which I don’t need to shape up my boule-making skills, and that’s for pita bread. It’s flat and round, slightly puffy in the middle. I thought I could handle that pretty well. And it turns out it’s as easy as it seems. Why everyone everywhere isn’t making pita bread everyday, I have no idea. Get after it, people.
Pita Bread, adapted from The Moosewood Cookbook
1 cup wrist-temp water (about 95-100F)
1.5 tsp. active dry yeast
1 tbs. sugar or honey (I used raw sugar)
1 tsp. salt
3 to 3.5 cups flour (1 cup can be whole wheat)
a bit of oil
extra flour
1. Combine yeast and water in the bowl of a stand mixer and let it get foamy over the next 5 minutes.
2. Add sugar/honey and salt and stir until dissolved.
3. Put bowl onto mixer with a dough hook attachment, add one cup of flour and start to combine on low speed. Slowly add in two more cups of flour and continue to let the dough need in the bowl over the next 3-5 minutes. If it seems wettish, add in a sprinkling of flour as it mixes. You’re looking for a smooth dough.
4. Put dough in an oiled bowl and roll it around in there until the dough surface is oiled, too. Cover with a clean tea towel or plastic wrap, set in a warmish place (75F is good) for about an hour or until the dough has doubled in bulk. It could take up to 1.5 hrs.
5. Punch down dough and set it onto a clean and floured surface. Kneed it by hand for 5 minutes. Cut the dough into equal-sized pieces, anywhere from 6 to 12 segments. I made 8 because it was simple, and the pitas turned out just the size I wanted. . Knead each little dough ball for a minute or so (I turned each 30 times and figured that was about right). With a rolling pin, roll out each dough piece into a VERY THIN circle (or near circle, it doesn’t matter exactly). You WILL need to throw down extra flour. DO make sure the dough is no more than 1/8 inch thick—otherwise you end up with a pizza crust, no kidding. Let the dough circles rest for 30 minutes. After I rolled out each circle I placed it on a half sheet-sized piece of parchment, four per sheet overlapping slightly. It’s ok, don’t worry.

NOTE: This circle-making process takes some time. By the time you are done rolling out the whole batch, the first circles have already been resting about 15 minutes. So at this point set the timer for 15 minutes, get your oven ready and start moving toward the next step.
6. Preheat oven to 500F. OR, if you have a silly oven like mine that will not go above 450F (Ggrrrrr…), set it to 450F and work with it. Place a sheet pan in the oven to warm up a bit then brush it with oil or cornmeal to prevent the dough from sticking. OR, place the dough circles on parchment and slide them onto the baking sheet, fitting as many dough circles in the oven as you can without them touching. Due to the craziness of my oven I am able to fit just two dough circles, which were placed on the parchment.
7. Let the circles bake for 6-8 minutes or until the circles puff up and are lightly browned and, more importantly, look like pita! At 450F, 8 minutes was the perfect amount of time. As soon as one batch is done, remove from the oven and wrap the pitas in a clean but damp tea towel and place them in a brown paper bag. Close the bag for 15 minutes. This keeps them soft(ish) for a day or so. After a day I would transfer them to a plastic bag.

As an experiment, roll out one dough circle a little thicker than 1/8 inch and bake. Whereas the thinner circles puff up like you’ve filled them with helium, you’ll notice the thicker circle doesn’t puff up much at all—if at all. It’s ends up more like a pizza crust. Which tells me why not have this same recipe handy for when you want to make pizza?

Give pita a try and let me know what you think!
Homemade Fig Newtons
April 2, 2013 § 2 Comments
My mother is a sucker for cookies of any kind. And I, being her offspring, somehow inherited that trait. She would bake cookies, yes. But wasn’t it more exciting to experiment with the cookie treasures found on store shelves? Oh, what those Keebler Evles did to us. Chocolate-covered anything went directly into our shopping cart. Those chocolate-covered marshmallow puffs on a graham cracker-like cookie were Mom’s favorite. I also had a soft spot for those styrofoam-like wafer cookies with “vanilla creme” sandwiched inside.
But what I really, really liked were fig newtons.
I contend that I never ate that many fig newtons. Not really. Just one box on average a year. Thing is, I would eat an entire sleeve of them at each sitting. Why else would they put them in a sleeve? Ah, logic of childhood. And to have that metabolism again…
A few years ago when I saw that Joanne Chang’s Flour cookbook had a recipe for fig newtons, I was surprisingly conflicted. I love fig newtons—so wouldn’t gourmet fig newtons be the bomb? But … do I want the ability to create something so cravingly delicious? I mean, I’m not a calorie counter but these could be dangerous.
It took me three years to work up the nerve, but I finally made Flour’s fig newtons this weekend. Homemade fig jam in a shortbread cookie. Yes, they are cravingly delicious. Yes, it requires self control to not eat the entire batch. They’re also nothing like the original fig newton. It’s more of a pastry, really…like a slice of fig pie with a shortbread crust. This is dessert worthy of far more than a sleeve. This is a dessert of adult sophistication.
Homemade Fig Newtons (from Joanne Chang’s Flour Cookbook) 
Fig Jam Filling
2+ pints ripe black mission figs, stems removed and figs quartered (2 is too little, 3 makes slightly too much)
1 orange, peeled, seeded and finely chopped (try to remove the white pith and membrane, too)
110 grams light brown sugar
1 tbs finely grated lemon zest (about 1 lemon)
1 tsp vanilla extract
Shortbread Dough
1 cup (2 sticks/228 grams) unsalted butter at room temp
75 grams granulated sugar
2 tbs confectioners’ sugar
1 egg yolk
1 tsp vanilla extract
140 grams all-purpose flour
120 grams cake flour
1/2 tsp baking powder
1/4 tsp kosher salt
1. Make the filling: Place quartered figs into a medium-sized, non-reactive saucepan. Add orange, brown sugar, lemon zest and salt. Heat on medium to simmer. Reduce to medium-low and simmer, uncovered for 40 minutes. Stir occasionally to prevent sticking. The mixture will turn into something reminiscent of jam. Remove from heat and add the vanilla. Let cool completely and set aside for 2 hours. (You can also refrigerate for up to three days in an airtight container.)
2. Start to make the dough: Using a KitchenAid mixer with a paddle attachment, cream together the butter and both sugars on medium speed until mixture is fluffy. This takes about 5 minutes with stoppages now and then to scrape sides of bowls and the paddle. Once that is fluffy, add in egg yolk and vanilla on medium (stopping and scraping) for another 2 or 3 minutes.
3. Separately combine the two flours, baking powder and salt in a small bowl and sift or mix it together well (I added all into a sieve to sift). Add these dry ingredients into the wet ingredients with the mixer on low, and let it combine for another 15 seconds or so. Do the stop-and-scrape thing again.
4. Cut a large piece of plastic wrap and scoop out the dough onto it. Wrap it up well and press the dough into a 6-in. disk about an inch thick. Pop it in the fridge for at least 30 minutes. At this point you can store it for up to 5 days or freeze it. If in the fridge for a long while, let it come to room temp for about 30 minutes before working it. If in the freezer, let it thaw out in fridge overnight.
5. Heat oven to 350F. While that is heating up, upwrap the dough disk and place onto a large piece of parchment paper. Add a bunch of flour to the parchment and onto a rolling pin, then gently roll the dough into a rectangle about 9 in. by 16 in. and about a 1/4-in. thick. Be careful not to pull or push the dough as this dough tears easily. Fix any tears by pressing together with your fingertips. I found it useful to trim the edges straight (saving the extra dough for treats later!).
6. With the long edge of the dough facing you, spoon the jam lengthwise across the center of the dough, left to right. The width of this jam “river” should be about 2.5 inches. You might not be able to fit all of the jam onto the dough. That’s okay—it’s tasty on toast. Once the jam river is down, you’ll grab the left and right edges of the parchment above the jam river and fold it down overtop of the jam. The dough should fold halfway down over the jam. Do the same with the bottom half of the dough, folding it up. Take pains to make sure these two dough halves meet in the middle, not overlapping and not having a gap. Side by side is what you are looking for. Once that happens, pinch those two dough halves together to seal, as well as the ends. Now, flip the jam-filled dough log over so the seam is on the bottom. Be careful! You may need to finagle it with adding another piece of parchment and rolling it over. Use your brain to figure it out.


Use your brain to figure out how to turn this jam-filled log seam-side down without damaging it.
6 optional. At this point you can wrap it up and refrigerate or place in the freezer.
7. Pop it in the oven for 60 minutes or until golden brown all over. The recipe says 65-70 minutes, but it really depends on your oven. My edges were getting awfully dark, so I opted to take it out 5 minutes early. Let it cool on a wire rack for at least 2 hours—I know, it’s a crazy long time but you want the jam to firm up a bit. Once cool, cut into 1-in. pieces crosswise. Enjoy with hot tea or coffee. And realize things are so much better than when you were a kid.
Apple Hand Pies
March 15, 2013 § 3 Comments
March 14. Or, 3.14. Known throughout the world as Pi Day in honor of that irrational number beginning with 3.14. But wait – wouldn’t they write it 14.3 in Europe?
I would rather consider it Pie Day. It’s the middle of March—we need a good pie this time of year. I’m all for it, quite honestly. Think about it—have you eaten pie since Thanksgiving? I didn’t think so.
I decided to make pie yesterday for Pie Day. But what kind? My go-to pies are those traditional fruity treats—peach, rhubarb, peach rhubarb (see a theme here?), apple, pumpkin. Nah. What about a cream pie? They get runny after a few days. The problem with any of these pies (if there can be a problem with pie) is that they are so darn big for two people (I know, I could invite you over but…). And as much as I’d like to eat an entire pie, I just can’t do it. At the last piece, all old and soggy, I begin to detest it. We must not go there. Can’t ruin pie like that.
So I decided on hand pies: Pies that fit into your hand. Individual servings of pie, all wrapped up in their individual casings. Perfect! Thing is, I’d never made hand pies before. What to do? What to make?
A little Googling got me to the Smitten Kitchen blog and her recipe for Bourbon Peach Hand Pies. Hmmm…peaches. Peaches and bourbon. And, according to the recipe, this dough holds up to the inevitable leaks that result in boiling hot fruit juicy spilling away, while also being light and flaky. Print it up—I’m in.
Alas, Trader Joe had other dessert intentions for me. Not a fresh peach to be found. So apples it was.
Before I get to the recipe, a few notes about it and the resulting pies:
- I used a food processor. When you have one, use it.
- The dough did exactly what she said it would—it held up well, didn’t leak (much) and is tasty and flaky. I’m definitely keeping it in my repertoire. BUT—it’s not really a pie dough. It’s more of a flaky morning pastry. Which is fine, just not very pie-ey.
- I used the same amount of apples as peaches the recipe called for. WAY TOO MUCH. Below is my estimation of half the recipe.
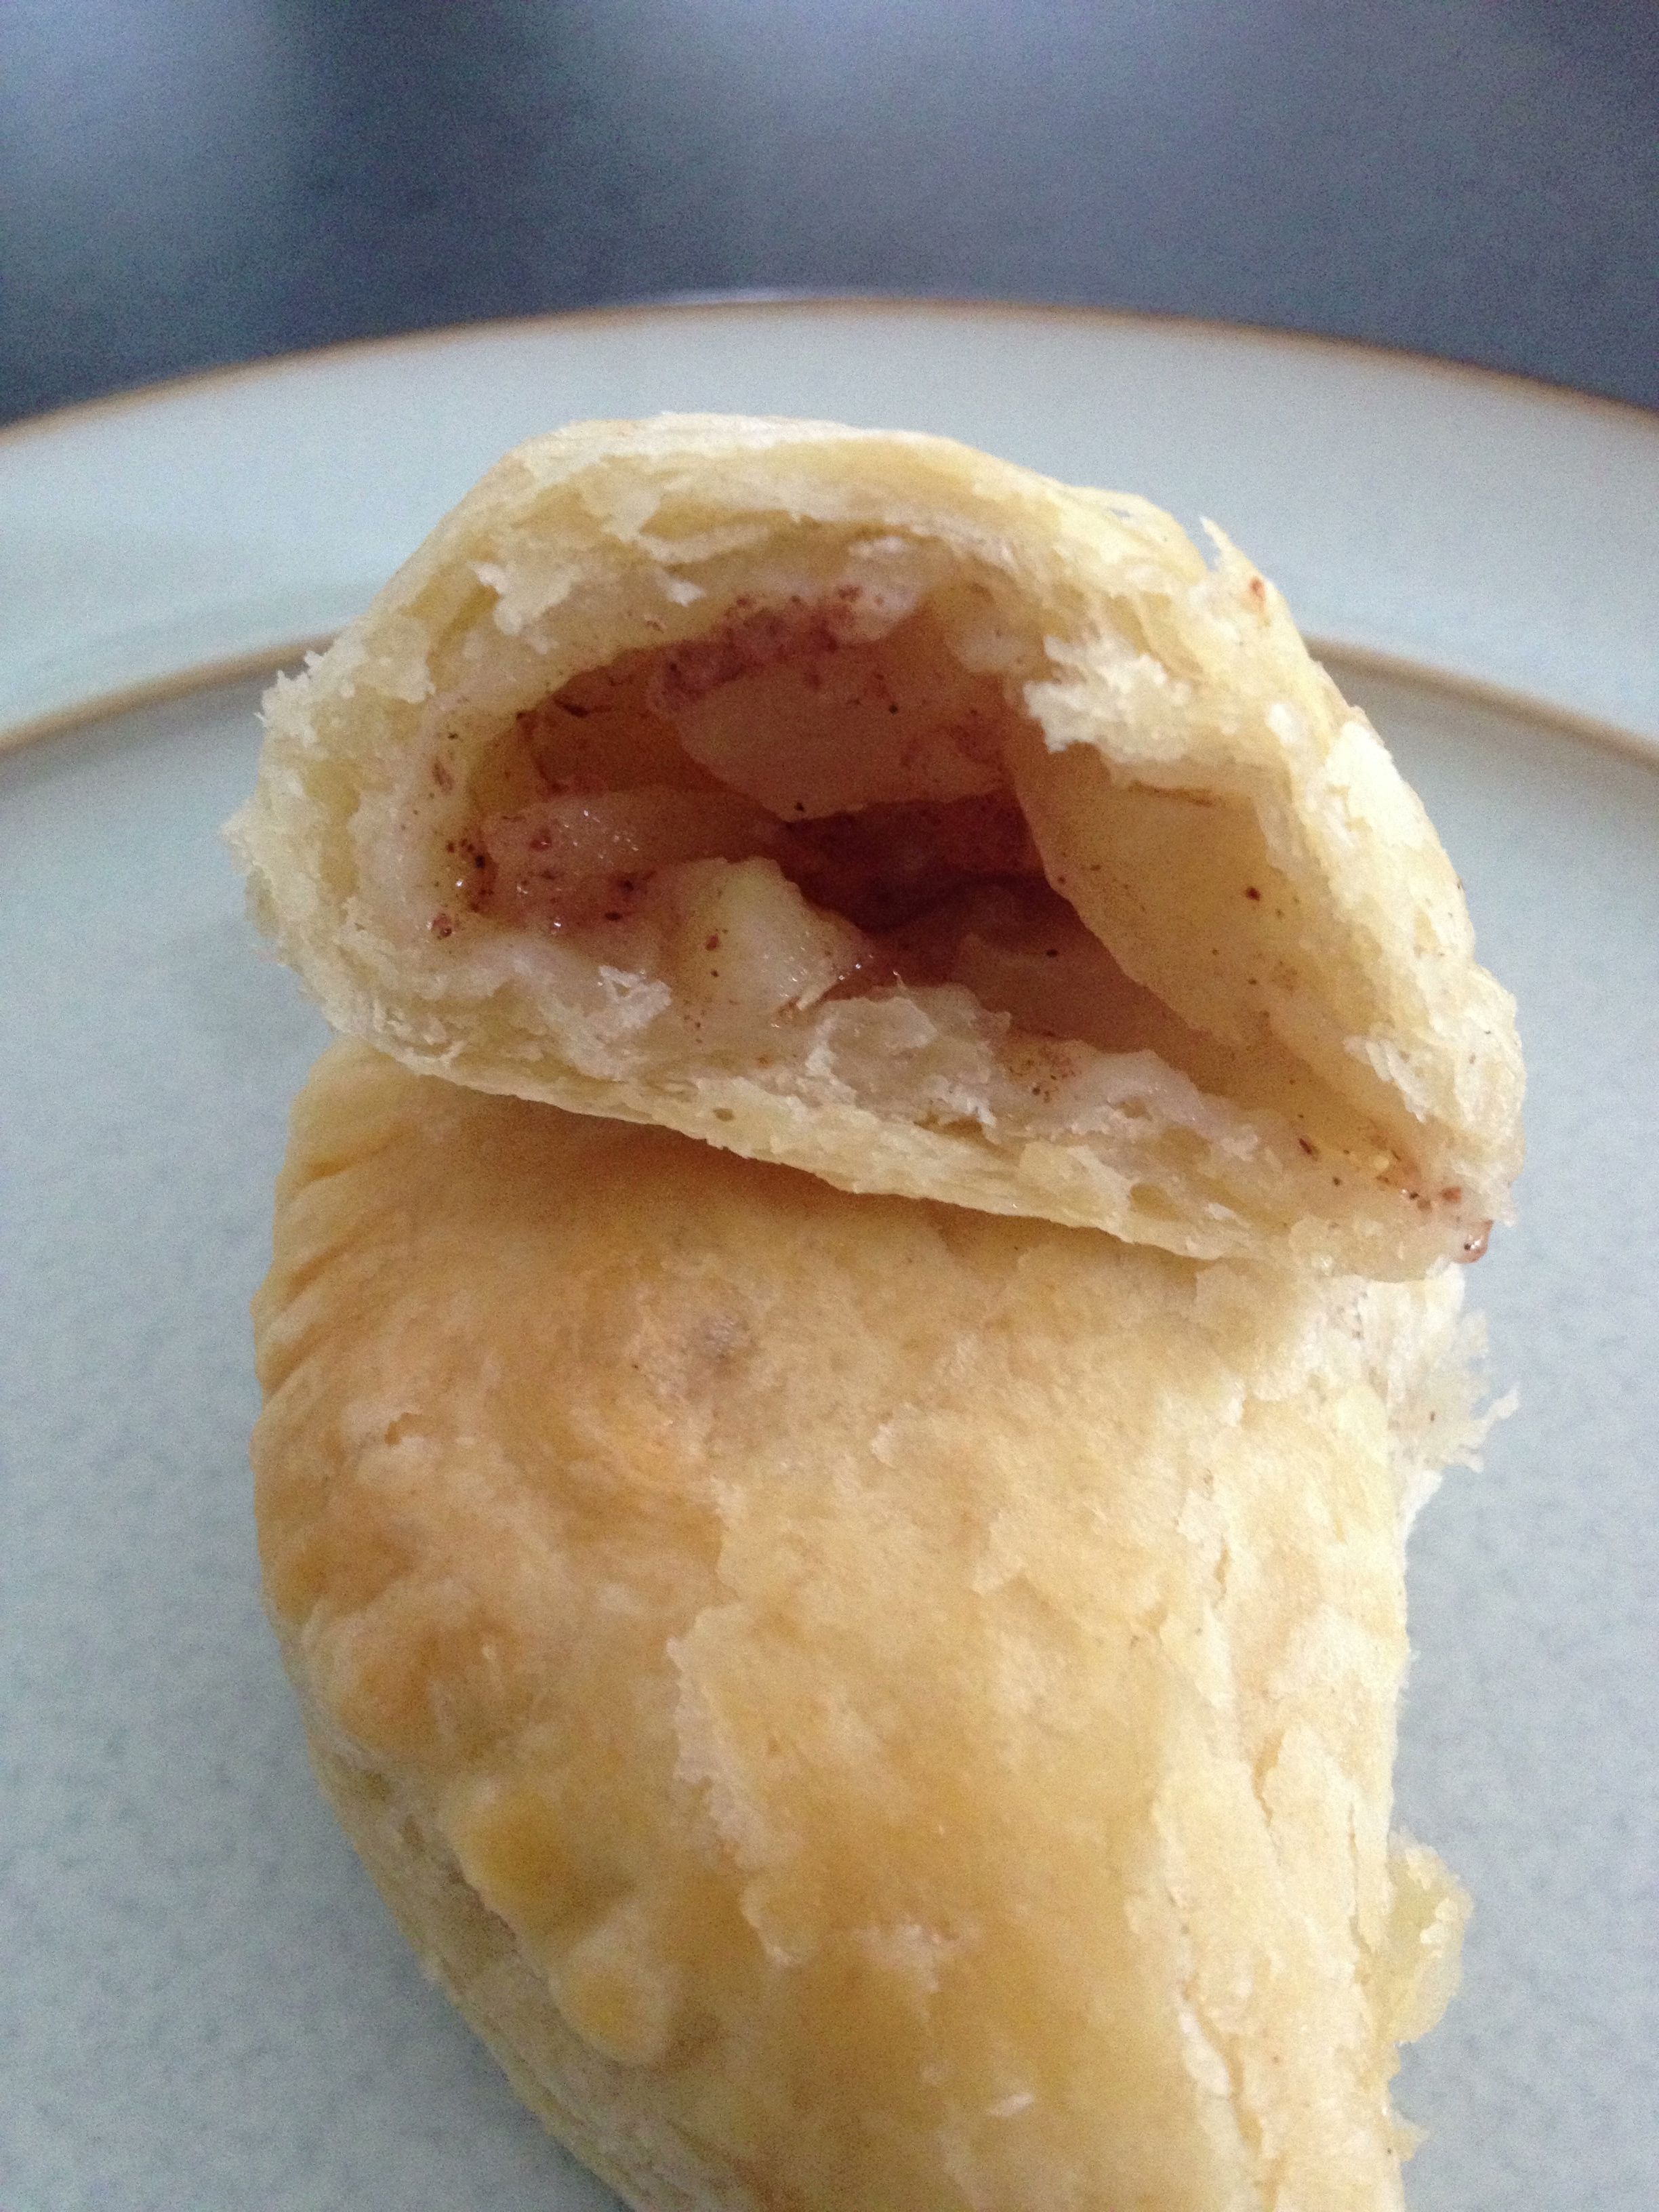
- The filling I made was tasty but 1) wasn’t juicy enough – maybe more sugar or let it sit longer? and 2) not enough of it in the pie. But that’s all I could fit in the dough rounds while still being able to close them securely. I’ll just need to experiment more, won’t I? One thought is to slice the apples (or peaches) lengthwise and layer the slices in the center of the dough rounds.
Apple Hand Pies (adapted from Smitten Kitchen’s Bourbon-Peach Hand Pies)
For the pastry dough:
2 1/2 cups all-purpose flour placed in bowl of food processor and chilled one hour in freezer
1/2 tsp. salt
2 8 oz. sticks unsalted butter, cut into pieces, placed into small bowl and chilled for 1 hour in freezer
1/2 cup sour cream
4 tsp. fresh lemon juice
1/2 cups ice water
For the filling:1 lb. apples, peeled and finely chopped
2 tbs. flour
2-4 tbs. sugar (the more sugar, the juicier it should be if you let it sit awhile)
pinch of salt
1 tsp. lemon zest
To finish:
Egg wash (One egg yolk beaten with 2 tbs. water)
Sanding sugar
1. Remove bowls from freezer. Add salt to the flour and stir. Place flour bowl onto food processor and add in chilled butter. Using 2- to 3-second pulses, whir up the flour and butter until the mixture looks like course corn meal.
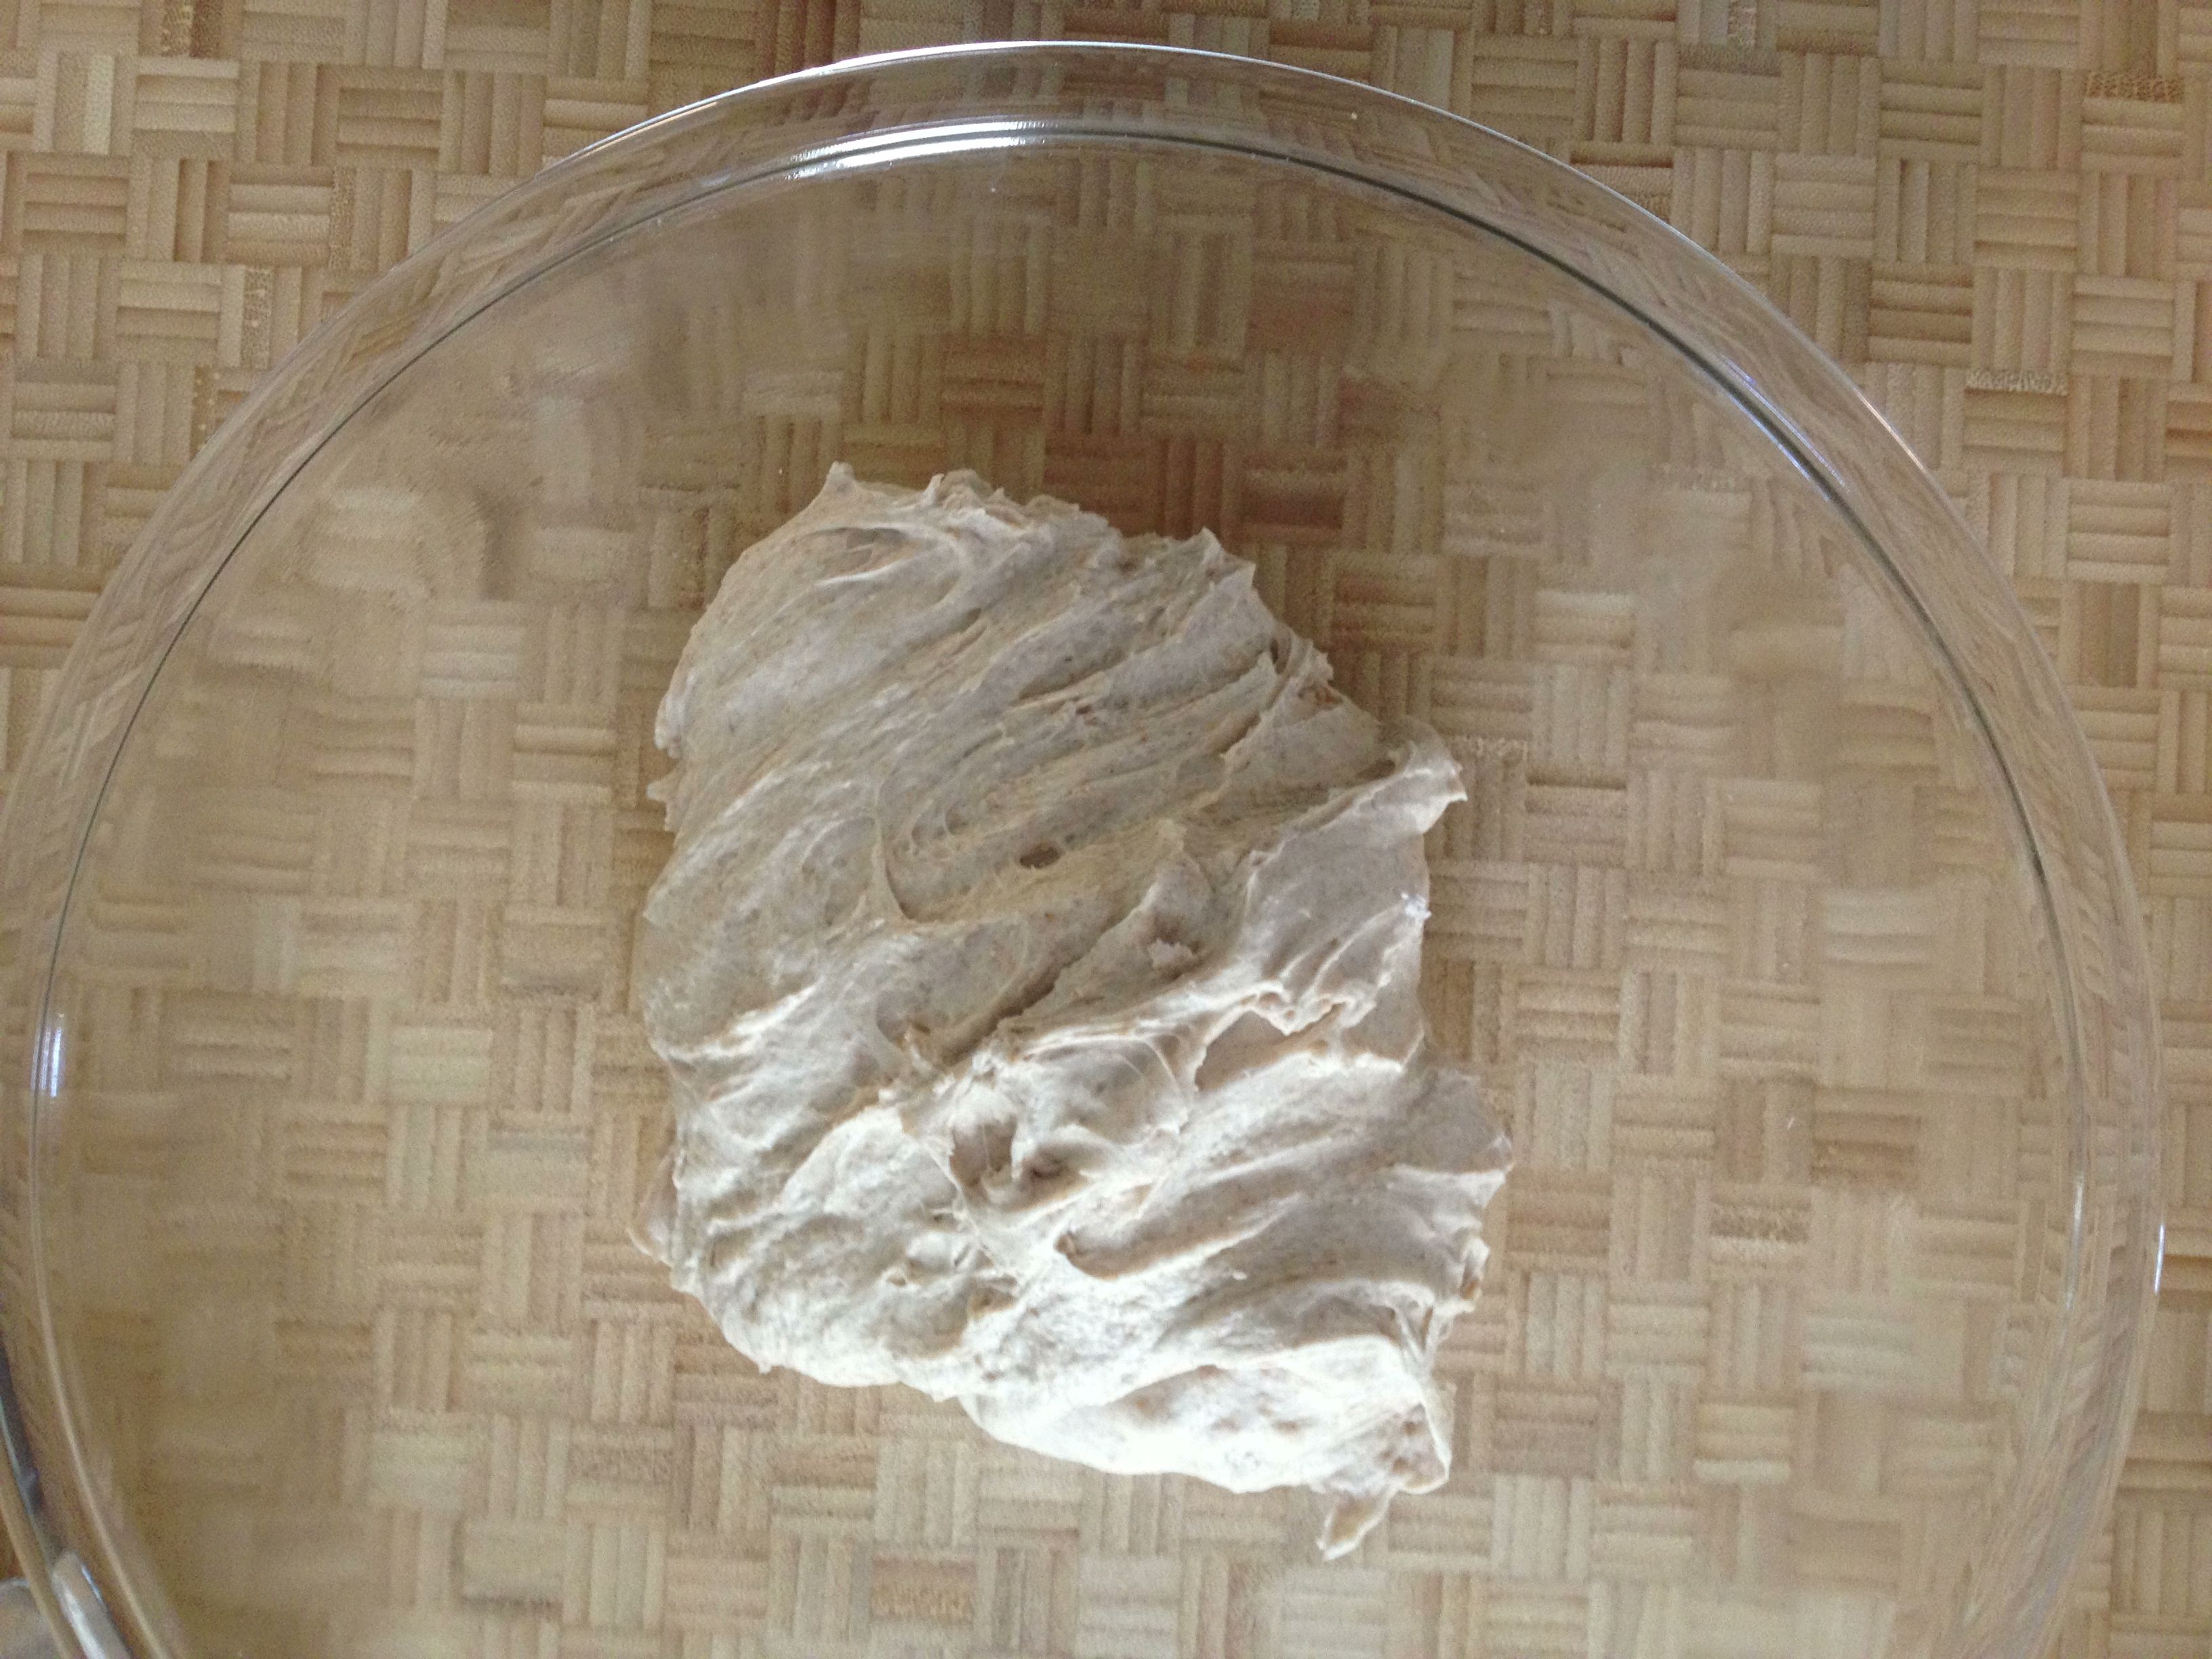
2. Combine sour cream, lemon juice and ice water to a small bowl and whisk until combined. Add to flour-butter mixture one half at a time, whirring in between. You’re looking for large clumps to form. Turn clumps out onto a work surface and bring mixture together with your hands to form a big ball. WARNING: Dough will be sticky. Lightly flour your hands before touching dough. Wrap dough ball in plastic wrap and refrigerate one hour. (At this point dough can be frozen up to one month. If doing so, wrap in something a bit more freezer proof.)
3. Divide dough ball into quarters. Work with one quarter at a time, leaving the others in the fridge while you work. Lightly flour the work surface (keep that flour handy). Roll the dough into a 1/8-in. thickness. Using something round with a 4.5-inch diameter, cut rounds out of the dough. NOTE: Only thing I had available was a 1-quart plastic container similar to the kind you’d get filled with potato salad at a deli. It’s about 4 inches, but it works. Use what you have on hand. Transfer these dough rounds onto a parchment paper-lined baking sheet and pop into the fridge. Repeat with other dough balls, filling up the parchment, and layering additional parchment on top of the previous. Keep these rounds chilled for 30 min. or more.

4. Filling: While the dough rounds chill, add the finely chopped apple to a large bowl. Add in the flour, sugar, pinch of salt and lemon zest. Let sit until the dough rounds are ready – this will let the sugars produce some juicy apple goodness—something I didn’t do this time around.
5. Assembly: Remove chilled dough from fridge and let them sit for 2-3 minutes to get a bit more workable. Spoon in about 1-2 tbs. of the apple mixture into the center of the round (more for larger circles, less for smaller). Brush the dough edges with water and fold one half over to meet the other to form a half circle. Seal it lightly with your thumb, then press closed with the back of a fork. Place each little pie back onto the parchment and return to the fridge for another 30 minutes.
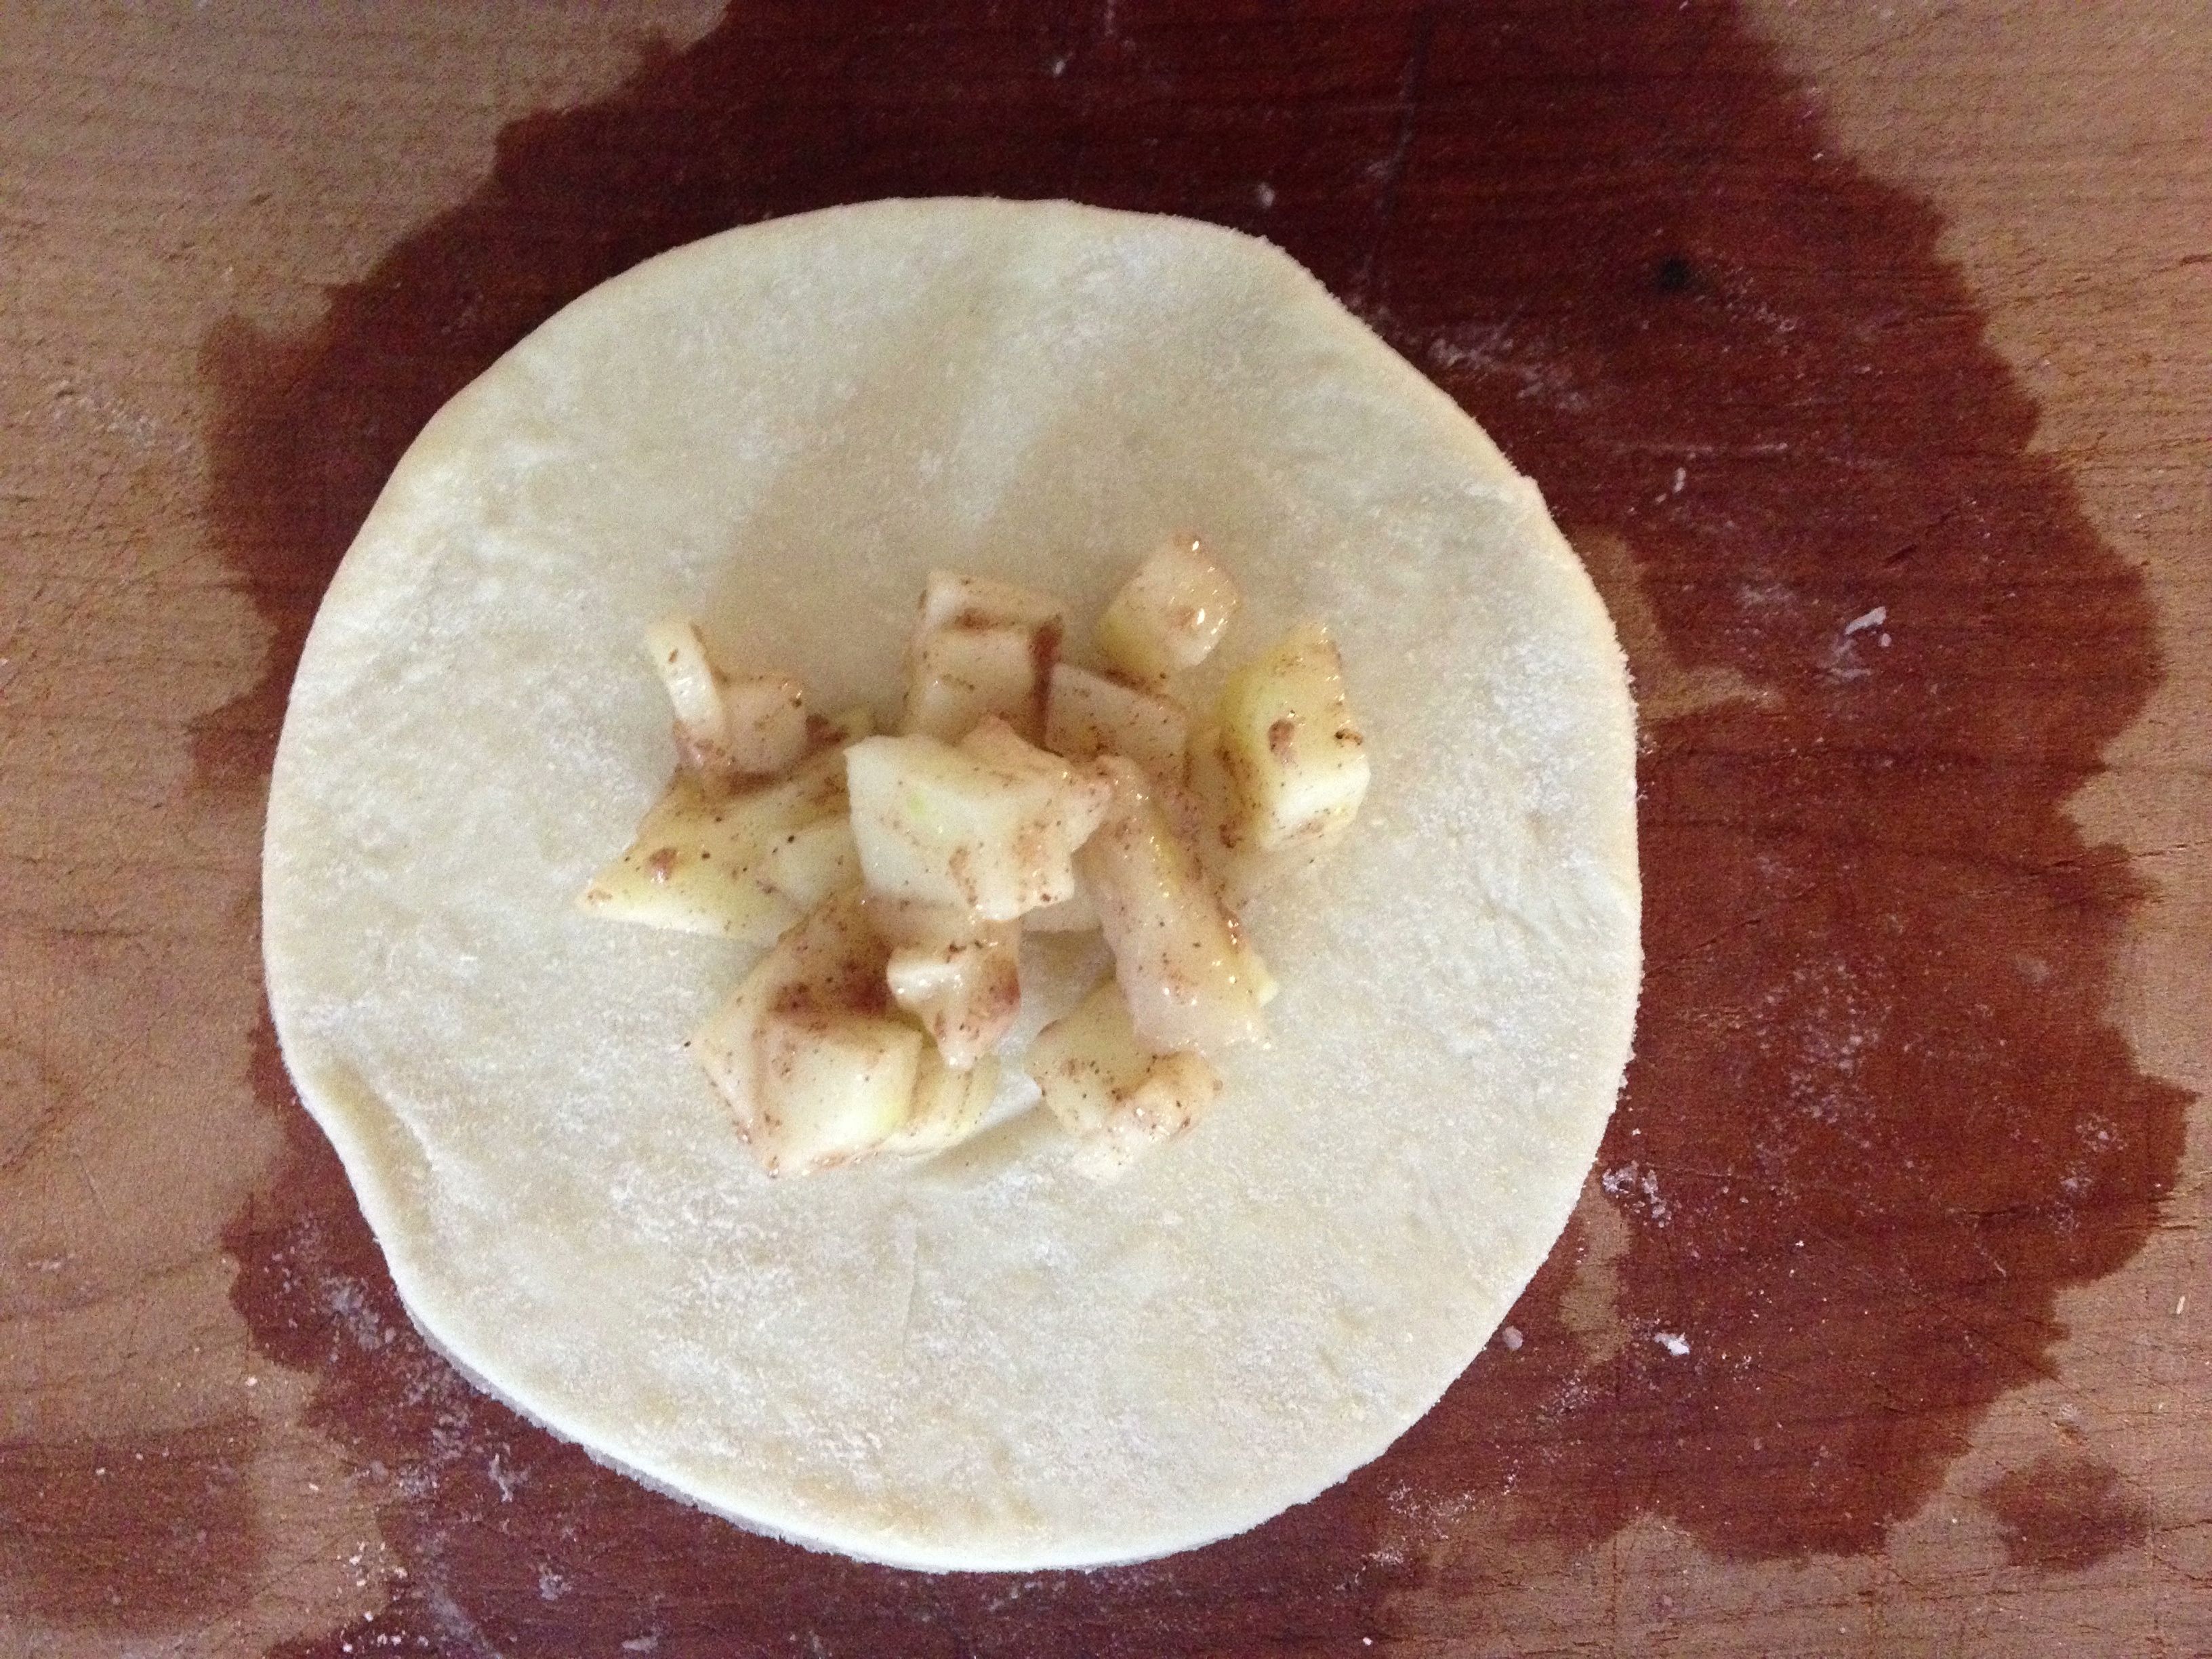

ANOTHER OPTION: Place a slightly larger amount of apple mixture onto the center of one round and place another round on top, stretching the top dough a bit so it meets the bottom’s edges. Seal as before. This makes a fun UFO-shaped pie.
6. Heat oven to 375. Removing the pies from the fridge, give each one a small slice of poke with a fork (to let steam out). Lightly brush each pie with the egg wash and sprinkle with sanding sugar (optional of course but yummy). Bake until the pies are golden brown – 20 to 23 minutes. Remove and let cool.

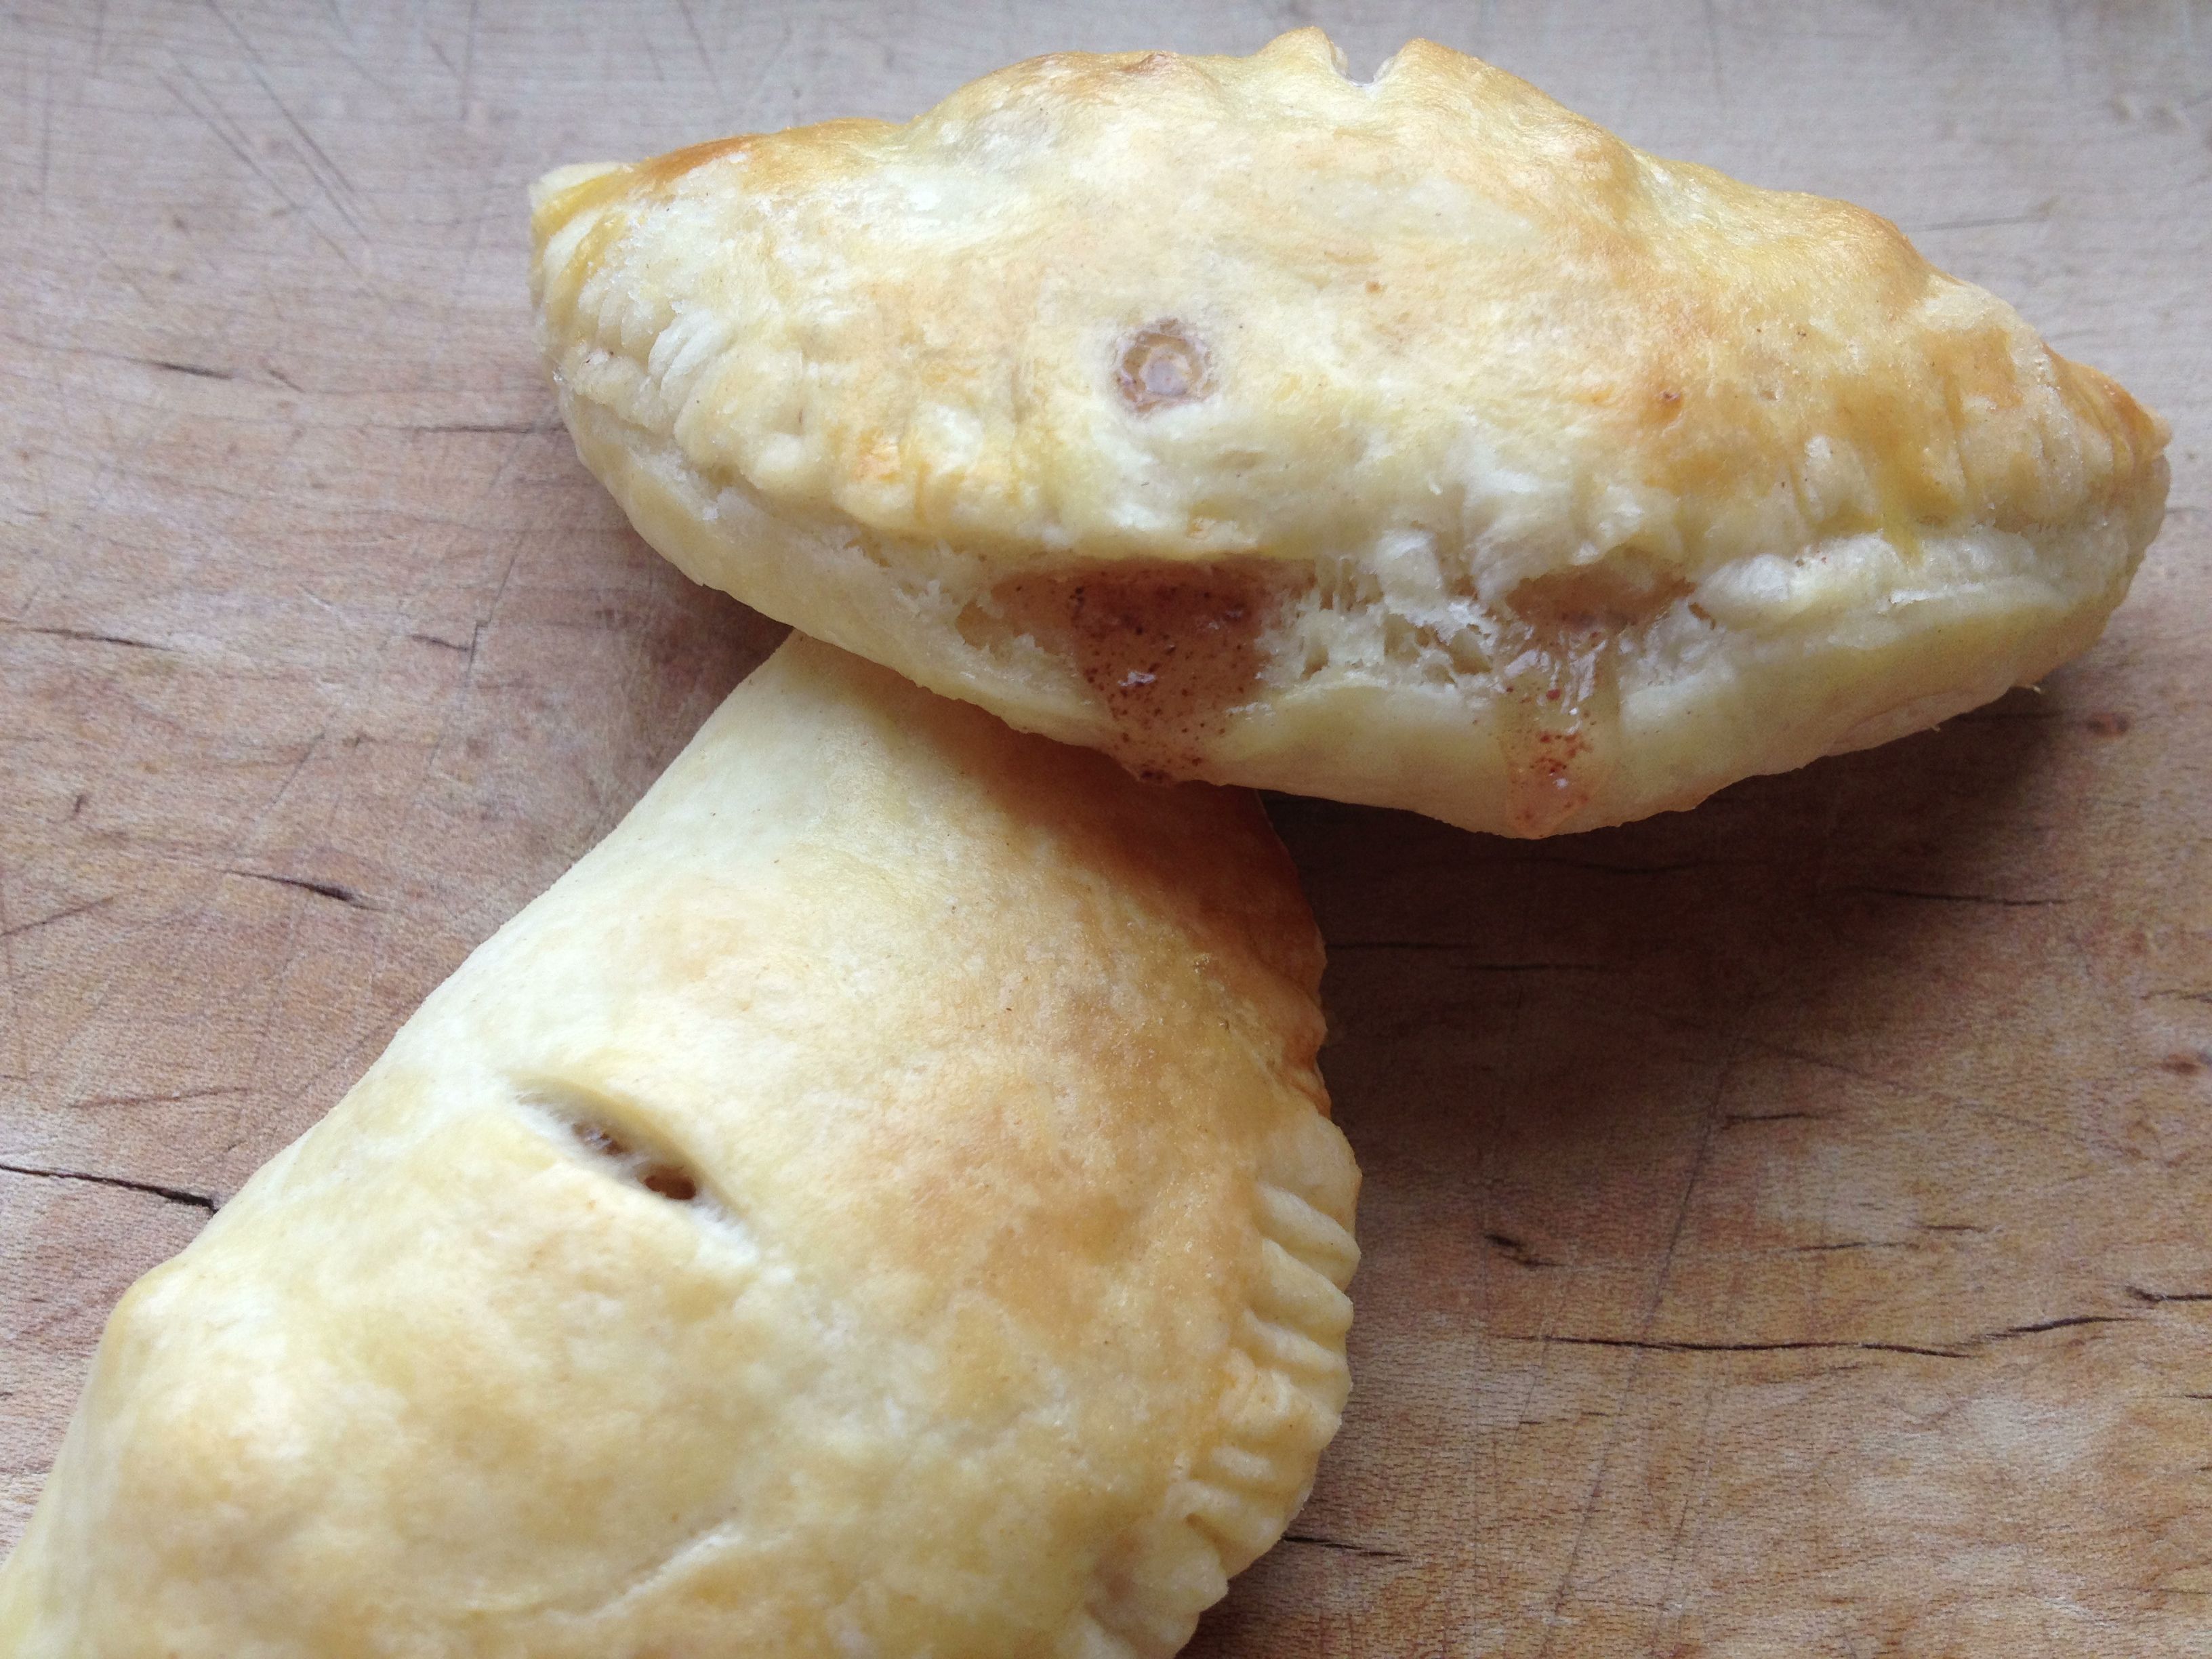
If you serve them still slightly warm, you’ll want to serve with vanilla ice cream. Otherwise, these are excellent pastries to have on hand for breakfast.
Seriously bummed that Trader Joe’s didn’t have peaches. What would you fill these with? Any suggestions for other dough that might be more like a traditional pie?
Whole Wheat Baguette
February 28, 2013 § 2 Comments
If we run out of crackers, I make Crackers. If we run out of hummus, I make Jennifer make Red Pepper Hummus. And if we run out of bread, I make bread. It’s just what we do. We make things. Bread included.
Bread is work. There’s the mixing and the kneading and the proofing and the punching and the second proofing and the loaf shaping. It’s up-to-your-elbows-in-dough kinda work—the type of work that gives you strong-as-oxen forearms.
Until a rather vigorous episode of dough kneading a few years ago set off some rather painful carpal tunnel symptoms, I kneaded all dough by hand. Then by necessity I had my Kitchen-Aid mixer and its dough attachment take over. And now, thanks to Mark Bittman, I’m letting the food processor do all that work.
It’s odd—almost sacrilegious—to think that a machine with a sharp spinning blade can make a soft and smooth clump of dough rather than a bowlful of shredded sticky flour. But it does. And while I was once skeptical and hesitant to come under the no-knead tent, I have entered, heard the word, and am now a food-pro convert. Halleluiah.
Mark Bittman, the New York Times‘ food guy, included the following recipe in the Feb. 3 NYT Sunday Magazine. It’s actually what he calls “not quite whole grain,” and I agree, but there is enough wheat flour in there to give it that nice flavor and chew. What I really like about this is the hands-off nature of the recipe. The first step takes no more than 3 minutes, then you’re free for the next 3 hours while the dough rises. The most work comes during the baguette shaping process. And quite honestly, if you want to learn how to shape a baguette, search for it on YouTube.
In all, you’ll have lovely baguettes in a little over 4 hours—and with very little effort. Throw some flour in your hair to make it look like hard work.

dry ingredients in bowl of food processor

dough comes together in food processor after about a minute
dough turned out into lightly oiled bowl, ready to rise

dough rises about this much after 3 hours
after turning the risen dough out onto a lightly floured surface, cut into three segments and roll into a tight ball
form the dough ball into the best rectangle you can get

fold the bottom side up toward the center

then fold the top down to create something that looks like an envelope

fold length of dough down about a third and press the seam to seal – and repeat.

set formed loaves into stiff canvas to help them keep their shape while they rise another 30 minutes.

fresh out of the oven! okay, so they are odd shaped. embrace the odd.
Whole Wheat Baguette (from Mark Bittman, New York Times Sunday Magazine, Feb. 10, ’13)
100 g. whole wheat flour
400 g. all-purpose flour + some
10 g. kosher salt
6 g. instant yeast
water
1. Combine dry ingredients in a food processor. Turn machine on and while it’s whirring, add about 1.5 cups of water slowly over a 30-sec. period. Keep machine running for another 45 sec. or so. Dough will be held together nicely and tacky, not wet. Turn dough into a large bowl (I lightly oil mine just in case), cover with plastic wrap, and let it rise. It should take 2-3 hours. I let it go for the whole 3 hours and it’s risen quite nicely.
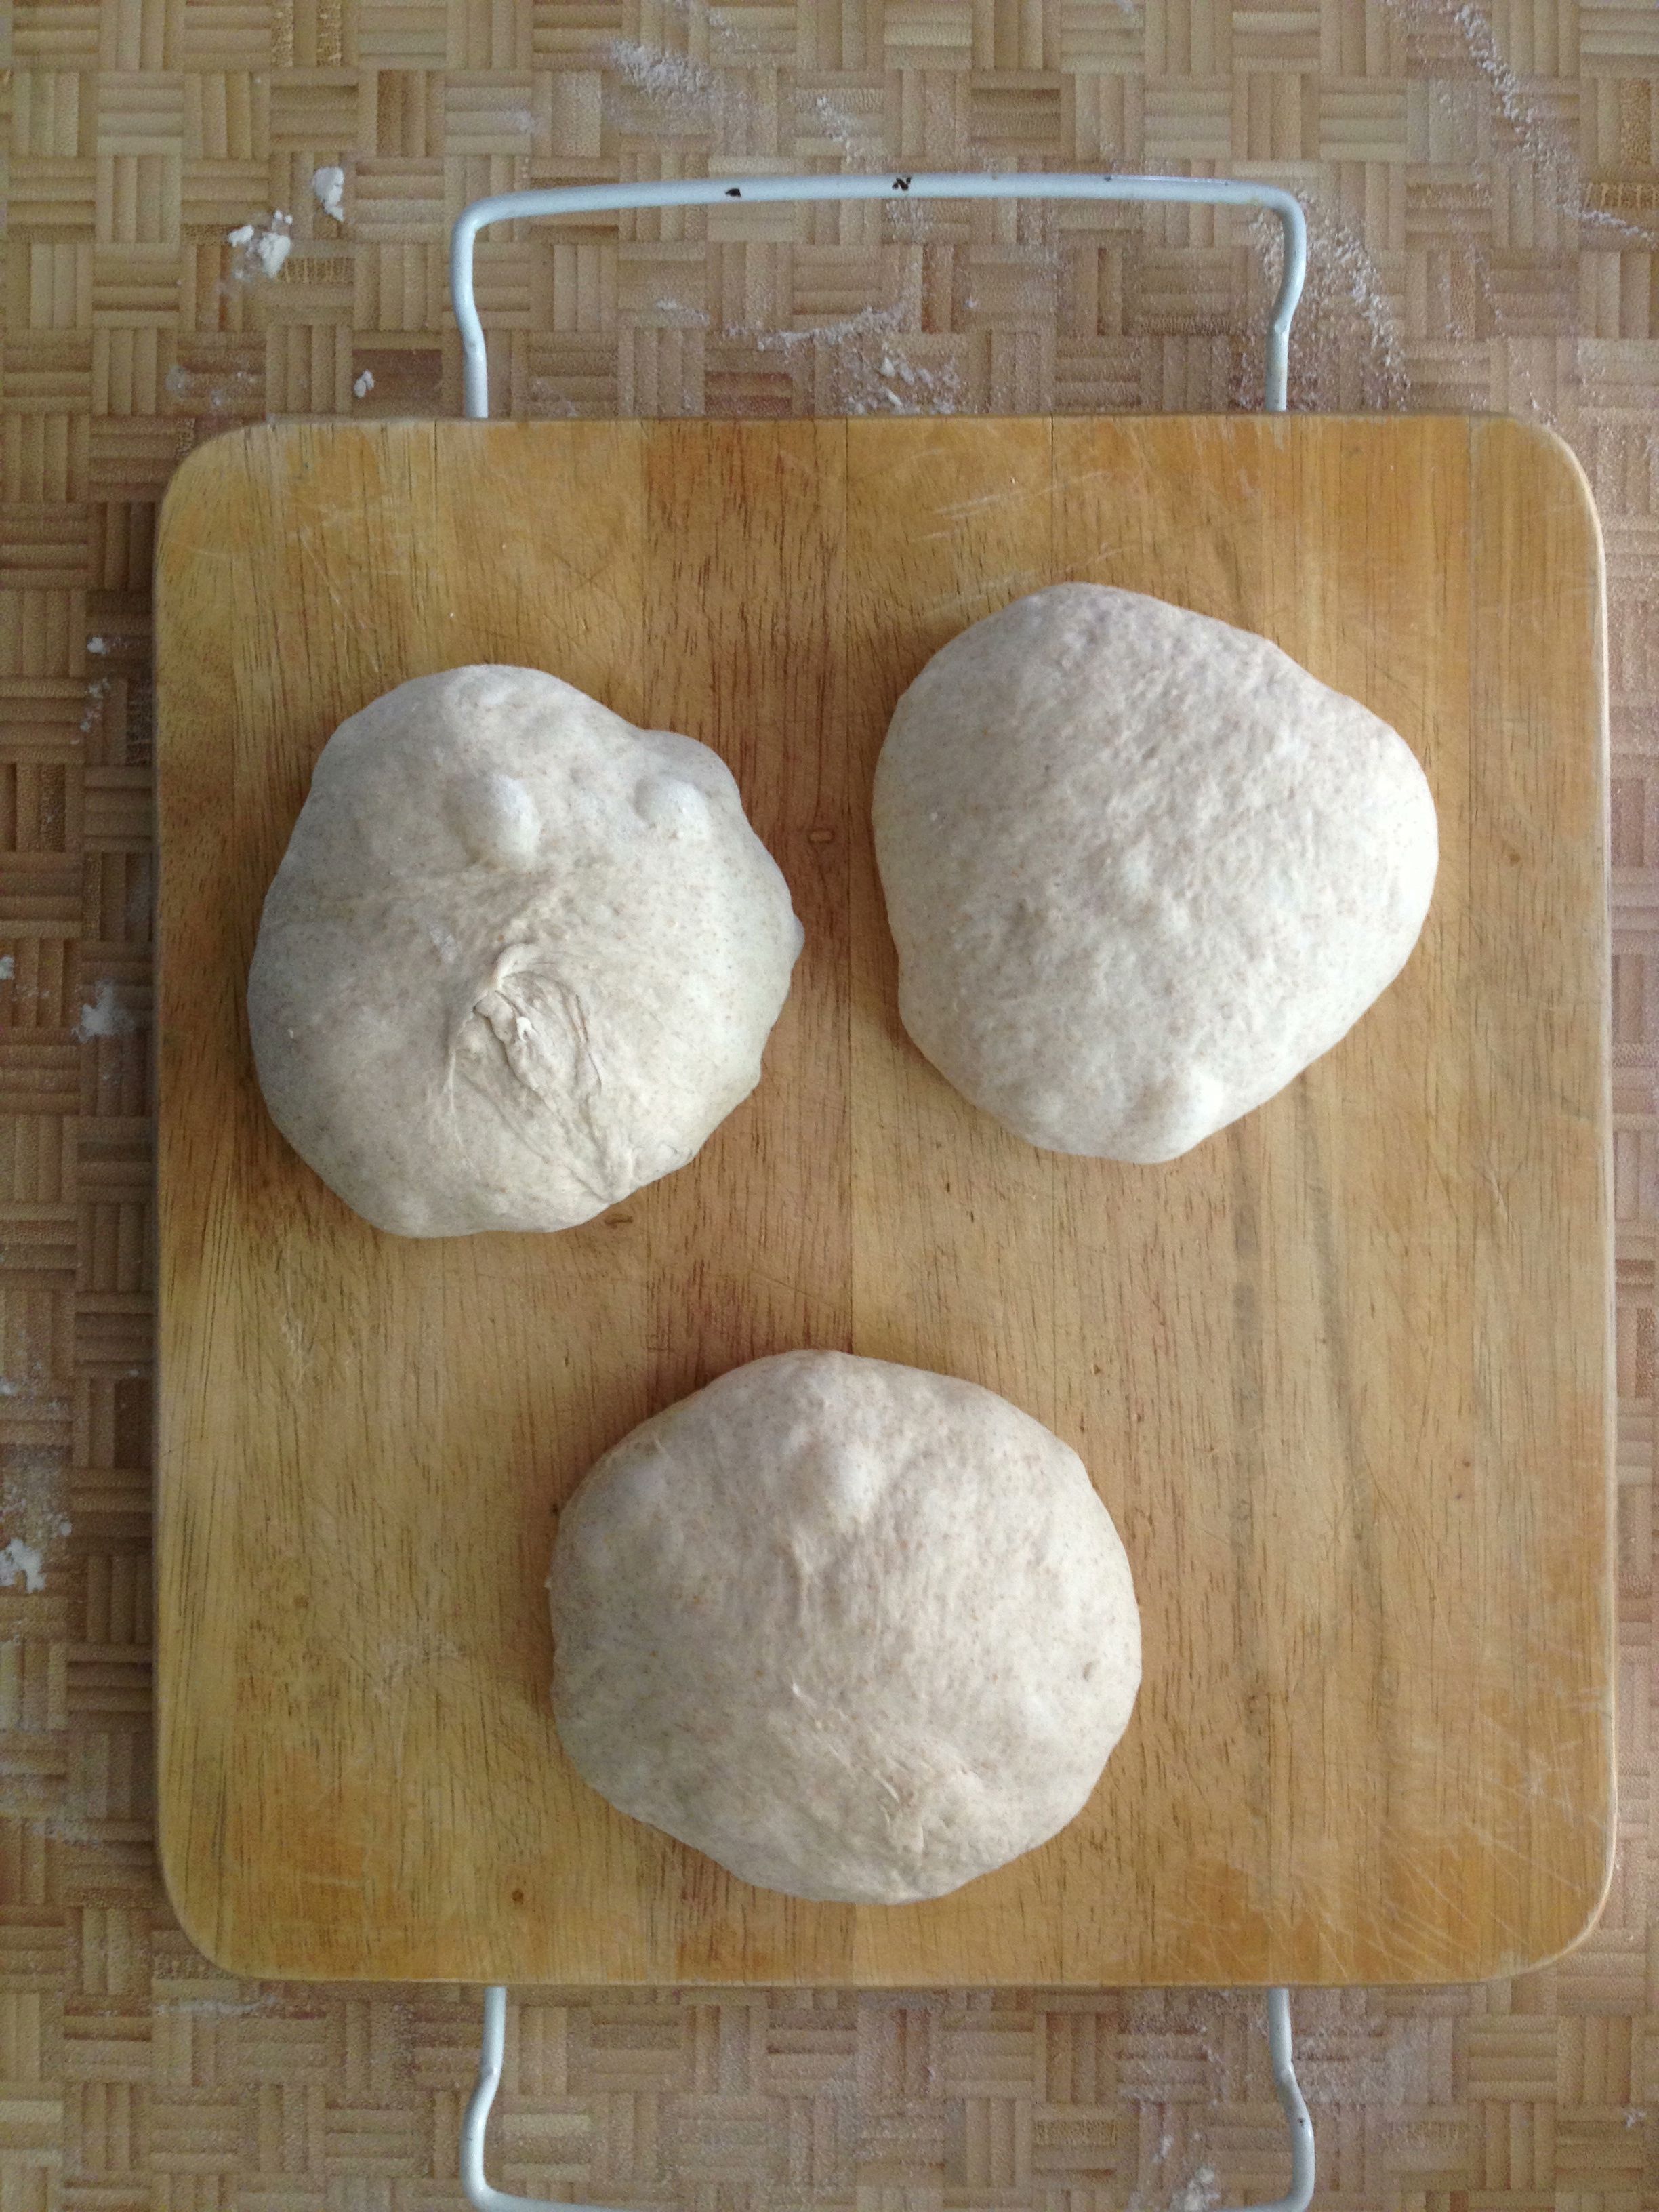
2. Turn the dough out onto a minimally floured surface, pat lightly, and cut into 3 equal pieces. Recipe says to form into a log, but I form into small round boules. Cover with a tea towel (or plastic wrap) and let it sit for 20 minutes.
3. Now shape each dough round into a baguette. I am SO not the expert at this but … This is how I do it:
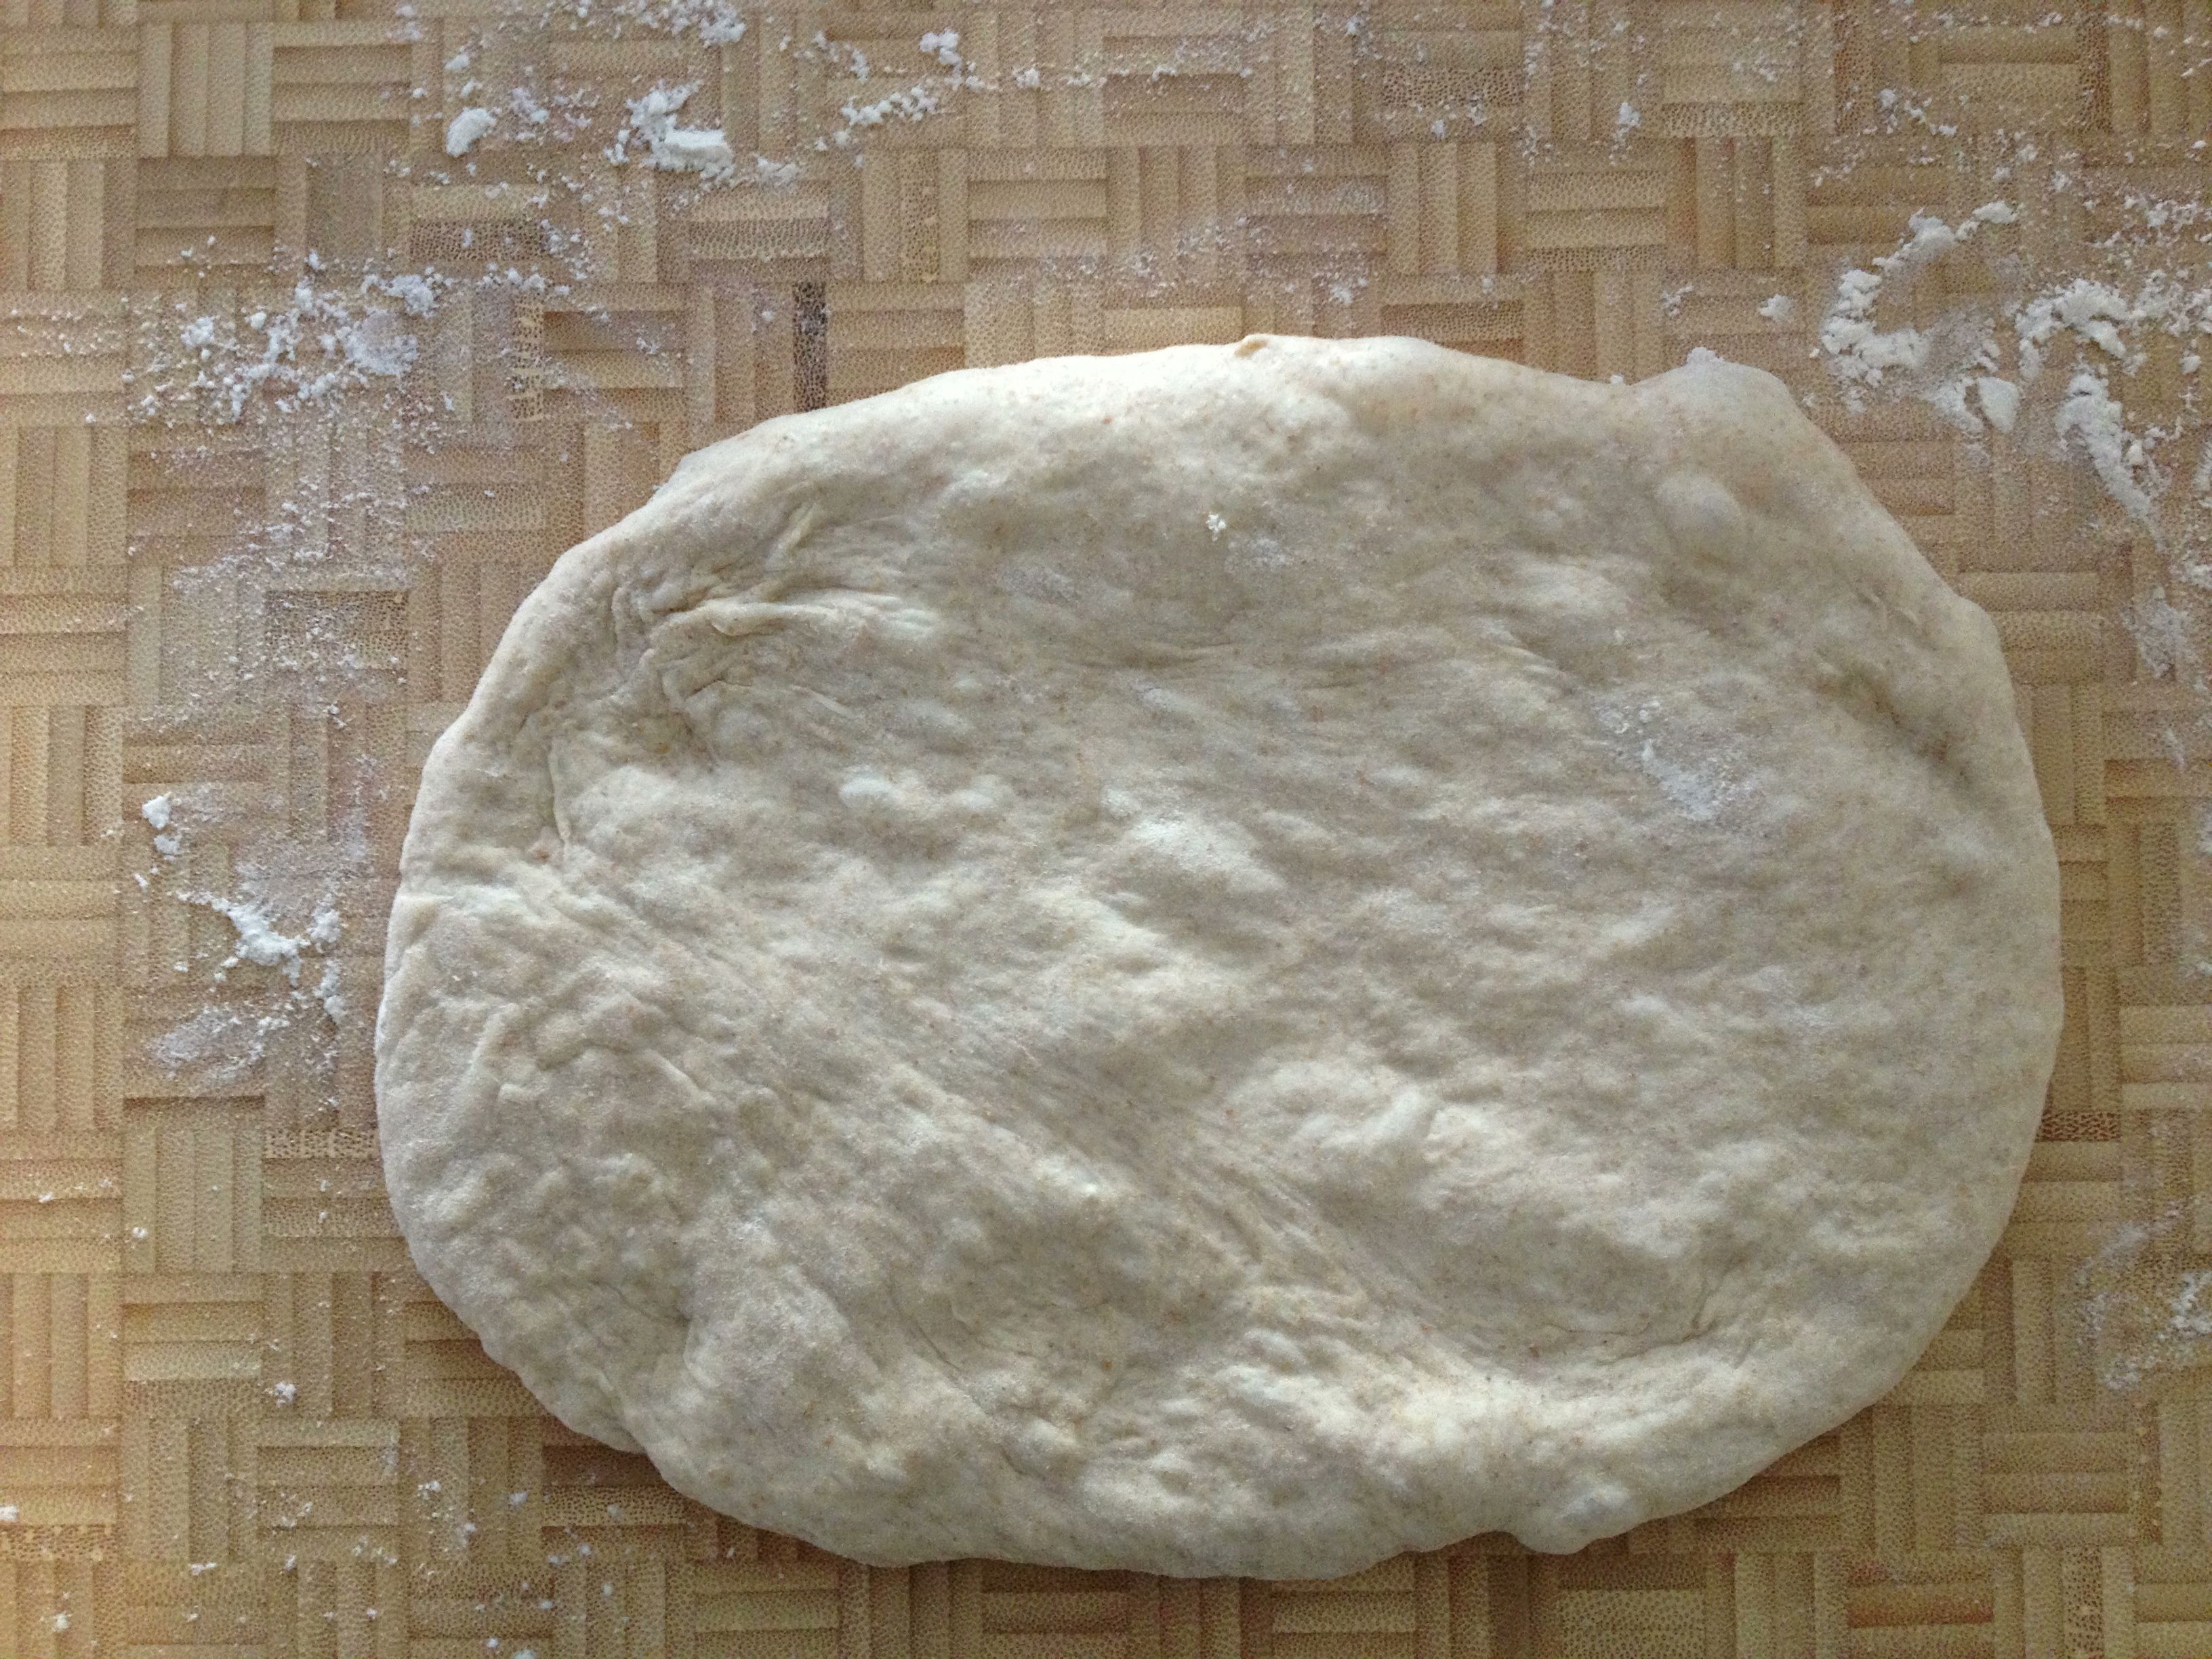
-pat dough into a rectangle, kinda the size of a small 8.5×5 notebook. The following will work best if the corners are as square as possible (yes, getting dough to be exactly square is impossible but give it your best try).
-Position the long side down. Fold the bottom end up about a 1/3 of the way, and then fold the top end down over it so it looks like an envelope. Take the heel of your hand or your thumb and press and seal that seam together. Lightly flatten the dough.
-Next, fold the top down about a 1/3 of the way and seal the seam again. Lightly flatten. Repeat this process another two to three times.
-Starting from the center of the dough, place your hands over the top of the dough and slowly and lightly roll the dough up and down, pressing outward to lengthen it. Don’t go all that far. The longer it is, the thinner it is. And … that’s it.
4. Once the baguette is formed, put the baguettes into something like a baguette pan. Or, use a lightly floured swatch of canvas (or a heavy tea towel) and shape the canvas around the long sides of each baguette. You want the canvas to cradle the dough and help keep the dough’s shape. Let the dough rise for about 30 minutes.
5. Meanwhile, get your oven heated to at least 450F (Bittman’s recipe says 465F, but my oven only goes to 450F). A few minutes before the dough is ready to go in the oven, open the oven door and spray some water around the side walls and close it back up. Just before putting the loaves in, put them on a piece of parchment on a sheet pan and slash the tops with quick movements of a very sharp knife. Slide it in the oven, give the loaves a quick squirt with was water and close the door. Repeat the squirting with water about a minute later. Keep them in the oven for about 25-30 minutes, or until the loaf sounds hollow when you thump the bottom of it with your thumb. Cool on a wire rack.
Now, why are we spraying with water? To create a bit of moisture in the oven and around the loaves. This moisture helps to create that light and crisp exterior on the loaf. It works, so give it a go.
You likely have your own favorite bread recipe. Let me know what it is in the comments below.
Quick Crackers
February 22, 2013 § 3 Comments
Sometimes after dinner you’re just hungry all over again. It happens. And it’s understandable if, say, you’ve been on a 12-consecutive-day yoga binge.
Open the cabinets. Raisins: Nope, not substantial enough. Almonds: It’s got the crunch but they aren’t gonna cut it. Not tonight. The bag of chips (healthy chips, of course) disappeared last night. There’s a nice hunk of Jarlsberg in the fridge…where’d the crackers go? Oh, they went away as a quick pre-yoga snack the other afternoon.
Bummer. I. Am. HONGRY. Hongry, by the way, is when you are very, very hungry.
But wait. I’m a baker. I’m not going to complain. I have the power to make my own crispy-crunchy goodness. And quickly, too.
I recalled I had found a super-good and super-quick herbed flatbread recipe on the Shutterbean blog not long ago. It was within my power to make these quick crackers – quackers? – before I became HANGRY, which means to be angry due to hunger. And since I had made them once previously, I new the tricks and adaptations to get these in and out of the oven in less than 20 minutes.
So, if you suddenly have guests or are ravenously empty-stomached and have nothing in the house, don’t complain. Put your baking cap on.

Quite complaining. Make your own crackers.
Quick Herbed Crackers (adapted from a recipe on Shutterbean)
- 1 3/4 cup all-purpose flour
- 1 tsp dried rosemary
- 1 tsp baking powder
- 3/4 tsp kosher salt
- 1/2 cup water
- 1/3 cup olive oil – keep the bottle handy
- Some fancy salt if you have it
1. Preheat oven to 450F. Really, this will be the longest step in the whole process.
2. Combine dry ingredients in a bowl and give it a quick stir to mix.
3. Make a well in the middle of the dry ingredients and add in the water and oil. Fold in the flour mixture with a spoon or large fork until its nicely incorporated.
4. Turn out the dough onto a work surface. No need for additional flour—this dough will not stick! Amazing and true. It’s the olive oil. Give it a really quick knead – a 5 or 6 times maybe – to make sure the dough is all snug together. Cut the dough ball into 3 chunks.
5. Roll out one dough ball until it’s super thin. You can roll it on the work surface or on a piece of parchment. Just be sure if you roll it out on the work surface that you can get it onto parchment with no problem. Roll into into whatever shape you want – it doesn’t have to be round. Color outside the lines with this.
6. Once on the parchment, experience has shown me to use a fork to prick the dough surface. Otherwise I ended up with super-big air bubbles in the finished cracker. Looked kinda cool and rustic, but not what I was looking for. After pricking, brush a tiny bit of olive oil on the dough surface and sprinkle some fancy schmancy salt on top. I happened to have some pink Himalayan sea salt on hand. Tasty.
7. Pop it into the oven. The recipe says 8-10 minutes. For crispy, keep it in 10 min, or even more. I’d say keep an eye on it and pull it out once it looks darker than you’d like. It all depends on your oven, really.
8. Let cool on a wire rack. Or not if you can’t resist.
9. While one is cooking you can roll out the other and put on new parchment. Recipe says to hold off on the oil and salt until just before popping into the oven, but I forgot for one of them and it was fine.

A few notes:
- The recipe called for fresh rosemary. I didn’t have any on hand, but recalled that if using dried herbs in place of fresh that one should use 1/3 the amount. So, if you’re using fresh rosemary, use 1 tbs of finely chopped herb.
- Try it with other herbs, too. Sage, for instance. But use less since sage is mighty powerful.
- It’s a throw-it-together kinda recipe, but be precise with the oil and water measurements. I used too much of one of them last night and the dough came out sticky enough to actually stick to the work surface. Lesson learned—I’ll never eyeball a 1/3 cup of liquid again.
Roasted Eggplant on Whole Wheat Baguette
February 21, 2013 § 3 Comments
The way I understand it, Paula Deen’s first food-for-money venture was preparing bagged lunches for the locals, which her sons  would then deliver. What those lunches were, I do not know. I imagine a typical lunch included a sandwich (or sammy). Maybe some chips. And there had to have been a decadent, butter-loaded dessert in that bag, too.
Anyone who follows me on Instagram has seen what I concoct for my own lunches, usually from leftovers or stuff just sitting in the veggie bowl. The Sweet Potato Sandwich has become a standby. The Salad Pizza is still one of my proudest moments. Avocados and boiled eggs smeared on toast are regulars, as well.
My latest sammy, Roasted Eggplant on Whole Wheat, has got me thinking about Paula Deen and her bagged-lunch business. This sammy, I’m tellin’ you, it’s good. Real good. People would want to eat it. And they might even pay real money for it—and for me to make and deliver it. Is something like this even feasible here in Boston? And I’m sure there’s some proper and official channels to go through to make sure I’m not serving thoroughly rotten food, too. I mean, someone’s got to make sure the cats and I are wearing hair nets, right?
The thought is on my mind. Who knows, maybe I’ll even give it a try, “underground catering” style (I didn’t really say that, if anyone official is reading this). Meanwhile I’ll keep putting various spreads and veg and cheese and such onto different sorts of breads and doughs. Keep up with them on Instagram and let me know which ones appeal to you most.
Roasted Eggplant on Whole Wheat Baguette
It’s simple, really:
Slice an eggplant into 1/2-in. slices. Place on a sheet pan. Sprinkle each slice with some olive oil, using a brush to spread it over the surface. Eggplants are like sponges—they soak up a lot of oil. That’s why it’s important to brush. Then sprinkle each slice with kosher salt, and give each slice a small twist from the pepper mill. Put in a 420F oven for about 20 min. Remove from oven and let cool. You’ll have extras—always a good thing.
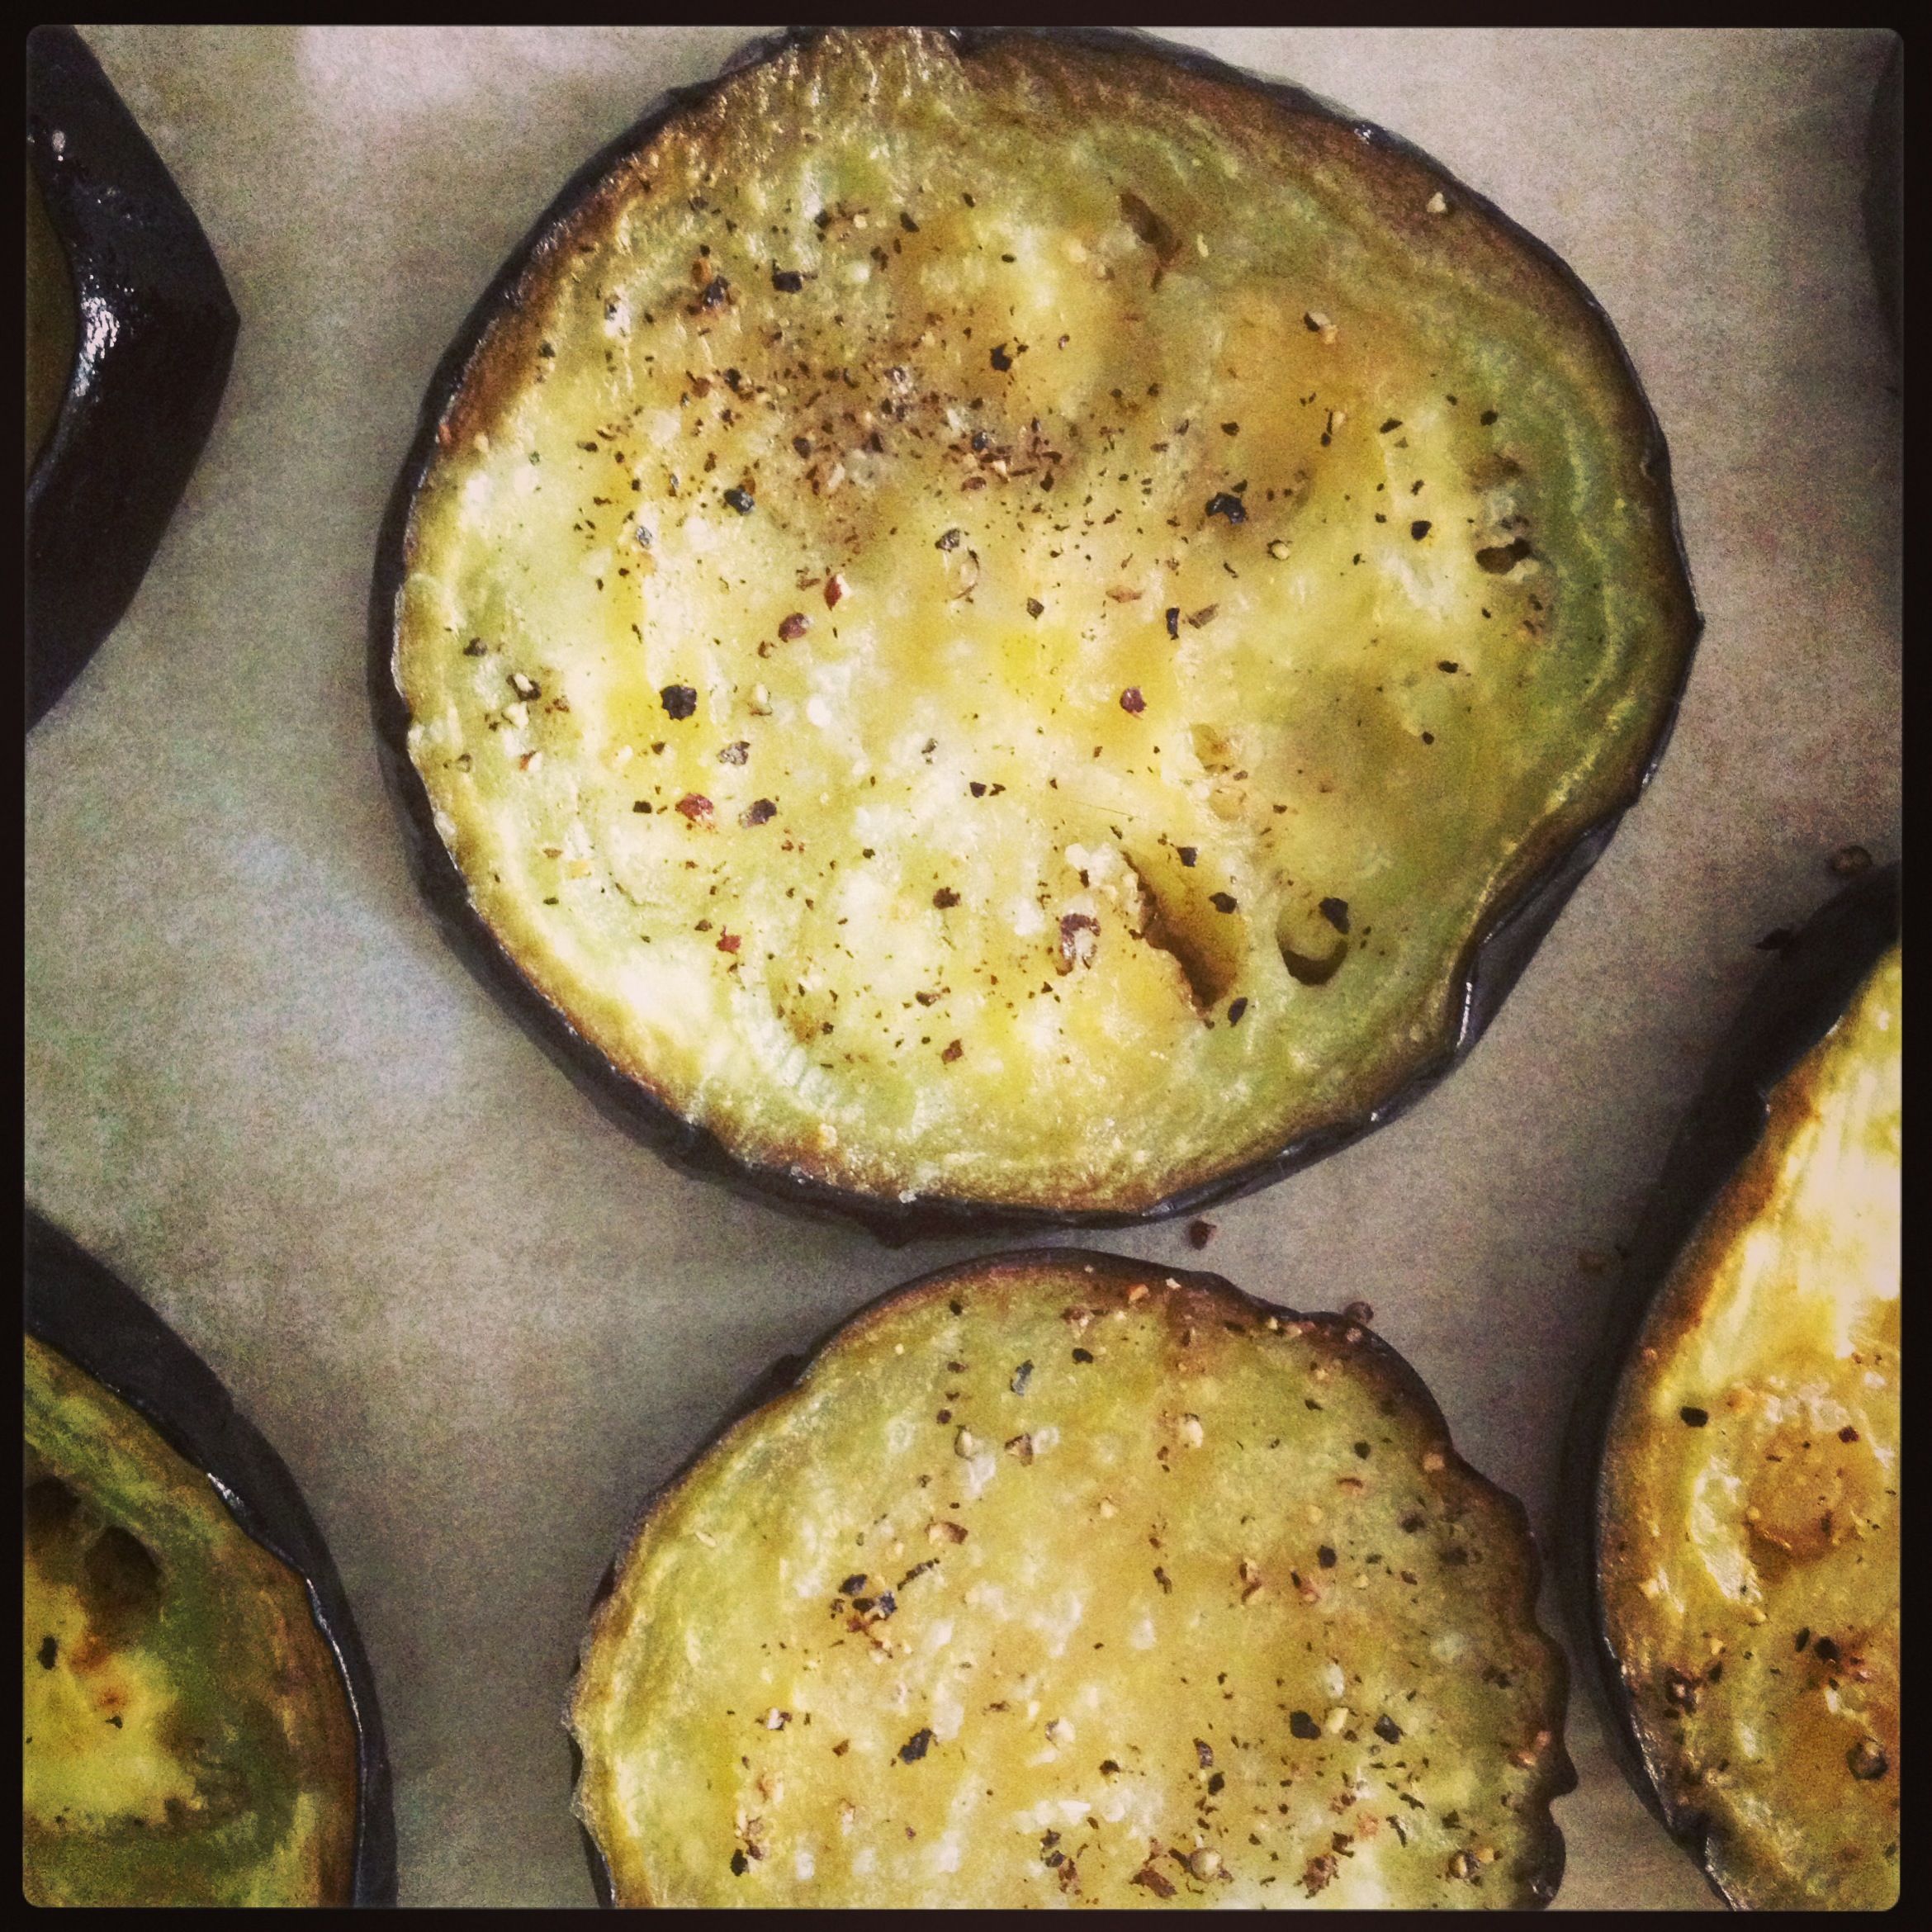
Roasted eggplant
If I’m roasting, why not throw a red pepper in there, too, right? Slice lengthwise, cutting in two, and remove seeds and pith. Flatten each half as best as possible. Find room on the sheet pan in amongst the eggplant. The peppers will take about 5-8 minutes longer than the eggplant—look for it to be dark around the edges. When done, place the halves into a small bowl and cover with plastic wrap. Remove from bowl 10 minutes later and peel off the skin.
Take a segment of homemade Whole Wheat Baguette (recipe is coming, I promise) and slice lengthwise.

Smear one side with homemade red pepper hummus (courtesy of Jennifer!).
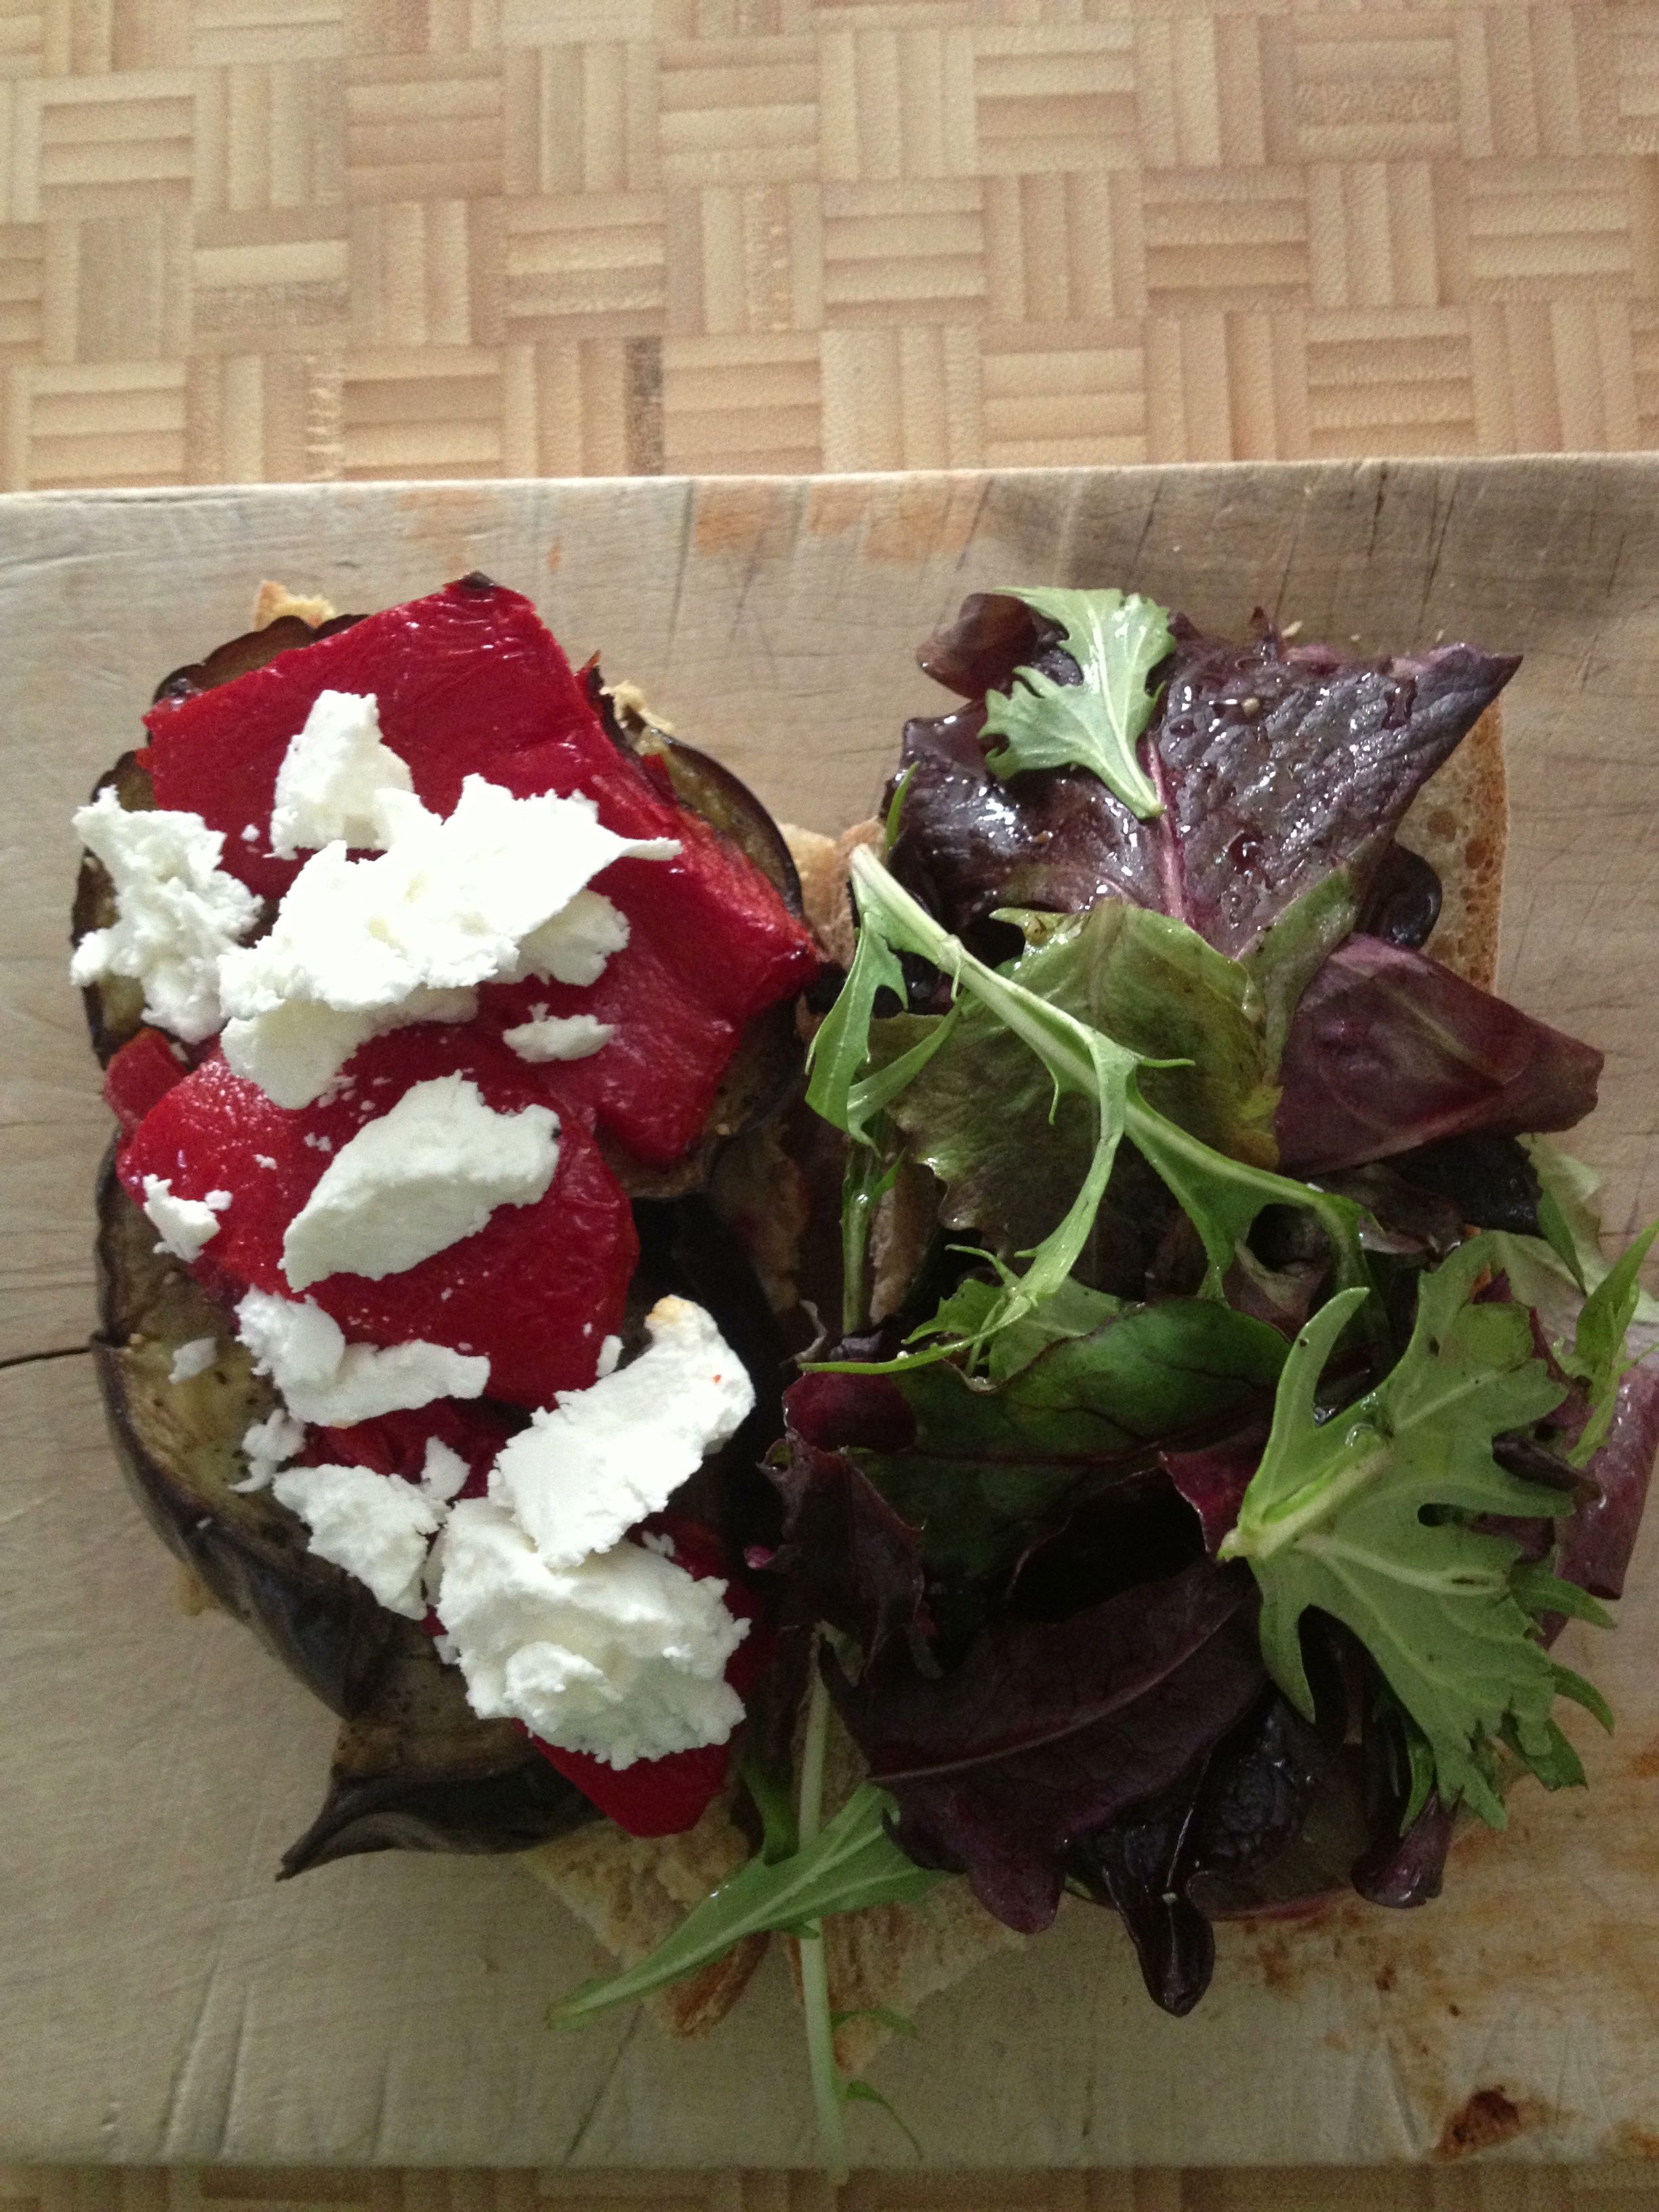
Top with however many slices of roasted eggplant you can fit on there. You may have to cut them in half and pretend it’s a puzzle.
Top the eggplant with roasted red pepper.
And top the pepper with goat cheese. What’s not good about anything I just mentioned? Really?
On the other side of the baguette, lay down some baby salad greens lightly dressed with something. I used Lemony Vinaigrette, which is always in a jar at the ready for good times.
Put one half on top of the other. Warning: Goat cheese crumbles may try to escape. That’s ok—they won’t get far.
Proceed to eat. Enjoy.
My question to you is this: Do you want to eat this? And how much would you pay to have it made for you? Add a pear and a cookie and you’ve got yourself a lunch.
Pumpkin Bread
December 9, 2012 § Leave a comment
At least that’s what I tell people it is—pumpkin bread. No pumpkin at all. Just like that pumpkin latte you’re drinking—there’s no pumpkin in there. You knew that, right?
My “pumpkin” bread is made with butternut squash. So is my pumpkin pie. And any other “pumpkin” thing I bake. Oh, wait … did you think I opened a can of Libby’s pumpkin puree and just slid that muck right into my recipe? No no no … that’ not how I roll. Nope. You’re more than welcome to, of course—I have nothing against it. But slicing, peeling, boiling and pureeing a butternut is no big deal for me and I don’t mind doing it to produce my squashy puree. After all, it’s a lot easier to do that with a butternut than with a pumpkin.
Hence why I use butternut.
Back to the pumpkin bread. The recipe is from my all-time favorite generalist baking book—The Fannie Farmer Baking Book. It’s got it all in there. I just randomly opened a page and found a Floreine Hudspeth’s Hoosier Cake. Who knew? Fannie knew. You want a fruitcake recipe, she has four. And her pumpkin pie? It has a shot of bourbon. That’s why I love Fannie.
And the pumpkin bread? Moist. Delicious. And very “pumpkiny.”
Fannie Farmer’s Pumpkin Bread
makes two 9x5x3 in loaves
Ingredients
3 1/2 cups flour
2 tsp baking soda
1/2 tsp baking powder
1 1/2 tsp salt
1 tsp cinnamon
1/2 tsp nutmeg
1/2 tsp ground cloves
2/3 cup vegetable shortening
2 cups mashed or pureed pumpkin (or butternut squash)
4 eggs, slightly beaten
2 2/3 cups sugar
2/3 cup milk
1 cup chopped walnuts
1. Preheat oven to 350F and grease and generously flour the two loaf pans. Set aside.
2. Combine the dry ingredients (flour baking soda and powder, salt and spices) in a medium bowl and stir until evenly mixed. In a bowl of a mixer (or a large bowl) combine the shortening, squash puree, eggs, milk and walnuts. Add the bowl of dry ingredients slowly to the wet ingredients and mix (or stir with a big wooden spoon) until the batter is just blended together. Make sure there are not floury lumps! Bits of shortening are ok.
NOTE: Know how when you make quick breads like this and the nuts or raisins always kinda sink to the bottom part of the bread? Try coating the nuts or raisins with a bit of flour first. It helps them not sink so much. Give it a try and let me know if it works for you.
4. Divide batter equally between the two pans. Bake for about an hour, or until a wooden skewer or toothpick comes out clean after inserting into the center of the loaf. Let cool on a wire rack for 5 min. then turn out of pans.

Divide batter evenly between two loaf pans.
This bread freezes well, so stick that second loaf in the deep freeze for later. Or use it as a hostess gift. And the butternut squash bit? They’ll never know.

They’ll never know it’s butternut squash bread.
Buttermilk-Caramelized Onion Pull-Apart Rolls
December 4, 2012 § Leave a comment
Since moving into our new house three months ago I have had a love-hate relationship with our oven. It’s a GE Profile Advantium—and it’s a convection oven. Not the typical convection, either. It’s one of those fancy convection ovens—the kind that can also be a microwave, a proofing space for dough, and a toaster. The interior is about the size of a toaster, too. I can list the issues I am having with it—such as the fact that the constantly turning carousel means I can’t use my half-sheet baking pans, or that the oven maxes out at 450F—but I’m going to stop there for now.
Let me hold off on the hate and talk about the love. The love part comes in the baking. The whole convection process, the constantly turning carousel—it makes for a nicely finished baked product. Pies, cookies, breads, rolls—they’ve never been better, quite honestly. And that’s why I haven’t thrown the oven out of our new triple-paned, German-engineered, energy-efficient windows.
My latest baking success is a recipe I spied in a Martha Stewart Living magazine about seven years ago—Buttermilk-Caramelized Onion Pull-Apart Rolls. I made them once, taped the recipe into my little book of “must keep these” recipes, and never made them again until last week. Oh boy, they’re good.
A few notes: There is yeast involved, but don’t let it scare you; you might want to cut down the amount of onions a bit.
Ingredients
11 tbs unsalted butter, softened, plus 3 tbs melted
1/4 oz. active dry yeast
1 tbs sugar
2 tbs warm water, about 105F
3/4 cup buttermilk
1 large egg, slightly beaten
2 3/4 cups all-purpose flour
2 tsp salt
2 lbs (or slightly less) sweet onions, thinly sliced
1. Directions say to butter a 9-inch cake pan with about 1 tbs of the butter. I used a 9-inch pie plate – two, actually – but use anything you think will hold the rounds of dough. Also butter a large bowl and set that aside.
2. Combine the yeast, sugar and water in a small bowl and let it sit a bit while it becomes foamy, about 5 min. Give it a good stir to dissolve. Add in the buttermilk and egg.
3. While the yeast mixture is sitting, combine flour and 1 1/2 tsp salt in the bowl of an electric mixer using a dough hook. It’ll form a well naturally. Pour the buttermilk-yeast mixture into that well and mix to combine – you may need to stop it and scrape the sides down. Add in 6 tbs softened butter (I’ve added non-softened butter and it was fine). Mix on medium speed for 10 minutes. A soft, sticky dough will form.
4. Scrape the dough onto a lightly floured surface, then sprinkle a bit more flour on top of the top and get a bunch on your hands, too. Knead the dough for about 5 minutes—gently. It’s gonna stick to your fingers if you knead too vigorously, so be gentle and flour your fingers often. The dough will begin to feel seductively soft and light—it’s the best part of the job. After 5 minutes, place the dough in the buttered bowl. Cover with a kitchen towel and let it rise in a warm place for about an hour, or until it’s roughly doubled in bulk. If it doesn’t exactly double, that’s ok.
5. The recipe says to caramelize onions in 4 tbs butter, but I use olive oil to do the job. Heat the oil or butter in a large pan over medium-high. Add the onions, sprinkle in a bit of salt (I would add 1 tsp) and stir to coat—grabbing the onions with tongs and flipping them over as you would a steak on the grill is the best way I have found to do this. Do this intermittently for 5 minutes, until the onions start to look translucent, then turn heat way down to medium low, and let them cook, stirring occasionally, for about 20-30 minutes until they are golden brown. Take off heat. If I were you, I would put them in a sieve over a bowl and let the onions drip off their liquid.
5. Meanwhile, the dough…punch it down and turn it out onto a lightly floured surface again—make sure you have plenty of room. Use a rolling pin to form a dough rectangle about 17 in x 10 in. NOTE: the important thing here isn’t the dimensions, it’s keeping the dough relatively of even thickness throughout. Brush the rectangle with 3 tbs melted butter and spread those caramelized onions evenly over the surface. Starting from the long side, roll the dough into a log and press the seam to seal it.

Spread caramelized onions evenly over the dough’s surface.
6. Next, cut the log into about 12 even segments. It’s harder than you think, because you’ll squish the roll into ovals—kinda scary. And then the onions pop out of the ends a bit. Don’t worry about it – it’s gonna happen. Just slice and don’t worry. Put these slices cut-size up in the buttered pan. Directions say to brush with another 2 tbs of melted butter, but really, there’s no need for that unless you want them to look browned. Cover the slices with plastic wrap and let them rise in a warm space for about 50 minutes.
7. Preheat oven to 375F. Bake the rolls for until they are golden. 35 minutes is perfect. Invert the pan onto a cooling rack and unmold the rolls. Serve warm.

I made these to serve with a bean stew, and pulling apart the rolls and dunking bits into the stew was awesome. The onions make the roll moist, which is super. I’ve since made these rolls and spread the dough not with onions but with roasted garlic and rosemary. These weren’t as moist but just as tasty, and you could really get a sense of the roll’s airy texture. This recipe is certainly not disappearing for another seven years.
Update on Dainty: Where’d June Go?
June 26, 2012 § 2 Comments
Hey, hi. Remember me?
Nope, haven’t forgotten about Dainty Dot. Truly have not. It’s been a bit of a busy month. And I’ve had other things on my mind. Dainty took a backseat for a bit.
A backseat to what, you ask? I’ll review in photos …

Boo – she’s growing too fast. My iPhone can barely hold all the photos I take of her.

June has so many Instagram opportunities. I can’t keep up. Pretty, huh?
 I’ve been perfecting my pizza-making skills. And man, do I have mad skills with the dough.
 Provincetown. Vacation. Roof deck. Water views. That really about says it.
 Thanks, Martha Stewart, for the most-appropriate Ptown vacation drink—the Cucumber Cape Codder. I’ll post that recipe soon. Really, so good.
 I’m slightly obsessed with yoga. Just slightly, but in a good way. Maybe I’ll talk to you about it someday. But for now, know that this mat has become a good friend of mine. And it’s fashionably orange.
 So, I’m a potato farmer’s daughter. And an avid gardener. And for the first time this spring, it dawned on me: Why not grow some potatoes? And it shall be so. Technically once the flowers bloom, there should be potatoes under the ground. But I want them bigger than peas, so I’ll await awhile.
 Oh, yeah, and by the way … we’re buying a brand-spankin’-new unit in a brand-spankin’-new building. New as in, this was a vacant lot last July. And it’s highly energy efficient and will have solar panels and is built like a German tank – and that’s with good reason. Obviously, more on this later.
 And have I mentioned lately that I love this person? I do, and I’ll do it all again in a split second. (Ain’t she a cutie, too?)
 More pizza. I might be slightly obsessed with pizza, too. Always in a good way.
 But just because I haven’t been writing here doesn’t mean I haven’t been writing. I’ve been taking a spin at fiction. More of a poetry-short fiction hybrid type of writing. And the cool thing is it’s fiction inspired by photos. The images are all iPhone Instagram pics taken by a friend who has a knack for knowing there’s a story behind a scene. Take this one, for instance. Who left the phone? Why? Who was on the other end? I took a stab at it—and a bunch of other photos, too—and am publishing them at The Skinny Fedora. The one above is “Hope Asked.”
So, give The Skinny Fedora a quick read and let me and the other skinny girl know what you think. Leave comments here or at www.theskinnyfedora.com.
