
More of Me
May 17, 2021 § Leave a comment
2021 called for a change. Less short-term vision, more “what do I want to be doing to feel I’m contributing?” thinking. Less drinking, more movement. Less feeling stuck and isolated, more freedom (yeah, I’m not the only one feeling that). Less paying someone’s rent and more home ownership.
Wait, hold on a minute. We actually already own two homes. So the paying rent/home ownership reference is really an analogy (I use those a lot, you’ll come to see). But it’s an analogy I feel in my bones, and this is what I mean by it: I work for someone else’s 5-year plan. I use my skills—whatever those may be—to further an objective that is not my own. Yes, okay, I get it. I’m getting paid so I can pay my own mortgages, feed my own dogs and cats, have the funds to live a good life. That right there is not a bad objective. In fact it’s a pretty good exchange that folks have been taking part in for millennia.

But it’s an exchange that is depleting me. I don’t know how else to say it. It’s like I’m a rain barrel and I have a slow leak and there’s no rain in sight to fill me up. And it’s not even as if that leaking water is nurturing anything other than whatever is growing near it. Dripping to depletion. I don’t … it’s not … see? No other words for it. I’m slowly emptying. Ah! There are some good words for it. Well, that’s somethin’.
What are those skills I use to fill another’s vision? I’m a writer. How I went from being a science nerd to a writer in the horticultural business—well, that’s a long story. I’m sure I will cover that topic someday. But for now, know two things: a) I’m in a field I never ever intended to be in – omg, for the last 25 years! and b) I’m actually pretty darn good at it, the writing thing. I’m well-known and well-respected in the commercial horticultural field. In fact I’m so good at it I’ve fooled most of the people most of the time into believing this is actually what I love to do and will be doing for the rest of my life.
Don’t get me wrong. I am grateful I get paid to write. I think about all those writers who have this yearning to write and publish and end up penning the police beat in the local paper. I’m truly blessed to have been employed as a writer because I know so many people have tried and could not make the money thing work. Not that I get paid a lot. I don’t. Not with this field.
So, I made a change. I had a talk with my boss and I said something along the lines of, “At the end of my life when I think back on what I want to be known for, it’s not this.” Ballsy, right? But when that feeling is with you for … for decades … when you decide to voice it, you voice it. No trouble finding the words that time, nossir.
Did I quit my job? Going into Year 2 of Pandemic Times? No. Not a good idea. I dropped let go of the writing that absolutely didn’t contribute to my feelings of self-worth and impact. I would still write for them, yes. It turns out that I am writing just two fewer pieces per month out of a total of eight or nine. No more magazine articles, so no more writing about new trends in decorative pots or how to upgrade your store’s POS system. And I’m also no longer writing my monthly editorial column. Not that I didn’t like writing it. I thought my columns were one of my strongest styles. Until I got to the end and had to figure out how to connect all the emotions and sentiments I developed in the previous 500 words to … horticultural retail objectives. And that’s where I’d die each month. That is where the rain barrel let loose through its spigot and I’d have to scramble emotionally to shut that down. At that moment in my column, that’s where my writing became not my own and I would lose myself. The one thing I was feeling really good about, taken from me.
Not having the mental weight of writing those two pieces each month freed my spirit. I literally felt lighter. I felt more joyful in the other six pieces I was still writing for them each month. Did I love love love writing for them now? Love is a strong word. I didn’t hate it and did find some additional enjoyment.
Am I writing more of my own, more for my own now? Funny you should ask. Until I sat down just now and wrote the words “2021 called for a change,” I had written just two short … let’s call them poems. Right? Just two. And it’s been two months since this change in job responsibility has taken place. What gives?
“But first, coffee.”
You’ve seen the shirt, the meme, the signs in front of shops with that written truth. And it is truth. You have a whole day’s worth of big plans ahead. You’re going to change the world! But first, let me prioritize my coffee. I am not complete until and unless coffee is consumed. Once I have my cuppa, I’m good to carry on.
For the past two months, I’ve been putting coffee in front of writing time. No, not actual coffee. I’m putting the yard work in front of writing. I’m prioritizing installing an organic lawn, planting my veg garden, getting the front door painted, making lists of what projects need to be completed while the weather is good. Now that I have the time, let me complete all these other things rather than use that now-freed time to do what I had originally intended with it.
Oh, and when you decide to prioritize what you would like to be most remembered for, do not start watching a new British crime drama. Lovely show, Shetland, but I need to backburner you.
Remember this, Ellen: But first, writing.
(Actually and truthfully, letting the dogs out to pee is first, followed by coffee and then a run with Sammie to tire out the little Goat Pony for a few hours. And then the writing. Let’s be realistic.)
This coming Saturday—five days from now—is when my editor’s column would have been published digitally. It’s the first time in nearly 13 years that I will not have published an edition of this piece. When I wrote my very last column, I kinda sorta said goodbye to my readers and told them I wasn’t gone forever, but would be found in the other usual things I write for the company. What I didn’t do was tell my mother of my plans. She actually really loves to read that column. It’s the only thing of mine that she reads. And when she read my departing column … oh, the concern she expressed in an email (she would never think to call me without prearranging a time). What was I going to do for money? What would I do with my time? Because she doesn’t receive/read my other six items I write for the company (nor does she realize all of the other freelance gigs I have), she thought I was thoroughly unemployed. Her concern was sweet. Bless her heart.
A good five days after she read my last editorial and wrote me that concerned email, Mom sent me a message via my work email. It read, “I will miss your articles, Ellen. I loved reading them. Love, Mom.”
Sweet, right? Yeah, that was sweet. Something she’s not known for, being sweet. She had to search for that address to email me separately. She wanted me to know she loved and appreciated my work. Her words made me stop for a moment. Well, should I? Should I cease writing those columns? Because she likes them and she’ll be disappointed.
It was just a thought for the moment, though. I had felt the weight of that writing lift weeks earlier and I would not go back to it. I could not not write for myself again. Other forms of writing—newsletters, blog content—sure. But not essay and article form. No one and no industry not of my choosing can claim my interest and my words in that manner again.
I was recently listening to an episode of Brené Brown’s Unlocking Us podcast. She had had musicians Gina Chavez and Carrie Rodriguez on her show. Accomplished Latinx musicians on their own, they had teamed up to write and record the music that accompanies Brene’s podcast. One of the ladies—I can’t remember now if it was Gina or Carrie—was talking about what I’ll call her origin story when it came to singing and songwriting. She had been for years performing with others and on her own, but … something was missing, something wasn’t quite right. She was doing well, but she sensed she wasn’t performing her music. I even stopped the car to jot down what I believe she said about it: “There was so much of me missing in my music.”
She was eventually introduced to the music of her great aunt—apparently a woman who was a well-known Mexican singer back in her day. The great aunt sang a particular style of Mexican folk music. That music, that was her music. That was the music that gave her fulfillment when she performed. No more of what wasn’t her. She’d sing and write the music that felt authentic to her.
I stopped the car to write down the gist of her statement but I wrote it this way: “There is so much of me missing in my writing.” Those are my words. Those words are the ones that come pretty darn close to filling in for the words I was at a loss for earlier. There is so much of me missing in my writing. I’ve tried writing a memoir. I began a novel. I do write short … let’s call them poems. I believe my editorial columns came closest to the writing that I can claim is mine. But not having it truly be mine … gosh, that made me ache.
So I am going to write more, write more of me. Here. It’ll be rough and raw and maybe uncomfortable. That’s me, though. And I wouldn’t want to be anyone else. Not anymore. Not even for my mom.
I may even print out some of this writing and mail it to her. I think she’d like that. She may email me to let me know.
Asking the Right Question
October 29, 2013 § Leave a comment
Five months ago I sat myself down in my picture window, propped up my feet, and allowed myself to think. “What is it I want to do with my life?” is usually how my internal conversations begin, and so it was this time around.
That line of questioning quickly stopped. Or, I should say, I steered myself from it. Why? Because I’ve asked myself that question over and over and over … and I’m still asking, with no resolution.
Maybe, I thought, I’m asking the wrong question.
The “What is it I want to do with my life?” posit typically turns into “What should I be doing?,” “What am I supposed to be doing?” and “What are my skill sets?” And then, of course, the small pebble of a question turns into a conglomerate rock of a boulder that quickly rolls downhill and out of control.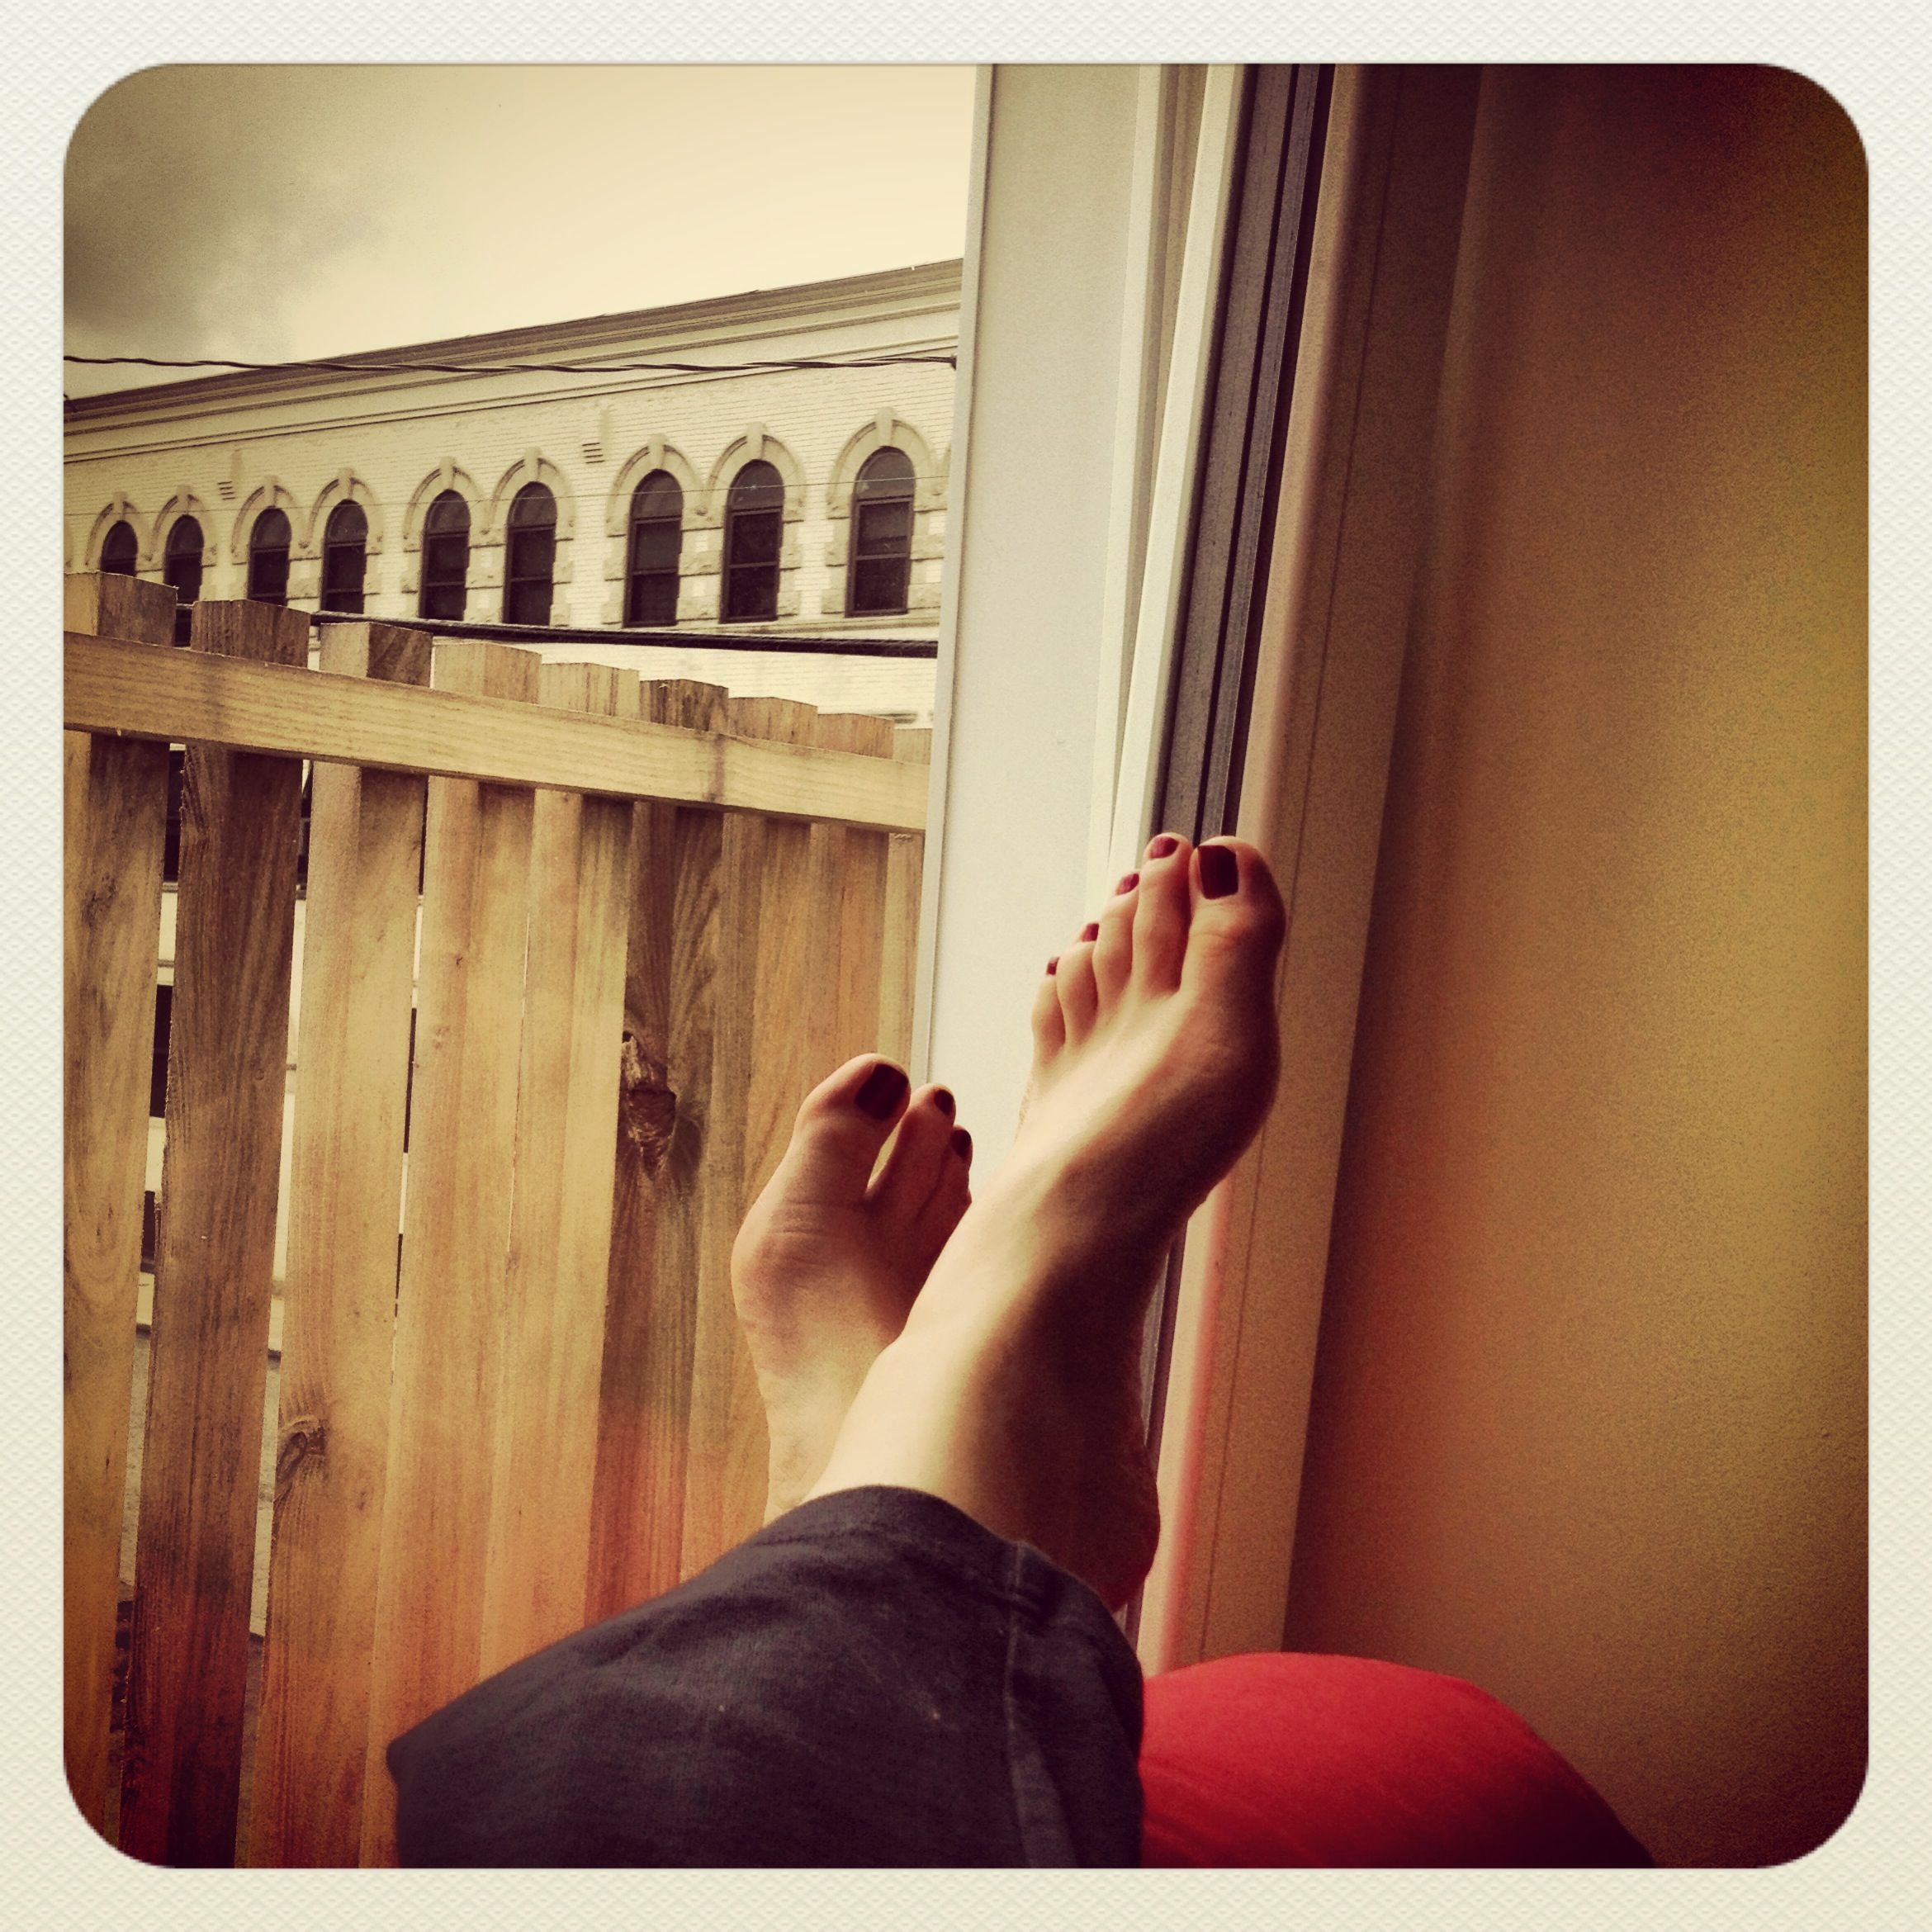
So I sat and thought a bit more. And I realized these questions I have been asking of myself are all filed under the category of “occupation.” Is that truly the question I wanted to explore? No, let’s not go that route this time, I thought. Because the answer to that question will follow as a result from a different question. A question I haven’t yet asked. The real question I need to ask myself.
The fact that I hadn’t found the right answer because I had been asking the wrong question was a bit of a window cleaning moment for me. By that I mean once I realized I’ve been asking the wrong question, I was able to wipe it away from the glass and have a clear vision of what lay beyond that distraction. I saw the question, the real question clearly. And because I saw this question clearly, the answer was right there with it.
The question isn’t what is it I want to do, but this: Who am I?
I listen. I see. I sense. I feel. And I write. Who I am is someone who searches, gathers and shares through the written word. It’s who I am. It’s what I do. It’s what fills me.
I’m already a writer by trade, so I’m on the right track. So why then am I still asking these questions? Perhaps I’m not writing what’s in my heart. Perhaps. Writing what’s in the heart—that’s what I should be doing. That’s what I am meant to do with my life.
That day five months ago I jotted a note to myself. It’s simply this:
There are two things I have passion for, one thing I know about more than the average person, and one thing I do really well. There’s a way to feel fulfilled and a way to feel joy with all of them.
Passion, knowledge and skill. Those three together are the recipe for happiness. For my happiness anyway. I have so much passion for yoga, and not just my own practice. Yoga is such a gift—a gift that I receive over and over, and one that I hope to give just as much. I’m also passionate about good food and eating well, and I know more than the average person about growing and using that food. That has always been a part of my life but has just now started to shine through. Sharing this is something I so love to do.
That missing question and its answer—Who am I?—can tie my passions, my knowledge and my abilities together. Since that time I sat in my window five months ago, I’ve slowly been shaping a new direction with these revelations in mind. And I’m there, or nearly so. I have made something to share with you.
In a few days, after tying up some loose ends, I’ll share with you my new endeavor. I am so thankful to be able to give this to you. In the meantime, if you feel a call to sit in a window and think, follow that feeling. Something extraordinary may come from it.
30 Things I Learned After 30 Days On a Yoga Mat
October 4, 2013 § 2 Comments
 I presented a challenge to myself. I would practice yoga each day during the month of September. That’s 30 straight days in a studio with an instructor. None of this rolling out my mat for 20 minutes while my cats nudge my forehead in down dog. For me now, a home practice isn’t protected time and it certainly isn’t protect space if my cats have any say in the matter. No, this would be legit and official practice.
I didn’t do it for a free T-shirt. I didn’t do it to get in some serious workouts. The “exercise” aspect of yoga isn’t why I practice, and free clothing certainly isn’t an incentive for me. After nearly two years of practicing I challenged myself, in a sense, to fully realize yoga. And that, to me, is to see inside myself. To have things bubble to the surface and let them roll around there for me to see. To observe how I react to myself, my body, my mind’s buried and rushed-over thoughts that arise with the buoyancy of breath. Living life on the surface doesn’t serve me anymore. It’s time to move in and learn what’s there.
Thirty days doesn’t make me an enlightened yogini, but it did gave me the space to learn a few things—definitely about myself but also about those who occupied the space around me. Here is what I bring home with me:
- Breathe in—fully.
- I have everything I need with me now. No matter where or when that is, I have all I need. Work with them.
- I bail. Oh, I don’t mean I bail out on a yoga pose that we’ve been holding for ages. I breathe through it, I hold it and let myself drop in and savor all those dirty things you learn about yourself when you’re confronted with, well, yourself. But because I don’t bail out of the pose, I recognize that I bail out of other things when I’m off my mat. For example, and I’m not kidding, I bailed out of the end of that last sentence and left it for two days. I get to a point—could be a sentence, could be a project, could be a relationship, whatever—where I’m doing well, or on the cusp of doing well, or on the cusp of doing something and I just don’t touch it. Sometimes never to return, sometimes just for a few days. Sitting through and working through the hard part—getting over that point, that’s where the joy is. I deny myself that.
- I am no big deal. I can do a crow, who cares? Doesn’t make me any more or less than the person on the mat next to me. I’m doing what I’m doing for me today. I’m good with that. That’s an important thing to take off my mat with me.
- Everything is easy. The stuff that’s valuable is hard. Want less. Value more.
- Doesn’t matter how many signs you put up—some people still aren’t gonna take off their shoes.
- My body holds everything that has ever happened to it, even if my mind has lost hold of it. The fall down the barn stairs could account for my persistent shoulder tweekiness. The kamikaze banana-seat bicycle spills might be why my knee squeaks walking up the stairs. And it’s emotional, too. What explains why I bolt from my office chair just as I’m about to write something great? Hmmm…
- If I have to ask where I am on my mat, I need to come back to my breath. The trigger of asking myself gets me there. Funny how that works.
- Tell me you did not just check your phone while the instructor was explaining something. Nobody’s got time for that. Put the phone in your bag, with the ringer and vibrate both switched off, and chuck it in the back of the room. I’m not gonna thank you because I shouldn’t have to ask.
10. All of life can be categorized into two piles: suffering and the end of suffering. You get to do the sorting of it all.
11. I don’t know why the other people in class are here. But they showed up and I respect them for taking the time for themselves. So many of us don’t.
12. That space where you just let go of it all and you just are … man, it’s totally worth everything to be there.
13. Hot yoga isn’t so bad if you’re not packed in mat to mat and you’re given time to set yourself into a pose. In fact, I’m getting to really like it, sweaty mat and all.
14. Respect the instructor. You got to choose whether or not you came to class but they didn’t get the choice. You don’t know what’s going on in his or her life at that moment. But they’ve shown up for you. Respect.
15. Yoga is like love. There’s the passion, the fire, the messiness of it. But the dishes still need to be done and the bills need to be paid. One is fleeting, and one is forever.
16. You don’t have to follow each cue. Do what you need for that day. All within your ability, of course, and still following #15. The mat is yours.
17. Speaking of the mat being your own—please don’t step on mine.
18. I’m a different person from before. And not different from who I was in August. Everything changes and everyone changes and no one has control over it. I didn’t used to be okay with that. Letting go of the not liking change has freed me to focus on other things that I know are in my control.
19. I have a serious lack of confidence. Not as badly as I used to, thank goodness. I need to just cut that shit out.
20. To make up for #19, I sometimes blather on about stuff I know nothing about or make non-factually based statements. Again, cut that shit out.
21. We are all beautiful and all very odd looking all at the same time. And we’re all very different. I’m getting to like that aspect of the human animal more and more.
22. Yin yoga is like a chocolate and whipped cream parfait.
23. Sometimes a rolled-up mat stuck in your gut can be a very comforting feeling. No, really.
24. Thirty days is a long time only after you start counting down to the end.
25. There will be a parade for me the day I can swing my leg behind my head. Not really. But I have promised myself ice cream.
26. I’m a lot stronger than I thought I could be.
27. Meditation is a necessity. Imagine if we all took a few minutes each day to just sit with ourselves to clear the mind. We’d have so much more understanding of each other.
28. We have our own deal going on. And it’s comforting to know that everyone has their own stuff they are dealing with, too. We’re not alone. Again, another reason to have more understanding for each other.
29. I can do this.
30. Breathe out.
In a week I begin a long-awaited 200-hour yoga teacher training program. That’s another reason I challenged myself to 30 straight days of yoga, to sort through some feelings and anxieties before the real training began. Call it a much-needed emotional survey of my state of being. And you know what I learned? I can do this. I’m ready.
Spicy Eggplant Relish
June 18, 2013 § 1 Comment
Funny how when I make a salad, sauce or spread for a gathering of friends, the recipe always turns out to be from the Moosewood Cookbook. Not kidding. For flavor profiles that were developed back in the crunchy ’70s, the Moosewood’s recipes really seem to be a hit with people in the 2010s. Their popularity doesn’t seem to have anything to do with being mindful of healthy eating and instead has EVERYTHING to do with the fact that this food tastes awesome. Good-tasting food is an instant classic.

Spicy Eggplant Relish on a Stacy’s Pita Chip
The most recent dish to receive the “Oh man, I seriously need this recipe” comment is Spicy Eggplant Relish. Keep it in an all-veggie-ingredients-minced form, or mash it into a chunky puree after cooking. In either state of consistency, it can be used as a topping for crackers and pita, as a sandwich spread, or even tossed onto a veggie burger (or a real burger if you’re into that kind of thing).
And don’t let the “spicy” descriptor dissuade you. You’re in control of the spice. Make it as light or spicy as you wish.
Spicy Eggplant Relish (ala The Moosewood Cookbook)
2 tbs. olive oil
1 cup minced onion
1 medium eggplant, diced (I kept the skin on, it’s fine)
1/2 tsp. kosher salt
1/2 tsp. cumin
1 medium red bell pepper, minced
1 medium clove garlic, minced
1 tbs. lemon juice
cayenne to taste (start with 1/4 tsp.)
1. Heat oil in pan. Add onions, eggplant, salt and cumin. Saute on medium for 15-20 minutes or until the eggplant is tender (but not mush). 2. Add in the pepper. Saute for about 8-10 minutes.
3. Stir in garlic and lemon juice and continue cooking another 5 minutes. Sprinkle in the cayenne, let it sit for a bit, then taste. Add more if you need more heat. Same goes for salt. Mash or not to mash, it’s up to you. Serve it straight away or let it come to room temperature. Cold is good, too, straight out of the fridge, but I prefer it room temp.
A Healthy, Fruit-filled Cookie
June 11, 2013 § 1 Comment
Oh, and chocolate, too. There’s dark chocolate in these healthy cookies.
I was recently charged with finding a healthy cookie recipe for a gathering of friends. Healthy, but tasty. And a real cookie, not something that was just pretending to be a treat, something “cookie” in name only. And usually when I try to find a healthy alternative to a traditionally loaded-with-bad-stuff recipe, I turn to The Moosewood Cookbook. In this case, the Moosewood let me down.
But not Ellie Krieger. Ellie had (still has?) a Food Network show, Healthy Appetite, all about healthy cooking. When the Moosewood lets me down or becomes a little too earthy-crunchy-granola-ey, I turn to Ellie. And in this healthy cookie recipes, she totally did not disappoint.
First, I’m not a dietician. Is this recipe healthy? I’m taking Ellie’s word on it. But I can tell you it’s not loaded with a ton of butter, shortening, oil, cholesterol, and sugar. Some, but not a lot. There’s applesauce! There’s egg whites! Plus it has dried fruit – and I think we all agree fruit is a pretty good-for-you thing to eat. As for the dark chocolate, I think we’ve all heard reports about how it’s actually a good thing in small amounts.
Not only are they healthy, they are incredibly tasty. Incredibly. I’ve made four batches in the last week and there’s more on the way.
Healthy Cookies (aka Kitchen Sink Cookies) via Ellie Krieger’s Healthy Appetite
Note: The recipe says it makes 18-20 cookies. Don’t believe it.
Ingredients
2 tbs unsalted butter, softened
2 tbs canola oil
1/3 cup light brown sugar
1/4 cup applesauce
1 egg white
1 tsp vanilla
2/3 cup whole-wheat pastry flour
1/2 cup oatmeal
1/4 tsp salt
1/4 tsp ground cinnamon
1/2 cup chopped dried fruit (Ellie recommends cherries and apricots. I used a dried berry blend from Trader Joe’s)
1/4 cup lightly toasted walnuts
2 oz. dark chocolate, cut into chunks
1. Preheat oven to 375 F.
2. Combine butter, oil and brown sugar in the bowl of a mixer. Mix on high speed. Stop occasionally to scrape down bowl. Mix until mixture is light and fluffy, about 2 minutes. Add applesauce, egg white and vanilla, mix to combine. Add flour, oatmeal, salt and cinnamon and mix just until just combined. Add dried fruit, walnuts and chocolate and mix to combine.
3. Prepare a baking sheet by spraying with a light cooking spray OR use sheets of parchment. Scoop out 1 tbs of cookie dough at a time and roll into balls. (I used a small-sized ice cream scoop that’s a tad bit bigger than 1 tbs). Place 2-inches apart on the baking sheet. Press cookies down with the palm of your hand to flatten slightly (less butter = less spread). I advise you flour your palm a bit because the dough will stick.
4. Bake for 12 to 14 minutes, or until lightly browned but still soft. Remove and cool on racks.
You’ll find that 1 tbs doesn’t make a big enough cookie. You’ll want HUGE cookies because they are incredibly good. But then, the larger the healthy cookie the less healthy it is, right? Let’s just disregard that logic for now.
Jicama Salad
June 4, 2013 § Leave a comment
My new favorite item to add to a salad is jicama, otherwise known as Mexican potato or yam bean. My fondness of the roundish, beige and nondescript tuber with a potato-pear texture began in an Asian restaurant in California (surprisingly not a Mexican place) about a month ago, when I had it in a jicama-grapefruit salad. And that was pretty much all it was: matchsticked jicama mounded on a plate and dressed with a spicy but light dressing. The grapefruit, ringed around the pile of jicama, was there to cool the heat. Toasted cashews added some crunch.

Jicama salad with apples, grapefruit and toasted cashews
I attempted to recreate my own jicama salad. Online searches gave me oodles of salad dressings that would serve the purpose. But I failed. And I failed because I attempted to recreate what I had experienced previously. I had a pile of poorly julienned jicama, grapefruit that I hadn’t segmented properly, and well, the Cat Cora-inspired dressing was okay. But just okay. And aside from properly preparing the jicama and grapefruit, the success of a jicama salad really pivots on its dressing.
Turns out friends returning from a vacation in Sedona also became infatuated with jicama in salads. They had a delectable jicama salad in one of Sedona’s best restaurants, Elote. Wisely, they bought the restaurant’s cookbook, complete with the recipe for the jicama salad dressing.
We have since used this to dress traditional salad greens to which we’ve added all sorts of things including jicama, orange, grapefruit, apple, cashews, peppers, etc. You could put it on an old shoe and it would taste wonderful. My suggestion is to keep a jar of this in your fridge at the ready for any type of salad (or shoe) you may be serving.
Jicama Salad Dressing (courtesy Elote Cafe Cookbook)
1 cup olive oil
2/3 cup lime juice
1/4 cup Cholula hot sauce
1 tsp kosher salt
1 tsp fresh ground pepper
1 tsp sugar
1. Add all ingredients to a lidded jar and shake vigorously until combined.
2. That’s it! You’re done! Pour it on! As with any salad, use a combination of whatever and however much you’d like: julienne a chunk of jicama, chop up an apple, segment half a grapefruit, add in a 1/2 cup of toasted cashews, through in some thinly sliced red peppers, and toss it all on top of some salad greens. Your salad is served.
NOTE: The brand of hot sauce matters here, or at least makes a difference in taste. Our friends make it with Cholula and the dressing is quite spicy. We have used Frank’s Red Hot (it’s what we have in the fridge) and it results in a less spicy-hot experience. Both are delightful on a salad. In fact, it’s what I’m having for lunch.
Adding Landscape Edging
May 14, 2013 § 1 Comment
Jennifer and I moved into a newly constructed building last September. To be more accurate, it was still under construction when we moved in, with fine work still being done inside. At the time, the outside perimeter – the barely 3-ft. wide space between the sidewalk and the building – was still a rubble pile. Talk about unsightly. And being a gardener, I was itching to get at designing and installing a landscape that would match the mod look of this unique house.
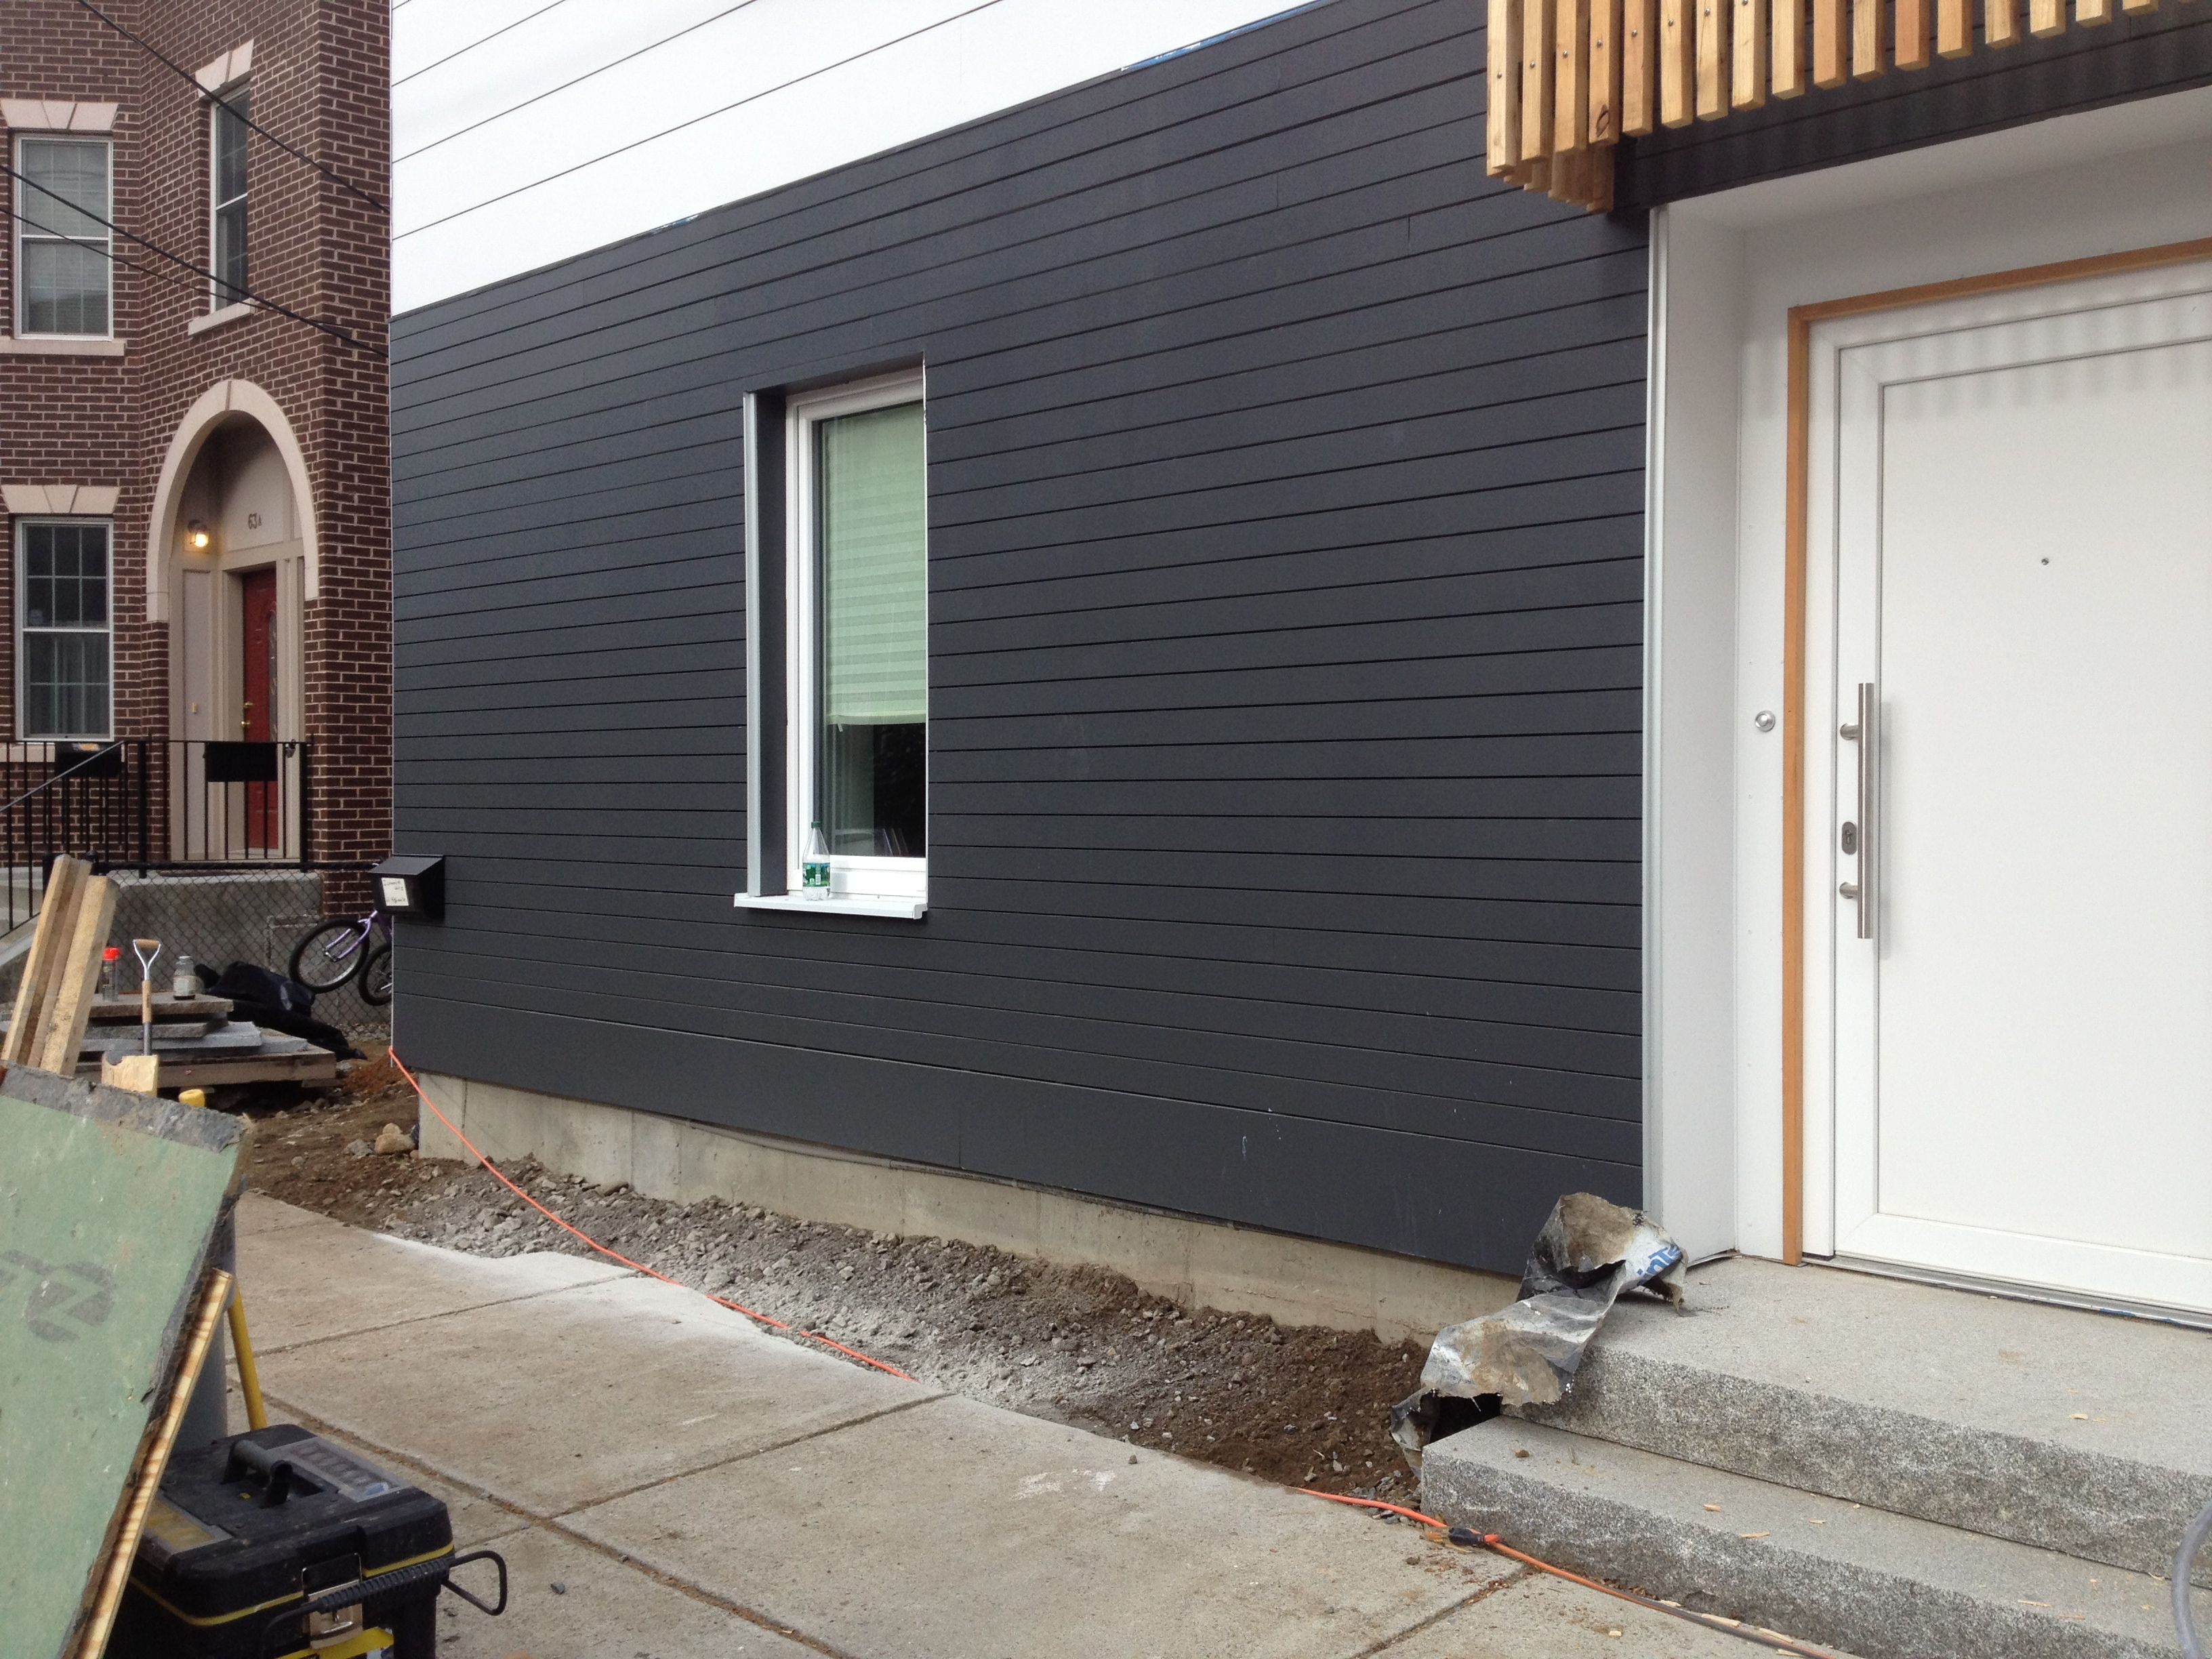
The contractors eventually added some soil to that space. Correct that—it was fill and not anything near good garden soil. They also added in a strip of black steel landscape edging between the sidewalk and the soil. Thing is, though, the edging was flush with the sidewalk. Any sort of mulch that I would add to the garden space would wash onto the sidewalk. And with the $15 per bag mulch that I prefer, I didn’t want any of that washing away.

After the soil was added and a few plants were just hanging out.
Since the building is based on German Passivhaus technology, I wanted the landscaping to reflect some German landscape aesthetic. In other words, ornamental perennial grasses (the Germans love ornamental grasses). Ornamental grasses are awesome because they are low water use plants, add visually to a landscape even in the winter with their stiff (i.e. dead) stalks, look kinda cool as their feathery flowers blow in the wind, grow into nice-sized clumps, and come in a range of colors, textures and heights to choose from.The plantings around the new Shapiro Building at Boston Medical Center served as my inspiration.

Landscaping around the Shapiro Building at Boston Medical Center served as inspiration.
The grasses would act as the foundation of the landscape and I would add some color with bulbs, annuals or perhaps choose some smaller perennials later on. So, last fall I planted a dozen or so Pennisetum ‘Karly Rose’ grasses (those will become about 3 ft. high), added in several ‘Blue Pacific’ creeping junipers, and dug in 100 ‘Daydream’ tulips. And then we suffered through a very long and snowy winter.
In late March I trimmed back the dried stems of the grasses and eagerly awaited the tulips. And I admit, it was very, very exciting when they finally popped.
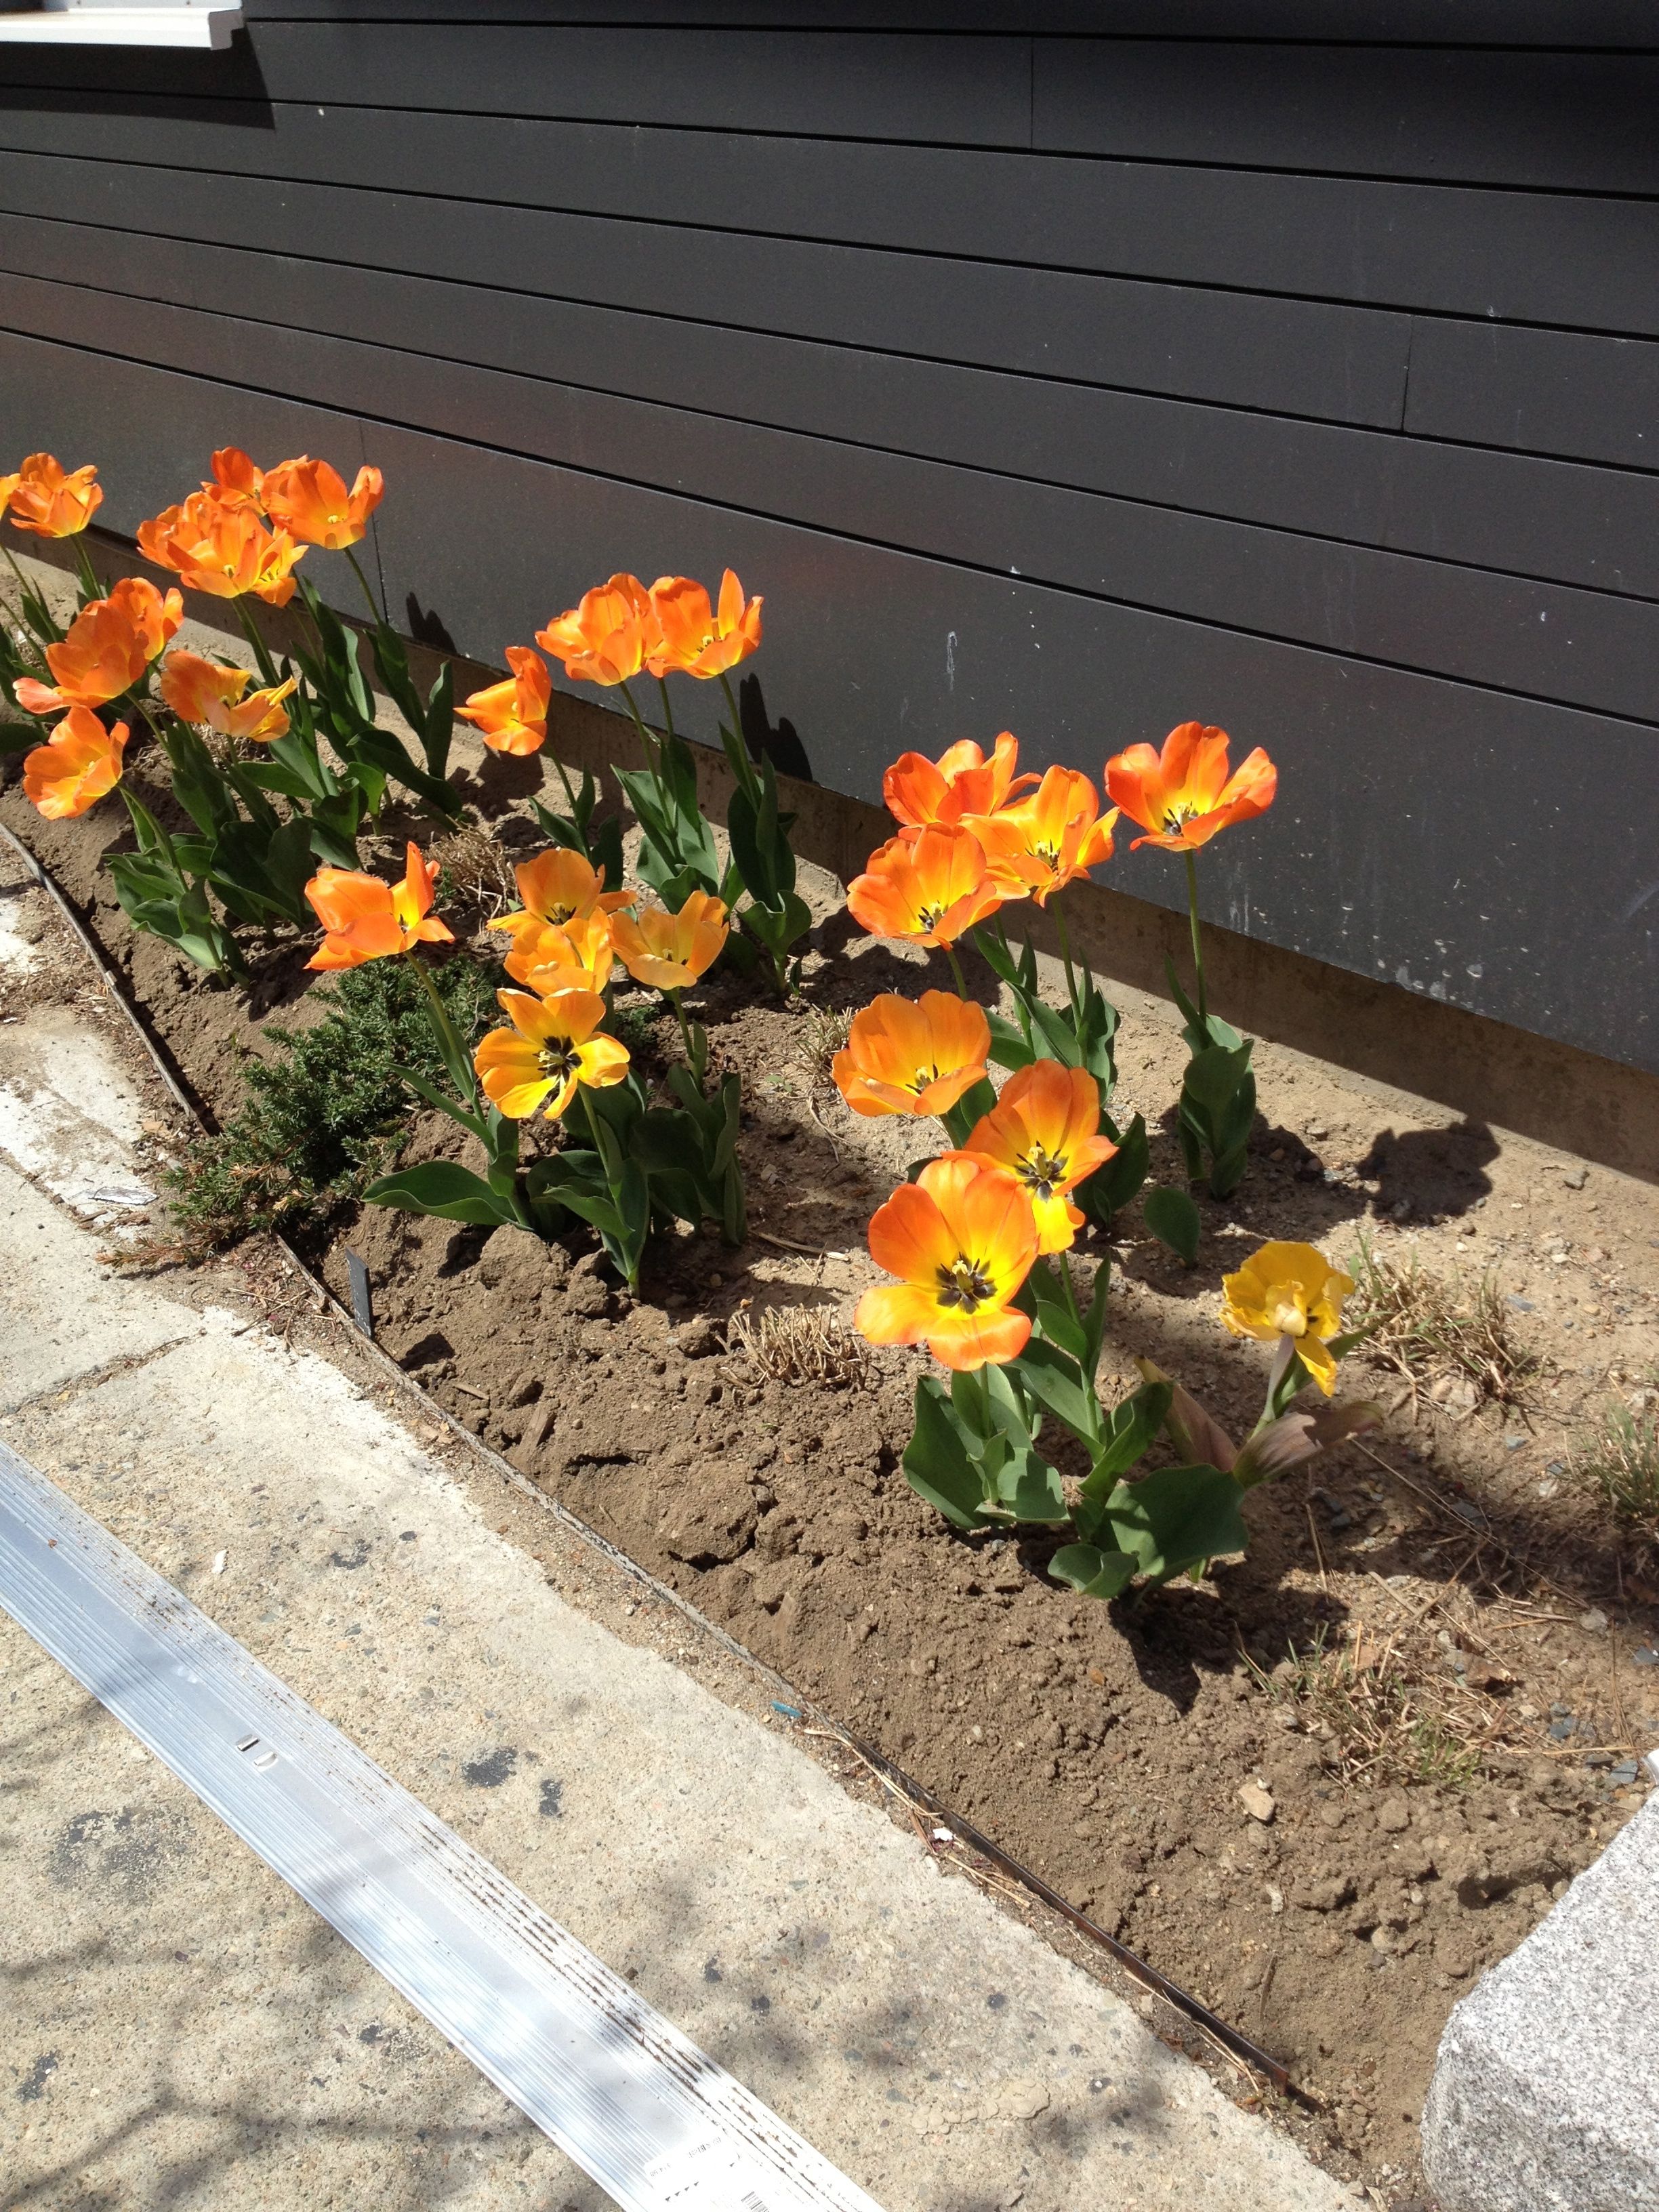
‘Daydream’ tulips in the new landscape.
Something was missing—other than the grasses, which I knew would emerge slowly over the course of April and May. What was missing was my favorite mulch—buckwheat hull mulch. Its dark color would really make those tulips so stunning. But in order to lay down the mulch, I needed something to hold the mulch inside the garden area without it washing away when it rained. After a little research, I decided on simple aluminum edging. I dug a shallow trench just behind the existing steel edging, inserted the aluminum edging about 1.5 inches down into the soil, secured it with some stakes every few feet, and backfilled with soil.

Landscape after the mulch and edging have been added.
Makes quite a difference, huh? Turns out the aluminum accents portions of the building’s edges, so that’s a bonus. And the edging and mulch will go well with the grasses once they emerge (you can just barely see one right there square in the front).
The best thing, though, is what the addition of the edging, the mulch, the plants—of the entire garden we are installing—is communicating to the neighbors. It says “We care about where we live and we really like it here.” In other words, curb your dog, put that wrapper in a trash can, throw that cigarette butt elsewhere, and it’ll continue to look nice for the whole neighborhood. While working on this over the course of several days many neighbors came up to me to comment on how nice it looks. “This was an overgrown trashy lot two years ago,” one young guy said to me. For a young man to even notice it enough to come up to a stranger and comment—well, I take it he was impressed with how that once empty lot has changed.
Because this garden space is so public, it’s not just for Jennifer and I to enjoy. It’s something the whole neighborhood can share in. That’s really what gardens are for. I’ll post more photos as the grasses grow and after I plant some annuals. Meanwhile I have a balcony herb garden in the works.
Shoyu Sauce
May 7, 2013 § 4 Comments
This is another “It’s not you, it’s me” posts. Meaning, this is a recipe I have kept on a slip of paper for well over a year now and if I lose it, I’d have NO idea how to recreate the proportions correctly. So, yes, I do hope you enjoy this recipe, but really, I’m putting it out there so I have a place to find it.
Okay, about this “I can’t remember it but I can’t live without it” recipe. If you live in the Boston/Cambridge area and you are a vegetarian, you have eaten at a crunchy, mostly raw food place called Life Alive. Think wheat grass juices, chia seed smoothies, barely cooked kale-based warm salads topped with marinated tofu, red lentils, quinoa and all sorts of good-for-you things. And quite tasty, too. Most of these salads are topped with an addictive ginger nama shoyu-based dressing. What’s nama shoyu? Good question. The short answer without going into the details (because I don’t know the details) is it’s an unpasteurized soy sauce. One taste of it and you must either eat every meal at Life Alive or find a DIY recipe.
I am not sure exactly where I found this recipe, but whoever it belongs to, I thank you immensely. Absolutely love it. We’ve only used it as a salad dressing but it could also be used to marinate tofu or top cooked veggies and rice. Is this exactly like the dressing at Life Alive? Not really, but that gives us an excuse to go back.
Shoyu Sauce 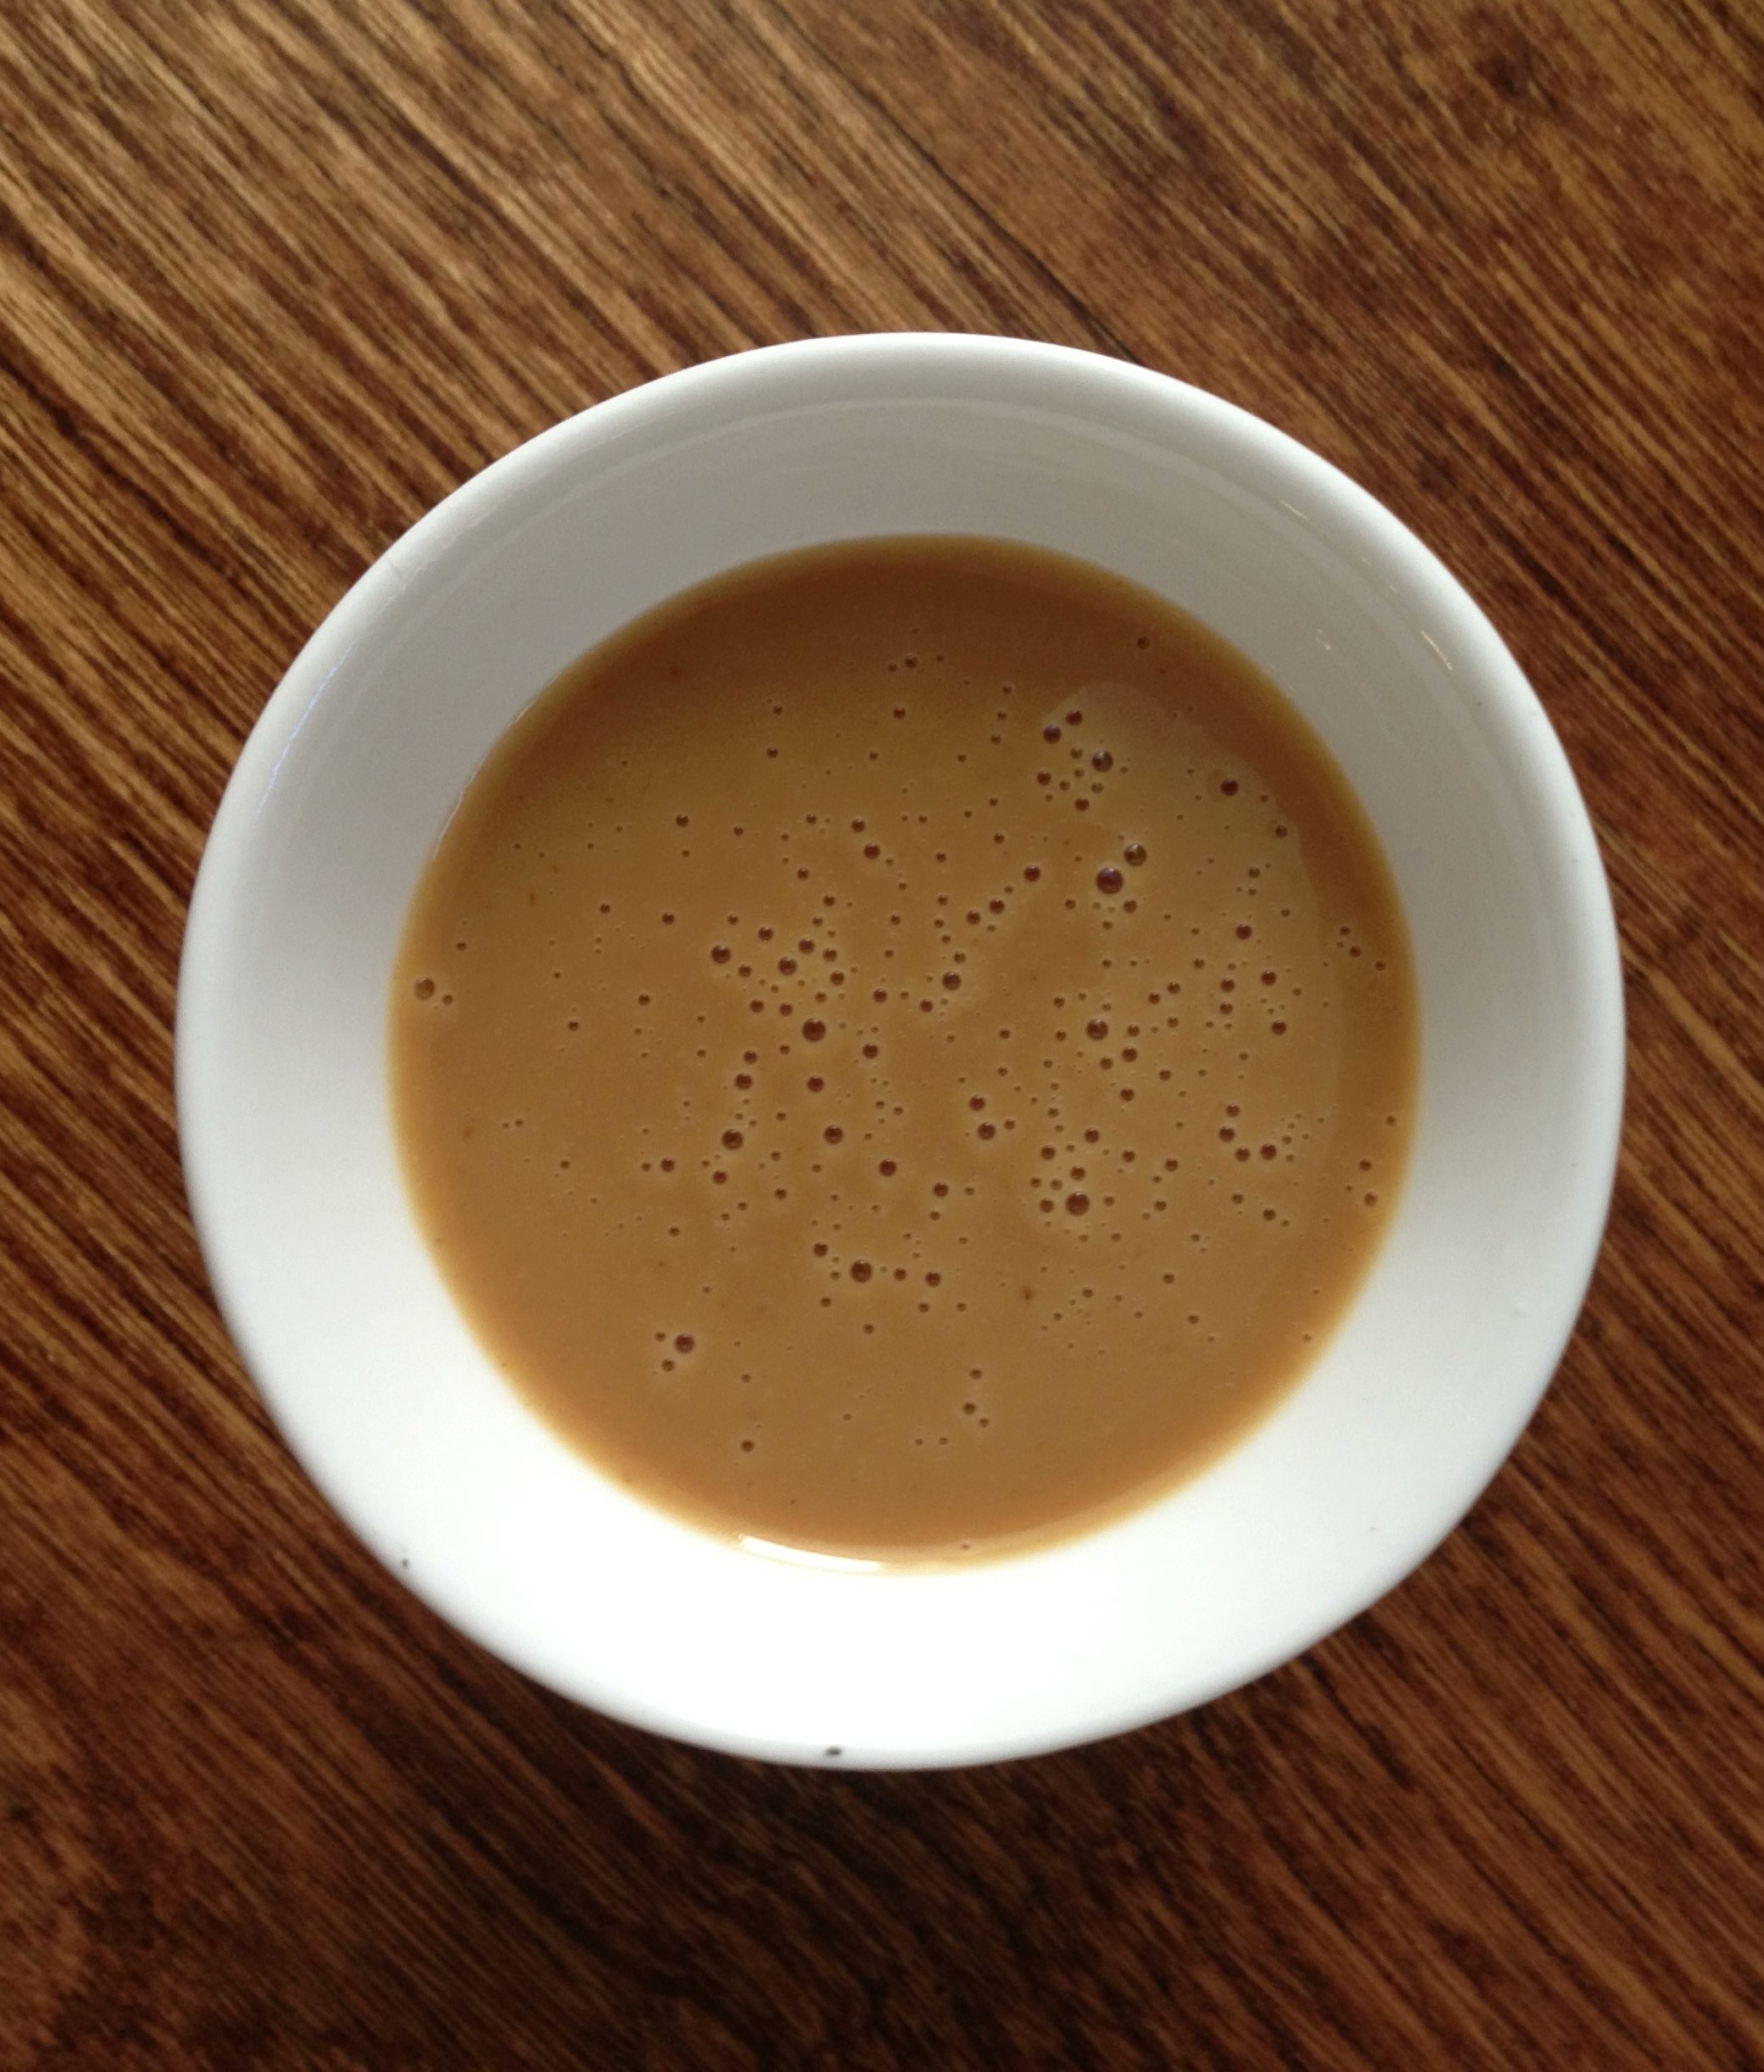
1/2 cup nama shoyu
1/2 cup tahini
1/4 cup sesame oil
2 tbs agave
1/4 cup cider vinegar
1 tsp salt
1 inch ginger, grated
1/4 cup olive oil
1 tsp lime
Combine all ingredients in a blender and liquify. Or combine in a high-sided bowl and use an immersion blender to whirr it all together.
A note about the ginger. We keep our ginger in the freezer because a) it won’t shrivel up in there like it does in the fridge and b) frozen ginger is WAY easier to grate with a microplane. It’s also easier to peel if frozen. Give it a try if you aren’t familiar with this technique.
Suggestions for what else to use this sauce with? Leave a comment below.
Homemade Pita Bread
April 25, 2013 § Leave a comment
I had a horrible experience, an embarrassing experience, a humility-inducing experience with homemade bread about 20 years ago. It was a “loaf” of rye bread that more accurately could be called an anvil. It defied some law of physics in how something so small could become so dense.
I swore off baking yeast breads for … oh, I’d say 15 years. And then, I let the embarrassment go. I’m a different person, I said. I can make different bread. I can make bread and be successful at it.
I’ve made a bunch of different bread overs the last five years or so. Various takes on wheat, white, whole grain, pizza, focaccia, sourdough—made with my very own sourdough starter! And it’s all turned out pretty tasty, too. I admit I need to work on my loaf shaping, but that will come with practice.
There’s one recipe for which I don’t need to shape up my boule-making skills, and that’s for pita bread. It’s flat and round, slightly puffy in the middle. I thought I could handle that pretty well. And it turns out it’s as easy as it seems. Why everyone everywhere isn’t making pita bread everyday, I have no idea. Get after it, people.
Pita Bread, adapted from The Moosewood Cookbook
1 cup wrist-temp water (about 95-100F)
1.5 tsp. active dry yeast
1 tbs. sugar or honey (I used raw sugar)
1 tsp. salt
3 to 3.5 cups flour (1 cup can be whole wheat)
a bit of oil
extra flour
1. Combine yeast and water in the bowl of a stand mixer and let it get foamy over the next 5 minutes.
2. Add sugar/honey and salt and stir until dissolved.
3. Put bowl onto mixer with a dough hook attachment, add one cup of flour and start to combine on low speed. Slowly add in two more cups of flour and continue to let the dough need in the bowl over the next 3-5 minutes. If it seems wettish, add in a sprinkling of flour as it mixes. You’re looking for a smooth dough.
4. Put dough in an oiled bowl and roll it around in there until the dough surface is oiled, too. Cover with a clean tea towel or plastic wrap, set in a warmish place (75F is good) for about an hour or until the dough has doubled in bulk. It could take up to 1.5 hrs.
5. Punch down dough and set it onto a clean and floured surface. Kneed it by hand for 5 minutes. Cut the dough into equal-sized pieces, anywhere from 6 to 12 segments. I made 8 because it was simple, and the pitas turned out just the size I wanted. . Knead each little dough ball for a minute or so (I turned each 30 times and figured that was about right). With a rolling pin, roll out each dough piece into a VERY THIN circle (or near circle, it doesn’t matter exactly). You WILL need to throw down extra flour. DO make sure the dough is no more than 1/8 inch thick—otherwise you end up with a pizza crust, no kidding. Let the dough circles rest for 30 minutes. After I rolled out each circle I placed it on a half sheet-sized piece of parchment, four per sheet overlapping slightly. It’s ok, don’t worry.

NOTE: This circle-making process takes some time. By the time you are done rolling out the whole batch, the first circles have already been resting about 15 minutes. So at this point set the timer for 15 minutes, get your oven ready and start moving toward the next step.
6. Preheat oven to 500F. OR, if you have a silly oven like mine that will not go above 450F (Ggrrrrr…), set it to 450F and work with it. Place a sheet pan in the oven to warm up a bit then brush it with oil or cornmeal to prevent the dough from sticking. OR, place the dough circles on parchment and slide them onto the baking sheet, fitting as many dough circles in the oven as you can without them touching. Due to the craziness of my oven I am able to fit just two dough circles, which were placed on the parchment.
7. Let the circles bake for 6-8 minutes or until the circles puff up and are lightly browned and, more importantly, look like pita! At 450F, 8 minutes was the perfect amount of time. As soon as one batch is done, remove from the oven and wrap the pitas in a clean but damp tea towel and place them in a brown paper bag. Close the bag for 15 minutes. This keeps them soft(ish) for a day or so. After a day I would transfer them to a plastic bag.

As an experiment, roll out one dough circle a little thicker than 1/8 inch and bake. Whereas the thinner circles puff up like you’ve filled them with helium, you’ll notice the thicker circle doesn’t puff up much at all—if at all. It’s ends up more like a pizza crust. Which tells me why not have this same recipe handy for when you want to make pizza?

Give pita a try and let me know what you think!
Let’s Grow Mushrooms
April 23, 2013 § Leave a comment
As a child I never liked mushrooms. Strike that—I never had the opportunity to eat mushrooms because my parents didn’t like them. Entering adulthood I just stayed away from encounters with mushrooms, picking them off the late-night pizzas ordered with friends at college and steering clear of them on Chinese food take-out menus.
Time has moved on, and so have my taste buds. I now love mushrooms. The earthier the mushroom, the better. Every shopping trip sees me sorting through the bins of different kinds. What a silly kid I was, I think as I marvel at the fresh and dried fungi.
This is the year I stop relying so heavily on store-bought mushrooms and I attempt to grow my own. With the popularity of “grow-your-own” everything—from bean sprouts to dinosaur kale to heirloom tomatoes—several different companies now offer grow-your-own mushroom kits. There are two that I know of:
Back to the Roots: Probably the most well-known of the mushroom-growing kits, the Back to the Roots kit promises to produce up to 1.5 pounds of pearl oyster mushrooms in about 10 days, and can produce at least two crops worth of mushrooms—maybe even three crops. Each box, which is shaped like a cardboard milk carton, contains 100% recycled plant-based waste which performs as the growing medium. Just open the lid, mist with water, and set it by a sunny window. How convenient to grow indoors! www.backtotheroots.com

Back to the Roots Pearl Oyster Mushroom Kit
Happy Cat Farm: This organic seed producer from Southeastern Pennsylvania offers a Shiitake Mushroom Log for outdoor mushroom growing. The log comes inoculated with a strain of mushroom spawn. Given proper shade and moisture, the log will produce shiitake mushrooms every 8-12 weeks for several years. Just place the log right on the ground in a place like a shaded mulched planting bed and keep it moist. If it dries out for more than a week, soak the log overnight in a container of water and it’ll be as good as new. www.happycatorganics.com

Happy Cat Shiitake Mushroom Log
