
Cool Wave Pansies for Cool Weather Color
April 4, 2013 § Leave a comment
My FedEx delivery person is a friendly woman, so chitchat usually ensues during the scrawling of my signature whenever she drops off a package. Last December when making a delivery, she commented on the beautiful pansies in my porch container. Mind you, it was pansies…in December. Not much blooms in December in New England, yet there these pansies were, looking as fresh as daisies in June. “What did you do to them to make them last so long?” she asked.

Cool Wave Blue
I did absolutely nothing to them. These were the new Cool Wave Pansies (obtained as free plant samples from the breeding company), and they can definitely stand the “cool” temperatures. At that time, the temperatures had definitely dipped down into the low 20s for several days and these plants were still looking great.
So, that’s the “Cool” part of the name. The “Wave” part of the name is inspired by the “wave” of vigorously blooming flowers on the plant, similar to what inspired the name of the Wave Petunia (from the same company). These Cool Wave pansies not only take cool temps, they spread themselves along the ground or trail from hanging baskets, creating a wave of color in the process.
My Cool Wave pansies finally succumbed to the cold weather—mostly. They hunkered down under at least a foot of snow on several occasions and, quite honestly, became an unsightly mess. However, in the beginning of March when the snow was finally gone, I noticed that some new growth emerging from the base of each plant and one lone flower that was about to bloom. It was a sad bloom that early on in the season, and it was eventually nipped by (yet another) snow storm. But during this first week of April each plant has about a half inch of new growth sprouting from its base. Resurrection time, indeed.
As luck would have it, I received another delivery of pansies to try out during early spring weather. Those are planted up right beside last season’s pansies. Both are still finding their feet as they settle into spring. In less than a month they should all look fabulous and really fill out the container.
Here are some further details:
Water: They like moist but not wet soil
Fertilizer: Every two weeks with an all-purpose liquid fertilizer
Spacing: Plant 12 inches apart, or for a lush-looking container, plant 3 plants in a 10- to 12-in. diameter container, basket or planter.
Height: They become 6-8 inches tall
Width: They trail to 2 feet in length or more!
Exposure: Full sun, at least 6 hours
Homemade Fig Newtons
April 2, 2013 § 2 Comments
My mother is a sucker for cookies of any kind. And I, being her offspring, somehow inherited that trait. She would bake cookies, yes. But wasn’t it more exciting to experiment with the cookie treasures found on store shelves? Oh, what those Keebler Evles did to us. Chocolate-covered anything went directly into our shopping cart. Those chocolate-covered marshmallow puffs on a graham cracker-like cookie were Mom’s favorite. I also had a soft spot for those styrofoam-like wafer cookies with “vanilla creme” sandwiched inside.
But what I really, really liked were fig newtons.
I contend that I never ate that many fig newtons. Not really. Just one box on average a year. Thing is, I would eat an entire sleeve of them at each sitting. Why else would they put them in a sleeve? Ah, logic of childhood. And to have that metabolism again…
A few years ago when I saw that Joanne Chang’s Flour cookbook had a recipe for fig newtons, I was surprisingly conflicted. I love fig newtons—so wouldn’t gourmet fig newtons be the bomb? But … do I want the ability to create something so cravingly delicious? I mean, I’m not a calorie counter but these could be dangerous.
It took me three years to work up the nerve, but I finally made Flour’s fig newtons this weekend. Homemade fig jam in a shortbread cookie. Yes, they are cravingly delicious. Yes, it requires self control to not eat the entire batch. They’re also nothing like the original fig newton. It’s more of a pastry, really…like a slice of fig pie with a shortbread crust. This is dessert worthy of far more than a sleeve. This is a dessert of adult sophistication.
Homemade Fig Newtons (from Joanne Chang’s Flour Cookbook) 
Fig Jam Filling
2+ pints ripe black mission figs, stems removed and figs quartered (2 is too little, 3 makes slightly too much)
1 orange, peeled, seeded and finely chopped (try to remove the white pith and membrane, too)
110 grams light brown sugar
1 tbs finely grated lemon zest (about 1 lemon)
1 tsp vanilla extract
Shortbread Dough
1 cup (2 sticks/228 grams) unsalted butter at room temp
75 grams granulated sugar
2 tbs confectioners’ sugar
1 egg yolk
1 tsp vanilla extract
140 grams all-purpose flour
120 grams cake flour
1/2 tsp baking powder
1/4 tsp kosher salt
1. Make the filling: Place quartered figs into a medium-sized, non-reactive saucepan. Add orange, brown sugar, lemon zest and salt. Heat on medium to simmer. Reduce to medium-low and simmer, uncovered for 40 minutes. Stir occasionally to prevent sticking. The mixture will turn into something reminiscent of jam. Remove from heat and add the vanilla. Let cool completely and set aside for 2 hours. (You can also refrigerate for up to three days in an airtight container.)
2. Start to make the dough: Using a KitchenAid mixer with a paddle attachment, cream together the butter and both sugars on medium speed until mixture is fluffy. This takes about 5 minutes with stoppages now and then to scrape sides of bowls and the paddle. Once that is fluffy, add in egg yolk and vanilla on medium (stopping and scraping) for another 2 or 3 minutes.
3. Separately combine the two flours, baking powder and salt in a small bowl and sift or mix it together well (I added all into a sieve to sift). Add these dry ingredients into the wet ingredients with the mixer on low, and let it combine for another 15 seconds or so. Do the stop-and-scrape thing again.
4. Cut a large piece of plastic wrap and scoop out the dough onto it. Wrap it up well and press the dough into a 6-in. disk about an inch thick. Pop it in the fridge for at least 30 minutes. At this point you can store it for up to 5 days or freeze it. If in the fridge for a long while, let it come to room temp for about 30 minutes before working it. If in the freezer, let it thaw out in fridge overnight.
5. Heat oven to 350F. While that is heating up, upwrap the dough disk and place onto a large piece of parchment paper. Add a bunch of flour to the parchment and onto a rolling pin, then gently roll the dough into a rectangle about 9 in. by 16 in. and about a 1/4-in. thick. Be careful not to pull or push the dough as this dough tears easily. Fix any tears by pressing together with your fingertips. I found it useful to trim the edges straight (saving the extra dough for treats later!).
6. With the long edge of the dough facing you, spoon the jam lengthwise across the center of the dough, left to right. The width of this jam “river” should be about 2.5 inches. You might not be able to fit all of the jam onto the dough. That’s okay—it’s tasty on toast. Once the jam river is down, you’ll grab the left and right edges of the parchment above the jam river and fold it down overtop of the jam. The dough should fold halfway down over the jam. Do the same with the bottom half of the dough, folding it up. Take pains to make sure these two dough halves meet in the middle, not overlapping and not having a gap. Side by side is what you are looking for. Once that happens, pinch those two dough halves together to seal, as well as the ends. Now, flip the jam-filled dough log over so the seam is on the bottom. Be careful! You may need to finagle it with adding another piece of parchment and rolling it over. Use your brain to figure it out.


Use your brain to figure out how to turn this jam-filled log seam-side down without damaging it.
6 optional. At this point you can wrap it up and refrigerate or place in the freezer.
7. Pop it in the oven for 60 minutes or until golden brown all over. The recipe says 65-70 minutes, but it really depends on your oven. My edges were getting awfully dark, so I opted to take it out 5 minutes early. Let it cool on a wire rack for at least 2 hours—I know, it’s a crazy long time but you want the jam to firm up a bit. Once cool, cut into 1-in. pieces crosswise. Enjoy with hot tea or coffee. And realize things are so much better than when you were a kid.
Plants as Decor
March 28, 2013 § Leave a comment
There is something about plants that freak out people. I think because a plant is a living thing, people are worried about not caring for it. The plant’s death, they think, will haunt them like a ghost.
You know, it’s okay. Plants die. And you know something else? Plants live despite your worry. So go ahead and try to grow some plants, would you?
Try this: Think of plants as living decor. That’s exactly how I am treating my newest set of houseplants. And thanks to a nifty ceramic container sold by Chive.com, I can suspend my succulent garden on the wall, literally creating living art.

Some things to note:
- Succulents don’t need a lot of water. There are no drainage holes in this suspended container, so having plants that don’t need lots of water is a good thing. I won’t need to water this much at all.
- Because the container is horizontal, it was important to add some vertical elements to this “art.” One succulent has a long flowering stem and several others cascade over the container’s side.
- Succulents are fairly small and so are appropriate for such a small container.
- If the plants die, that’s ok. I can put other small plants in it. Or I could put non-plant things in the container, too. It’s decor, fashion, even. And I can change it up whenever I want.
Head on over to the Chive.com site and find a few plant and flower containers that fit your style. Then have some fun choosing otherworldly-looking succulents to pot up at your local farm market or garden center. It’s artwork as unique as any Rothko.
Roasted Eggplant on Toasted Pita
March 26, 2013 § Leave a comment
Ah, an over-stuffed pita sandwich…yum.
Who am I kidding!? When have I ever stuffed a pita and have it NOT break apart on me? Never. Ever. And once it breaks, it’s just all downhill from there. Your fingers get full of hummus. Whatever dressing you’ve put on the sandwich runs down your wrist into your sleeve. It’s no good, stuffing a pita.
Better to use pita like a sandwich bread.
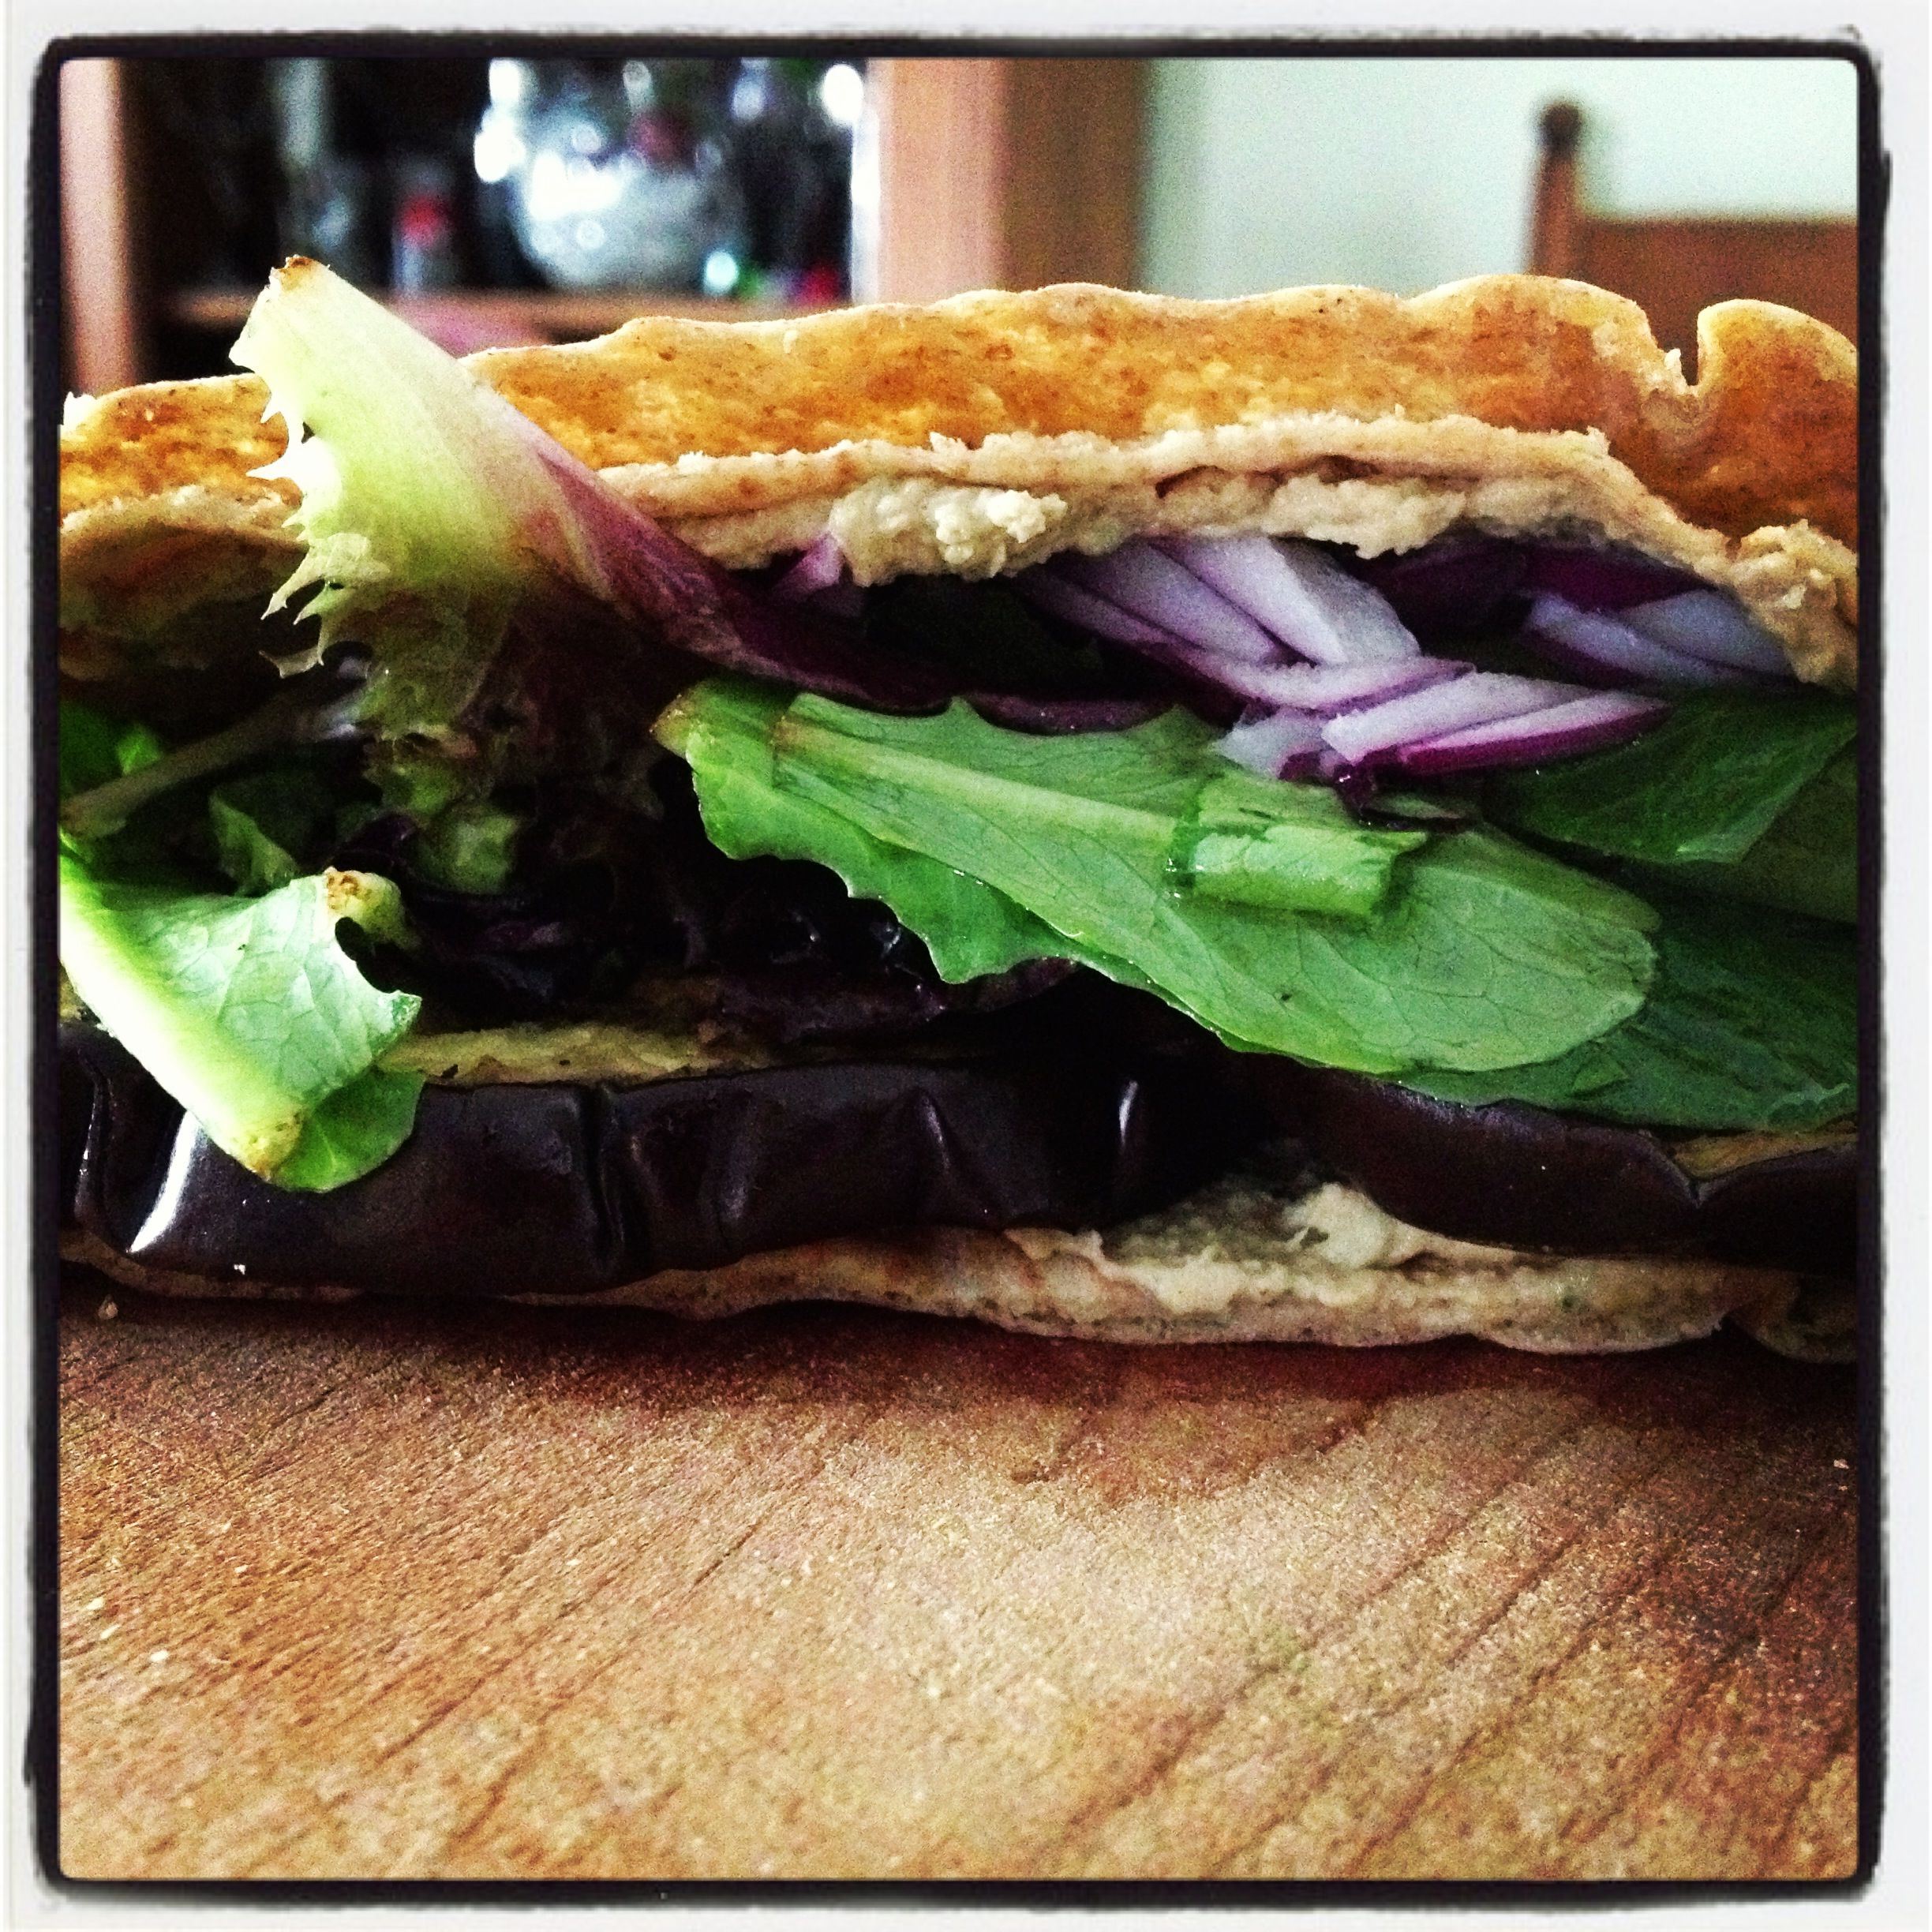
Roasted eggplant and hummus on toasted pita
That’s exactly what I did for lunch yesterday. Toasted pita cut into two half moons, each spread with Red Pepper Hummus, some roasted eggplant, and some greens lightly dressed with Lemony Vinaigrette. After chowing down, I realized the Fiery Onion Relish may have been a fun thing to have as a topping, too.
Maybe I’ll try that for today’s lunch.
Caning a Woven Chair Seat
March 21, 2013 § 2 Comments
I’m a crafty individual. I am able to craft words for a living, and I’m thankful for that. But I really do like to work with my hands. Typing on a keyboard just isn’t hands-on enough for me. Gardening and cooking are hands on, and I love those activities. But I really do enjoy working with furniture.
I have refinished a number of old family pieces myself, and have killed off many a brain cell from working with wood strippers and stains in an enclosed, non-ventilated space. My dream would be to have Norm Abrams workshop with all the woodshop gadgets—and an exhaust system. Not that I know how to use everything in Norm’s arsenal, or that I’ve ever made a dresser in my life. But I’d love to have those tools, turn some chair legs, stain some cabinets and make things that are beautiful and useful.
We don’t have room for a workshop, but in our new house we at least have room for me to work on one furniture-related project. I have one chair missing its cane seat, and I know how to weave it. I picked up the skill more than 20 years ago in an adult-ed class one summer. And it’s a good skill to have.
There are two types of woven cane seats:

Chair with pre-woven cane seat
1) The type with a groove around the seat’s opening into which you secure a pre-woven mat (see above). Easy peasy.

Seat with holes drilled around the opening’s perimeter.
2) The type with holes drilled around the seat’s opening, through which you weave individual lengths of cane (see above).
Luckily, I know how to do both.
We are having a dinner party for six people next Friday, and have six chairs—but only five seats. Time for me to start working on that sixth seat.
Funny thing about this set of chairs—antiques from way before my grandmother’s time—is that five of them have the groove, and just this one has holes drilled through the seat. If you look closely at the above photo you can still see bits of that groove. Who knows why they didn’t just replace the pre-woven mat, but it is what it is.
First step: I work with the vertical strips first. Place one cane strip in each hole, secure with a pin, and thread it through to the opposite side. You can use a really long strip and weave it under and through to the adjacent holes.
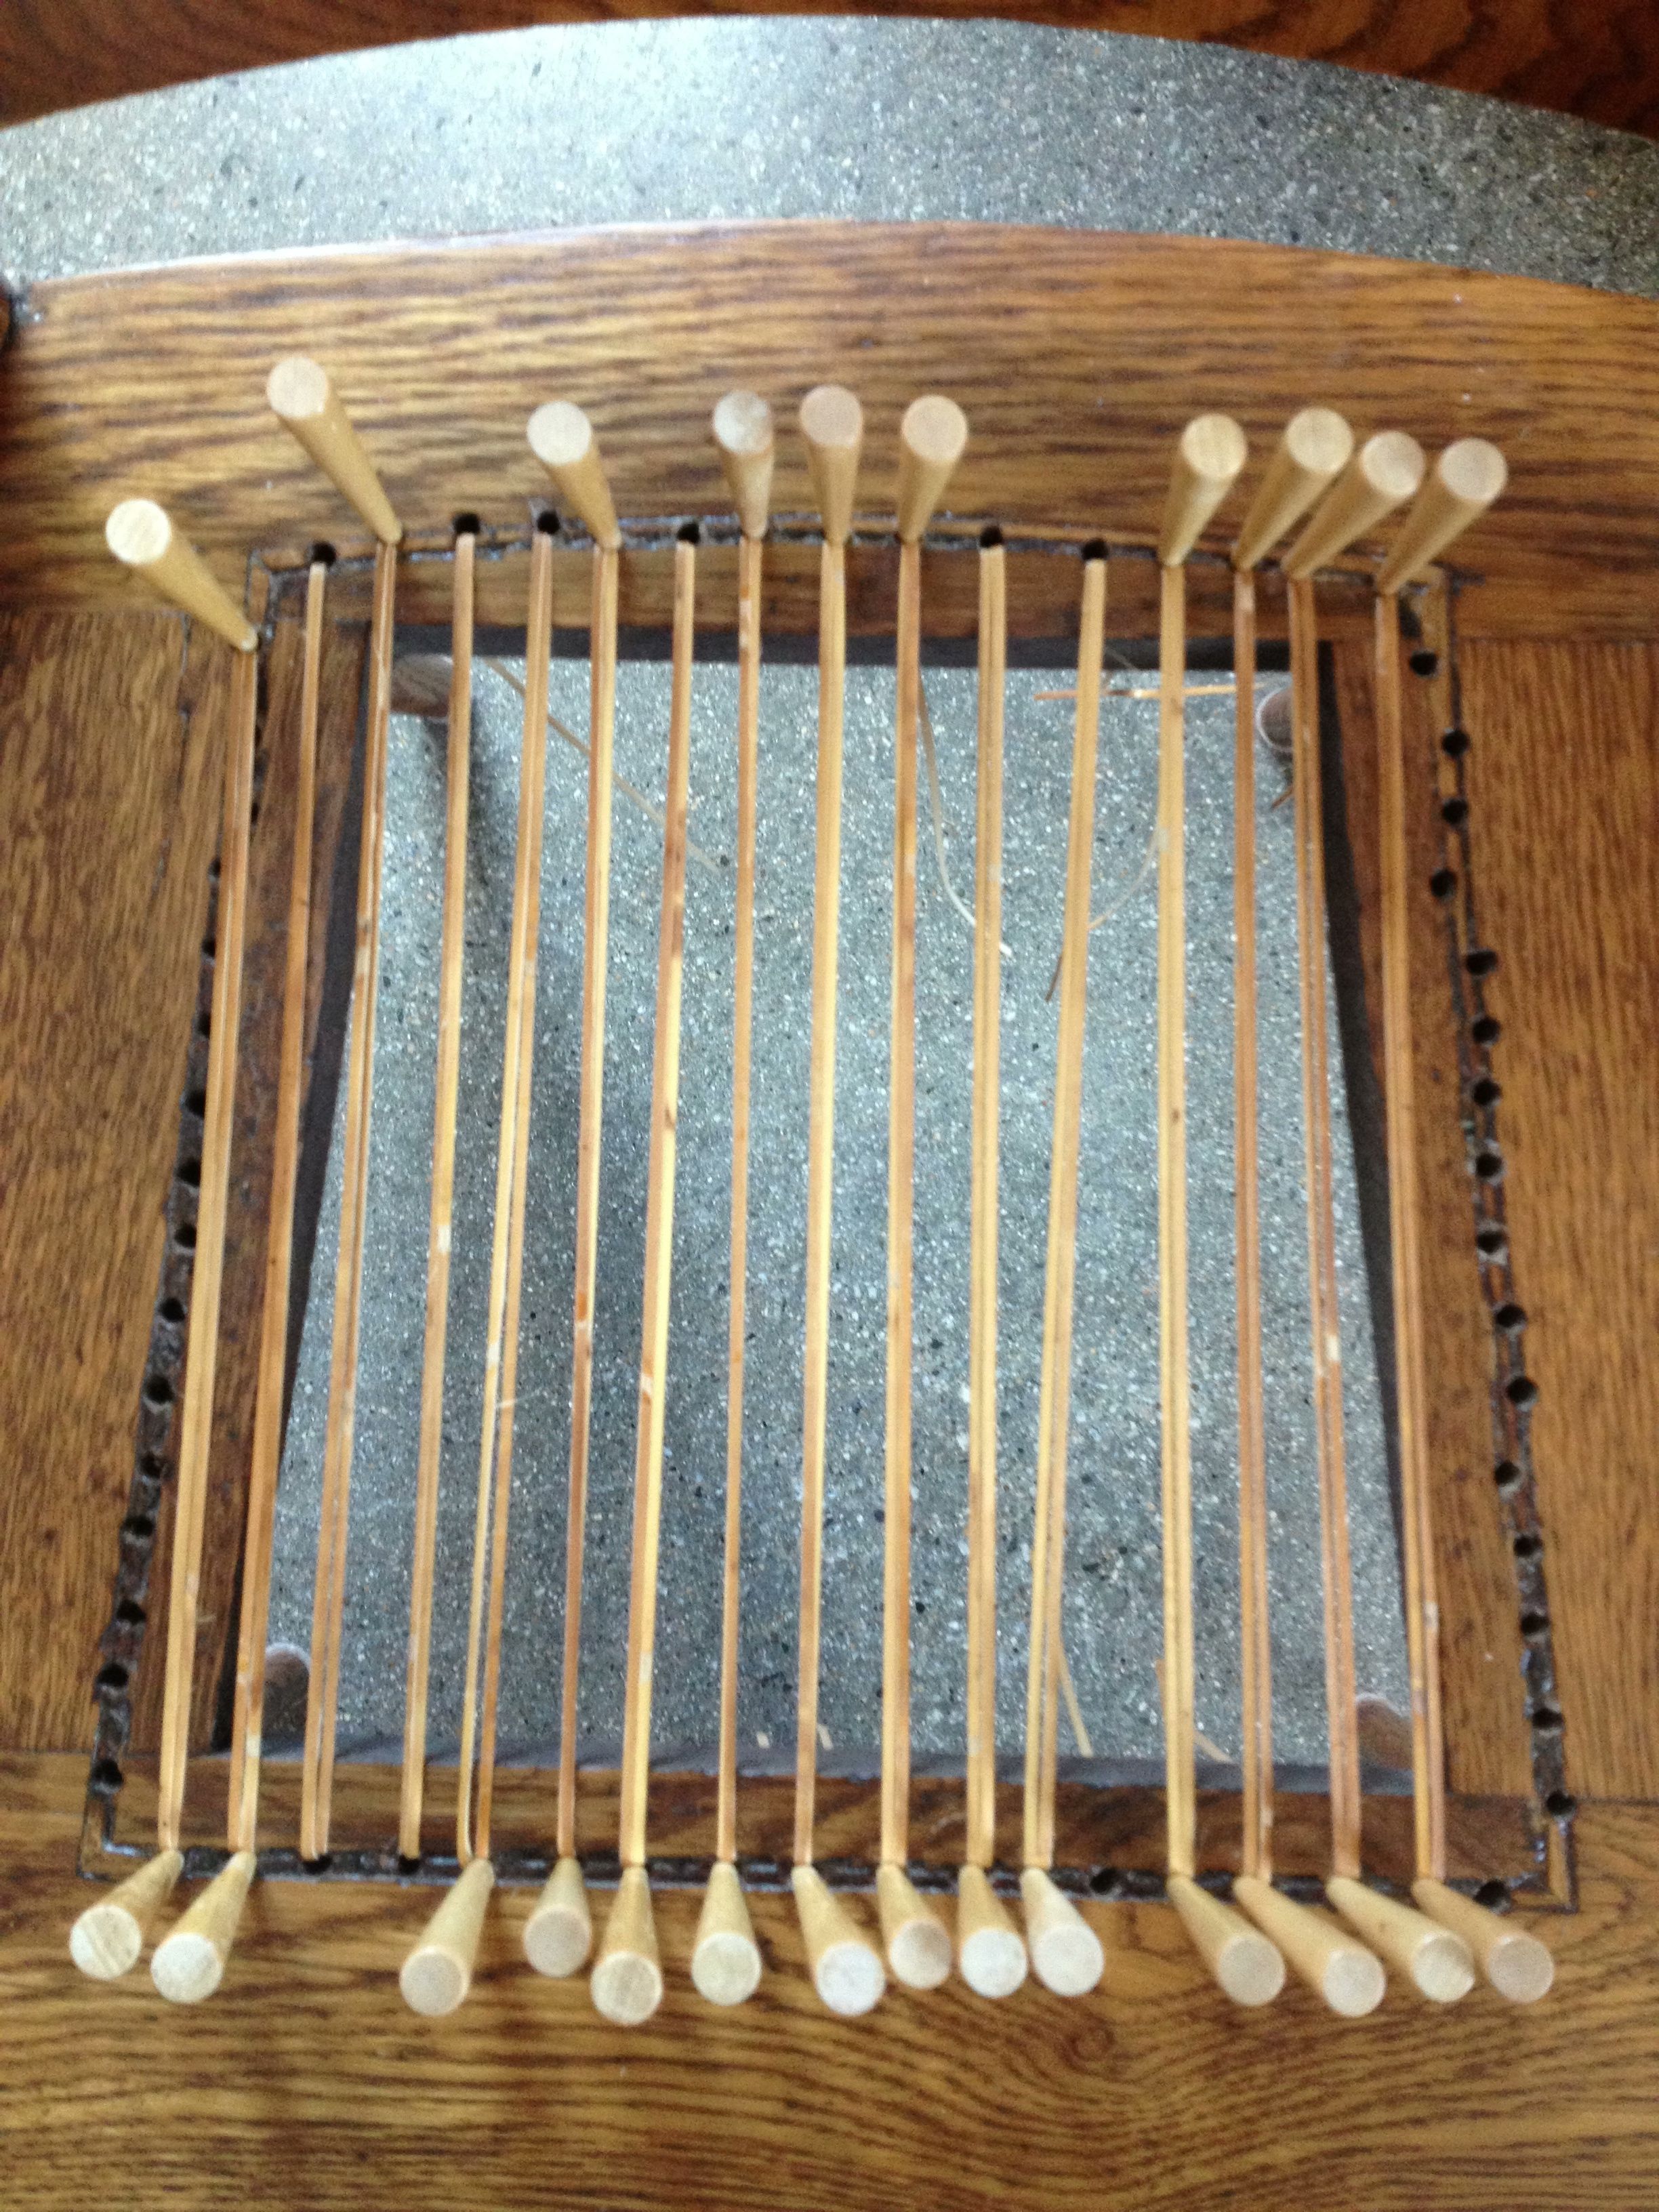
Second step: Repeat, same step so you now have two cane strips in each hole, side by side (see above). What can go wrong? Well, if someone drilled their own darn holes into the seat, sometimes you end up with holes that aren’t quite even. You can see that in the seat above. Don’t worry – it’ll work itself out. You’ll see.
Third step: Now work horizontally. In each hole you’ll insert the end of one strip. Now is where the weaving begins, over and under each of the vertical strips, ending up in the corresponding hole on the other side. To keep things simple, weave each strip the same. That way you’ll easily see if you’ve made an error, if you notice one row looks different from another.

Weaving the first horizontal strip.
Fourth step: You guessed it—you’re now going to put a second horizontal strip in each hole, adjacent to the existing strip, and weave in the OPPOSITE manner of the first weave. This is where it starts getting difficult, mainly when it comes to squeezing the cane under another cane that is flush with the wood of the seat.

Weaving the second horizontal strip, in an opposite manner from the first.
Fifth step: Haven’t gotten that far yet—but I will very soon. This is where the diagonal strips come in, weaving from upper left to lower right AND THEN upper right to lower left. This is where, fingers crossed, that extra hole on the bottom will kinda sorta disappear.
So, what can go wrong?
- The cane needs to remain moist while you weave or it will break. It’s already happened to me a dozen times. Either the cane you weave breaks, or a cane that is already in the seat breaks as you pull the working cane. Sucks.
- You can have a batch of caning that is just ready to split no matter how wet it is. Again, dealing with this RIGHT now.
- Unless you’ve got yourself a nifty work station where you can suspend the chair at chest level, there’s a lot of bending involved. Watch your lower back.
- Your cats can feel like they must be involved, chewing on the ends of the cane strips from below, stealing your pins, and hoping up onto the unfinished seat.
Once you get going, it’s not so bad. Nothing that frequent breaks and a good playlist can’t get you through. Stay tuned for Part II and pics of the finished product. If I don’t finish, someone will have to sit on a folding chair. And that just CANNOT happen at a good dinner party.
If you have a chair that needs caning and have NO idea where to begin (and don’t quite get what they are telling you in those YouTube videos), I’d be happy to explain or help. Just let me know.
Fiery Onion Relish
March 19, 2013 § 1 Comment
The best things in life aren’t necessarily free. They are unexpected. The sudden burst of sunset as the day’s snowstorm pulls away. The street fair you happen upon while heading on an errand. The new friend you meet just randomly. You didn’t mean it, plan it, expect it—and then there it is and you’re incredibly happy with an unexpected smile. Really, it’s the best.
This recipe is like that. Unexpected and happy and the best. Well, maybe not the best best, but the unexpectedness of it pushes it right up there. It’s one of those recipes you find while you are on your way to something else. In this case I was in search of something new to do with sweet potatoes (I don’t want to burn myself out on Sweet Potato Wontons with Cashew Sauce ala Garum Factory). And while flipping through the pages that Sundays at the Moosewood Restaurant’s index told me to search, I just randomly and unexpectedly happened upon this relishy goodness.
I’m a fan of Moosewood’s sauces and relishes. Their Spicy Eggplant Relish (The New Moosewood Cookbook) is a definite go-to for me, as it their savory onion marmalade (Moosewood Restaurant Low-Fat Favorites). This particular recipe was in the cookbook’s chapter on India—not a chapter I’d normally hang out in. Nor is something with the word “fiery” in the title a recipe I’d eagerly seek out. But I saw it, and I made it, using it as a condiment for today’s Roasted Eggplant on Whole Wheat Baguette. And it was unexpectedly delicious.

fiery onion relish
Fiery Onion Relish (from Sundays at the Moosewood Restaurant)
1 cup minced onion (use sweet onion if you want a mellow onion flavor)
4 tsp. lime or lemon juice (I used lime)
1/2 tsp. sweet Hungarian paprika
1/4-1/2 tsp. cayenne
salt to taste
Combine all the ingredients in a small bowl. Stir with a fork to mix well. Set aside for 30 minutes before using to blend flavors. The relish is meant to be spicy hot. The more cayenne, the spicier it is. Yields 1 cup and can be refrigerated for several days.
Apple Hand Pies
March 15, 2013 § 3 Comments
March 14. Or, 3.14. Known throughout the world as Pi Day in honor of that irrational number beginning with 3.14. But wait – wouldn’t they write it 14.3 in Europe?
I would rather consider it Pie Day. It’s the middle of March—we need a good pie this time of year. I’m all for it, quite honestly. Think about it—have you eaten pie since Thanksgiving? I didn’t think so.
I decided to make pie yesterday for Pie Day. But what kind? My go-to pies are those traditional fruity treats—peach, rhubarb, peach rhubarb (see a theme here?), apple, pumpkin. Nah. What about a cream pie? They get runny after a few days. The problem with any of these pies (if there can be a problem with pie) is that they are so darn big for two people (I know, I could invite you over but…). And as much as I’d like to eat an entire pie, I just can’t do it. At the last piece, all old and soggy, I begin to detest it. We must not go there. Can’t ruin pie like that.
So I decided on hand pies: Pies that fit into your hand. Individual servings of pie, all wrapped up in their individual casings. Perfect! Thing is, I’d never made hand pies before. What to do? What to make?
A little Googling got me to the Smitten Kitchen blog and her recipe for Bourbon Peach Hand Pies. Hmmm…peaches. Peaches and bourbon. And, according to the recipe, this dough holds up to the inevitable leaks that result in boiling hot fruit juicy spilling away, while also being light and flaky. Print it up—I’m in.
Alas, Trader Joe had other dessert intentions for me. Not a fresh peach to be found. So apples it was.
Before I get to the recipe, a few notes about it and the resulting pies:
- I used a food processor. When you have one, use it.
- The dough did exactly what she said it would—it held up well, didn’t leak (much) and is tasty and flaky. I’m definitely keeping it in my repertoire. BUT—it’s not really a pie dough. It’s more of a flaky morning pastry. Which is fine, just not very pie-ey.
- I used the same amount of apples as peaches the recipe called for. WAY TOO MUCH. Below is my estimation of half the recipe.
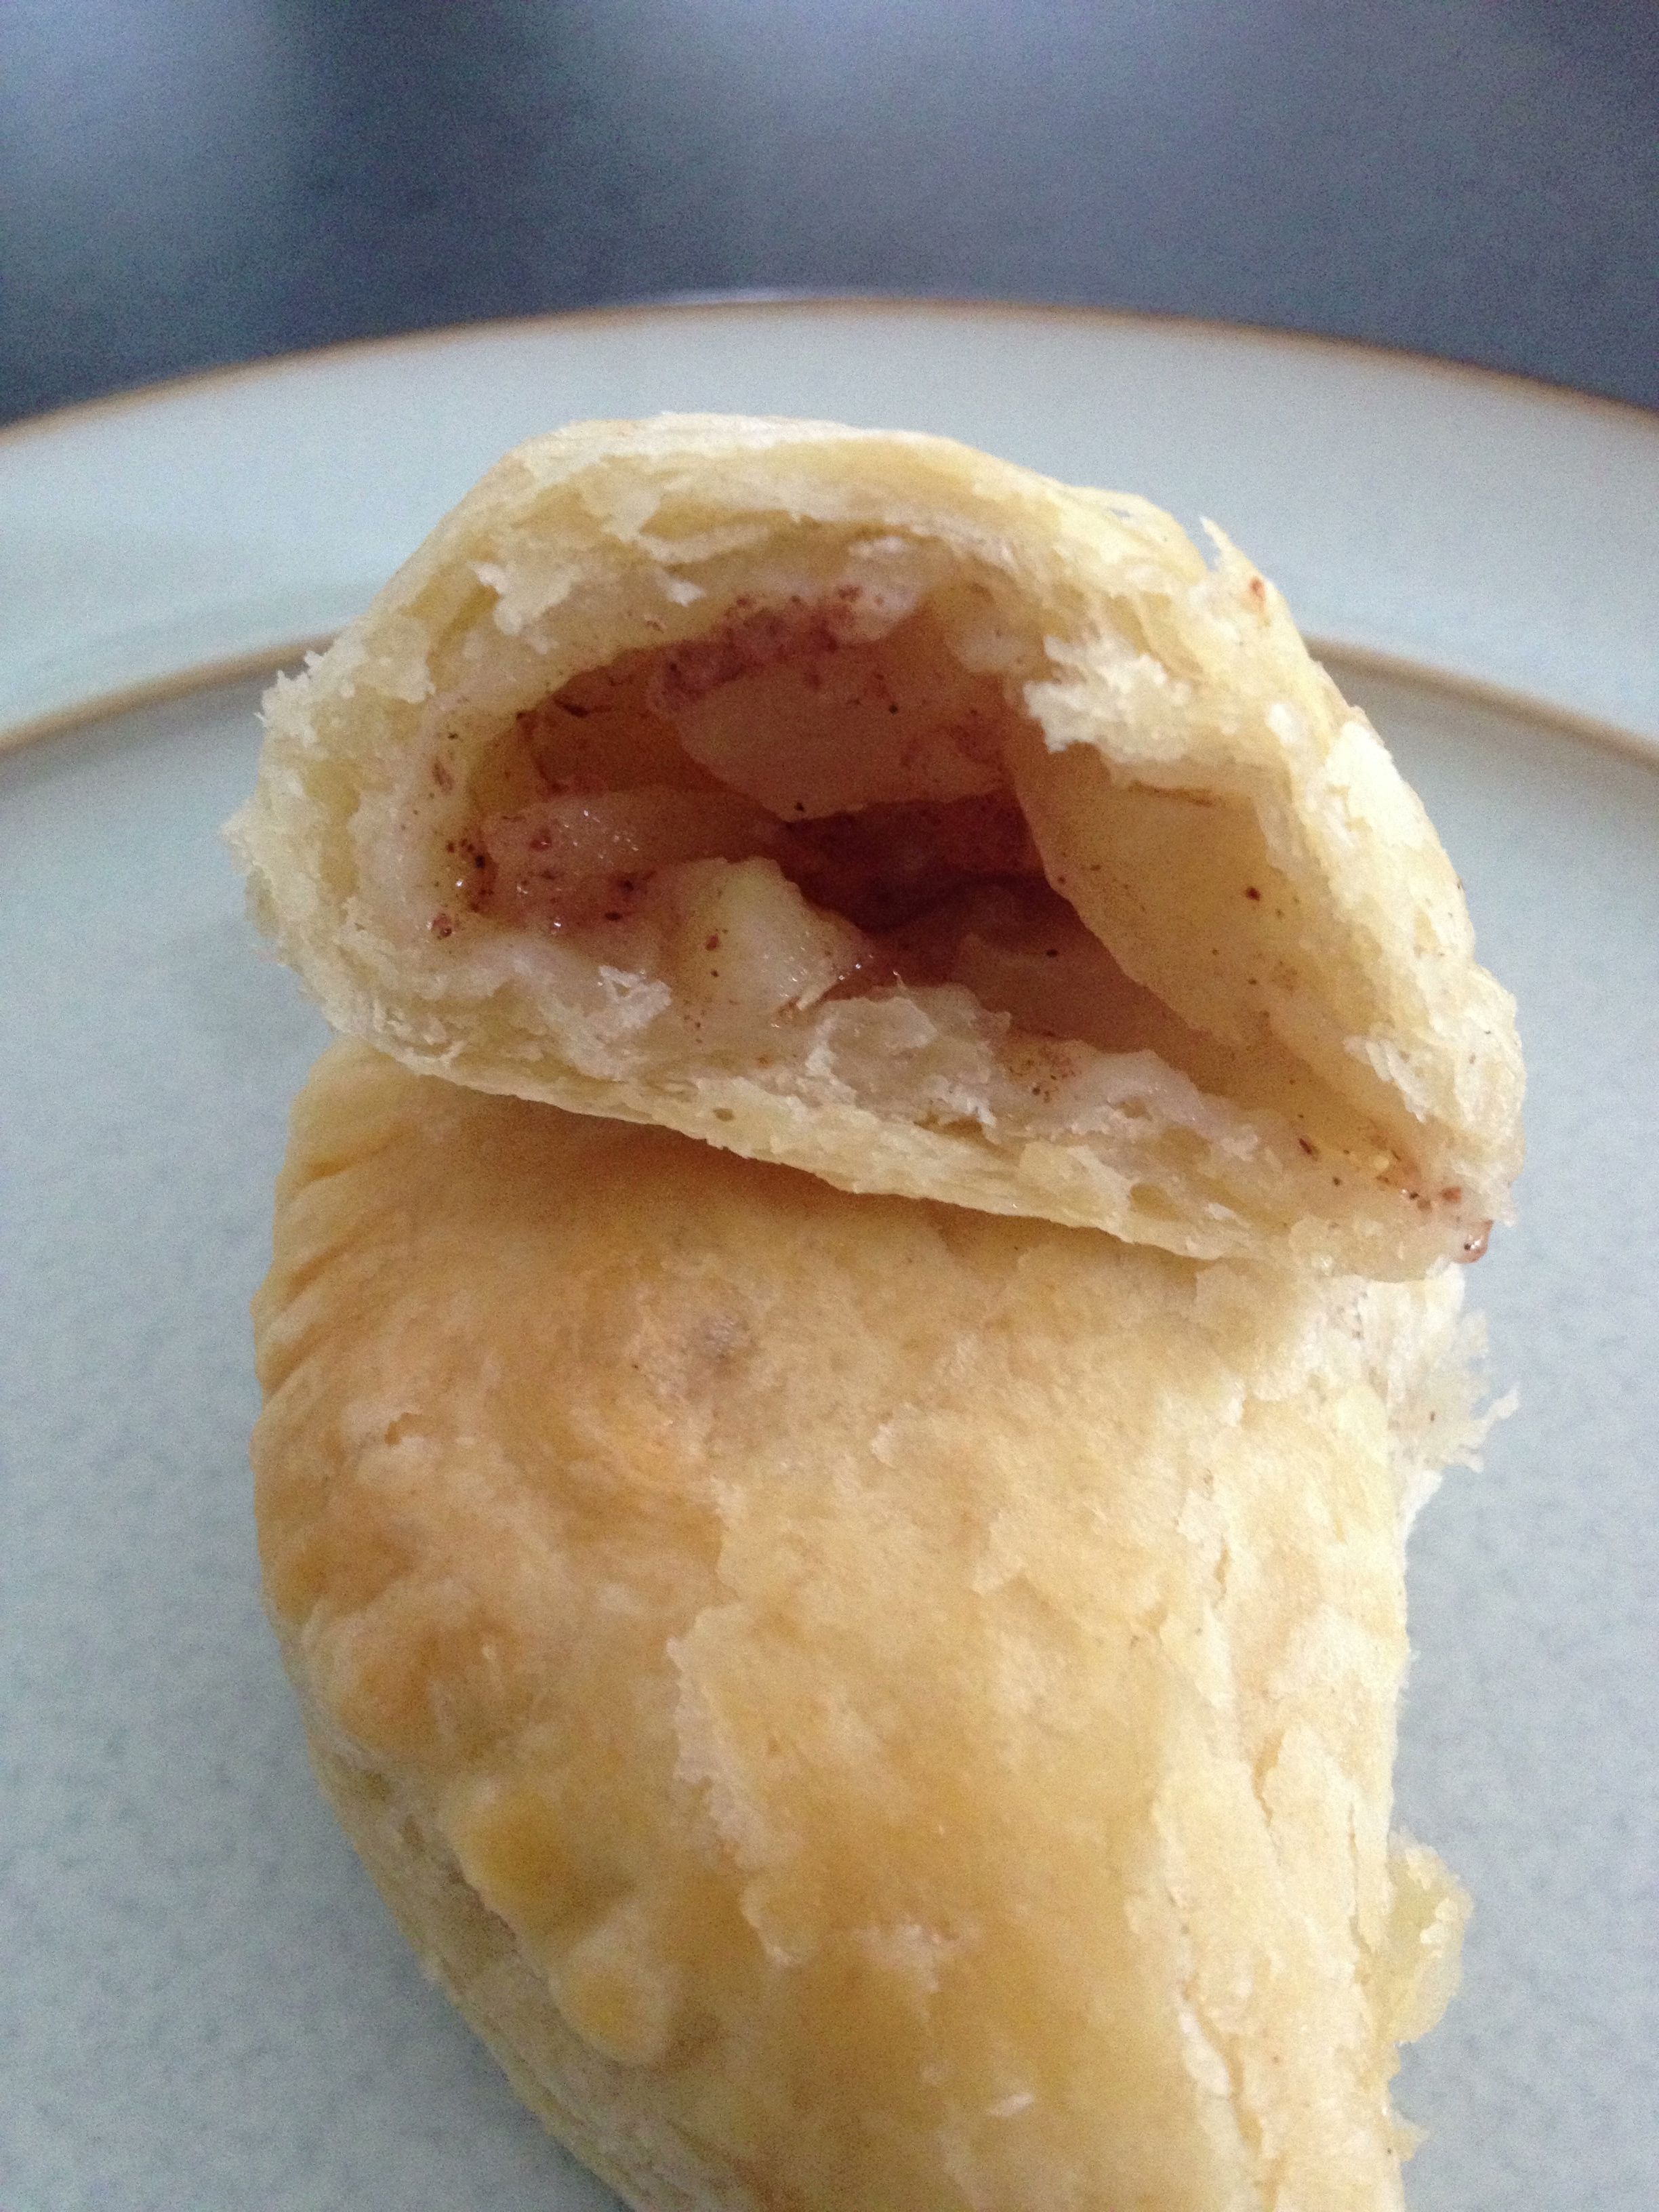
- The filling I made was tasty but 1) wasn’t juicy enough – maybe more sugar or let it sit longer? and 2) not enough of it in the pie. But that’s all I could fit in the dough rounds while still being able to close them securely. I’ll just need to experiment more, won’t I? One thought is to slice the apples (or peaches) lengthwise and layer the slices in the center of the dough rounds.
Apple Hand Pies (adapted from Smitten Kitchen’s Bourbon-Peach Hand Pies)
For the pastry dough:
2 1/2 cups all-purpose flour placed in bowl of food processor and chilled one hour in freezer
1/2 tsp. salt
2 8 oz. sticks unsalted butter, cut into pieces, placed into small bowl and chilled for 1 hour in freezer
1/2 cup sour cream
4 tsp. fresh lemon juice
1/2 cups ice water
For the filling:1 lb. apples, peeled and finely chopped
2 tbs. flour
2-4 tbs. sugar (the more sugar, the juicier it should be if you let it sit awhile)
pinch of salt
1 tsp. lemon zest
To finish:
Egg wash (One egg yolk beaten with 2 tbs. water)
Sanding sugar
1. Remove bowls from freezer. Add salt to the flour and stir. Place flour bowl onto food processor and add in chilled butter. Using 2- to 3-second pulses, whir up the flour and butter until the mixture looks like course corn meal.
2. Combine sour cream, lemon juice and ice water to a small bowl and whisk until combined. Add to flour-butter mixture one half at a time, whirring in between. You’re looking for large clumps to form. Turn clumps out onto a work surface and bring mixture together with your hands to form a big ball. WARNING: Dough will be sticky. Lightly flour your hands before touching dough. Wrap dough ball in plastic wrap and refrigerate one hour. (At this point dough can be frozen up to one month. If doing so, wrap in something a bit more freezer proof.)
3. Divide dough ball into quarters. Work with one quarter at a time, leaving the others in the fridge while you work. Lightly flour the work surface (keep that flour handy). Roll the dough into a 1/8-in. thickness. Using something round with a 4.5-inch diameter, cut rounds out of the dough. NOTE: Only thing I had available was a 1-quart plastic container similar to the kind you’d get filled with potato salad at a deli. It’s about 4 inches, but it works. Use what you have on hand. Transfer these dough rounds onto a parchment paper-lined baking sheet and pop into the fridge. Repeat with other dough balls, filling up the parchment, and layering additional parchment on top of the previous. Keep these rounds chilled for 30 min. or more.

4. Filling: While the dough rounds chill, add the finely chopped apple to a large bowl. Add in the flour, sugar, pinch of salt and lemon zest. Let sit until the dough rounds are ready – this will let the sugars produce some juicy apple goodness—something I didn’t do this time around.
5. Assembly: Remove chilled dough from fridge and let them sit for 2-3 minutes to get a bit more workable. Spoon in about 1-2 tbs. of the apple mixture into the center of the round (more for larger circles, less for smaller). Brush the dough edges with water and fold one half over to meet the other to form a half circle. Seal it lightly with your thumb, then press closed with the back of a fork. Place each little pie back onto the parchment and return to the fridge for another 30 minutes.
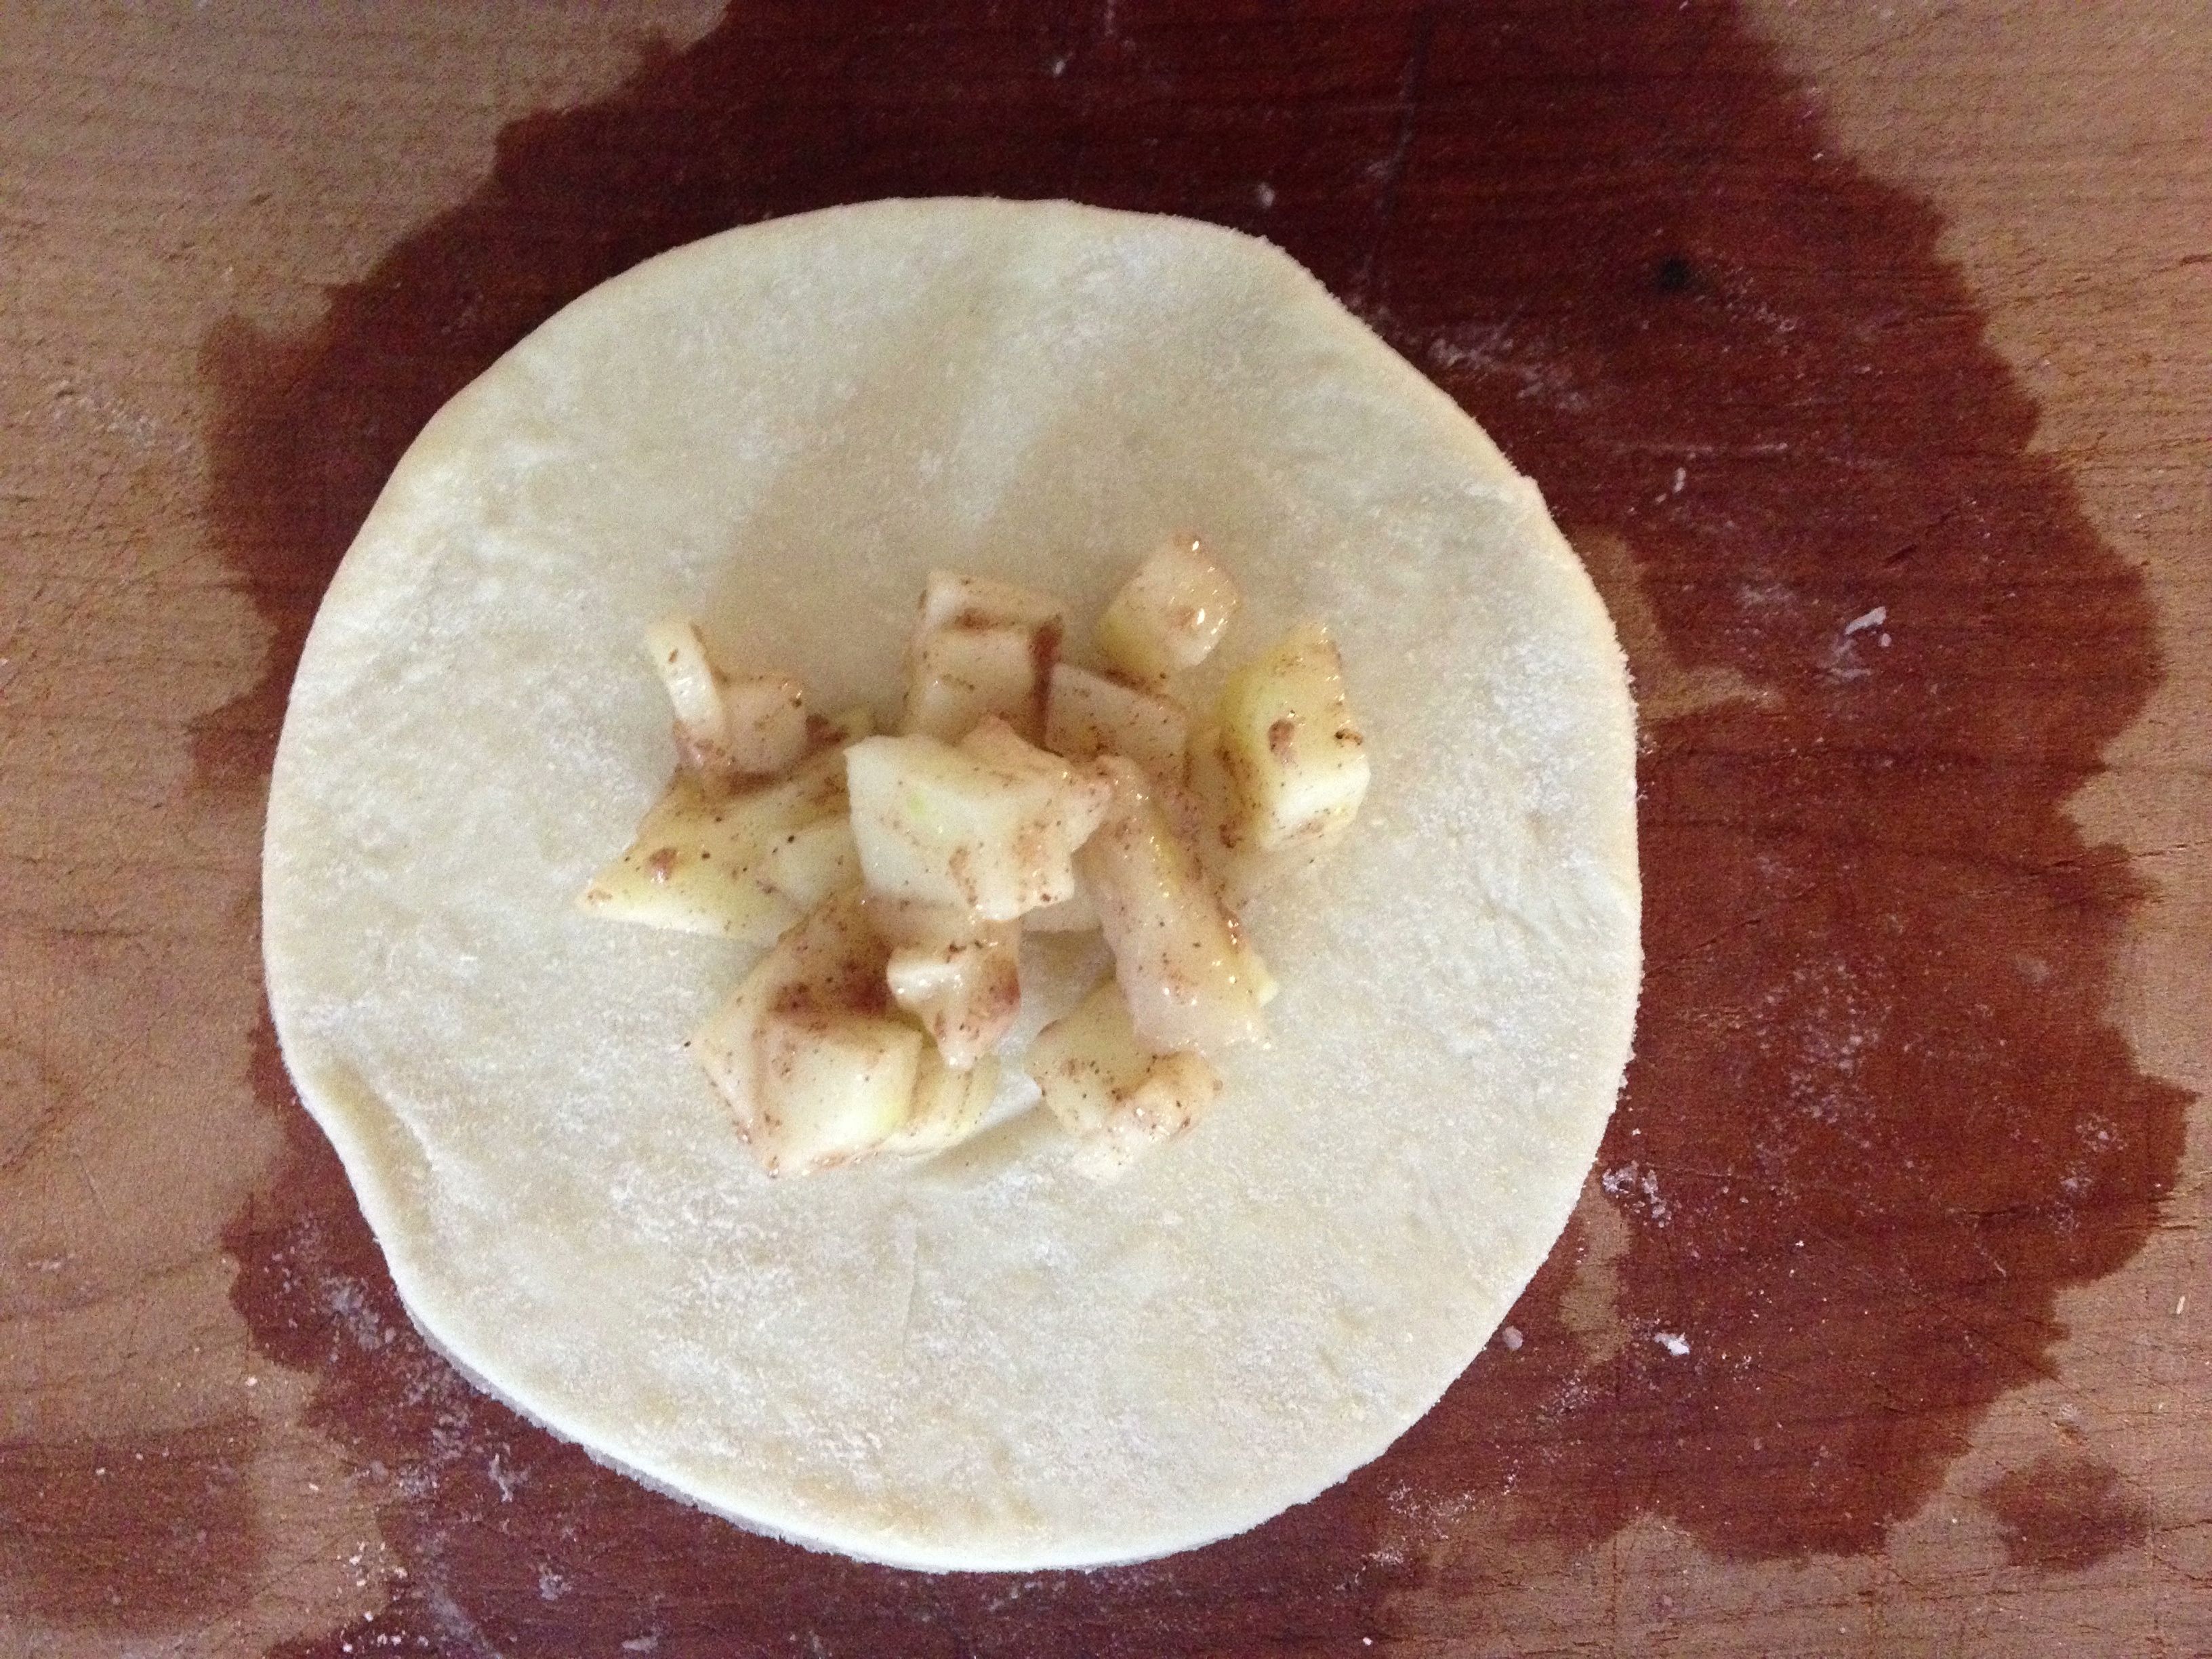

ANOTHER OPTION: Place a slightly larger amount of apple mixture onto the center of one round and place another round on top, stretching the top dough a bit so it meets the bottom’s edges. Seal as before. This makes a fun UFO-shaped pie.
6. Heat oven to 375. Removing the pies from the fridge, give each one a small slice of poke with a fork (to let steam out). Lightly brush each pie with the egg wash and sprinkle with sanding sugar (optional of course but yummy). Bake until the pies are golden brown – 20 to 23 minutes. Remove and let cool.


If you serve them still slightly warm, you’ll want to serve with vanilla ice cream. Otherwise, these are excellent pastries to have on hand for breakfast.
Seriously bummed that Trader Joe’s didn’t have peaches. What would you fill these with? Any suggestions for other dough that might be more like a traditional pie?
Eggplant Rollatini
March 12, 2013 § 1 Comment
Sometimes you have to shop for dinner. Sometimes it’s in your fridge or freezer, in bits and pieces, just waiting for you to assemble.
That’s what happened with last night’s dinner—Eggplant Rollatini. Open the fridge and there’s an eggplant needing to be used ASAP. Open the freezer and there’s a cup or so of frozen ricotta and chard lasagna filling left over from last fall’s Roasted Vegetable Lasagna making festivities. And there’s a large can of whole peeled tomatoes in the cabinet.
Get out the mandolin, folks—it’s rollatini-making time. And having never made rollatini before, this was all off the cuff.
Eggplant Rollatini

Eggplant Rollatini
- olive oil (to be used throughout recipe)
- kosher salt and pepper to taste (to be used throughout recipe)
- 3-4 cloves garlic, depending on size, smashed and minced
- 1 28-oz. can whole peeled tomatoes
- 1-2 tsp. Italian seasoning
- 1 tsp. sugar
- 1 medium-large eggplant, sliced lengthwise to about 1/4-in. thickness with a mandolin (be careful!)
- Chard-ricotta mix from Roasted Vegetable Lasagna, or about 1-1.25 cups plain ricotta for this recipe
- About 1/ cup Parmesan cheese to sprinkle
1. Turn oven to 400F.
2. Add 1 tbs. olive oil to pan on medium heat. Add garlic and let it go until it becomes fragrant. Slowly pour in the liquid from the canned tomatoes. Take out each tomato from the can and gently mush and tear it into pieces with one hand and add to the pan. Messy, but it’s the best and easiest way to do it. Add in Italian seasoning, sugar (really, it helps brighten the sauce, trust me) and a large pinch of kosher salt.
3. The sauce will really be bubbling at this point. Turn it WAY down and let it simmer gently. Add in a turn or two from the pepper mill. Continue to simmer until it thickens a bit, about 20-30 minutes, just about until you’re ready to assemble the rollatini.
4. Meanwhile, slice eggplant. Place each slice on a sheet pan, and pour a bit of olive oil (not a lot, not a little) over each slice, using a brush to spread the oil over each slice. Sprinkle kosher salt and pepper on each slice. No need to do both sides, one side will do. Pop the sheet pan in the oven and bake for 15-16 minutes, or until the firmness of the eggplant is gone but the eggplant has not become wicked soft. When done, take out and let cool enough to handle, about 5-8 minutes. Keep oven on!

Eggplant, thinly sliced and baked.
5. Working with one slice of eggplant at a time, spread about a tablespoon of the ricotta mixture over the surface of the eggplant slice. You don’t want it too thick or you won’t be able to roll it very well. Starting at the narrow end of the eggplant slice, roll it into a “cigarello,” or, as I would rather imagine it, roll it up like you’d roll your yoga mat. Set aside. Continue with the next slice until you either run out of ricotta or eggplant.

Eggplant slices spread with ricotta mixture and rolled.
6. Lay down about 1/4 cup of the tomato sauce in the bottom of an 8×8 baking dish. Place eggplant rolls in dish on their sides (not standing up). Fit as many as you can in there. When done, generously spoon sauce over the surface—but you don’t want it soaking wet, either. Find the happy medium. When done, sprinkle a coating of grated Parmesan on top and cover with foil.

Lay the rollatinis side by side in an 8×8 baking dish

Spoon sauce over top and sprinkle with Parmesan cheese
7. Pop back into the 400F oven for about 20 minutes. Remove foil and bake another 5 minutes or so. Remove and let cool for 5 minutes before digging in.
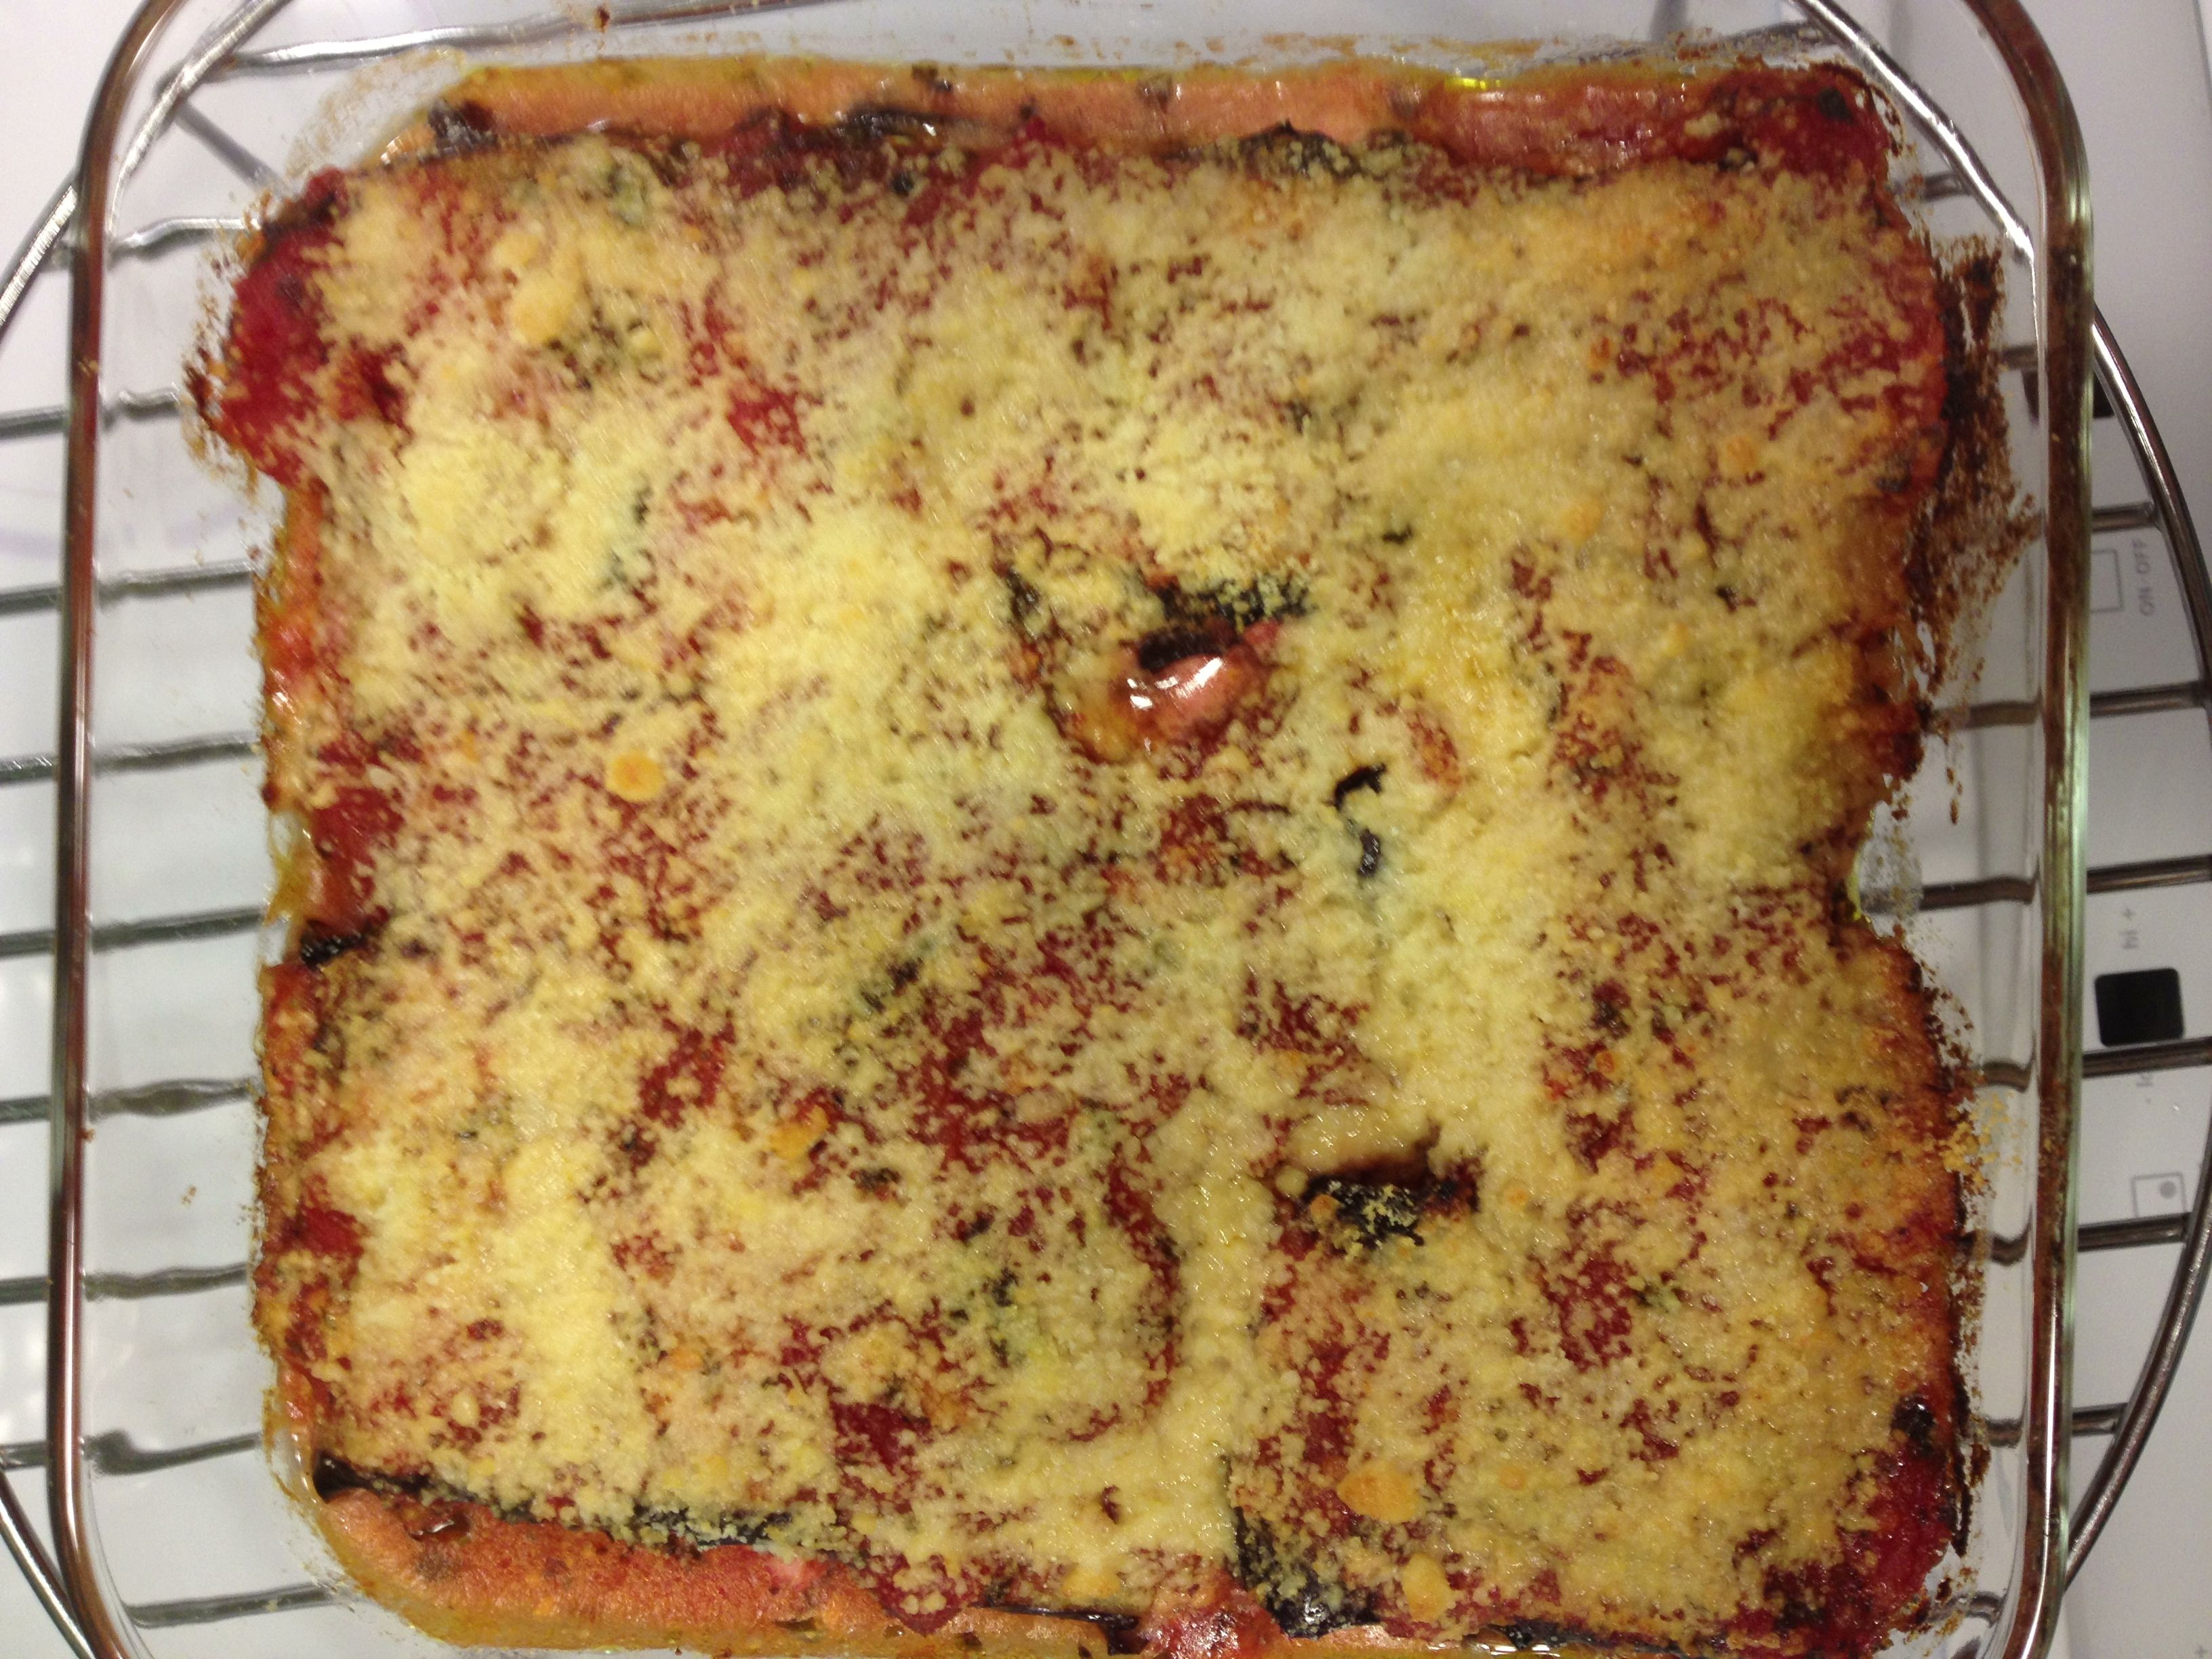
Bake for a total of about 20-25 minutes.
Have something like this in your repertoire? Let me know your version in the comments section.
Hellebores for an Early Spring Garden
March 7, 2013 § Leave a comment
I made a spontaneous weekend trip to the Philadelphia Flower Show last weekend. What you usually see at early spring flower shows are flowers and shrubs and even trees that have been heated and pampered to produce blooms long before they’d do so with Mother Nature’s guidance alone. That’s what people come for—to be inspired by what the warmer weather promises.
Flower Show visitors don’t have to wait for long to see a few of the plants that were in full bloom indoors. The hellebore (Helleborus) is a good example of that.
Hellebores bloom in late winter and early spring—some varieties as early as January. There’s been a resurgence in interest in this perennial plant over the last decade or so, and plant breeders have introduced all sorts of cool flower colors and foliage colors. The hellebore’s leaves, by the way, are evergreen – they won’t die back in winter, which is another cool thing about this plant.

Helleborus ‘HGC Mahogany Snow’ planted en masse at the Philadelphia Flower Show
Take Helleborus ‘HGC Mahongany Snow’, for instance. This variety can begin blooming as early as January in some areas. And the blooms are beautiful—dusty rose buds open into creamy white flowers. The leaves are chocolatey in color and the flower stems reddish. The whole package—leaves, stems and blooms—gives the garden some low-key color at a low-key time of the year. And they’re astounding planted en masse like this.
There’s been a push in recent years to sell hellebores as potted plants in the late fall through winter. Give them as Thanksgiving and Christmas gifts, that sort of thing. Think of them as temporary blooming houseplants biding their time until you can plant them outdoors in spring. It’s a good idea. In fact, I have had a potted hellebore ‘Jacob’ in my office window since late December. It’s looking a little weak right now, but that’s ok—it’ll be heading outside in a few short weeks.
Why you might enjoy hellebores:
- Blooms way early in the year, just when your garden needs it!
- Come in some great colors—both flower and leaf color
- Perennials, so you’ll have them year after year, and they’ll get bigger each year
- Evergreen foliage for year-round color
- A good choice for your partial shade garden, under bushes, and so forth
- Deer resistant—bonus!
- Nice as winter houseplants—another bonus!
Have you tried hellebores? How have they held up in your garden? Leave a comment and let me know.
Wheat Berry and Bean Salad
March 6, 2013 § 2 Comments
The only on-the-package-recipe you should ever make is Nestle Toll House Chocolate Chip Cookies. Truly. It’s a proven recipe and makes a darned-good cookie, a cookie you will experience from the first years of your life to your last. It’ll even be served at your wake. Every other recipe found on a package—whether it’s a box of Velveeta or a fancy grain—should be embarked upon with hesitation and doubt. A dingy full of doubt.
I love what wheat berries do for me for breakfast. I’ve also included them in bread recipes and sprinkled them on a green salad. So when I grabbed my bag of Bob’s Red Mill Wheat Berries and noticed the Wheat Berry & White Been Salad recipe on the back I thought, “Why not try something new today?” “New,” I am reminded now, means a learning experience and not necessarily a guarantee of something awesome.
The salad is simple—wheat berries, white beans (I used chickpeas I had on hand), scallions, celery and tomato with a vinaigrette. The vinaigrette is what I regret here. Following the recipe as I did, the ratio of vinaigrette to salad ingredients was way too much. It was more of a thick soup than a salad because it was so heavily dressed. I had to fill out the salad somehow.

A little too overdressed for my liking.
Reconstructive salad making ensued. Wheat berries went from 1 cup to about 1 3/4 cup (all of what I had just cooked). I had no more chick peas, and no more lentils, which are my usual go-to filler for salads like this. Bulgar would have been too fine of a texture to add into the salad. In the end I cooked up a batch of black beans and added to the soupy salad until it was soupy no more. I must have added close to 2 cups, no kidding.
Wheat Berry and Bean Salad (adapted from Bob’s Red Mill) 
Salad:
1 cup cooked wheat berries
1 cup chick peas
2 cups black beans (or some sort of bean or lentil)
1/2 cup scallions, chopped
1/2 cup celery, diced (makes for a nice crunch)
1/2 cup cherry tomatoes, quartered
Vinaigrette:1/2 cup olive oil
2 tbs. lemon juice (about 1/2 lemon)
2 tbs. white wine vinegar
2 tbs. chopped parsley
1 tbs. honey mustard
2 tbs. minced shallot
1/4 tsp. kosher salt
1/4. tsp. black pepper (or 5-6 grinds from a pepper mill)
1. Mix the vinaigrette ingredients together. I chose to emulsify with an immersion blender. I then added the vinaigrette to the bottom of a large bowl.

wheat berry salad vinaigrette
2. Add the salad ingredients to the vinaigrette and combine. If it looks overdressed to you, add something to it! Soggy salad is not something you should put up with, really and truly.
3. The recipe says to chill overnight to blend the flavors. Perhaps over that period the beans and berries are supposed to soak up some of the vinaigrette? I didn’t want to leave it to chance. Serving suggestion is to serve on a bed of leaf lettuce. Again, I didn’t want my greens to be soaked, so the additional beans were necessary.
Eat and enjoy—and let me know what you think about the amount of vinaigrette here, please! Too much? Not enough? Just right in a Mamma Bear sort of way? Comments are not just appreciated—they’re anxiously awaited!
