
A Healthy, Fruit-filled Cookie
June 11, 2013 § 1 Comment
Oh, and chocolate, too. There’s dark chocolate in these healthy cookies.
I was recently charged with finding a healthy cookie recipe for a gathering of friends. Healthy, but tasty. And a real cookie, not something that was just pretending to be a treat, something “cookie” in name only. And usually when I try to find a healthy alternative to a traditionally loaded-with-bad-stuff recipe, I turn to The Moosewood Cookbook. In this case, the Moosewood let me down.
But not Ellie Krieger. Ellie had (still has?) a Food Network show, Healthy Appetite, all about healthy cooking. When the Moosewood lets me down or becomes a little too earthy-crunchy-granola-ey, I turn to Ellie. And in this healthy cookie recipes, she totally did not disappoint.
First, I’m not a dietician. Is this recipe healthy? I’m taking Ellie’s word on it. But I can tell you it’s not loaded with a ton of butter, shortening, oil, cholesterol, and sugar. Some, but not a lot. There’s applesauce! There’s egg whites! Plus it has dried fruit – and I think we all agree fruit is a pretty good-for-you thing to eat. As for the dark chocolate, I think we’ve all heard reports about how it’s actually a good thing in small amounts.
Not only are they healthy, they are incredibly tasty. Incredibly. I’ve made four batches in the last week and there’s more on the way.
Healthy Cookies (aka Kitchen Sink Cookies) via Ellie Krieger’s Healthy Appetite
Note: The recipe says it makes 18-20 cookies. Don’t believe it.
Ingredients
2 tbs unsalted butter, softened
2 tbs canola oil
1/3 cup light brown sugar
1/4 cup applesauce
1 egg white
1 tsp vanilla
2/3 cup whole-wheat pastry flour
1/2 cup oatmeal
1/4 tsp salt
1/4 tsp ground cinnamon
1/2 cup chopped dried fruit (Ellie recommends cherries and apricots. I used a dried berry blend from Trader Joe’s)
1/4 cup lightly toasted walnuts
2 oz. dark chocolate, cut into chunks
1. Preheat oven to 375 F.
2. Combine butter, oil and brown sugar in the bowl of a mixer. Mix on high speed. Stop occasionally to scrape down bowl. Mix until mixture is light and fluffy, about 2 minutes. Add applesauce, egg white and vanilla, mix to combine. Add flour, oatmeal, salt and cinnamon and mix just until just combined. Add dried fruit, walnuts and chocolate and mix to combine.
3. Prepare a baking sheet by spraying with a light cooking spray OR use sheets of parchment. Scoop out 1 tbs of cookie dough at a time and roll into balls. (I used a small-sized ice cream scoop that’s a tad bit bigger than 1 tbs). Place 2-inches apart on the baking sheet. Press cookies down with the palm of your hand to flatten slightly (less butter = less spread). I advise you flour your palm a bit because the dough will stick.
4. Bake for 12 to 14 minutes, or until lightly browned but still soft. Remove and cool on racks.
You’ll find that 1 tbs doesn’t make a big enough cookie. You’ll want HUGE cookies because they are incredibly good. But then, the larger the healthy cookie the less healthy it is, right? Let’s just disregard that logic for now.
Eggplant Rollatini
March 12, 2013 § 1 Comment
Sometimes you have to shop for dinner. Sometimes it’s in your fridge or freezer, in bits and pieces, just waiting for you to assemble.
That’s what happened with last night’s dinner—Eggplant Rollatini. Open the fridge and there’s an eggplant needing to be used ASAP. Open the freezer and there’s a cup or so of frozen ricotta and chard lasagna filling left over from last fall’s Roasted Vegetable Lasagna making festivities. And there’s a large can of whole peeled tomatoes in the cabinet.
Get out the mandolin, folks—it’s rollatini-making time. And having never made rollatini before, this was all off the cuff.
Eggplant Rollatini

Eggplant Rollatini
- olive oil (to be used throughout recipe)
- kosher salt and pepper to taste (to be used throughout recipe)
- 3-4 cloves garlic, depending on size, smashed and minced
- 1 28-oz. can whole peeled tomatoes
- 1-2 tsp. Italian seasoning
- 1 tsp. sugar
- 1 medium-large eggplant, sliced lengthwise to about 1/4-in. thickness with a mandolin (be careful!)
- Chard-ricotta mix from Roasted Vegetable Lasagna, or about 1-1.25 cups plain ricotta for this recipe
- About 1/ cup Parmesan cheese to sprinkle
1. Turn oven to 400F.
2. Add 1 tbs. olive oil to pan on medium heat. Add garlic and let it go until it becomes fragrant. Slowly pour in the liquid from the canned tomatoes. Take out each tomato from the can and gently mush and tear it into pieces with one hand and add to the pan. Messy, but it’s the best and easiest way to do it. Add in Italian seasoning, sugar (really, it helps brighten the sauce, trust me) and a large pinch of kosher salt.
3. The sauce will really be bubbling at this point. Turn it WAY down and let it simmer gently. Add in a turn or two from the pepper mill. Continue to simmer until it thickens a bit, about 20-30 minutes, just about until you’re ready to assemble the rollatini.
4. Meanwhile, slice eggplant. Place each slice on a sheet pan, and pour a bit of olive oil (not a lot, not a little) over each slice, using a brush to spread the oil over each slice. Sprinkle kosher salt and pepper on each slice. No need to do both sides, one side will do. Pop the sheet pan in the oven and bake for 15-16 minutes, or until the firmness of the eggplant is gone but the eggplant has not become wicked soft. When done, take out and let cool enough to handle, about 5-8 minutes. Keep oven on!

Eggplant, thinly sliced and baked.
5. Working with one slice of eggplant at a time, spread about a tablespoon of the ricotta mixture over the surface of the eggplant slice. You don’t want it too thick or you won’t be able to roll it very well. Starting at the narrow end of the eggplant slice, roll it into a “cigarello,” or, as I would rather imagine it, roll it up like you’d roll your yoga mat. Set aside. Continue with the next slice until you either run out of ricotta or eggplant.
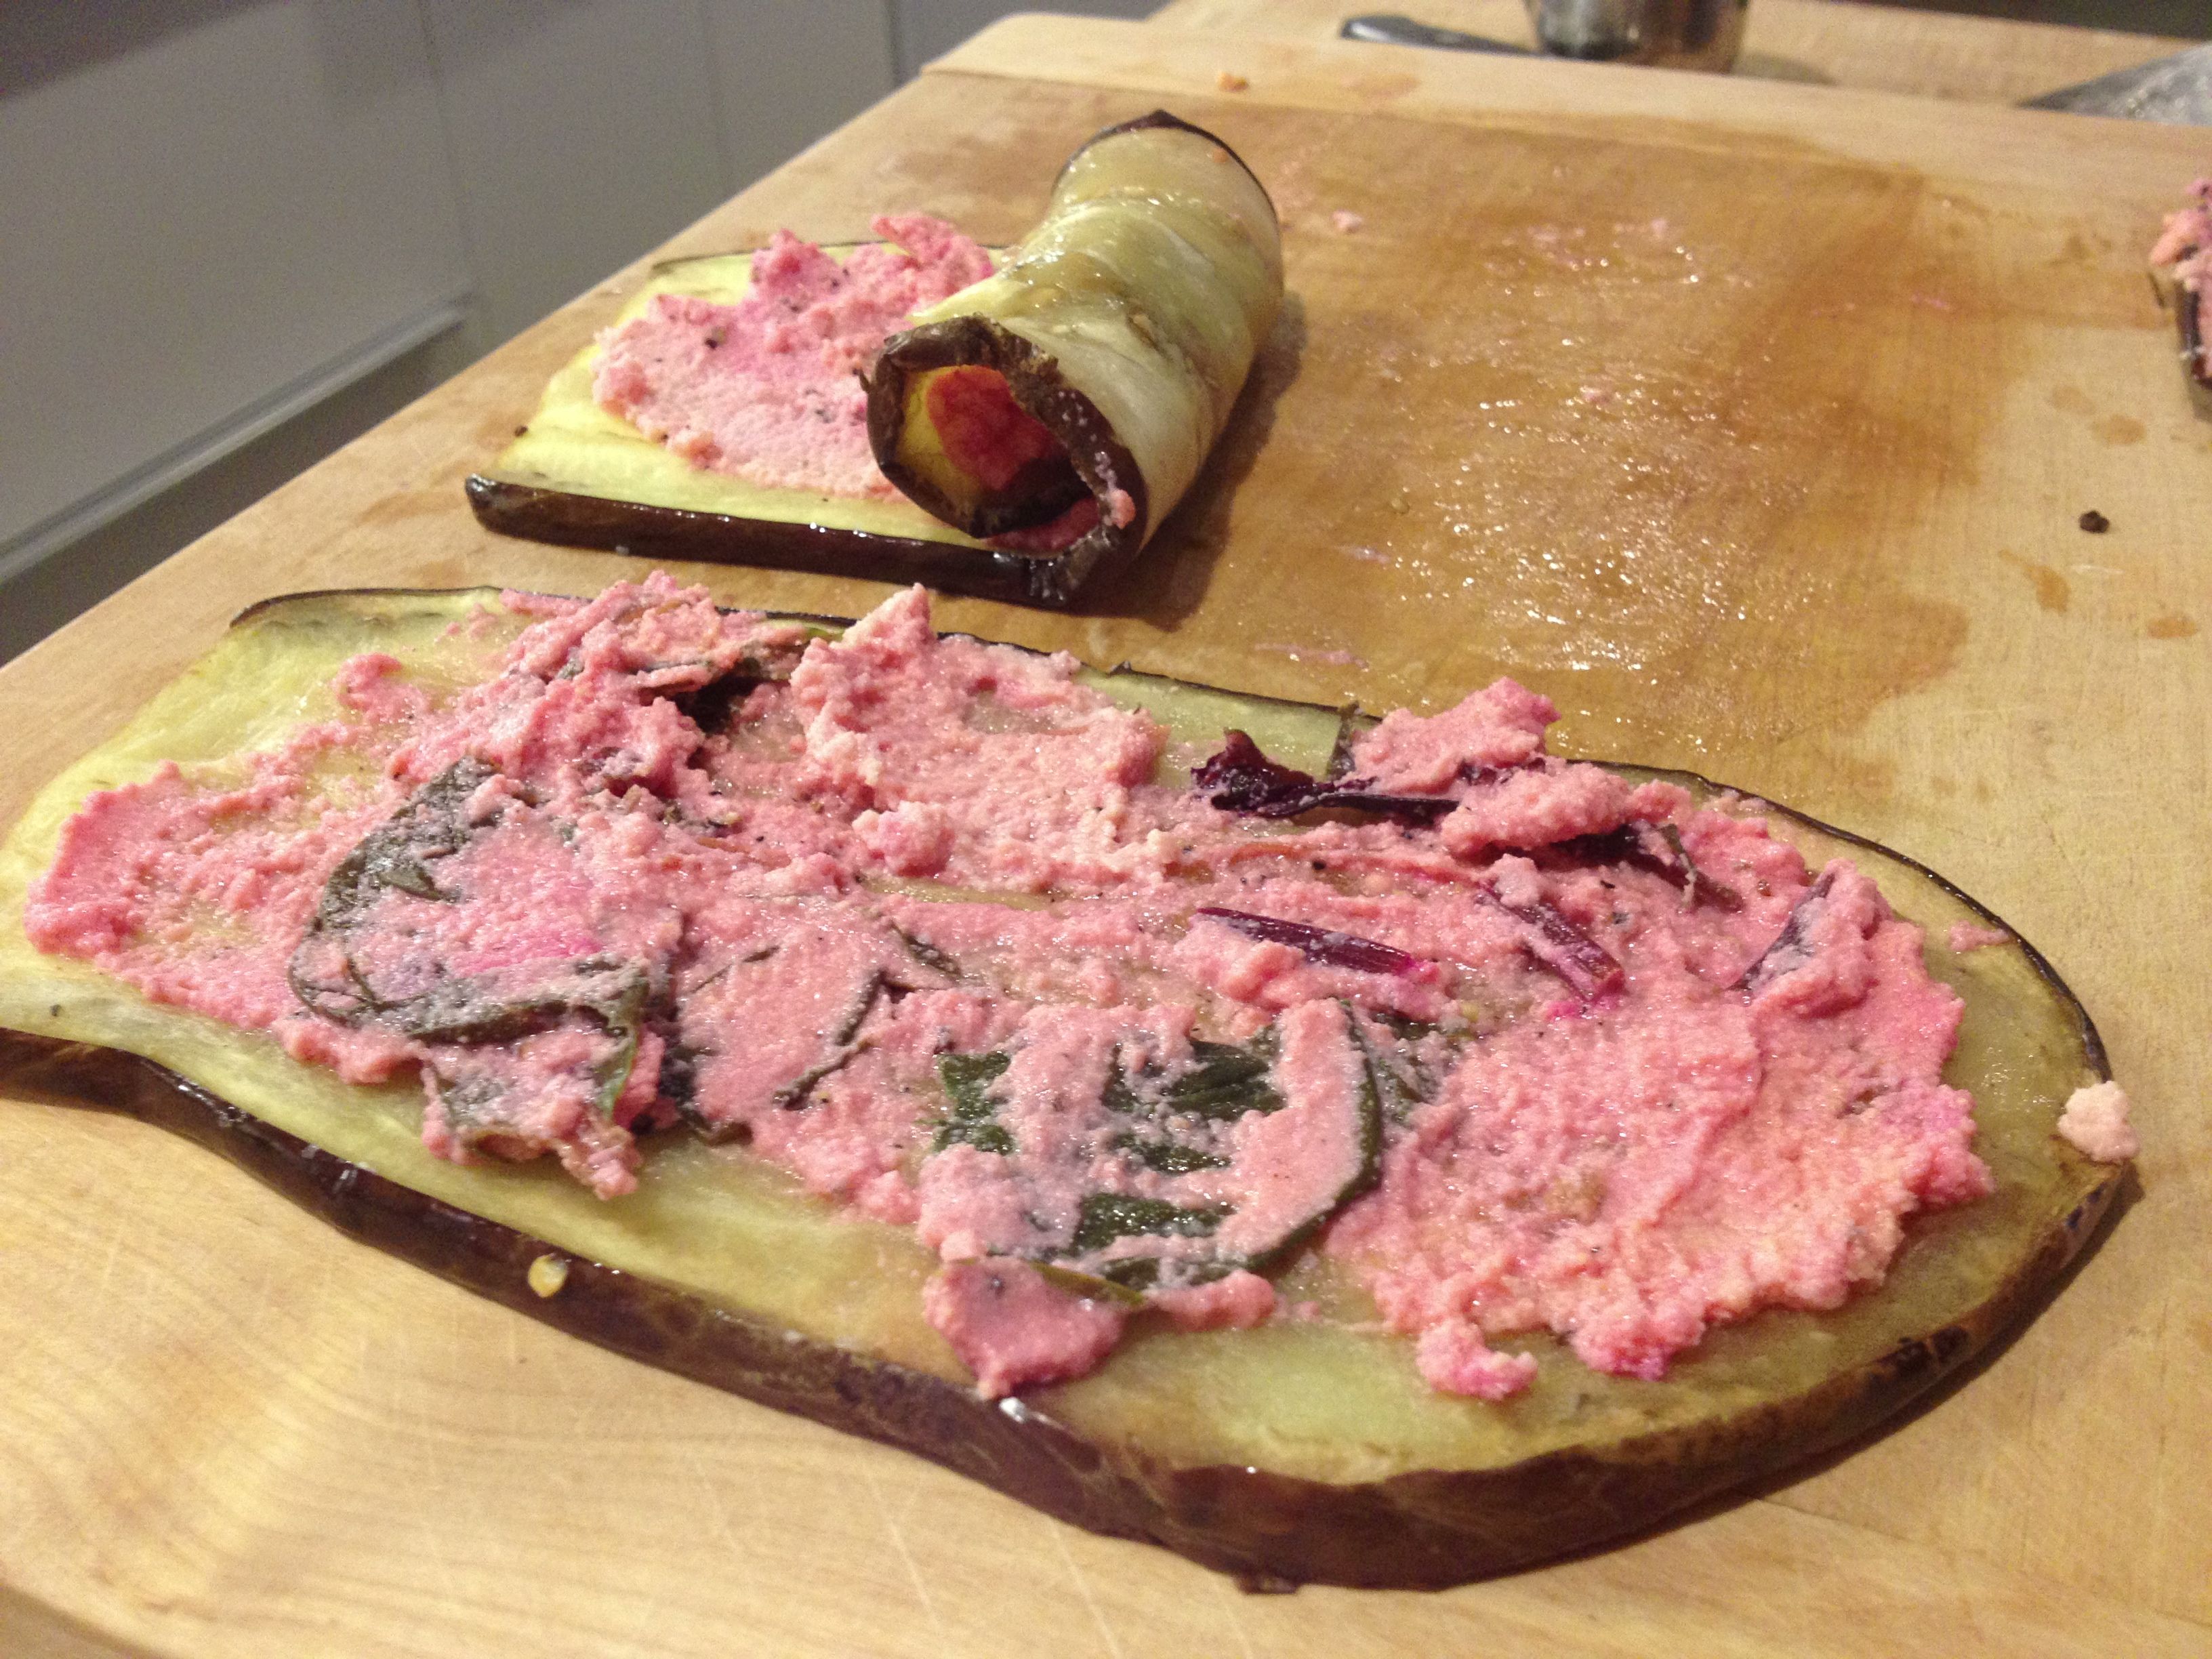
Eggplant slices spread with ricotta mixture and rolled.
6. Lay down about 1/4 cup of the tomato sauce in the bottom of an 8×8 baking dish. Place eggplant rolls in dish on their sides (not standing up). Fit as many as you can in there. When done, generously spoon sauce over the surface—but you don’t want it soaking wet, either. Find the happy medium. When done, sprinkle a coating of grated Parmesan on top and cover with foil.

Lay the rollatinis side by side in an 8×8 baking dish

Spoon sauce over top and sprinkle with Parmesan cheese
7. Pop back into the 400F oven for about 20 minutes. Remove foil and bake another 5 minutes or so. Remove and let cool for 5 minutes before digging in.
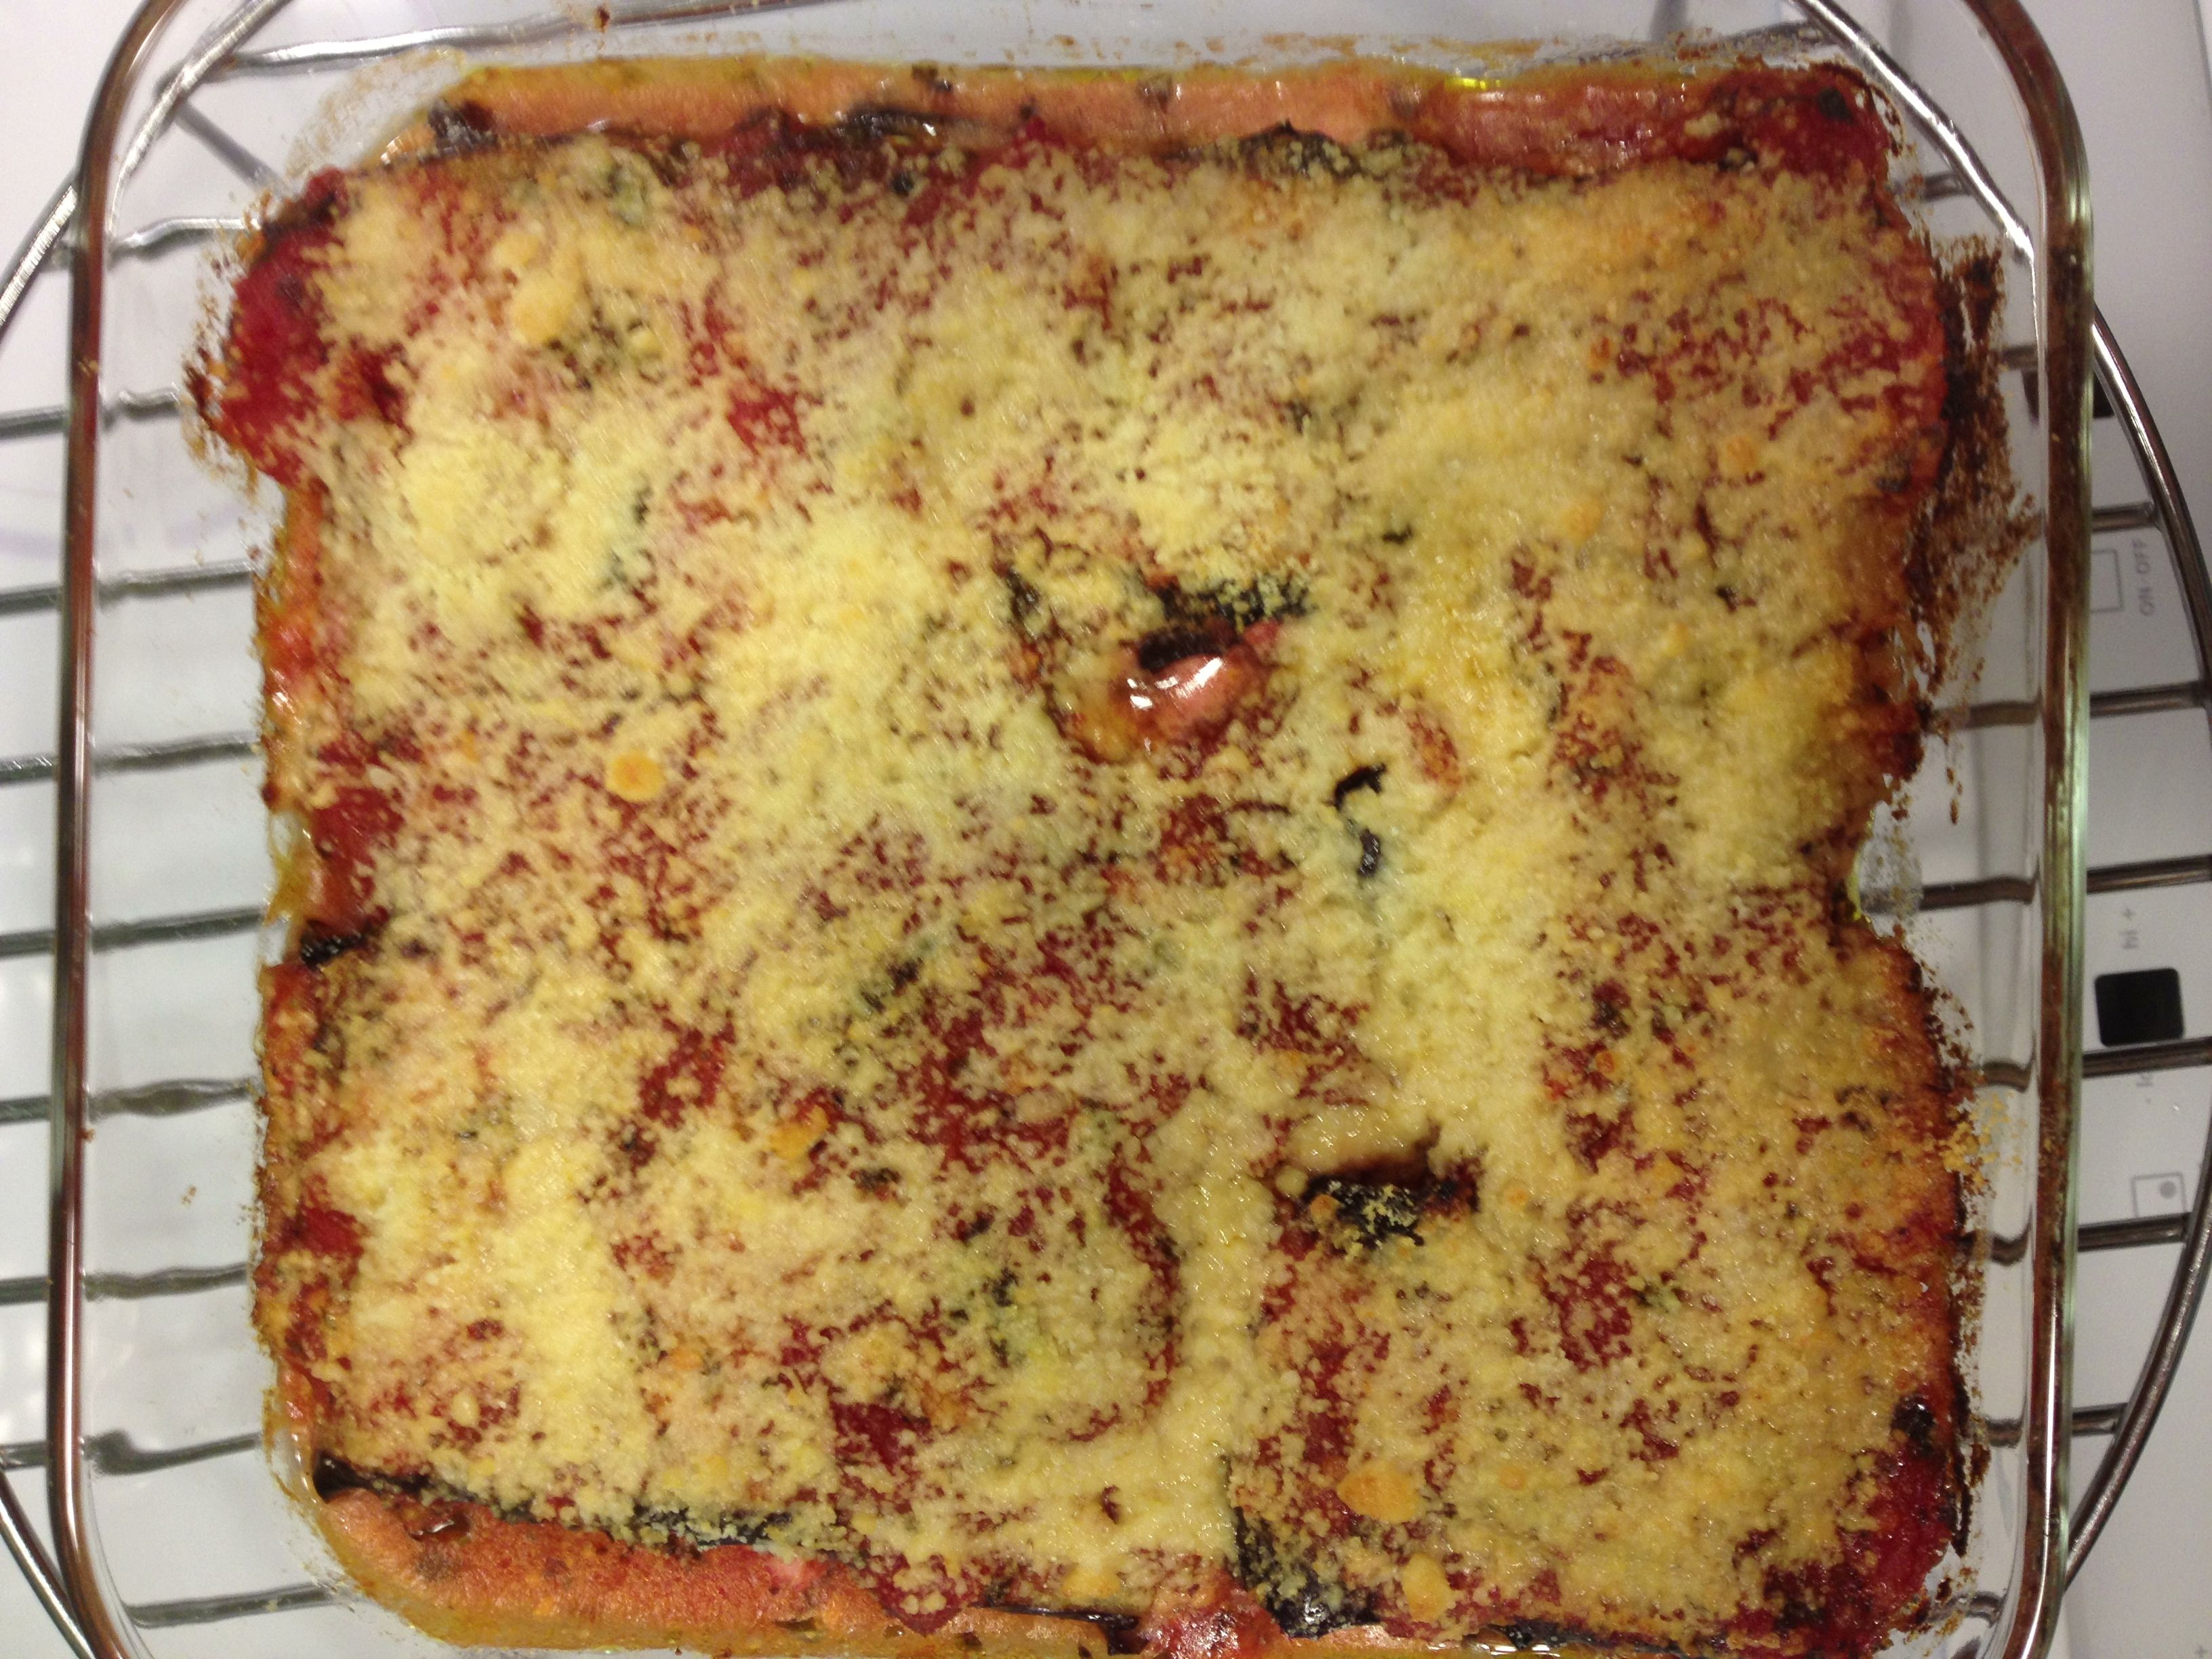
Bake for a total of about 20-25 minutes.
Have something like this in your repertoire? Let me know your version in the comments section.
Red Pepper Hummus
February 26, 2013 § 4 Comments
We haven’t bought a can of beans in, oh gosh…I’d say six months. This weekend we used our last stray can of black beans for a chili—and I remember moving to our new house with it and packing it away on an upper kitchen shelf. Cooking up dried beans in a pressure cooker is super easy and super cheap, and here’s the bonus: You get several cups of flavorful bean broth to add to whatever dish needs a little tasty liquid. (See how easy it is here.)
And if we’re cooking up our own beans, we might as well make our own favorite bean-based spread, right? I’m speaking of hummus, of course, made with those funny looking little chickpeas (aka garbanzo beans). I’ve written about hummus here before, but after making several batches of the stuff, I was left disappointed. Too thick. I wanted the creaminess you’d find in the off-the-shelf brands.
Jennifer found the solution—or very nearly—with a recipe from The New Moosewood Cookbook. Not completely creamy as we had hoped, she adjusted and tasted and made batch after batch until finally, she made the perfect consistency. The secret? Adding in some of that aforementioned bean broth and reducing the amount of tahini. Oh, and adding in a roasted red pepper.
Red Pepper Hummus (adapted from The New Moosewood Cookbook)

red pepper hummus
- 2-3 cloves garlic, sliced
- large handful parsley
- 2 scallions, chopped into 1-in. pieces
- 3 cups cooked chickpeas (nearly a 1-lb. bag of dry beans cooked, reserve cooking liquid)
- 4 tbs. tahini
- Juice of one lemon juice (or more, depending on said lemon’s juiciness)
- 3/4-1 tsp. salt
- 1/2 tsp. cumin
- 1/4 – 1/2 sumac to taste (optional if you can find it at your local Middle Eastern grocer)
- 1/4 tsp. paprika
- 1 red pepper, roasted at 425F for 30 min., cooled and skin removed, and cut into strips
1. In a food processor combine the garlic, parsley and scallions, and whir up into a mince.
2. Add chickpeas, tahini, lemon and salt. Puree into a paste.
3. Add the cumin, sumac and paprika as you add some of that reserved bean cooking liquid—try about 1/4 cup—and process. Add more liquid by the tablespoon until you find the consistency right for you. Careful with the sumac—you may like just a tad, so taste before adding any more than a 1/4 tsp.
4. Add the red pepper at the very end and pulse the food processor until it breaks down the red pepper. We’re not looking for a completely pureeing of the pepper. We just want it broken down into bits.
It’s great on a chip, on this awesome cracker we made last week, or—my favorite use—schmeared on a Roasted Eggplant on Whole Wheat Sandwich.
Tofu Noodle Soup
January 29, 2013 § 3 Comments

Tofu Noodle Soup
I’m a fan of tofu. Not a crazy fan, but a fan nonetheless. And I’m not sure how it happened. Omitting red meat and poultry from my diet accounts for some of my fandom, I guess. Quite honestly, I am just going to let me fondness of tofu exist for what it is. Why bother explaining, right?
The best tofu I ever had was in a take-out dish from a Chinese restaurant in Ithaca, New York, about 18 years ago. The name, the flavorings, the accompaniments all escape me now. The one piece of the dish that remains in my memory is the tofu. Crispy on the outside. Soft on the inside. The closest thing to a McDonald’s french fry this side of the Golden Arches. I want that. I crave that even.
In the absence of that crispy tofu dish, I’ll take this tofu noodle soup. Soy sauce is in there, but it’s not too salty. And the hoisin gives it that … umami. There, I said it. Umami, that fifth and most flavorable of the basic tastes. A bowl of this broth will satisfy me for lunch. The tofu and noodles make it a real deal meal.
I’ve adapted this recipe – and I keep adapting each rendition of it – from a VegNews Magazine newsletter. I found that the original recipe had too little broth and way too many noodles. A halving of this and a doubling of that with on-the-fly adjustments takes care of that problem.
Ingredients
1 thinly sliced yellow onion
4 garlic cloves, minced
1 tbs grated fresh ginger (about an inch or less)
4 tbs hoisin sauce
4 tbs soy sauce
9 cups vegetable broth (or water)
1 15-oz. package extra-firm tofu, cut into 2-inch cubes
1 8-oz. package rice noodles, cooked and drained
4 tbs rice vinegar
4 tsp Asian hot sauce
Scallions, bean sprouts and cilantro to sprinkle, if desired
- In a large pot, saute the onion in about 1 tbs of oil over medium-high heat until translucent, about 5 minutes. Add the garlic and ginger and saute for another 30 seconds or so.
- Stir in hoisin, soy and broth. Bring to a boil. Lower heat to a simmer and let cook for 15 minutes.
- Stir in tofu, noodles, vinegar and hot sauce. Now, here’s an embarrassing thing: I have JUST NOW realized the recipe calls for cooking the noodles FIRST, then adding them to the pot. This explains a lot. Well, adding them at the end is fine, too—just simmer them in the broth for about 5 minutes or so.
- Serve soup in bowls and sprinkle with scallions, sprouts and/or cilantro if you so choose.
Next time, I’ll boil up the noodles beforehand THEN add them to the soup and report back to you if there is a major difference. Meanwhile, enjoy!
Wheat Berries for Breakfast
January 15, 2013 § 3 Comments
Wheat berries. Never heard of them? Neither had I, until I came across them as an ingredient in a course-grained whole wheat bread recipe (more on that bread another day). And now, they’re a special breakfast treat.

Wheat berries with raisins, slivered almonds and apple cider.
How did they go from bread to breakfast? When I spotted them in the Amy’s Bread cookbook recipe I read up a bit on this whole grain. According to Wikipedia, “wheat berry” is just another term for the whole wheat kernel. Silly me, I thought they looked familiar. As a farm kid, I had wheat kernels end up in pant cuffs, socks and occasionally other locations on my person after a day on the wheat combine. If milled instead of left whole, the wheat berries become wheat flour. And as we know, grains left whole are good for you because none of the nutrients are processed out of the grain. Keeping it whole leaves all that good-for-you protein, fiber and iron (and I’m sure other good things) right in that wheat berry for your health and flavor enjoyment.
The whole wheat berry as an ingredient in bread gives the bread some chewy texture—something to bite into other than just the bread. They’re also a bit sweet and nutty in flavor—a great thing when used not just in breads, but also when added to salad greens or made into a grain-based dish.
My course-grained bread recipe called for just a 1/2 cup of cooked wheat berries with a half-cup of the reserved cooking liquid. Wanting to have some extra on hand, I added one cup of uncooked berries to about 2.5-3 cups boiling water, then let it simmer, mostly covered, for about 50 minutes. The result was about 2 cups of plump wheat berries and surprisingly just enough liquid.
The berries that didn’t make it into the bread made it into my breakfast bowl. Taking a cue from my typical steel-cut oats preparation, these berries received some raisins (highly recommend the jumbo raisin mix from Trader Joe’s) and slivered almonds. And to plump up the raisins while warming in the microwave, I added enough apple cider to come nearly to the surface of the wheat berries. Soul-satisfyingly delicious. And it filled my belly. I even slurped from last juices from the bowl.
I would love to try wheat berries in a savory application and have seen a recipe or two pairing them with mushrooms. If you have any recommendations—either savory or sweet—please leave me a comment below.
And now that I know my family has a barn full of these wheat berries at home, I think I’ll bring home a great big bag of them next time I visit.
Salad on a Pizza
November 27, 2012 § 2 Comments
Indecision can be crippling. Seriously crippling. Should I wear the green coat or the black leather? Should I dodge this person on the left or right? Should I sit here or there? Soon enough you find yourself standing in the produce aisle for 15 minutes, not sure which head of broccoli is the one destined for your dinner table.
Don’t think it hasn’t happened to me. It has.
Today I avoided a near calamity in the kitchen—the calamity of not knowing for sure what to have for lunch. At breakfast time (and by breakfast I mean my two helpings of coffee), I was thinking I’d have a salad for lunch. And yes, I do consider lunch that early in the morning.
Then at 10am, I spied that last ball of pizza dough in the fridge. Pizza for lunch. My fave. But … there’s the salad. And gosh darn it, that pizza dough is sitting there, asking me to redeem myself for a not-so-great pizza making session last night.
Salad.
Pizza.
Salad … on a pizza? Salad pizza! Why not, right? Why not, indeed.
I’ve had arugula pizzas at fun, fancy pizza joints before. So I felt comfortable enough throwing something together despite my lack of arugula. Here’s what I eventually made, using 1/2 of one ball of pizza dough.

Pizza topped with pesto, lightly dressed greens, shrimp and goat cheese.
Since my new convection oven tops off at just 450F (a minimum of 480F is what I prefer for pizza), I baked the dough naked for 8 minutes, knowing I’d want my salad topping in the oven for just a minute. After 8 minutes, I took out the base and applied:
-pesto
-baby spinach/young greens with thinly sliced red onion and red pepper, lightly dressed with a balsamic vinaigrette
-leftover sauteed shrimp (pre-heated while the naked dough cooked)
-goat cheese
Sneak it back into the oven for just a minute more. Sprinkle with kosher salt and pepper.
Delicious. It was so good, it’s gone.

I’m always looking for not-your-typical pizza topping suggestions. What are some of yours? Leave a comment and let me know.
Induction Is Like Magic
October 5, 2012 § 2 Comments
Dainty has been absent, but I have a good .. strike that .. I have a great excuse. I’ve moved.
Not far. Just a mile or so down the road. But even if the distance was 10 feet, it’s still a huge process. Packing, unpacking. Oh, and buying the place. And dealing with a construction crew that is – even a month after moving – still on site. But they are good boys so I don’t mind them being around.
Yes, the builders are still here. And yes, this building is new construction. It’s an unusual building, too. The design is based on the Powerhaus design used quite a bit in Germany and apparently this is the first building of its sort in the U.S.
And what makes it so unusual? It’s incredibly energy efficient. Like, super super efficient. I’ll get into it in more detail eventually, but let’s first talk about how it impacts Dainty the most: In the kitchen.
I’ve cooked with gas stoves since I learned to cook. But, the question in this Powerhaus design is this: Is gas efficient? No. Apparently gas is upwards of 70% less efficient than electricity. Bleh. I hate electric stoves. I mean, fire is so fierce, you know? Fire is awesome.
But, fire fails in efficiency. So … Dainty now has an electric cooktop. To be more specific, it’s an Electrolux Radiant/Induction Cooktop. It has two radiant burners and two induction burners on its flat surface. What’s induction? You know that commercial with Kelly Ripa making a meal and her water boils in 90 seconds? That’s induction. It’s a little like magic. But water boiling in 90 seconds? Awesome.
After about a week of avoiding all forms of cooking once we moved in, I decided to cook something on the induction burner. Or at least boil something. Can’t go wrong with boiling, right?
I boiled eggs. It’s a simple enough process: Eggs in pot, cover with an inch or so of water. Bring to a boil. Cover. Turn off heat. Let them sit for 12-15 minutes. Rinse with cold water to bring down temp. I did exactly as outlined.
And I got a soft-boiled egg.
Here’s where I went wrong: When cooking on a radiant, coiled or gas burner, it takes time for the water to come to a boil. During that time—what? maybe 5-6 or so minutes?—those eggs are slowly cooking. When using induction, that time to boil is cut drastically short and hence the cooking time is cut short. Ergo, soft-boiled eggs.

Eggs boiled on induction cooktop at a 1.5 minute full boil.
I’ve gotten back up on the cooktop and tried boiling eggs again. One minute at a full boil is not enough. 90 seconds, not enough. Two full minutes, a tad too much. Plus, without a slowly firming inside the shell, the shells tend to crack when they come to a rolling boil so quickly, spilling their whites.
So, what’s the solution?
Using the radiant burner. Thank goodness it’s a hybrid.
Zucchini Tomato Mozzarella Sliders
July 27, 2012 § 4 Comments
Zucchini. It doesn’t stop.
Turn around for a minute and the long green veggie is 3 inches longer on the vine. Not kidding. Hold off on picking it for a day and … well … it becomes a billy club. Growing up, we’d throw the very large zukes into the pig pen. Healthy, zucchini-loving pigs, that’s what we had.
Lately, thoughts during my 25-minute walk back home from yoga have turned to how to use that day’s zucchini. Pizza. Pasta. Salad. I’ve done them all and wanted something different. Last night, my craving for a burger—really, the craving for something meaty between two bready buns—decided dinner for me. Why should sliders be reserved for meat eaters? Zucchini can play that game, too.
Ingredients
1 5-6 in. zucchini
2 tbs olive oil
1+tbs balsamic vinegar
1 spring oregano
kosher salt and freshly ground pepper
6 small French rolls, cut into top and bottom halves
2 cloves garlic, peeled
1-2 tbs olive oil
1 deliciously red heirloom tomato
mozzarella
1. Slice zucchini into rounds slightly thicker than 1/2 in. Discard (or eat!) the smaller rounds. Shoot for using 12 rounds.
2. Combine oil, vinegar, oregano, a big pinch of kosher salt and several turns of the pepper grinder in a medium bowl. Dip your finger in there and adjust seasoning if you’d like (more vinegar? more oil? It’s your food—make it taste the way you like!). Add zucchini slices and toss. Put aside.
3. Smash those garlic cloves with the back of your chef’s knife (on a cutting board, of course) and schmear it together until the garlic becomes kinda pasty. You can add a sprinkle of salt or not. Add this to a small bowl of 1-2 tbs olive oil. Brush this oil onto the bun halves.
4. Set a grill pan onto medium-high heat. When it’s hot, place buns, cut side down, onto the pan and flatten slightly. 10-15 seconds will do. Put grilled buns into a bowl and cover with a tea towel for now. Turn off grill pan.
5. Meanwhile … we’re still waiting for the zucchini to marinate a bit. Take this time to make a small side salad and whip up a quick vinaigrette.
6. Okay, done with the salad? Time to move on. Get that grill pan back up to medium high. Place your zucchini rounds onto the grill pan. Using a brush, dab some of the liquid remaining in the bowl onto each slice. Let them sit for 4-5 min, or until they get some nice-looking grill marks on the bottom.
7. While those are grilling, slice the tomato into 6 slices and add to whatever liquid remains in the bottom of that bowl.
8. Mozzarella. Time to slice it. Slice it about 1/4 in. thick or less, and into whatever size will sit nicely on top of a zucchini round.
9. Back to those zucchinis. They should be ready to flip onto the other side. Do that. Then place a bit of mozzarella on top of each. Let them grill for a minute.
10. Get your buns ready, working with one top and bottom at a time. This part is optional: Make some room in that grill pan and place the buns cut side down into the goodness the zucchini has been cooking in. Only takes a second, and remove quickly. If not doing that: Place one zucchini slice onto the bun bottom, and overlap a second on top of that. Add a slice of tomato. Top it off with other half of the bun. Repeat with the remaining zukes and buns.
Super. Good. I ate one and a half. Coulda had two. Or three.
Enjoy. I’m off to make zucchini bread now.
Do you have a favorite zucchini recipe? Share it in the comments section.
Update on Dainty: Where’d June Go?
June 26, 2012 § 2 Comments
Hey, hi. Remember me?
Nope, haven’t forgotten about Dainty Dot. Truly have not. It’s been a bit of a busy month. And I’ve had other things on my mind. Dainty took a backseat for a bit.
A backseat to what, you ask? I’ll review in photos …

Boo – she’s growing too fast. My iPhone can barely hold all the photos I take of her.

June has so many Instagram opportunities. I can’t keep up. Pretty, huh?
 I’ve been perfecting my pizza-making skills. And man, do I have mad skills with the dough.
 Provincetown. Vacation. Roof deck. Water views. That really about says it.
 Thanks, Martha Stewart, for the most-appropriate Ptown vacation drink—the Cucumber Cape Codder. I’ll post that recipe soon. Really, so good.
 I’m slightly obsessed with yoga. Just slightly, but in a good way. Maybe I’ll talk to you about it someday. But for now, know that this mat has become a good friend of mine. And it’s fashionably orange.
 So, I’m a potato farmer’s daughter. And an avid gardener. And for the first time this spring, it dawned on me: Why not grow some potatoes? And it shall be so. Technically once the flowers bloom, there should be potatoes under the ground. But I want them bigger than peas, so I’ll await awhile.
 Oh, yeah, and by the way … we’re buying a brand-spankin’-new unit in a brand-spankin’-new building. New as in, this was a vacant lot last July. And it’s highly energy efficient and will have solar panels and is built like a German tank – and that’s with good reason. Obviously, more on this later.
 And have I mentioned lately that I love this person? I do, and I’ll do it all again in a split second. (Ain’t she a cutie, too?)
 More pizza. I might be slightly obsessed with pizza, too. Always in a good way.
 But just because I haven’t been writing here doesn’t mean I haven’t been writing. I’ve been taking a spin at fiction. More of a poetry-short fiction hybrid type of writing. And the cool thing is it’s fiction inspired by photos. The images are all iPhone Instagram pics taken by a friend who has a knack for knowing there’s a story behind a scene. Take this one, for instance. Who left the phone? Why? Who was on the other end? I took a stab at it—and a bunch of other photos, too—and am publishing them at The Skinny Fedora. The one above is “Hope Asked.”
So, give The Skinny Fedora a quick read and let me and the other skinny girl know what you think. Leave comments here or at www.theskinnyfedora.com.
Brothy Asian-Inspired Soup
March 19, 2012 § 4 Comments
Hearty soups … yes, I love them. And the ones I make are nearing the definition of stew. But every once in a while I will be in the mood for something light, breathy and brothy.
This Asian-Inspired Soup is a riff on something Mark Bittman published in March 2011. He gave three simple (very simple) recipe suggestions in each of four categories: creamy, brothy, earthy and hearty. The second and third recipes are slight twists on the first in each category. By the end of making the twelfth, he says, you’ll never need to follow another soup recipe.
With a package of firm tofu and some leftover chickpea broth (remember that from Pressure Cooker Basics?), I twisted Mark Bittman’s own Asian twist on brothy soups.
Ingredients 
- 8 cups water, in this case chickpea broth and water
- 1/4 cup chopped scallions (about 3-4)
- 1 package firm tofu, drained and cubed
- 4 oz oyster mushrooms, roughly chopped
- 1 tbs soy sauce
- 1 tbs sesame oil
-To a large pot add the water or broth, scallions, tofu, mushrooms, soy and sesame.
-Heat over a medium-high flame to just boiling, them bring to a quiet simmer, partly covered. Let simmer for … 15 minutes? 20 minutes? It’s up to you and how tender you like your oyster mushrooms. Check it at 15, then check the mushrooms every few minutes.

Oyster mushrooms - aren't they just beautiful?
-Ladle into bowls. Garnish with a few chopped scallions. You might enjoy a crispy baguette to dunk.

Brothy Asian-inspired soup
Seriously, I tried to make this soup sound difficult/complex/sophisticated/finicky. But that’s just impossible. This soup is just way simple. And delicious.
Any Asian-inspired and simple soup suggestions or ingredient ideas? Leave a comment and let me know.
