
Eggplant Rollatini
March 12, 2013 § 1 Comment
Sometimes you have to shop for dinner. Sometimes it’s in your fridge or freezer, in bits and pieces, just waiting for you to assemble.
That’s what happened with last night’s dinner—Eggplant Rollatini. Open the fridge and there’s an eggplant needing to be used ASAP. Open the freezer and there’s a cup or so of frozen ricotta and chard lasagna filling left over from last fall’s Roasted Vegetable Lasagna making festivities. And there’s a large can of whole peeled tomatoes in the cabinet.
Get out the mandolin, folks—it’s rollatini-making time. And having never made rollatini before, this was all off the cuff.
Eggplant Rollatini

Eggplant Rollatini
- olive oil (to be used throughout recipe)
- kosher salt and pepper to taste (to be used throughout recipe)
- 3-4 cloves garlic, depending on size, smashed and minced
- 1 28-oz. can whole peeled tomatoes
- 1-2 tsp. Italian seasoning
- 1 tsp. sugar
- 1 medium-large eggplant, sliced lengthwise to about 1/4-in. thickness with a mandolin (be careful!)
- Chard-ricotta mix from Roasted Vegetable Lasagna, or about 1-1.25 cups plain ricotta for this recipe
- About 1/ cup Parmesan cheese to sprinkle
1. Turn oven to 400F.
2. Add 1 tbs. olive oil to pan on medium heat. Add garlic and let it go until it becomes fragrant. Slowly pour in the liquid from the canned tomatoes. Take out each tomato from the can and gently mush and tear it into pieces with one hand and add to the pan. Messy, but it’s the best and easiest way to do it. Add in Italian seasoning, sugar (really, it helps brighten the sauce, trust me) and a large pinch of kosher salt.
3. The sauce will really be bubbling at this point. Turn it WAY down and let it simmer gently. Add in a turn or two from the pepper mill. Continue to simmer until it thickens a bit, about 20-30 minutes, just about until you’re ready to assemble the rollatini.
4. Meanwhile, slice eggplant. Place each slice on a sheet pan, and pour a bit of olive oil (not a lot, not a little) over each slice, using a brush to spread the oil over each slice. Sprinkle kosher salt and pepper on each slice. No need to do both sides, one side will do. Pop the sheet pan in the oven and bake for 15-16 minutes, or until the firmness of the eggplant is gone but the eggplant has not become wicked soft. When done, take out and let cool enough to handle, about 5-8 minutes. Keep oven on!

Eggplant, thinly sliced and baked.
5. Working with one slice of eggplant at a time, spread about a tablespoon of the ricotta mixture over the surface of the eggplant slice. You don’t want it too thick or you won’t be able to roll it very well. Starting at the narrow end of the eggplant slice, roll it into a “cigarello,” or, as I would rather imagine it, roll it up like you’d roll your yoga mat. Set aside. Continue with the next slice until you either run out of ricotta or eggplant.
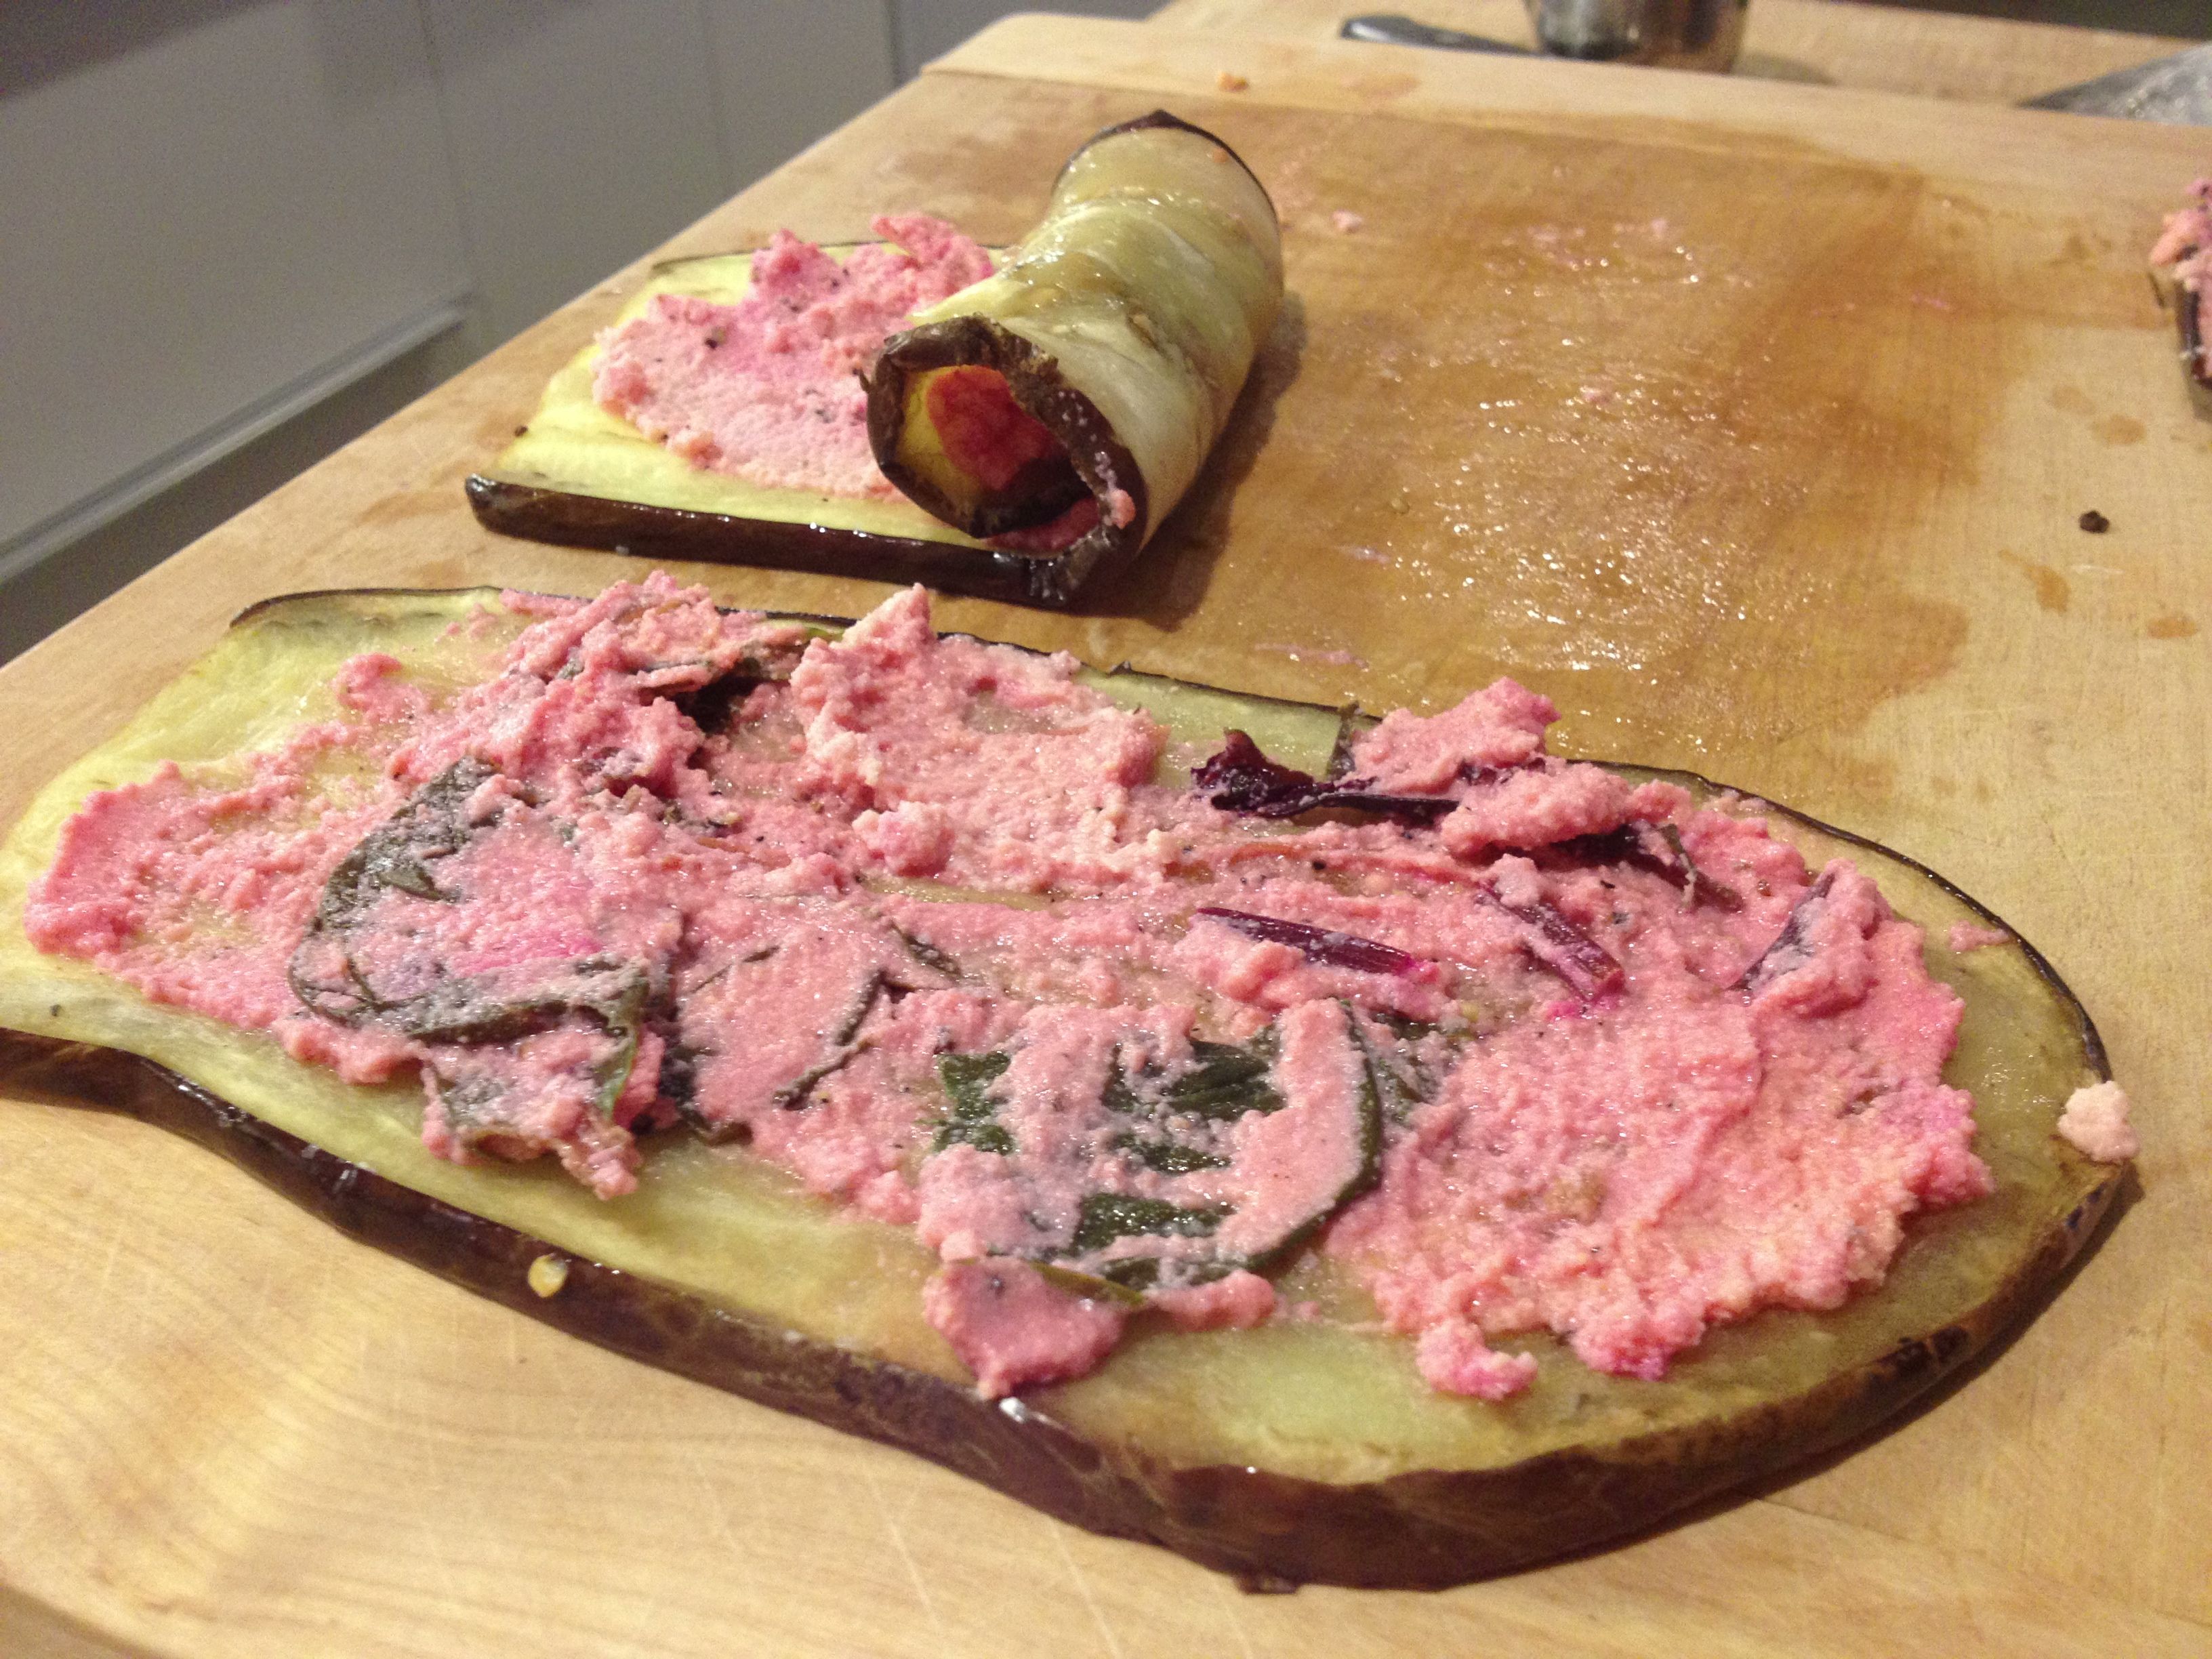
Eggplant slices spread with ricotta mixture and rolled.
6. Lay down about 1/4 cup of the tomato sauce in the bottom of an 8×8 baking dish. Place eggplant rolls in dish on their sides (not standing up). Fit as many as you can in there. When done, generously spoon sauce over the surface—but you don’t want it soaking wet, either. Find the happy medium. When done, sprinkle a coating of grated Parmesan on top and cover with foil.

Lay the rollatinis side by side in an 8×8 baking dish

Spoon sauce over top and sprinkle with Parmesan cheese
7. Pop back into the 400F oven for about 20 minutes. Remove foil and bake another 5 minutes or so. Remove and let cool for 5 minutes before digging in.
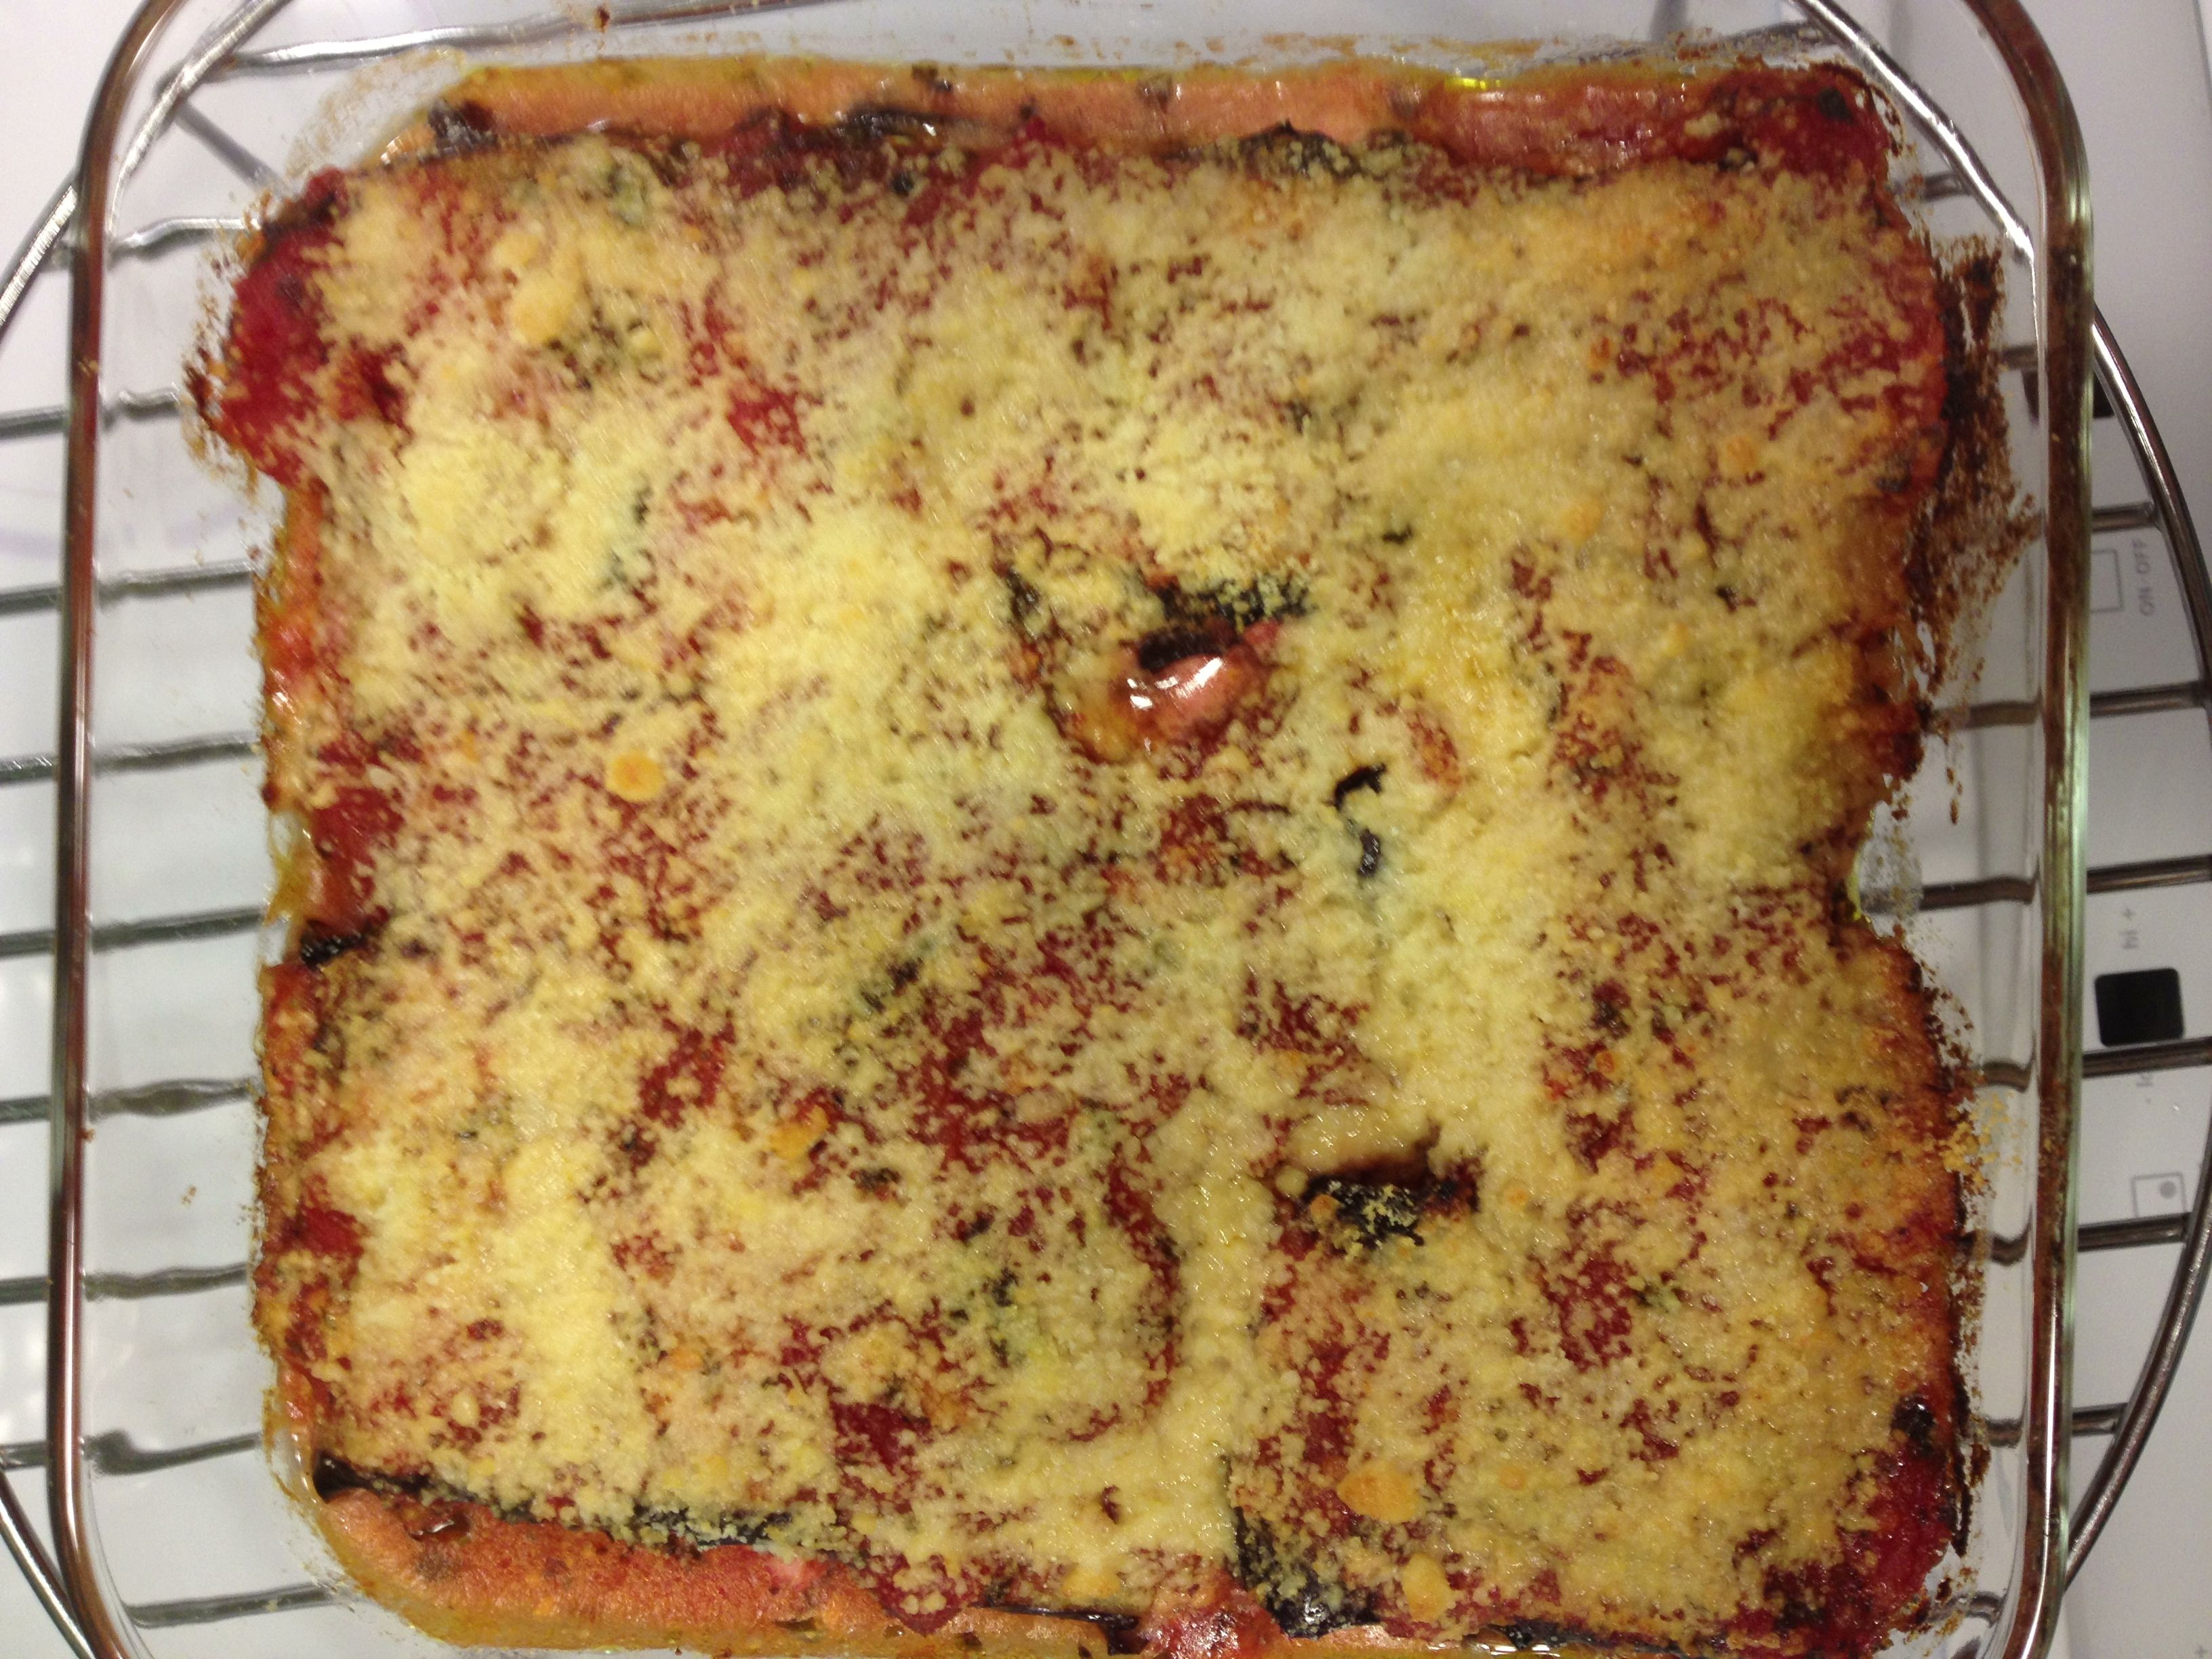
Bake for a total of about 20-25 minutes.
Have something like this in your repertoire? Let me know your version in the comments section.
Quick Crackers
February 22, 2013 § 3 Comments
Sometimes after dinner you’re just hungry all over again. It happens. And it’s understandable if, say, you’ve been on a 12-consecutive-day yoga binge.
Open the cabinets. Raisins: Nope, not substantial enough. Almonds: It’s got the crunch but they aren’t gonna cut it. Not tonight. The bag of chips (healthy chips, of course) disappeared last night. There’s a nice hunk of Jarlsberg in the fridge…where’d the crackers go? Oh, they went away as a quick pre-yoga snack the other afternoon.
Bummer. I. Am. HONGRY. Hongry, by the way, is when you are very, very hungry.
But wait. I’m a baker. I’m not going to complain. I have the power to make my own crispy-crunchy goodness. And quickly, too.
I recalled I had found a super-good and super-quick herbed flatbread recipe on the Shutterbean blog not long ago. It was within my power to make these quick crackers – quackers? – before I became HANGRY, which means to be angry due to hunger. And since I had made them once previously, I new the tricks and adaptations to get these in and out of the oven in less than 20 minutes.
So, if you suddenly have guests or are ravenously empty-stomached and have nothing in the house, don’t complain. Put your baking cap on.

Quite complaining. Make your own crackers.
Quick Herbed Crackers (adapted from a recipe on Shutterbean)
- 1 3/4 cup all-purpose flour
- 1 tsp dried rosemary
- 1 tsp baking powder
- 3/4 tsp kosher salt
- 1/2 cup water
- 1/3 cup olive oil – keep the bottle handy
- Some fancy salt if you have it
1. Preheat oven to 450F. Really, this will be the longest step in the whole process.
2. Combine dry ingredients in a bowl and give it a quick stir to mix.
3. Make a well in the middle of the dry ingredients and add in the water and oil. Fold in the flour mixture with a spoon or large fork until its nicely incorporated.
4. Turn out the dough onto a work surface. No need for additional flour—this dough will not stick! Amazing and true. It’s the olive oil. Give it a really quick knead – a 5 or 6 times maybe – to make sure the dough is all snug together. Cut the dough ball into 3 chunks.
5. Roll out one dough ball until it’s super thin. You can roll it on the work surface or on a piece of parchment. Just be sure if you roll it out on the work surface that you can get it onto parchment with no problem. Roll into into whatever shape you want – it doesn’t have to be round. Color outside the lines with this.
6. Once on the parchment, experience has shown me to use a fork to prick the dough surface. Otherwise I ended up with super-big air bubbles in the finished cracker. Looked kinda cool and rustic, but not what I was looking for. After pricking, brush a tiny bit of olive oil on the dough surface and sprinkle some fancy schmancy salt on top. I happened to have some pink Himalayan sea salt on hand. Tasty.
7. Pop it into the oven. The recipe says 8-10 minutes. For crispy, keep it in 10 min, or even more. I’d say keep an eye on it and pull it out once it looks darker than you’d like. It all depends on your oven, really.
8. Let cool on a wire rack. Or not if you can’t resist.
9. While one is cooking you can roll out the other and put on new parchment. Recipe says to hold off on the oil and salt until just before popping into the oven, but I forgot for one of them and it was fine.

A few notes:
- The recipe called for fresh rosemary. I didn’t have any on hand, but recalled that if using dried herbs in place of fresh that one should use 1/3 the amount. So, if you’re using fresh rosemary, use 1 tbs of finely chopped herb.
- Try it with other herbs, too. Sage, for instance. But use less since sage is mighty powerful.
- It’s a throw-it-together kinda recipe, but be precise with the oil and water measurements. I used too much of one of them last night and the dough came out sticky enough to actually stick to the work surface. Lesson learned—I’ll never eyeball a 1/3 cup of liquid again.
Zucchini Tomato Mozzarella Sliders
July 27, 2012 § 4 Comments
Zucchini. It doesn’t stop.
Turn around for a minute and the long green veggie is 3 inches longer on the vine. Not kidding. Hold off on picking it for a day and … well … it becomes a billy club. Growing up, we’d throw the very large zukes into the pig pen. Healthy, zucchini-loving pigs, that’s what we had.
Lately, thoughts during my 25-minute walk back home from yoga have turned to how to use that day’s zucchini. Pizza. Pasta. Salad. I’ve done them all and wanted something different. Last night, my craving for a burger—really, the craving for something meaty between two bready buns—decided dinner for me. Why should sliders be reserved for meat eaters? Zucchini can play that game, too.
Ingredients
1 5-6 in. zucchini
2 tbs olive oil
1+tbs balsamic vinegar
1 spring oregano
kosher salt and freshly ground pepper
6 small French rolls, cut into top and bottom halves
2 cloves garlic, peeled
1-2 tbs olive oil
1 deliciously red heirloom tomato
mozzarella
1. Slice zucchini into rounds slightly thicker than 1/2 in. Discard (or eat!) the smaller rounds. Shoot for using 12 rounds.
2. Combine oil, vinegar, oregano, a big pinch of kosher salt and several turns of the pepper grinder in a medium bowl. Dip your finger in there and adjust seasoning if you’d like (more vinegar? more oil? It’s your food—make it taste the way you like!). Add zucchini slices and toss. Put aside.
3. Smash those garlic cloves with the back of your chef’s knife (on a cutting board, of course) and schmear it together until the garlic becomes kinda pasty. You can add a sprinkle of salt or not. Add this to a small bowl of 1-2 tbs olive oil. Brush this oil onto the bun halves.
4. Set a grill pan onto medium-high heat. When it’s hot, place buns, cut side down, onto the pan and flatten slightly. 10-15 seconds will do. Put grilled buns into a bowl and cover with a tea towel for now. Turn off grill pan.
5. Meanwhile … we’re still waiting for the zucchini to marinate a bit. Take this time to make a small side salad and whip up a quick vinaigrette.
6. Okay, done with the salad? Time to move on. Get that grill pan back up to medium high. Place your zucchini rounds onto the grill pan. Using a brush, dab some of the liquid remaining in the bowl onto each slice. Let them sit for 4-5 min, or until they get some nice-looking grill marks on the bottom.
7. While those are grilling, slice the tomato into 6 slices and add to whatever liquid remains in the bottom of that bowl.
8. Mozzarella. Time to slice it. Slice it about 1/4 in. thick or less, and into whatever size will sit nicely on top of a zucchini round.
9. Back to those zucchinis. They should be ready to flip onto the other side. Do that. Then place a bit of mozzarella on top of each. Let them grill for a minute.
10. Get your buns ready, working with one top and bottom at a time. This part is optional: Make some room in that grill pan and place the buns cut side down into the goodness the zucchini has been cooking in. Only takes a second, and remove quickly. If not doing that: Place one zucchini slice onto the bun bottom, and overlap a second on top of that. Add a slice of tomato. Top it off with other half of the bun. Repeat with the remaining zukes and buns.
Super. Good. I ate one and a half. Coulda had two. Or three.
Enjoy. I’m off to make zucchini bread now.
Do you have a favorite zucchini recipe? Share it in the comments section.
Sweet potato, goat cheese and rosemary-sage pizza
May 7, 2012 § 1 Comment
The following is a paraphrased and nearly completely inaccurate account of a recent text conversation.
Text from Nan: J’s sick, can’t use tix to tonight’s show at Club Passim. Can you use them?
Text from Dainty: Uh … wha? Tonite? Sure! Who’s playing, where’s it?
Nan: Meg Hutchison. She’s great. H Sq.
Dainty: We’re in! Coming after Baptiste yoga, could eat a cow. Do they have food?
Nan: Veggie Planet serves their food. Order Henry’s Dinner. On a pizza. Trust me.
Jennifer and I do indeed trust Nan—she’s a lawyer, after all, and we love her. We go to Club Passim, ravenous, and after a cursory glance at the menu, immediately ordered the Henry’s Dinner, pizza version. Something about sweet potato, goat cheese, asiago, rosemary and sage—oh, don’t forget the caramelized onions—all atop a whole wheat pizza.
First thought: Um … yeah. It’s really good. Things that should come together as a side dish at Turkey Time turns out to be a great topping for a pizza.
Second thought: I could totally make that.
And I did Here’s my version.
Ingredients:
- 2 pizza doughs from the Biga-Based Pizza Dough recipe (which makes a total of four)
- 1 large sweet potato
- 1 sweet onion
- olive oil
- balsamic vinegar
- fresh rosemary and sage, ground in a spice mill together, about 2 tbs each
- a log of goat cheese
- asiago cheese (we used parmesan)
- salt and pepper go without saying …
-We had a gigantic sweet potato, so we spiked it with a few holes and popped it into a 425F oven for nearly an hour. After 45 min you want to keep poking a fork in it to see if it’s done all the way through. When done, let it cool enough to handle. The skin will just peel right off with your hands. Slice it into 1/4-1/2 inch think rounds.

Baked sweet potato
-While the potato is cooking, slice up that sweet onion. Add about 2 tbs olive oil to your trusty large skillet, set on medium high, and toss the onion in there. Add maybe 2 tbs balsamic vinegar. Sprinkle generously with kosher salt. Toss often. After a bit you’ll want to turn the heat down low and let it saute low and slow. Half hour, maybe. Give the onions a taste halfway through – you might want to add more balsamic to your liking. When they’re done, let them cool, too.
-Heat the oven to 480F. Got a pizza stone? You need one, seriously.
-When you’re ready, flour your counter and roll out that pizza dough – thin but not super super thin. Sprinkle a pizza peel with fine corn meal and lay that dough on there.
-Next, brush the dough surface with some olive oil. Now you can arrange your ingredients however you want. I put the caramelized onions on the bottom. Next I layer with sweet potato – I broke my potato slices into chunks and spread them out a bit. Same with the goat cheese – I just broke chunks off the log and applied liberally. Next, a generous dusting of the rosemary-sage mixture, followed by Parmesan cheese. Salt and pepper on top.
-Slide the pizza onto the stone. 6-7 minutes is all you need. You should have enough ingredients for two pizzas, so while the first one is cooking, get the second one all set to go.
-Wait 3 minutes before cutting into it. You gotta let that thing set up.

sweet potato, caramelized onion, goat cheese and rosemary-sage pizza
Jennifer just took the leftovers for lunch and popped it into the break room toaster oven. A colleague asked, “Hey, is that the Henry’s Dinner pizza from Veggie Planet?” Looks like I got it right.

Homegrown Food Challenge—Day 3
October 14, 2011 § 1 Comment
Day 3 on the Homegrown Food Challenge and no fish heads were lopped off on this particular day. But the grill did get lit, and that’s always a fun thing. Here’s how our day progressed.
Breakfast:
Starting to look very familiar. Flat Black coffee with Maine’s Own Organic Milk. Stonyfield yogurt with local apple, honey and a crumbled Effie’s oatcake. We’ll get a bit more creative with breakfast on the weekend, no worries.
Lunch:
Jennifer and I both had big salads with local stuff, similar to the one I had for lunch on Day 2. Local lettuce and red pepper, pickled beets, homemade dressing, etc etc. I even made some homemade croutons from homemade bread.
Dinner:
This is where the grill gets lit—finally! We cranked it up for some pizza made with homemade pizza dough. Two pizzas are usually enough to take care of dinner plus give us enough for lunch the following day.

Pizza #1: Homemade sauce using slightly green homegrown tomatoes (similar to the roasted cherry tomato sauce I make), grilled eggplant (from farmers market) and locally made mozzarella.

Pizza #2: Homemade pesto using homegrown basil, grilled eggplant, roasted red pepper (from farmers market) and caramelized homegrown leeks.
Can’t have pizza without beer, right? We had some Whale’s Tale Pale Ale from Cisco Brewers on Nantucket. Pretty tasty stuff!
As I am two days behind in posting, I can hint at what awaits you for Day 4: One of the most fabulous creations to ever have been sandwiched between two pieces of bread. Think I over-exaggerate? Oh. No.
Grilled Pizza
August 24, 2011 § 1 Comment
Summertime … and the grilling is easy. Cheese is melting, and the pizza is fine.
Okay, I’m no George Gershwin, but what I’m trying to say is this: Pizza on the grill is not only easy, it’s one of the quickest summertime grilled meals possible. What do I like about it most? The fact that I don’t have to deal with my smoke alarms going off. Yeah, that happens whenever we cook pizza inside. The super-heated oven ends up burning the corn meal that remains on our pizza stone. Pizza in January usually means both our front and back doors are open to prevent smoke buildup. No. Kidding.
So, when we can slap that pizza dough on a hot grill, we go there.
And you can go there, too.
I’m not going to tell you what kind of pizza to make. Your toppings are your toppings. You want pepperoni? Have pepperoni. You want smoked salmon? Go for it. Sauce? Yes, please—but don’t go overboard. A little dab will do ya (I’m showing my age with that quote).

My assorted pizza toppings, minus a bowl full of kale-ricotta mixture.
Plus, I’m not the pizza maker. Jennifer is the star when it comes to assemblage. I make the dough, I’ll make sauce. I’ll sous, but she chefs when it comes to pizza time. We’re practiced at this, but the following are our tips, not our must dos. Also, p.s., our grilling is done on a gas grill. Charcoal? A slightly different animal, so adjust as you see fit.
Grilled Pizza Tips
A hot hot grill is good. 500F is good. Clean it really well, not leftover burnt chicken skin, please.
Prep your toppings. I can’t emphasize that enough. Slice, dice, chop, stir. Get ’em ready. AND, pour a small bowl – maybe 1/3 to a 1/2 cup? – of olive oil to have on hand. Put ’em all on a big cutting board or tray to carry out to the grill.
Roll out a nice flat but not too thin dough. Round, square, oblong, whatever.
Here’s a great trick: Lightly oil a section of aluminum foil. Take that dough you just rolled out and put it down on the foil. Now, lightly swab the top of the dough with oil.

Okay, maybe I over-oiled this one. Swab off any extra oil!
Grill’s good and hot. Your toppings are ready to go. Your dough is ready to go. So, go out to the grill and … Quickly flip that dough, oiled top side down, on top searing-hot grill, and peel back the foil. There’ll be some “yikes!” and “oh, sh*t” moments, I’m not gonna lie to you. Pull the dough one way or the other, make your tweaks QUICKLY, and then close that grill cover. And fast. The sooner heat completely surrounds the dough, the quicker that dough is going to turn into a pizza crust. Right? Right.
Two-three minutes. Peek once or twice to make sure the underside is not burning. Oh, it’ll burn. Believe you me.

Oh damn, I burned the first one. These things happen.
NOTE: The first dough got kinda … well … crispy. I started another. Much, much better.
Get your mise en place in place, ready to go. Open the grill, flip that crust over.
Not using a sauce? Then give a quick brush all over the top with evoo. Using a sauce? Spread it thinly and quickly. Layer everything else on as you see fit. And be quick about it!
Close the lid for another couple of minutes. Keep an eye on the bottom, making sure it’s not burning. When the cheese (if you’re using) and the sauce look melty and hot, it’s time to take it off the heat.

Let sit for three minutes to let the sauce and toppings set. And then cut yourself a slice.
Worth it all, huh?
Roasted Vegetable Lasagna
August 14, 2011 § 1 Comment
Sometimes … sometimes I just want to eat bad things. Good-tasting things but bad for you, or your waistline. Fried chicken. Wings. A big drippy pulled-pork sandwich. A pile o’pasta.
But if it’s homemade, I hear, it’s half as much calories, conveniently. At least that’s what I tell myself. And if it has vegetables in it, well … then it’s downright a health food.
So that makes our roasted vegetable lasagna not only calorie-free but good for you, too. And the best thing about this recipe is it’s a combination of three previous posts. Brilliant!
Recipe
- Roasted vegetables of your choice
- Homemade pasta
- Roasted cherry tomato sauce
- 1 lb. ricotta cheese
- 1/2 lb. chard
- 1 tsp nutmeg
- 3 balls of fresh mozzarella, thinly sliced.
- One rectangular casserole dish, what are they, 8×13?
NOTE: If you’re not making your own pasta … and really, you don’t have to … buy the lasagna sheets that you don’t have to pre-boil. A few cents more, but really, the convenience is worth it.
-Our roasted vegetables of choice for this lasagna are yellow squash. We sliced it into 1/4-in. slices, lengthwise. Glug of evoo, salt and pepper, and roast at 425F for 6 minutes each side.When done, set aside.
-Roasted cherry tomato sauce – just as the recipe says. You may want to puree it.
-Homemade pasta … prepare just as the recipe says. Make the sheets to fit half the width of the pan.
We have the sauce, the pasta, the veggies. Oh, wait – one more vegetable.
-Chard. Stem it and then steam it for 1 minute, 2 minutes max. Let it cool. Squeeze the water out of it. And chop. Set aside.
-Put the ricotta into a medium bowl. Add the chopped chard, nutmeg and a pinch of salt and combine. That’s your cheese filling.
Now it’s time to assemble! It’s all about layers. Get the layers, get the lasagna.
-Lay down a thin layer of sauce. Then top with two lengths of pasta sheets. If you crank out the pasta as you go, you can cut the pasta to the correct length. Top the pasta with some roasted vegetables. For the squash, we fit 4-5 lengths of squash per layer.
-Next, spread some of the ricotta – as much as you’d like – over the veggie layer. Dot with slices of mozzarella. A little cheese, a lotta cheese – whatever you want.
-Add another layer – sauce, pasta, veggies, cheeses. You can make as many layers as you have ingredients for. Three or four is typical. Just keep going until you fill the dish and have absolutely no more room.
-When you are done layering, you’re going to top with a layer of pasta, then a thin coating of sauce. Then top with as much mozzarella cheese as you like. And a dusting of parmesan, too. Done!

-Cover with aluminum foil. Pop into a 375F oven for 25 minutes. Remove foil and cook for another 15ish, or until the sauce and cheese are bubbling.
-Let it sit for 10 minutes.
Try not to make a pig of yourself at the dinner table. Really, you’re better than that.
De Kas Restaurant: A Hot Table in Amsterdam
May 24, 2011 § 3 Comments
More than a week after lunching at De Kas Restaurant in Amsterdam, I’m still dreaming of the meal. It’s one of the hottest tables in Amsterdam, and no wonder, given its fresh, bright flavors, dedication to locally grown foods and airy environment. And I mean airy environment: The restaurant is under glass in a state-of-the-art greenhouse.

Restaurant De Kas
De Kas is certainly in unique surroundings. The history of the property goes something like this: Back in the 1920s, the parcel of land was home to Amsterdam’s municipal nurseries. All of the plants and flowers used for Amsterdam’s municipal plantings were grown on these grounds and in greenhouses. Over the decades, the nurseries were shut down and the buildings and greenhouses became dilapidated—such a shame! About 10 years ago the greenhouses were scheduled for demolition, but a Michelin-rated chef, Gert Jan Hageman, came up with the idea of converting one of the greenhouses into a restaurant and growing area. The dining room was designed by renowned designer Piet Boon and is lovely. The kitchen is open, and there’s even a chef’s table, where guests can enjoy their meal just steps from the hot grill (honestly, not something on the top of my list to do). And the bar area, while open and visible, is tucked away and is just shady enough for any self-respecting bar fly.

The Piet Boon-designed dining room, with the just-shady-enough bar in the background.
As I mentioned, they believe in fresh, local food. And it can’t get more local than the greenhouse adjacent to the kitchen and the gardens that surround the restaurant. The team also has a farm that produced a great deal of their produce. What they don’t grow and raise themselves is sourced from nearby farms and the North Sea.

The veggie gardens outside De Kas.

The growing area inside De Kas's greenhouse, adjacent to the kitchen.
Enough about that, let’s move on to the food. The three-course menu is fixed; i.e. you are served what they are preparing that day (they do ask if the chef should take into account for any dietary restrictions). And they do offer a wine pairing, which I eagerly agreed to. Can’t recall the first wine, but the second was an unoaked chardonnay from Spain. Tasty!
The meal was fabulous, that’s a given. And beautiful – not something every restaurant gets right. Instead of attempting to describe the meal, I’ll just leave you to enjoy the photos.

First of two first-course salads: Roasted beets and steamed rhubarb over baby beet (?) greens with a pea puree and nasturium flowers.

Second of two first-course salads: White asparagus, turnip and a boiled quail's egg over young lettuce greens with a sauce of some kind (sorry, whatever it was, it was delicious) and sweetpea blossoms.

Second course: Lobster with a bechamel sauce topped with a light frisee salad.

Third course: Pollack over roasted eggplant and cauliflower with a North Sea-shrimp and caper brown butter sauce. (Oh man, was this good.)

First dessert: Pistachio meringue with salt-touched white chocolate ice cream and pansy petals.

Second dessert: Platter of three cheeses with fruit and nut brown bread and a dot of apple-pear stroop (syrup) to the right and a candied cherry (?). Translation of cheese on right is "cheese that sticks to your knife."
While the municipal nurseries are long gone, the remainder of the property has retained its “municipalness”—it’s now a public park enjoyed by people and wildlife alike.

Children's play area below, and a stork nest with baby on top of the smoke stack.
A Lovely Day in Amsterdam: Part 1
May 16, 2011 § 2 Comments
It may be raining and a bit chilly here today, but I love every minute I spend in Amsterdam. And I love everything about it—the cheese, the beer, the bikes, the people, the canals. The cheese. Did I mention how wonderful Dutch cheese is? You get my point. Oh yeah, and cheese.
This is my third visit to the city – all for business, lucky me – and each time I’ve tacked on at least a day to spend on my own. Each time I’ve tried to add on to my experiences. Even though I’ve just finished an absolutely lovely second day in the city – which I will tell you about in another post – I have a few thoughts about Day 1:
As a rule, the Dutch people are tall and beautiful. I don’t know why or how, but we should be so lucky. I’ll try to provide visual evidence to this affect later this week.

A guy pedaling along with a box full of kids like it's nothing.
I don’t recommend being like your average New Yorker and just walk along the cobblestone streets with your head down and your headphones on. If you do, you will suffer injuries. Someone will hit you with a bike or moped or tram. Pay attention! And I will now put a positive spin on this: It’s terrific that there’s so much green transportation in this town. But seriously, transporting yourself on two wheels – whether motorized or person-powered – is the fastest and smartest way of getting around. Some mommy bloggers would have a fit if they saw how unprotected children are on the bikes, for sure. But that’s the way this society is, and motorists just motor along with bicyclists’ safety top of mind. Again, we should be so lucky.
Interestingly, bars/restaurants serve only particular beers. Like some restaurants in the States have either Coke or Pepsi products. For the bigger beer companies, they’ll serve Heineken or Amstel—that’s regular Amstel, not Light—or Grolsch or whichever other. Oh, and by the way, Holland, you need to have bigger beer glasses. If only to keep around in service for American customers. 
For the foodie types out there, I have an interesting food delivery gadget for you. I ordered the largest piece of apple cake I’ve ever seen “to go,” or as they say, to take away. And check out the cardboard sleeve they placed the slice into. It’s not a pastry box, but it still gives support to the baked item. And it uses minimal cardboard. Who knows, maybe these are commonplace somewhere in the U.S., but I’ve never seen it and I think it’s a fabulous way to box up a to-go pastry.
The hotel I’m staying in has the most amazing line of toiletries. I stayed at the same hotel last year—Jennifer joined me at the end of the trip for a few days, too—and we snagged as many of the teeny tiny bottles of shampoo, shower gel and lotion as we could. Especially the lotion. The brand is called Rituals, and I believe it’s made in the UK, but I’m not sure. We’ve been very judicious in our use of our bottles from last year and are constantly on the hunt for it. In fact, I nearly accosted a flight attendant last week because I swore she was wearing the stuff. I slather as much lotion as possible on myself each morning and seriously, I should be a little worried about this obsession. I wish smell-o-vision was possible, but until then, here’s what the bottle looks like:

Rituals body milk, shampoo and shower gel.
This is truly a beautiful city. Picturesque beyond words. I don’t have the best photography skills but I think this might capture just a bit of what makes Amsterdam so special.

Day 2 coming up next.
Scott Conant’s Scarpetta in South Beach
March 8, 2011 § 1 Comment
Where’s Dainty been these last few days? Not blogging, obviously. It think it’s a misdemeanor to blog while in the big warm world of South Beach. We jetted away last week to find some relief from this lagging winter.
While down there, I had to make good on a bet. Thanks to the Pittsburgh Steelers, I owed Jennifer a meal at the Fountainebleau Hotel – a fabulous haven for the young and rich who want to be seen. We just wanted to check out the glitz.
After a little research, we found that Scott Conant had a restaurant in the compound call Scarpetta. Scott Conant – he’s one of the judges on Chopped, the one who practically had someone cuffed and thrown into jail for including cheese with a fish dish, apparently a big Italian food no-no. You don’t know me if you don’t know how I feel about such restrictions. Wanting to learn more about the man’s culinary viewpoint—and secretly wanting to put cheese on fish while on the guy’s turf—we decided that Scarpetta would be it.
The restaurant – dimly lit, private, modernly comfortable. The front-of-house girls – Jennifer even called them vacuous to their faces and they giggled. The waitstaff – well-trained. Although our guy looked vaguely like a thin Charlie Sheen. We were seated on the veranda, which typically has ocean and pool views but was enclosed due to high winds. Maybe our seating had something to do with 50 Cent and his entourage dining inside. Who knows.
Anyway … I’m not going to tell you about our entire meal – I’m sure there are enough reviews out there for your reading pleasure. You can assume it was great. If it wasn’t, I’d write all about it. What I’m going to tell you about is my appetizer, which – and I’m not kidding – may be the best thing I’ve ever eaten in my life.
Burrata atop heirloom tomatoes. I will forever remember this dish, and here’s why.
A burrata is a fresh cheese creation consisting of a solid mozzarella shell and mozzarella and cream interior, served at room temperature. It takes a caprese salad and makes it look like McNuggets. The burrata is like a pillow of dairy with a creamy dairy filling. This topped a thick slice or two of fresh heirloom tomatoes, perhaps lightly tossed in evoo – it was a little hard to tell after I cut into the burrata, but more about that later. When I ordered, I was skeptical of the “fresh heirloom tomato” bit, but silly Northerner that I am, Florida can grow fresh produce during the winter. I do wish they had specified which tomato variety they used. I know they’d have to change out the menu frequently if they did that. Perhaps the waitstaff could relay that info as the “heirloom tomato of the day” like the “fish of the day.”
Now, about that burrata – this was a mozzarella that must have just begun to form and was immediately served to us, it was that fresh. And delicate. So, so delicate. Cutting into the burrata released a small dose of warm cream, coating the ripe yet firm tomato. Someone’s Italian grandmother was in the back making this. I just know it. So, there was this small bite of rich and creamy cheese contrasting with the bright light tang and texture of the thick slab of tomato. The taste and texture could make me believe angels exist, it was that good.
I had wanted to save a small corner of the burrata to put on my turbot entree, but I just could not leave a drop of it for later. I must learn to make burrata.
Dainty Rates: The burrata – off the charts.
