
Adding Landscape Edging
May 14, 2013 § 1 Comment
Jennifer and I moved into a newly constructed building last September. To be more accurate, it was still under construction when we moved in, with fine work still being done inside. At the time, the outside perimeter – the barely 3-ft. wide space between the sidewalk and the building – was still a rubble pile. Talk about unsightly. And being a gardener, I was itching to get at designing and installing a landscape that would match the mod look of this unique house.
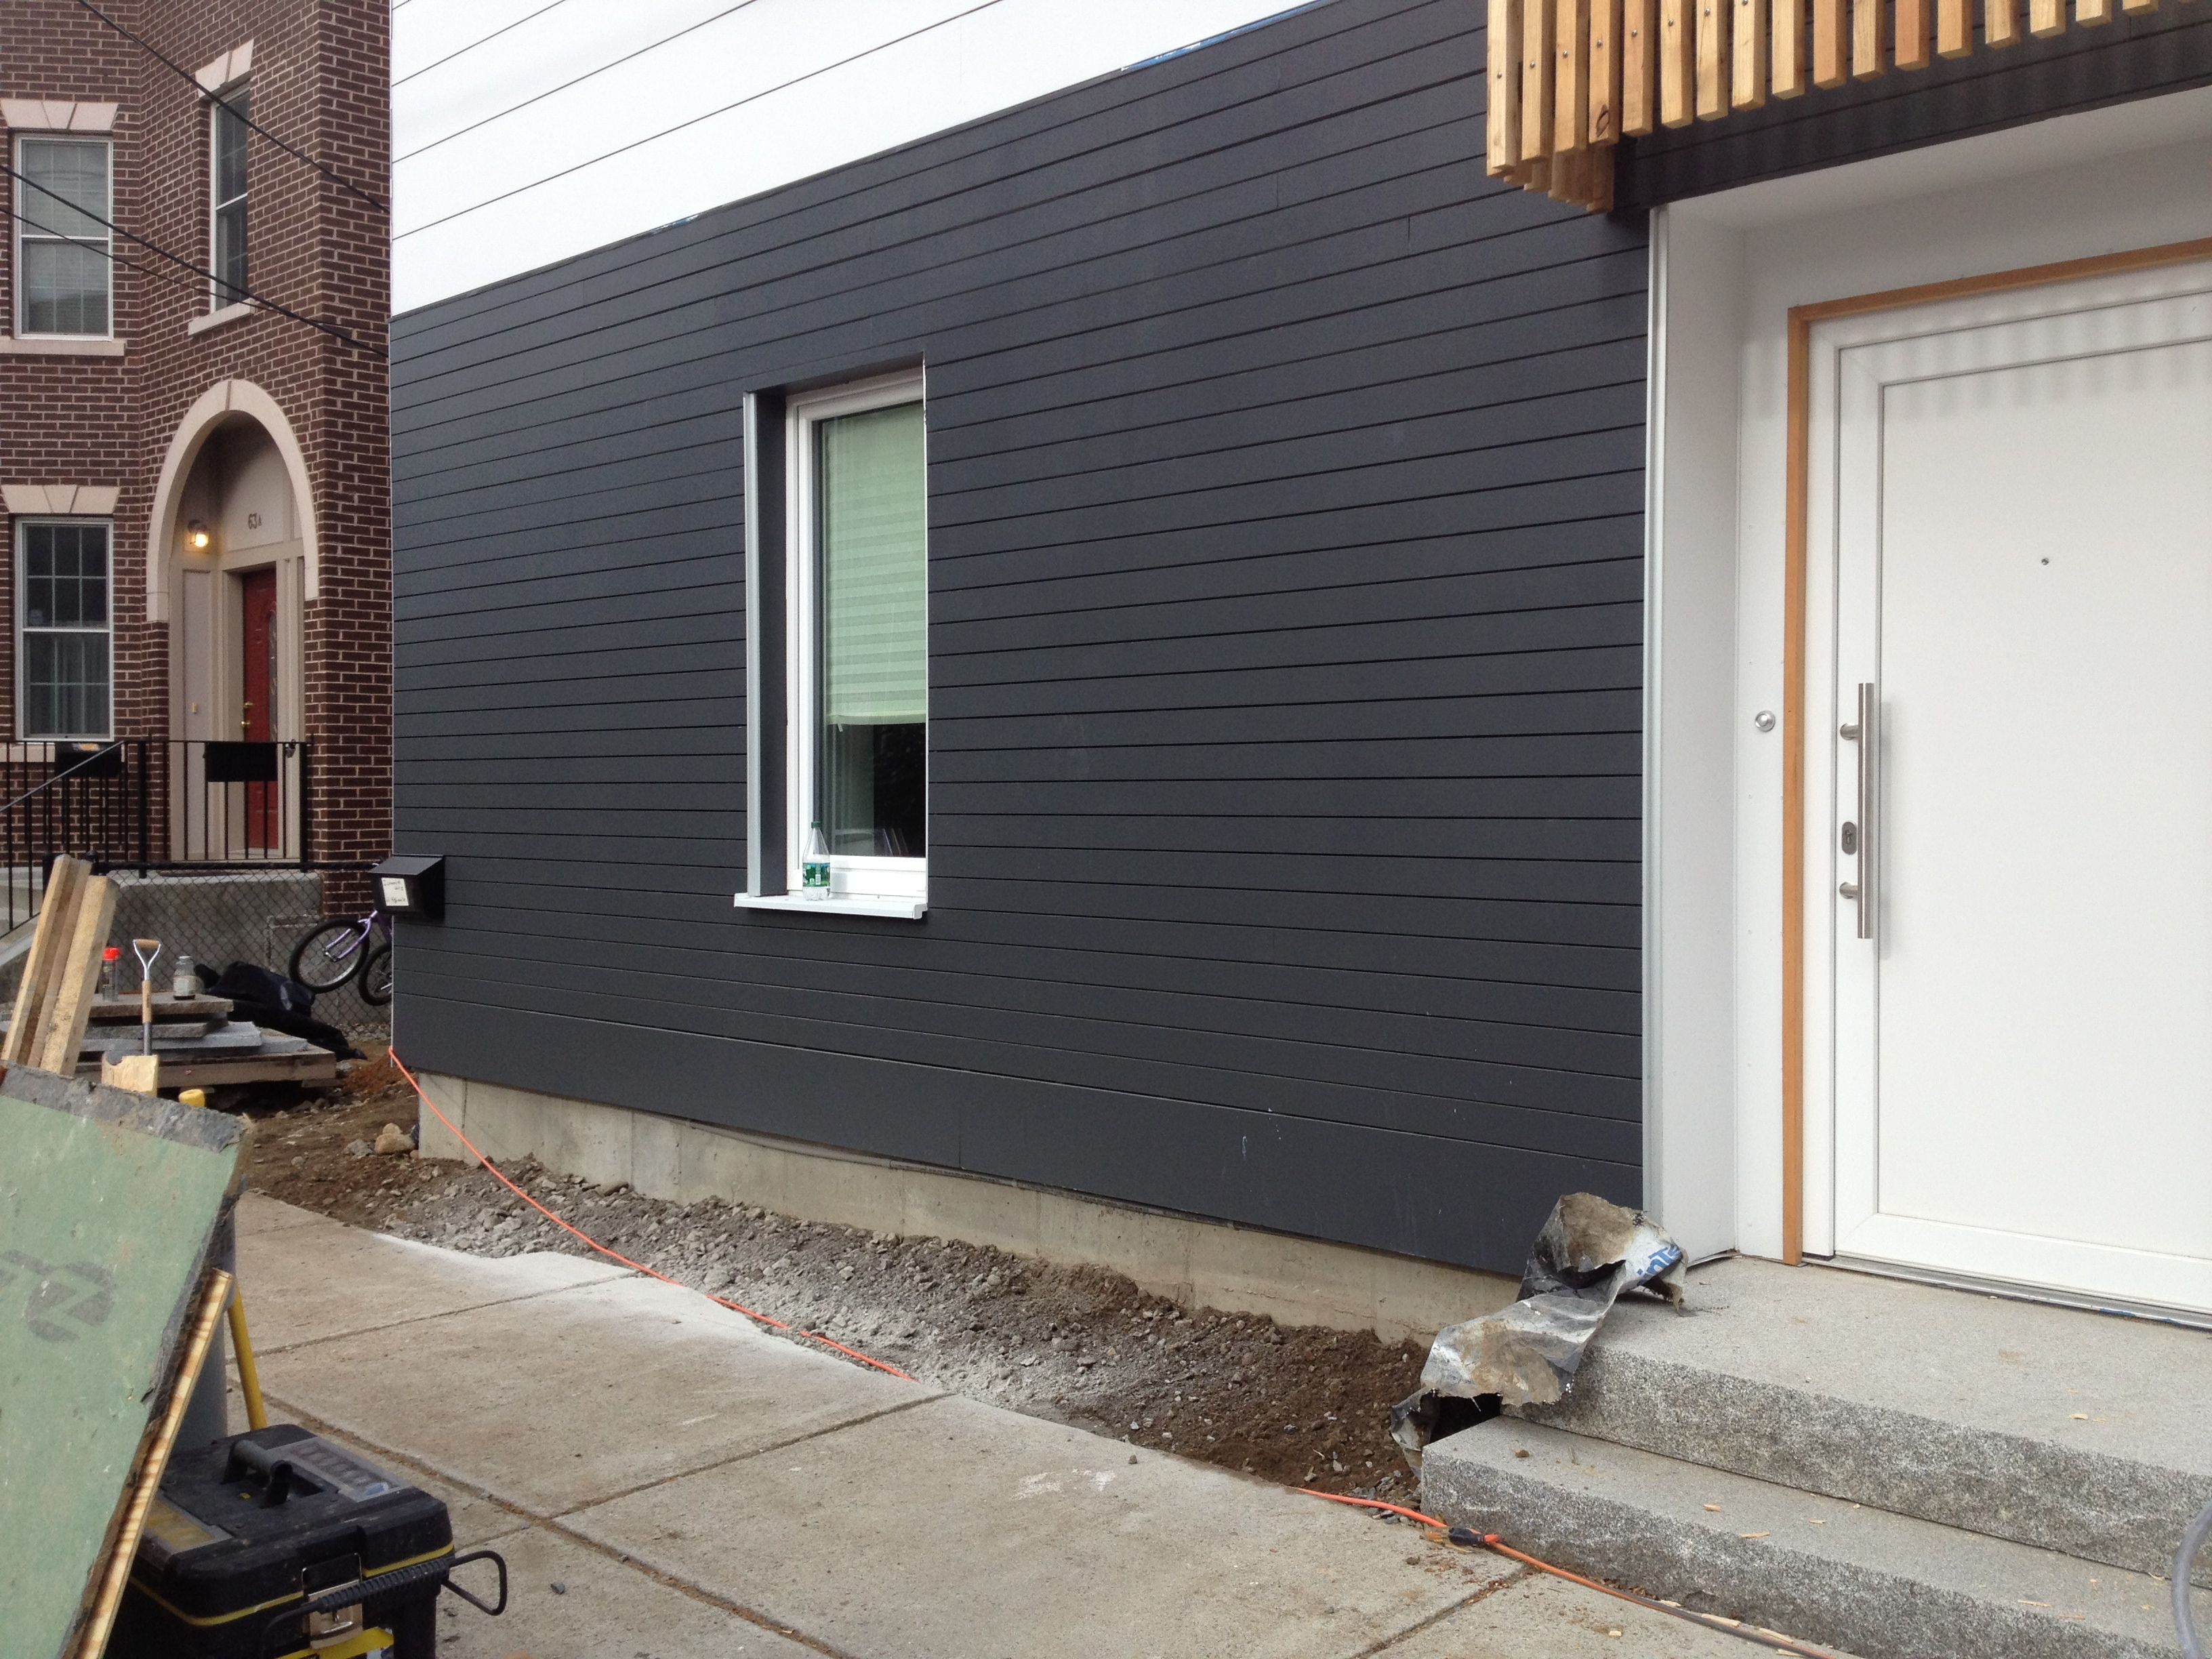
The contractors eventually added some soil to that space. Correct that—it was fill and not anything near good garden soil. They also added in a strip of black steel landscape edging between the sidewalk and the soil. Thing is, though, the edging was flush with the sidewalk. Any sort of mulch that I would add to the garden space would wash onto the sidewalk. And with the $15 per bag mulch that I prefer, I didn’t want any of that washing away.

After the soil was added and a few plants were just hanging out.
Since the building is based on German Passivhaus technology, I wanted the landscaping to reflect some German landscape aesthetic. In other words, ornamental perennial grasses (the Germans love ornamental grasses). Ornamental grasses are awesome because they are low water use plants, add visually to a landscape even in the winter with their stiff (i.e. dead) stalks, look kinda cool as their feathery flowers blow in the wind, grow into nice-sized clumps, and come in a range of colors, textures and heights to choose from.The plantings around the new Shapiro Building at Boston Medical Center served as my inspiration.

Landscaping around the Shapiro Building at Boston Medical Center served as inspiration.
The grasses would act as the foundation of the landscape and I would add some color with bulbs, annuals or perhaps choose some smaller perennials later on. So, last fall I planted a dozen or so Pennisetum ‘Karly Rose’ grasses (those will become about 3 ft. high), added in several ‘Blue Pacific’ creeping junipers, and dug in 100 ‘Daydream’ tulips. And then we suffered through a very long and snowy winter.
In late March I trimmed back the dried stems of the grasses and eagerly awaited the tulips. And I admit, it was very, very exciting when they finally popped.
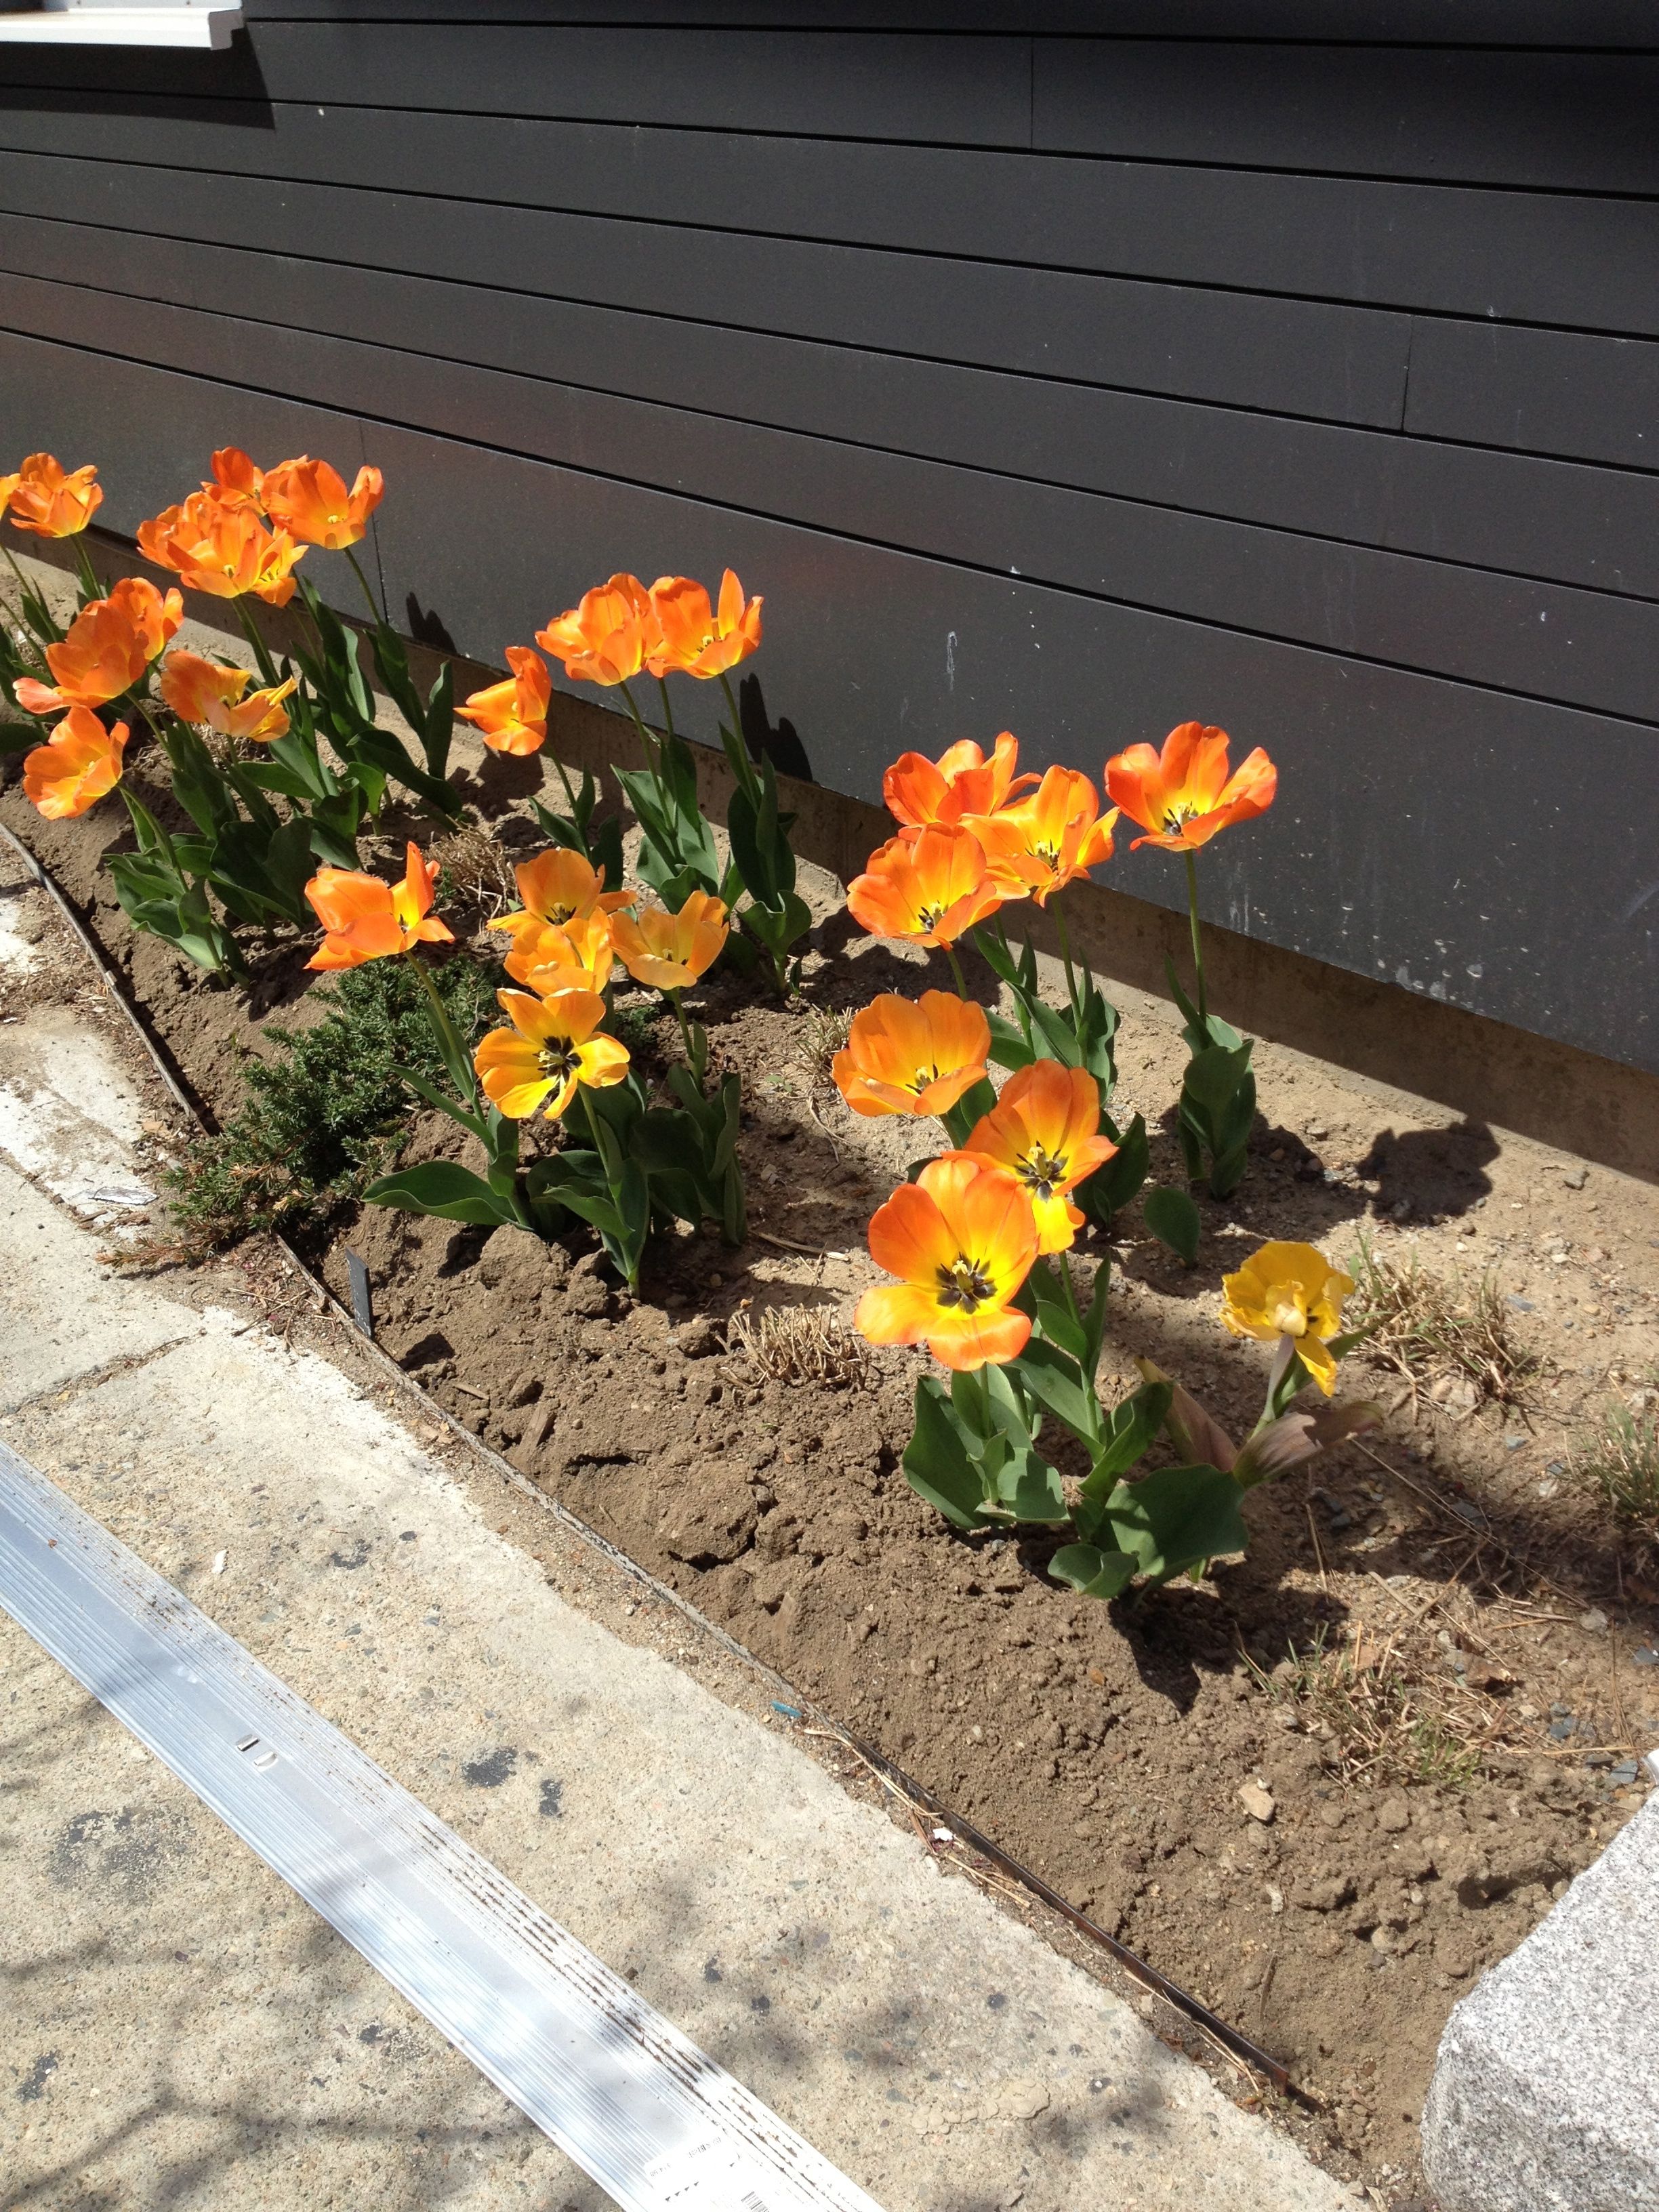
‘Daydream’ tulips in the new landscape.
Something was missing—other than the grasses, which I knew would emerge slowly over the course of April and May. What was missing was my favorite mulch—buckwheat hull mulch. Its dark color would really make those tulips so stunning. But in order to lay down the mulch, I needed something to hold the mulch inside the garden area without it washing away when it rained. After a little research, I decided on simple aluminum edging. I dug a shallow trench just behind the existing steel edging, inserted the aluminum edging about 1.5 inches down into the soil, secured it with some stakes every few feet, and backfilled with soil.

Landscape after the mulch and edging have been added.
Makes quite a difference, huh? Turns out the aluminum accents portions of the building’s edges, so that’s a bonus. And the edging and mulch will go well with the grasses once they emerge (you can just barely see one right there square in the front).
The best thing, though, is what the addition of the edging, the mulch, the plants—of the entire garden we are installing—is communicating to the neighbors. It says “We care about where we live and we really like it here.” In other words, curb your dog, put that wrapper in a trash can, throw that cigarette butt elsewhere, and it’ll continue to look nice for the whole neighborhood. While working on this over the course of several days many neighbors came up to me to comment on how nice it looks. “This was an overgrown trashy lot two years ago,” one young guy said to me. For a young man to even notice it enough to come up to a stranger and comment—well, I take it he was impressed with how that once empty lot has changed.
Because this garden space is so public, it’s not just for Jennifer and I to enjoy. It’s something the whole neighborhood can share in. That’s really what gardens are for. I’ll post more photos as the grasses grow and after I plant some annuals. Meanwhile I have a balcony herb garden in the works.
Start Seeds This Weekend
April 15, 2011 § 1 Comment
What kind of crafty, homey, cooking, gardening type of person do I think I am if I can’t find somewhere in our condo to grow some seeds??
Yes, we live in the “garden level” unit (think Laverne and Shirley). Yes, we have zero natural light. Yes, we have your average city person’s complaint of lack of space. BUT! What Dainty has is a will to get things done and a complete hatred of whining that I can’t do something.
So, instead of letting another spring pass by during which I complain about not being able to start my own veggie seeds, I decided to create space somewhere, anywhere.
While we have your typical South End rowhouse-type one-floor apartment that has VERY little storage, we do have a 3-ft. wide by 18-ft long storage closet that is a GEM. It’s unbelievable. Storage like this is unheard of here. And, it’s one of the reasons we bought the place. It’s stuffed to the gills with pantry items, jackets, sporty-spice stuff, a small freezer, bins of guest sheets towels, and even our wine. There had to be some extra space in this room to start a bunch of veggie seeds. And I found it.

This is a small space about 18 inches wide and tall and about 2 ft deep. I had a bunch of duffel bags sitting on top of some towel-containing storage bins, in a Metro Shelving-type coat rack kinda space. Just to the right of the bins are hanging a bunch of jackets. If I remove the duffel I get a nice flat surface.
Next I bought an 18-in. long fluorescent light, some chain and some S-hooks. I hung the light from the top rack using the S-hooks. It’s important to have the lamp hanging like this so when the plants grow taller, you can move the light up. Having the light at the very top to start with will make the little seedlings “leggy”, that is, they’ll get thin and stretchy. Not good. You want the light close to the seeds when the germinate.
Okay, next I planted some seeds in some pots. Got an old plastic yogurt container? Old milk container? Old pots? You can use anything that can contain soil, so use it. I happen to have a bunch of Cow Pots—yes, they are made out of cow poo but they don’t smell, check out their web page—so I used those. Oh, and they are plantable, too. The seeds will germinate in them and when the plants are big enough you can plant the entire thing into the ground or into a patio container. Pretty cool.
I filled the Cow Pots—which are 6 connected little pots better known as “packs”—with a special soil for starting seeds. I happened to pick up something from MiracleGro. Any good quality potting mix should do the trick. Then I put the filled 6-packs onto an old baking tray and then filled the tray to the rim with water. The pot and soil sucks up the water. Capillary action, remember that from school? Anyway, give them about 30 minutes to absorb the water in the tray.
During that time, plant your seeds! All I do is make a little divet in the soil with my pinky. The larger the seed, the larger the divet. These little pots are about 3 inches square. I made three divets in each cell. And I put two seeds in each divet. Am I even spelling divet correctly? Hmmm … Be sure to label what’s in which cell. If you’re mind is going like mine is, you’ll forget what you did within the hour, so make a record of it.
Once the water was all absorbed, it was safe to move the trays and pots to their new home. Voila! A seed starting area set up and going in nowhere and in no time at all. Now, all I have to do is wait.

Seed starting area
What Did I Plant?
It’s still cold outside folks. Nights still get chilly here, and only some plants can take it. Chard, spinach, beets, carrots, lettuce, cabbage and such can be planted outside now. Seeds can be sown directly into the soil, too.
But, the big bonanza plants just can’t survive quite yet. Those would be veggies like tomatoes, squash, peppers, melons, zucchini, beans, pumpkins, corn. You can sow their seeds, but the chill isn’t going to do them any good. Better to start them inside now – or even a couple of weeks ago – so they’ll be a good size to plant out in the garden at the end of May. That’s right, I said end of May for most everyone here in the Northeast. It’s not that they’ll die at even the slightest chill. They just really really prefer to grow with some heat. Wouldn’t you? Anyway, the weekend before or during Memorial Day is a good time to plant these outside. You could and can do it a bit earlier, but I prefer to give them optimal growing conditions. May’s it for me.
I’ll post updates of my little babies as soon as they hatch!
