
Eggplant Rollatini
March 12, 2013 § 1 Comment
Sometimes you have to shop for dinner. Sometimes it’s in your fridge or freezer, in bits and pieces, just waiting for you to assemble.
That’s what happened with last night’s dinner—Eggplant Rollatini. Open the fridge and there’s an eggplant needing to be used ASAP. Open the freezer and there’s a cup or so of frozen ricotta and chard lasagna filling left over from last fall’s Roasted Vegetable Lasagna making festivities. And there’s a large can of whole peeled tomatoes in the cabinet.
Get out the mandolin, folks—it’s rollatini-making time. And having never made rollatini before, this was all off the cuff.
Eggplant Rollatini

Eggplant Rollatini
- olive oil (to be used throughout recipe)
- kosher salt and pepper to taste (to be used throughout recipe)
- 3-4 cloves garlic, depending on size, smashed and minced
- 1 28-oz. can whole peeled tomatoes
- 1-2 tsp. Italian seasoning
- 1 tsp. sugar
- 1 medium-large eggplant, sliced lengthwise to about 1/4-in. thickness with a mandolin (be careful!)
- Chard-ricotta mix from Roasted Vegetable Lasagna, or about 1-1.25 cups plain ricotta for this recipe
- About 1/ cup Parmesan cheese to sprinkle
1. Turn oven to 400F.
2. Add 1 tbs. olive oil to pan on medium heat. Add garlic and let it go until it becomes fragrant. Slowly pour in the liquid from the canned tomatoes. Take out each tomato from the can and gently mush and tear it into pieces with one hand and add to the pan. Messy, but it’s the best and easiest way to do it. Add in Italian seasoning, sugar (really, it helps brighten the sauce, trust me) and a large pinch of kosher salt.
3. The sauce will really be bubbling at this point. Turn it WAY down and let it simmer gently. Add in a turn or two from the pepper mill. Continue to simmer until it thickens a bit, about 20-30 minutes, just about until you’re ready to assemble the rollatini.
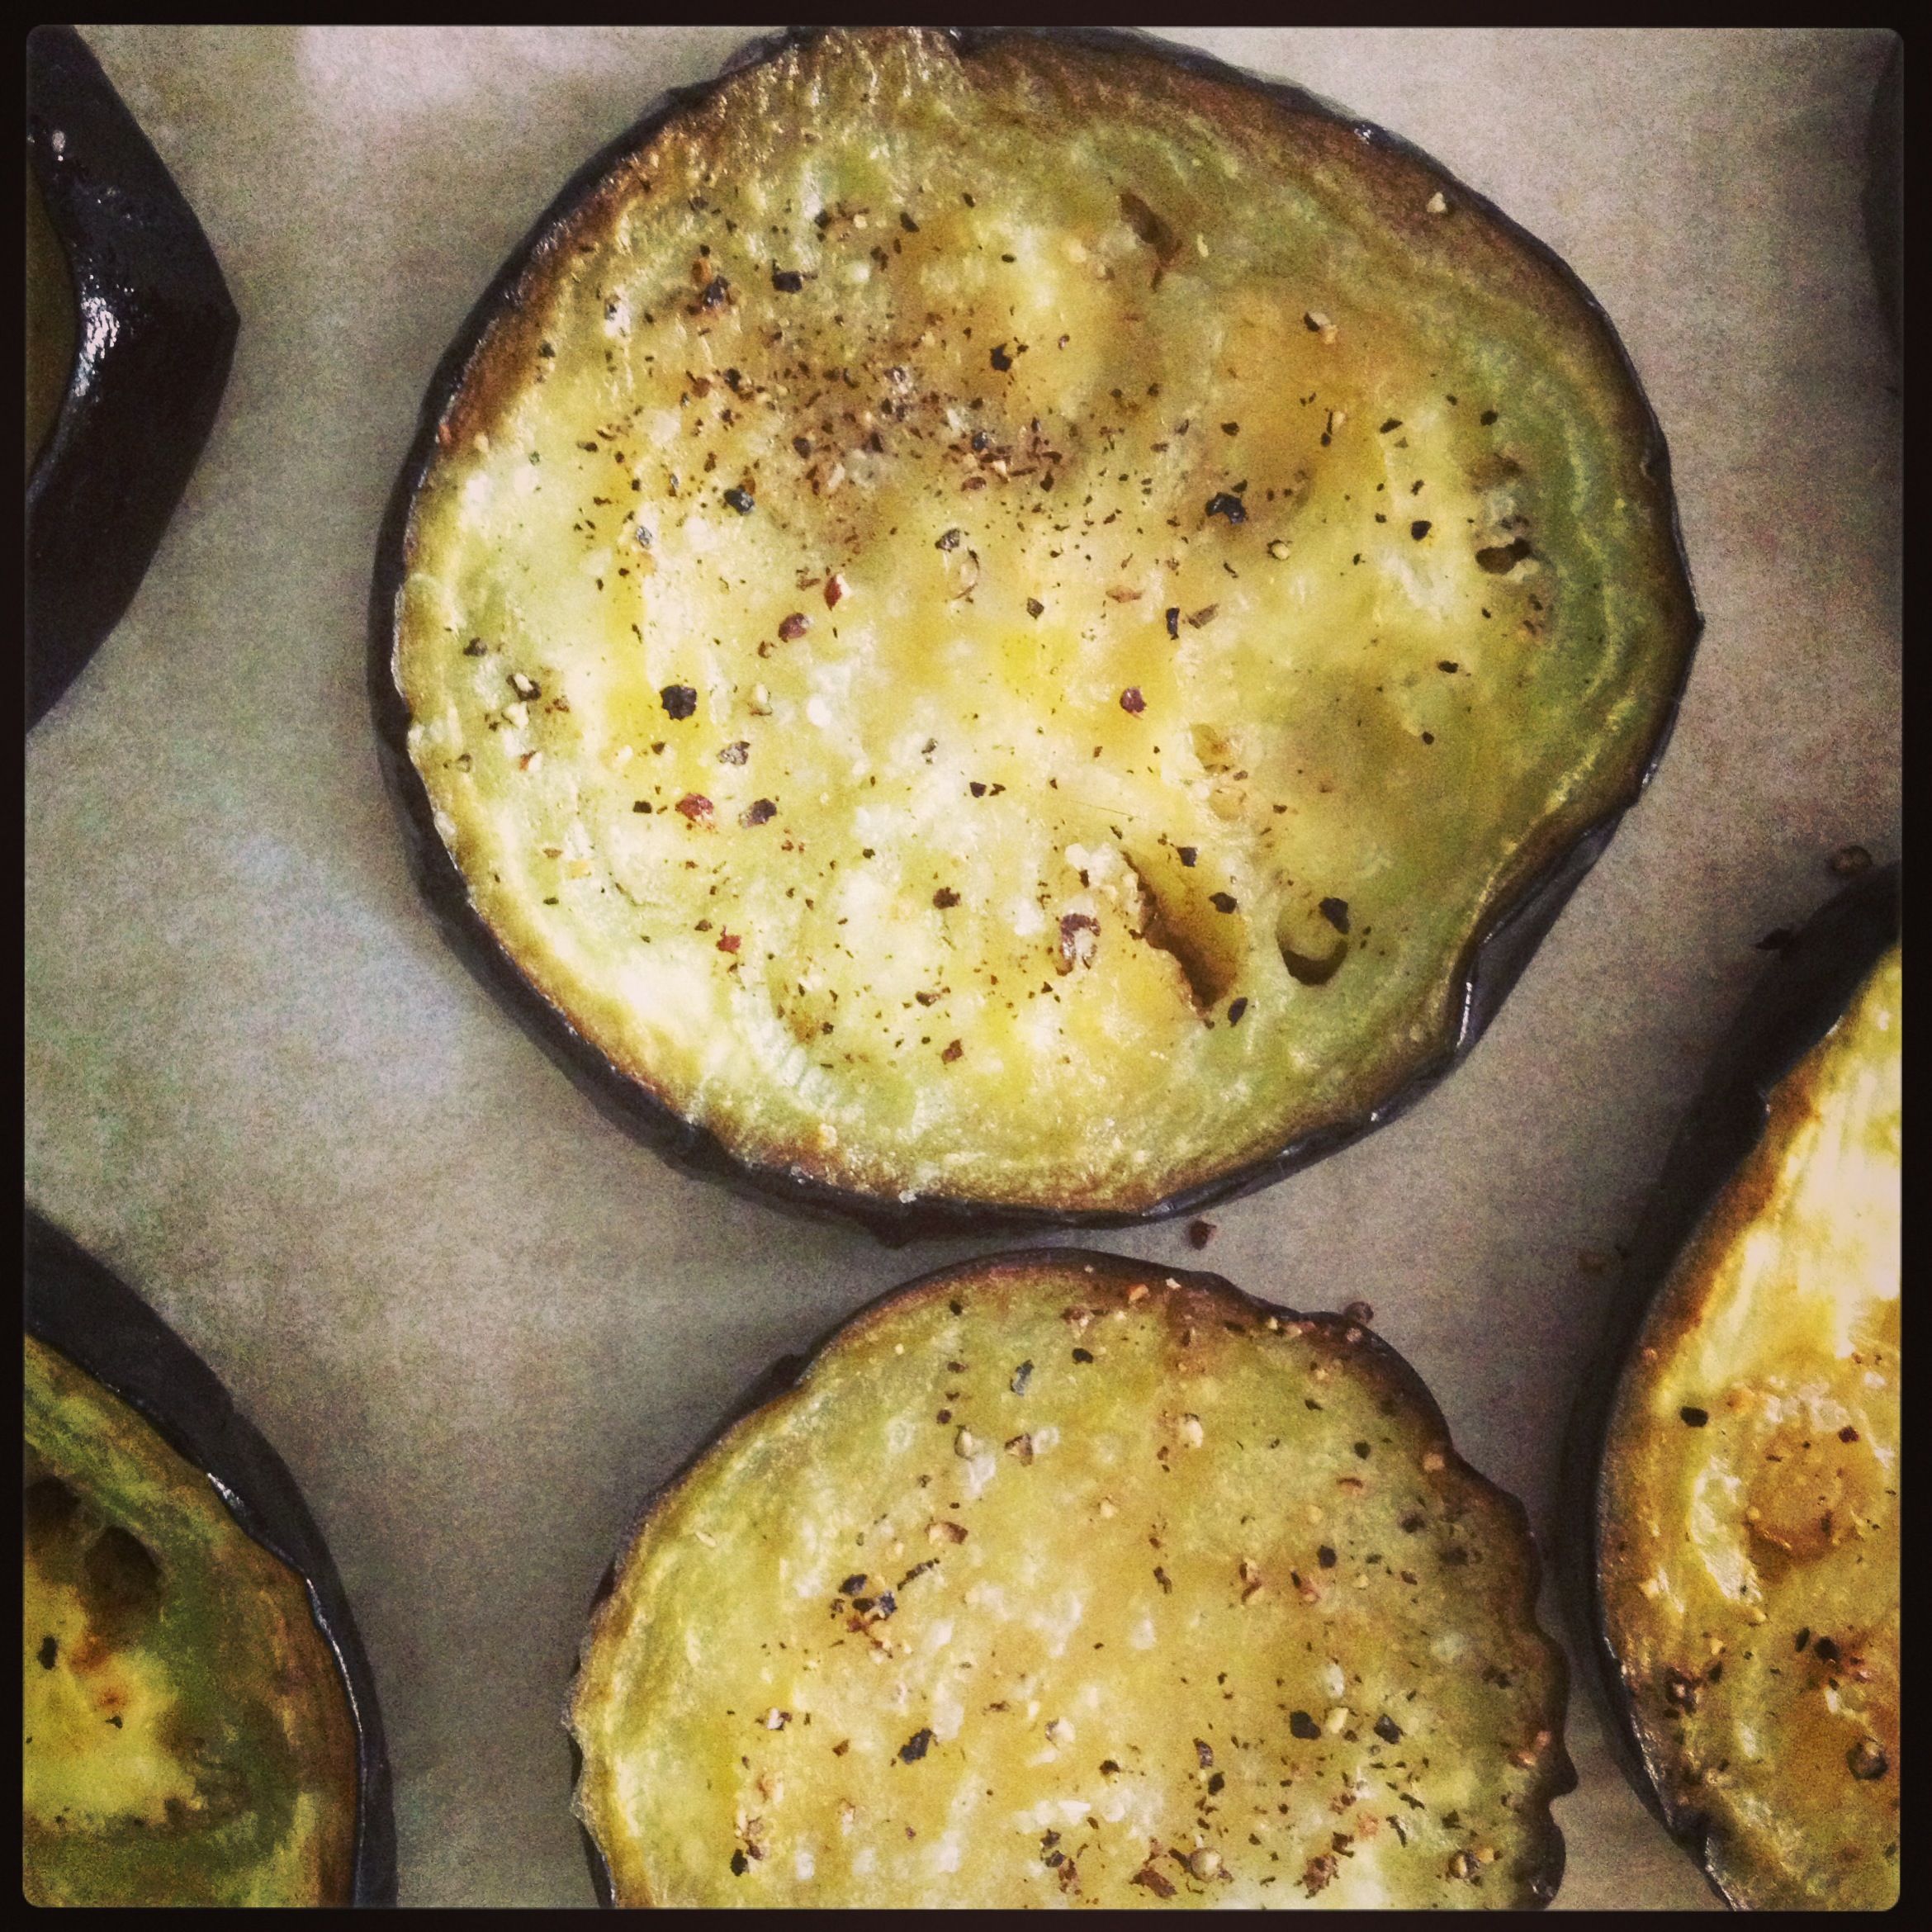
4. Meanwhile, slice eggplant. Place each slice on a sheet pan, and pour a bit of olive oil (not a lot, not a little) over each slice, using a brush to spread the oil over each slice. Sprinkle kosher salt and pepper on each slice. No need to do both sides, one side will do. Pop the sheet pan in the oven and bake for 15-16 minutes, or until the firmness of the eggplant is gone but the eggplant has not become wicked soft. When done, take out and let cool enough to handle, about 5-8 minutes. Keep oven on!

Eggplant, thinly sliced and baked.
5. Working with one slice of eggplant at a time, spread about a tablespoon of the ricotta mixture over the surface of the eggplant slice. You don’t want it too thick or you won’t be able to roll it very well. Starting at the narrow end of the eggplant slice, roll it into a “cigarello,” or, as I would rather imagine it, roll it up like you’d roll your yoga mat. Set aside. Continue with the next slice until you either run out of ricotta or eggplant.

Eggplant slices spread with ricotta mixture and rolled.
6. Lay down about 1/4 cup of the tomato sauce in the bottom of an 8×8 baking dish. Place eggplant rolls in dish on their sides (not standing up). Fit as many as you can in there. When done, generously spoon sauce over the surface—but you don’t want it soaking wet, either. Find the happy medium. When done, sprinkle a coating of grated Parmesan on top and cover with foil.

Lay the rollatinis side by side in an 8×8 baking dish

Spoon sauce over top and sprinkle with Parmesan cheese
7. Pop back into the 400F oven for about 20 minutes. Remove foil and bake another 5 minutes or so. Remove and let cool for 5 minutes before digging in.
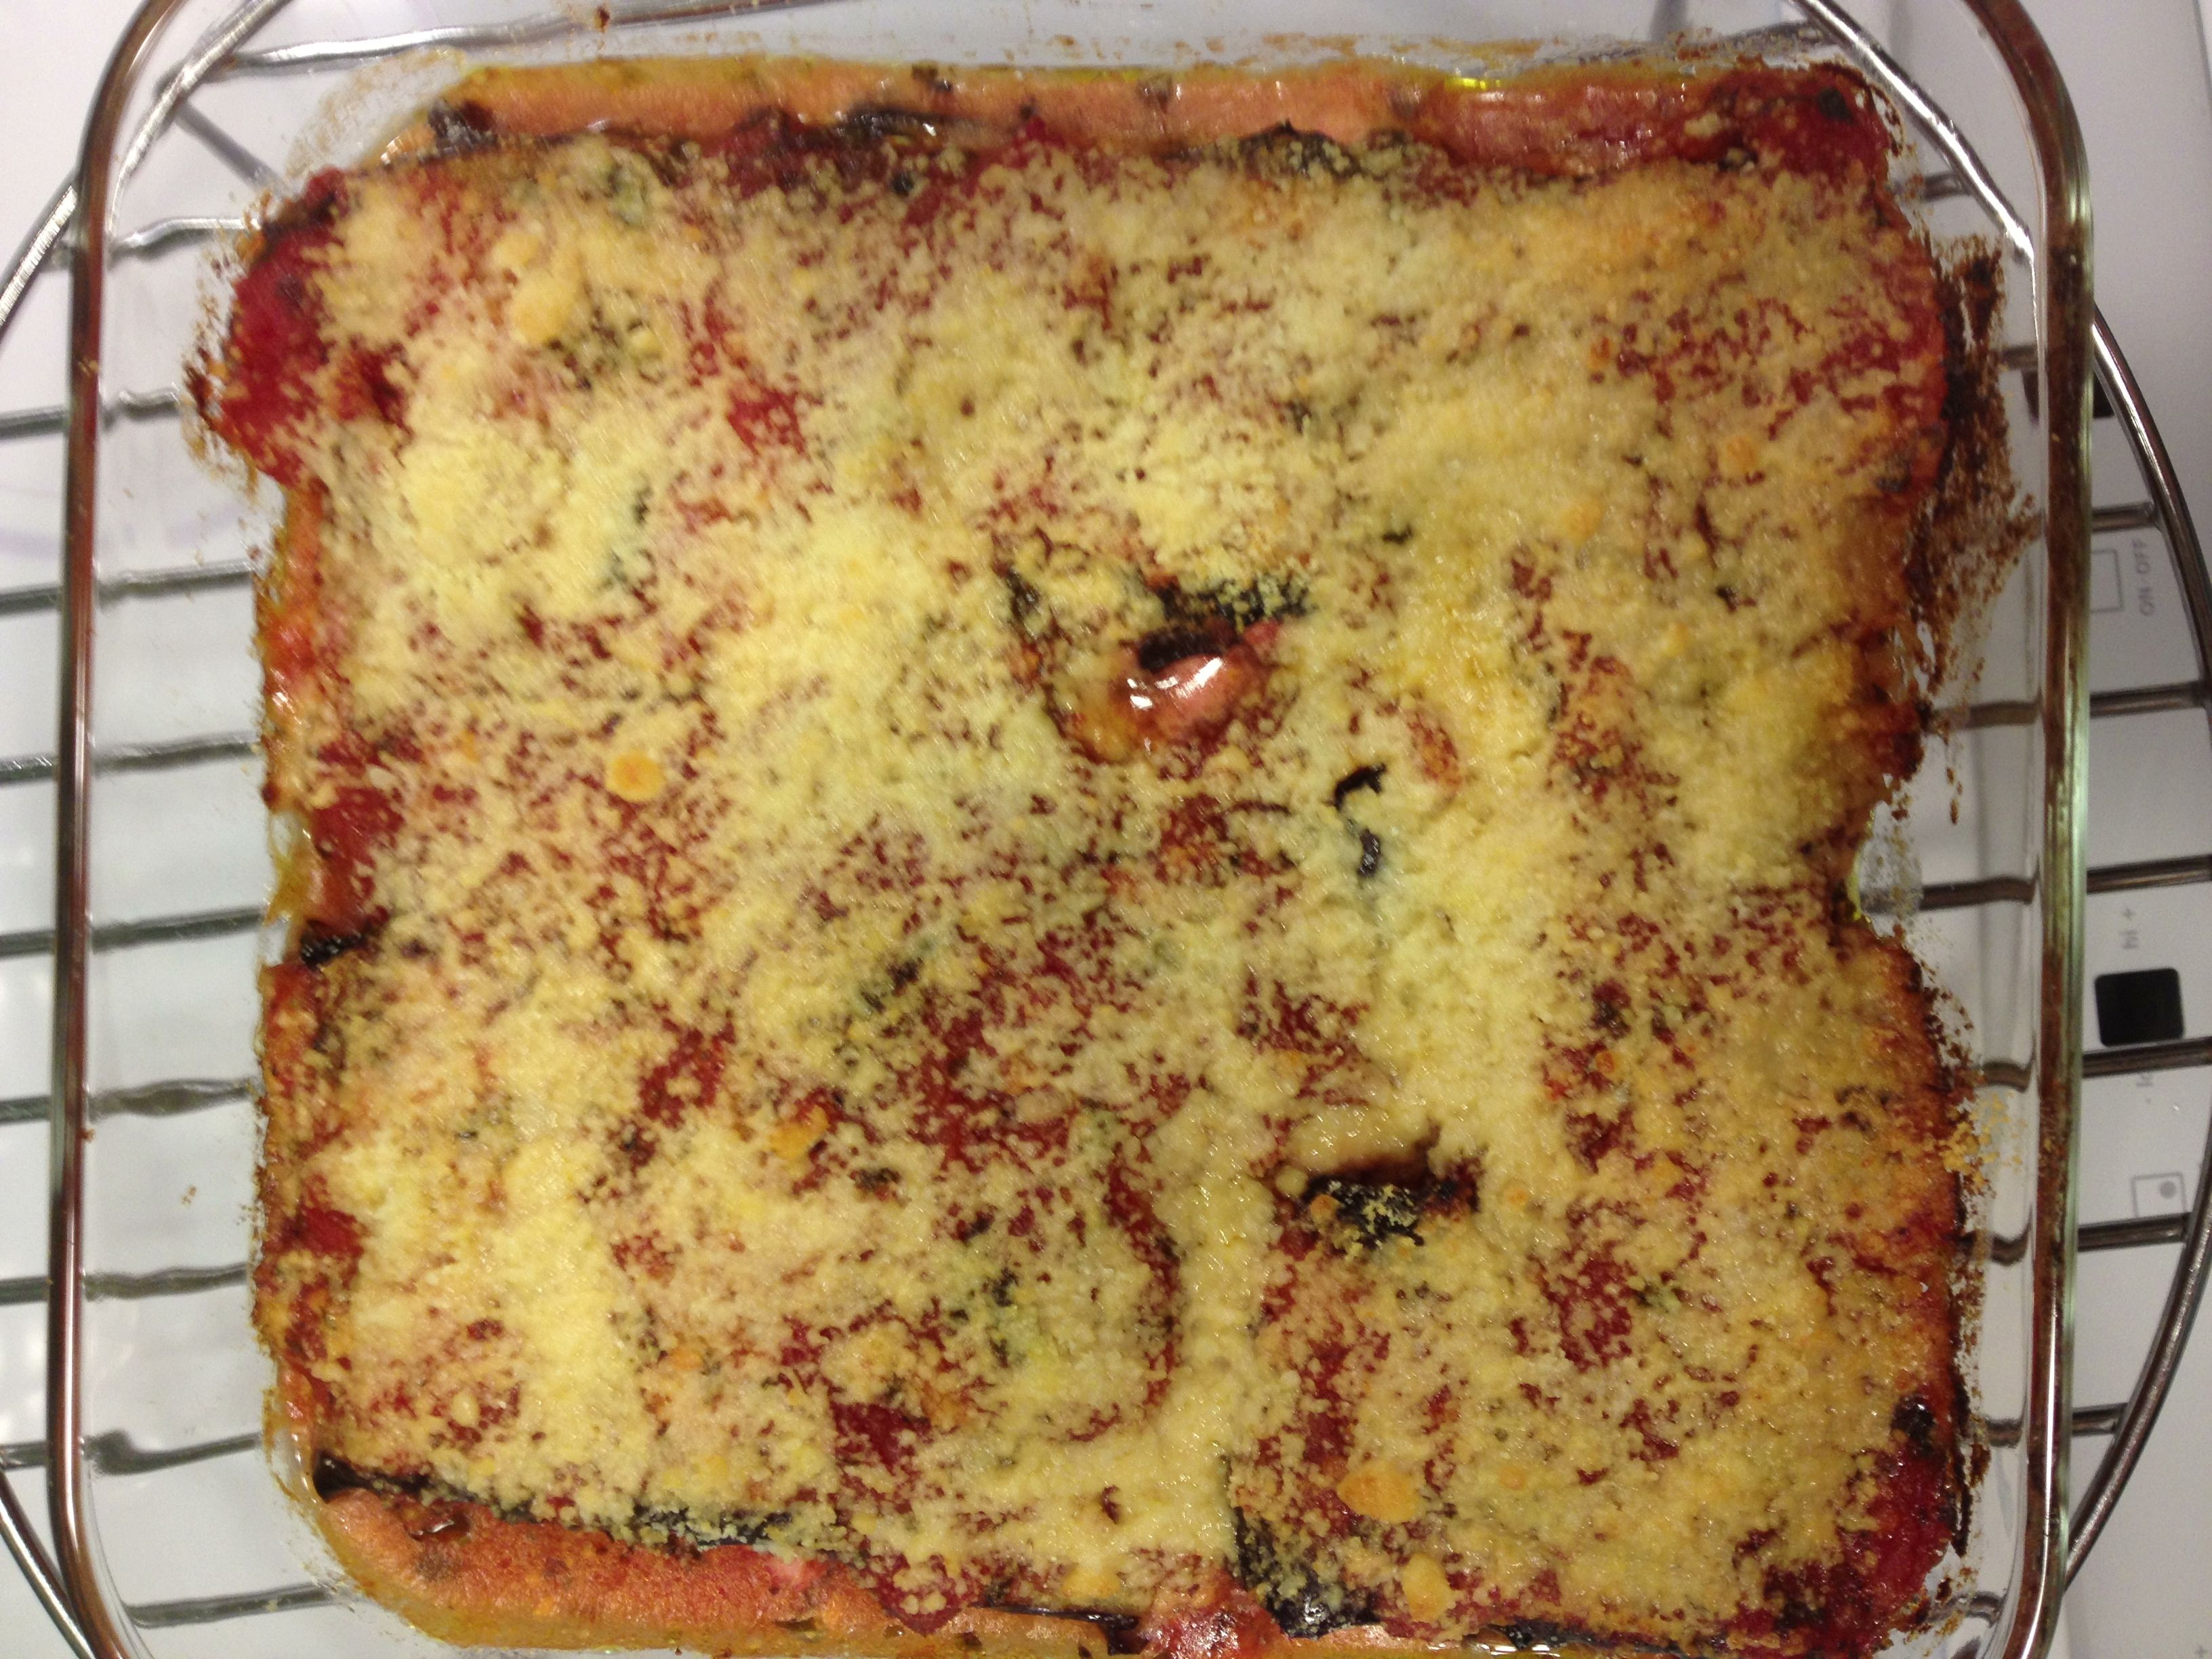
Bake for a total of about 20-25 minutes.
Have something like this in your repertoire? Let me know your version in the comments section.
Wheat Berry and Bean Salad
March 6, 2013 § 2 Comments
The only on-the-package-recipe you should ever make is Nestle Toll House Chocolate Chip Cookies. Truly. It’s a proven recipe and makes a darned-good cookie, a cookie you will experience from the first years of your life to your last. It’ll even be served at your wake. Every other recipe found on a package—whether it’s a box of Velveeta or a fancy grain—should be embarked upon with hesitation and doubt. A dingy full of doubt.
I love what wheat berries do for me for breakfast. I’ve also included them in bread recipes and sprinkled them on a green salad. So when I grabbed my bag of Bob’s Red Mill Wheat Berries and noticed the Wheat Berry & White Been Salad recipe on the back I thought, “Why not try something new today?” “New,” I am reminded now, means a learning experience and not necessarily a guarantee of something awesome.
The salad is simple—wheat berries, white beans (I used chickpeas I had on hand), scallions, celery and tomato with a vinaigrette. The vinaigrette is what I regret here. Following the recipe as I did, the ratio of vinaigrette to salad ingredients was way too much. It was more of a thick soup than a salad because it was so heavily dressed. I had to fill out the salad somehow.

A little too overdressed for my liking.
Reconstructive salad making ensued. Wheat berries went from 1 cup to about 1 3/4 cup (all of what I had just cooked). I had no more chick peas, and no more lentils, which are my usual go-to filler for salads like this. Bulgar would have been too fine of a texture to add into the salad. In the end I cooked up a batch of black beans and added to the soupy salad until it was soupy no more. I must have added close to 2 cups, no kidding.
Wheat Berry and Bean Salad (adapted from Bob’s Red Mill) 
Salad:
1 cup cooked wheat berries
1 cup chick peas
2 cups black beans (or some sort of bean or lentil)
1/2 cup scallions, chopped
1/2 cup celery, diced (makes for a nice crunch)
1/2 cup cherry tomatoes, quartered
Vinaigrette:1/2 cup olive oil
2 tbs. lemon juice (about 1/2 lemon)
2 tbs. white wine vinegar
2 tbs. chopped parsley
1 tbs. honey mustard
2 tbs. minced shallot
1/4 tsp. kosher salt
1/4. tsp. black pepper (or 5-6 grinds from a pepper mill)
1. Mix the vinaigrette ingredients together. I chose to emulsify with an immersion blender. I then added the vinaigrette to the bottom of a large bowl.
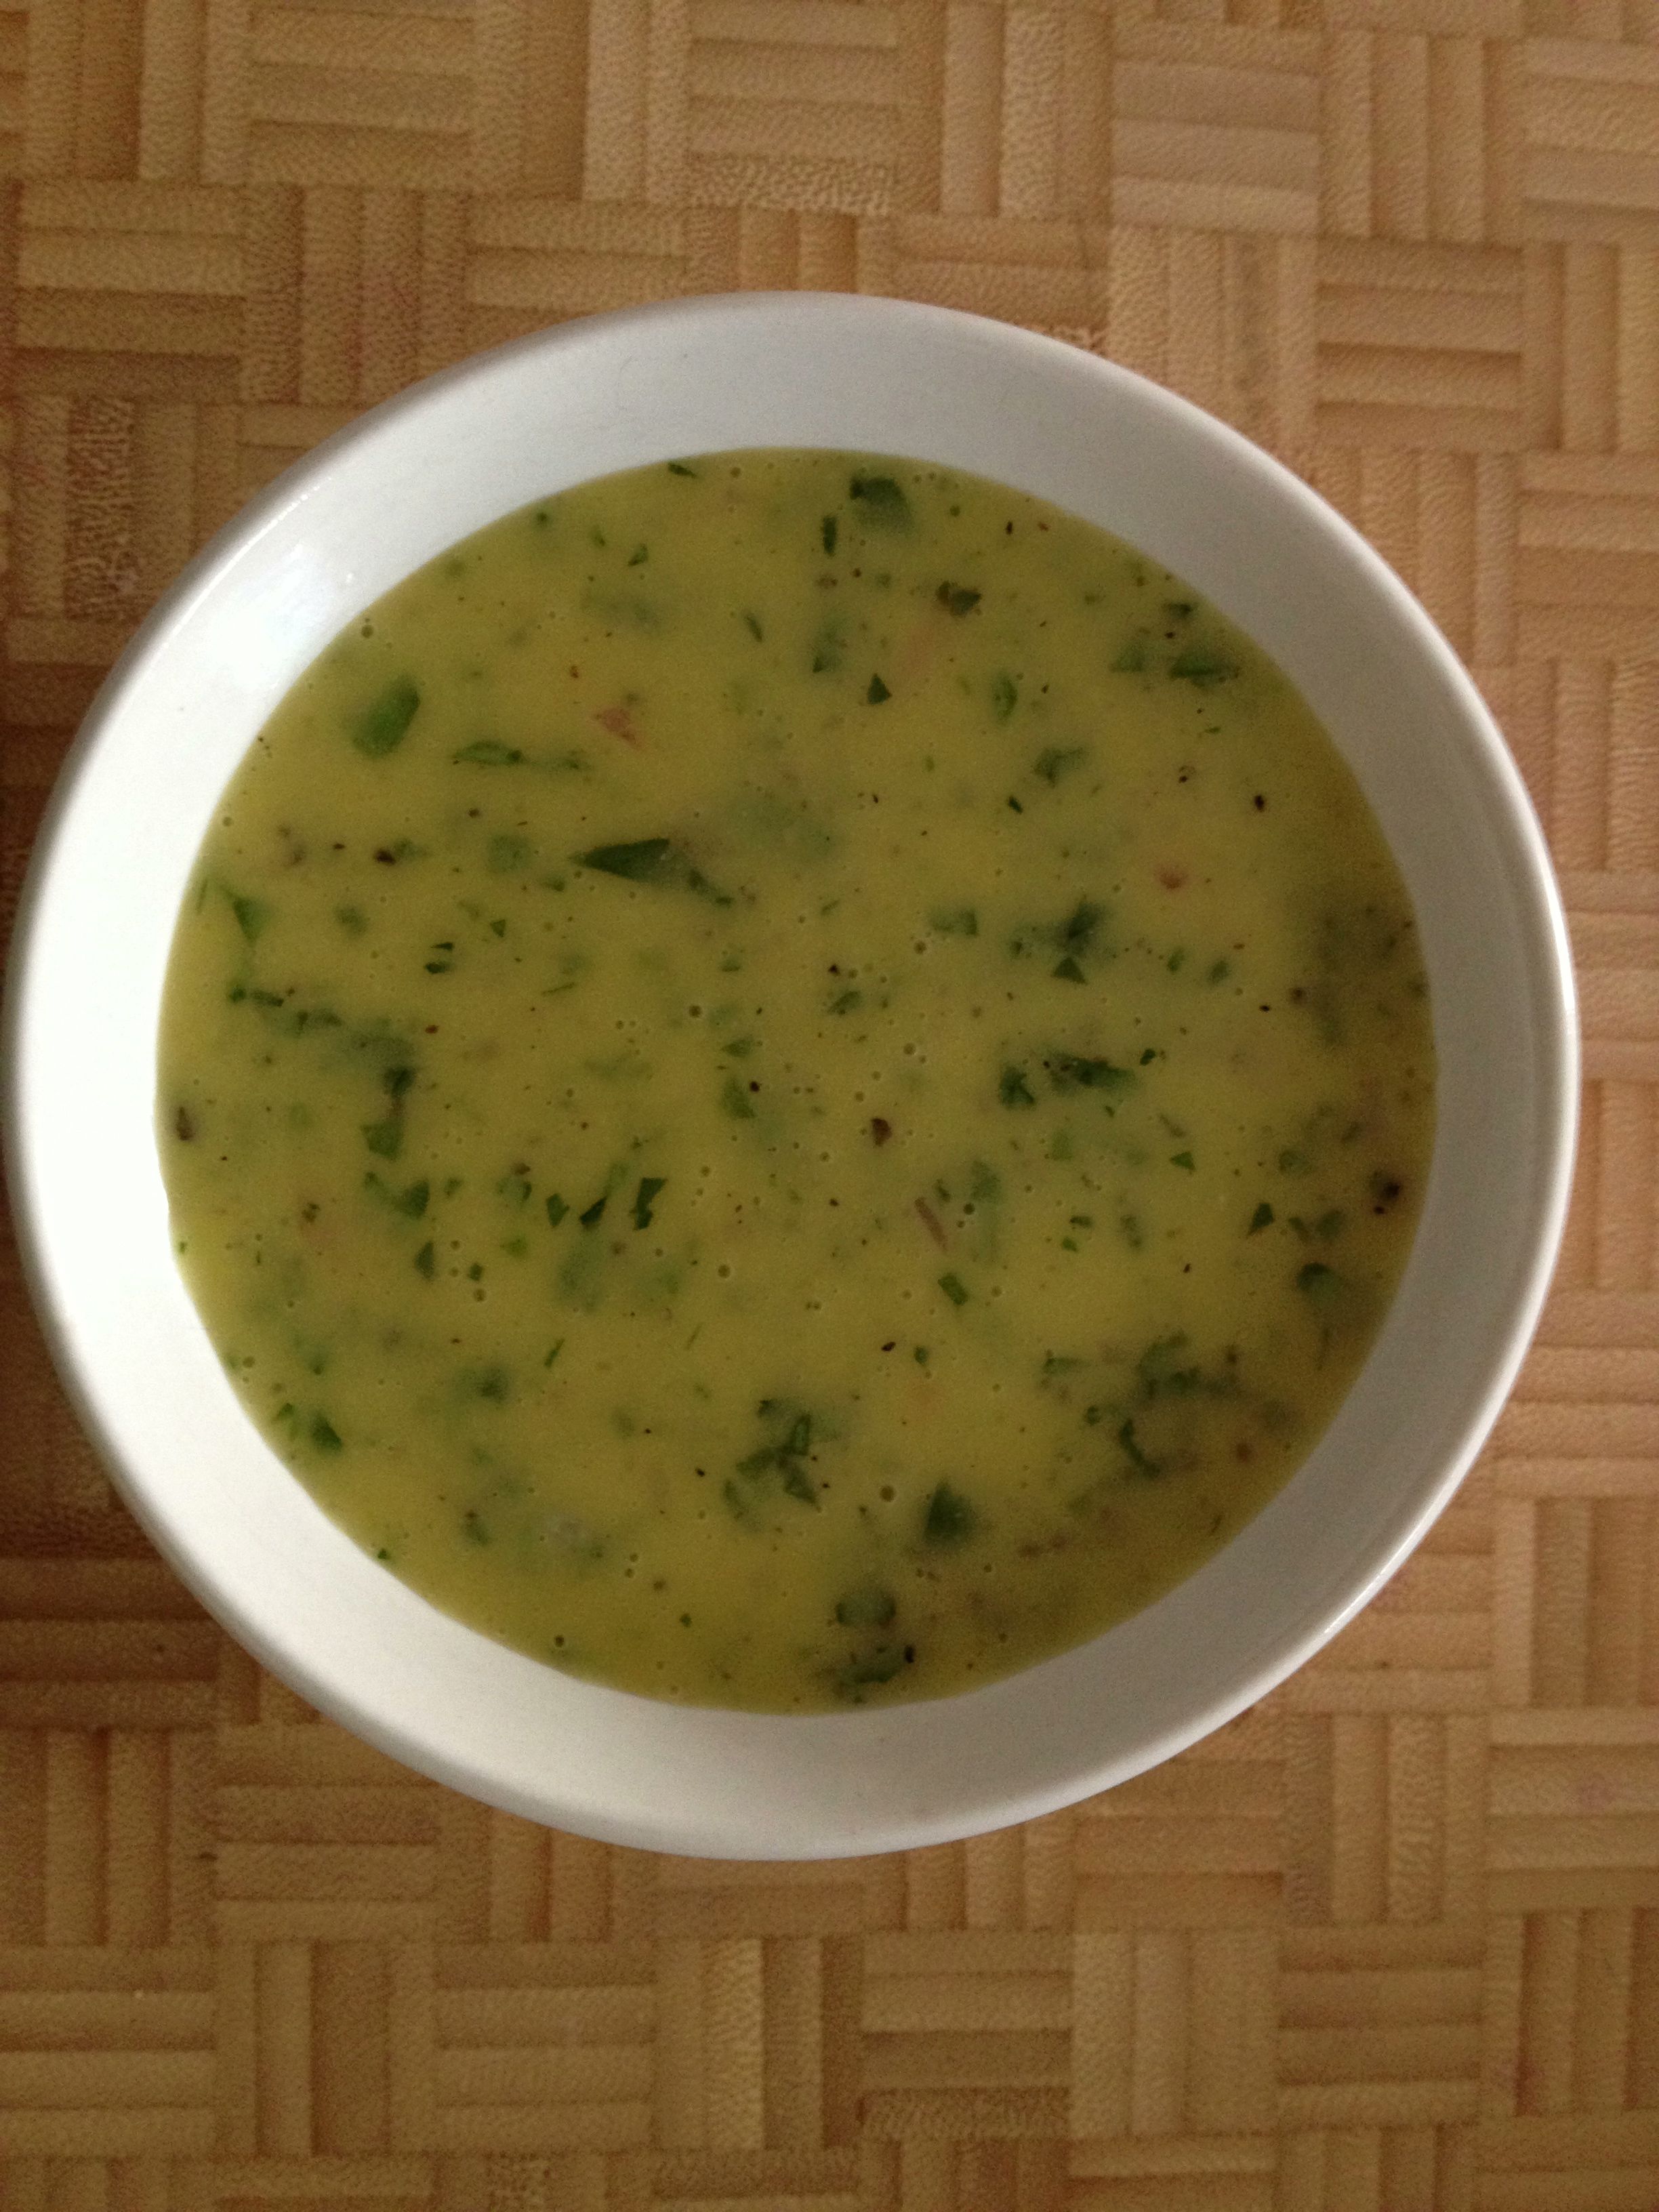
wheat berry salad vinaigrette
2. Add the salad ingredients to the vinaigrette and combine. If it looks overdressed to you, add something to it! Soggy salad is not something you should put up with, really and truly.
3. The recipe says to chill overnight to blend the flavors. Perhaps over that period the beans and berries are supposed to soak up some of the vinaigrette? I didn’t want to leave it to chance. Serving suggestion is to serve on a bed of leaf lettuce. Again, I didn’t want my greens to be soaked, so the additional beans were necessary.
Eat and enjoy—and let me know what you think about the amount of vinaigrette here, please! Too much? Not enough? Just right in a Mamma Bear sort of way? Comments are not just appreciated—they’re anxiously awaited!
Whole Wheat Baguette
February 28, 2013 § 2 Comments
If we run out of crackers, I make Crackers. If we run out of hummus, I make Jennifer make Red Pepper Hummus. And if we run out of bread, I make bread. It’s just what we do. We make things. Bread included.
Bread is work. There’s the mixing and the kneading and the proofing and the punching and the second proofing and the loaf shaping. It’s up-to-your-elbows-in-dough kinda work—the type of work that gives you strong-as-oxen forearms.
Until a rather vigorous episode of dough kneading a few years ago set off some rather painful carpal tunnel symptoms, I kneaded all dough by hand. Then by necessity I had my Kitchen-Aid mixer and its dough attachment take over. And now, thanks to Mark Bittman, I’m letting the food processor do all that work.
It’s odd—almost sacrilegious—to think that a machine with a sharp spinning blade can make a soft and smooth clump of dough rather than a bowlful of shredded sticky flour. But it does. And while I was once skeptical and hesitant to come under the no-knead tent, I have entered, heard the word, and am now a food-pro convert. Halleluiah.
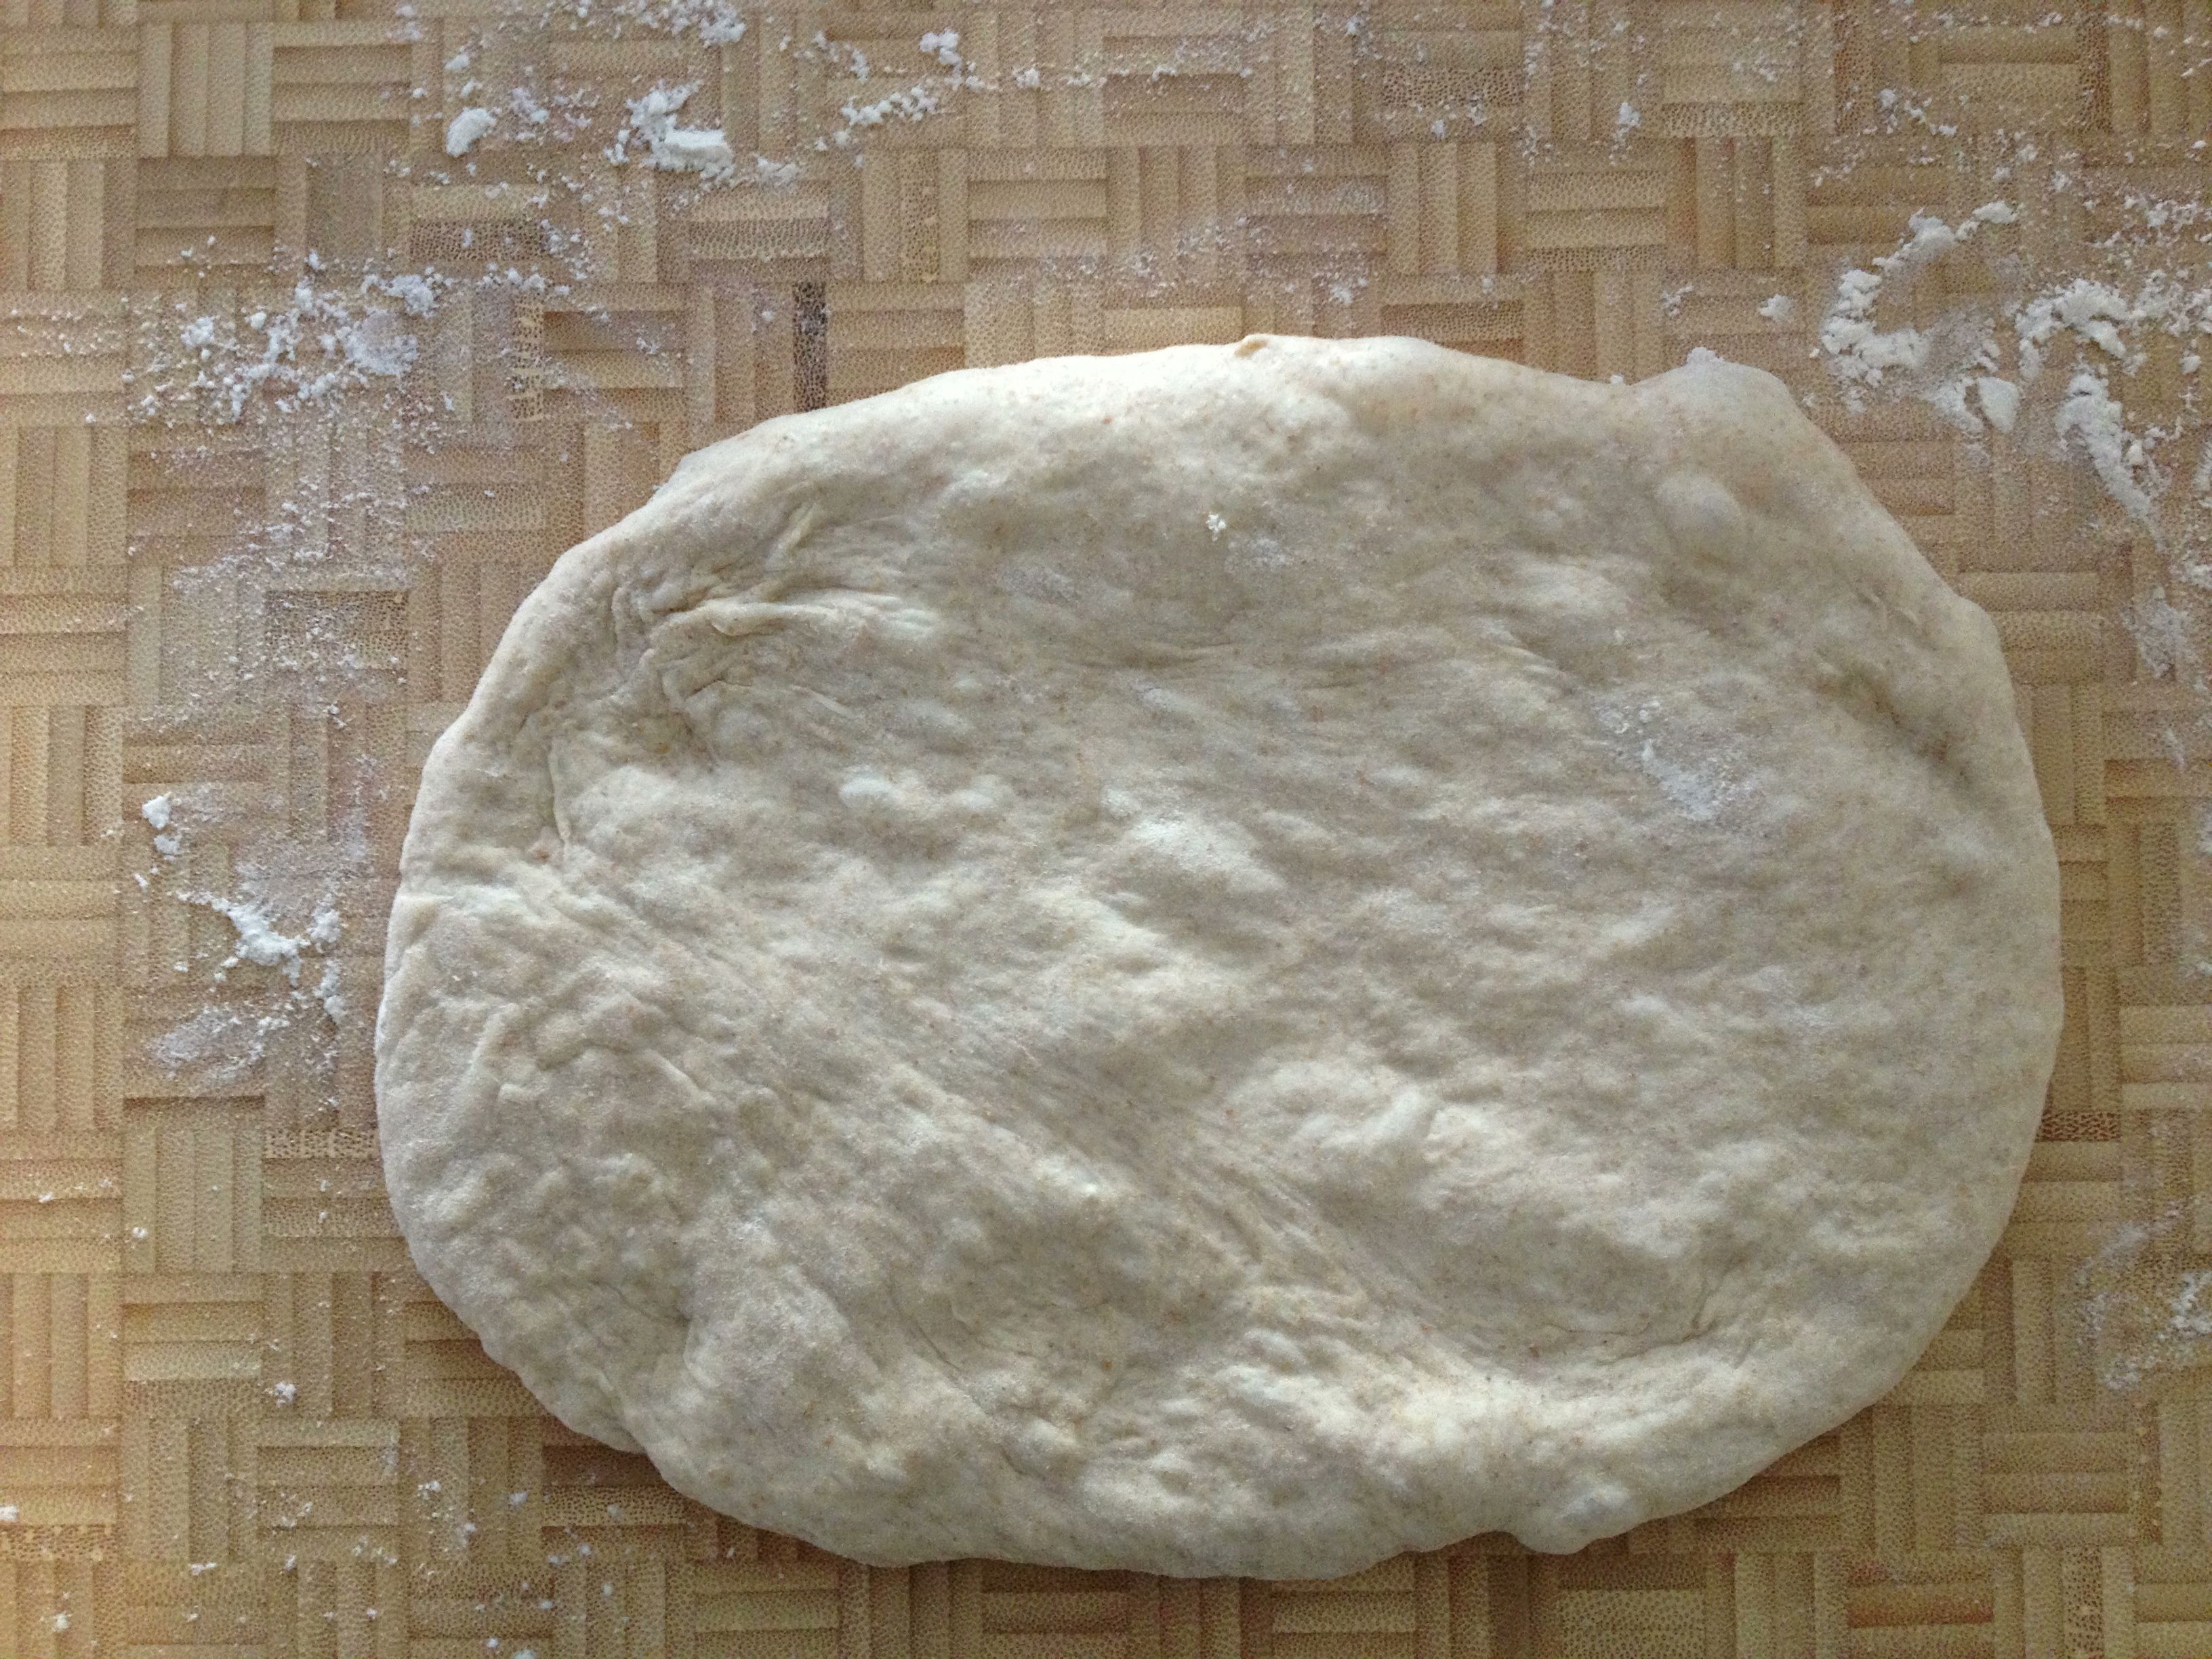
Mark Bittman, the New York Times‘ food guy, included the following recipe in the Feb. 3 NYT Sunday Magazine. It’s actually what he calls “not quite whole grain,” and I agree, but there is enough wheat flour in there to give it that nice flavor and chew. What I really like about this is the hands-off nature of the recipe. The first step takes no more than 3 minutes, then you’re free for the next 3 hours while the dough rises. The most work comes during the baguette shaping process. And quite honestly, if you want to learn how to shape a baguette, search for it on YouTube.
In all, you’ll have lovely baguettes in a little over 4 hours—and with very little effort. Throw some flour in your hair to make it look like hard work.

dry ingredients in bowl of food processor

dough comes together in food processor after about a minute
dough turned out into lightly oiled bowl, ready to rise

dough rises about this much after 3 hours
after turning the risen dough out onto a lightly floured surface, cut into three segments and roll into a tight ball
form the dough ball into the best rectangle you can get

fold the bottom side up toward the center

then fold the top down to create something that looks like an envelope

fold length of dough down about a third and press the seam to seal – and repeat.

set formed loaves into stiff canvas to help them keep their shape while they rise another 30 minutes.

fresh out of the oven! okay, so they are odd shaped. embrace the odd.
Whole Wheat Baguette (from Mark Bittman, New York Times Sunday Magazine, Feb. 10, ’13)
100 g. whole wheat flour
400 g. all-purpose flour + some
10 g. kosher salt
6 g. instant yeast
water
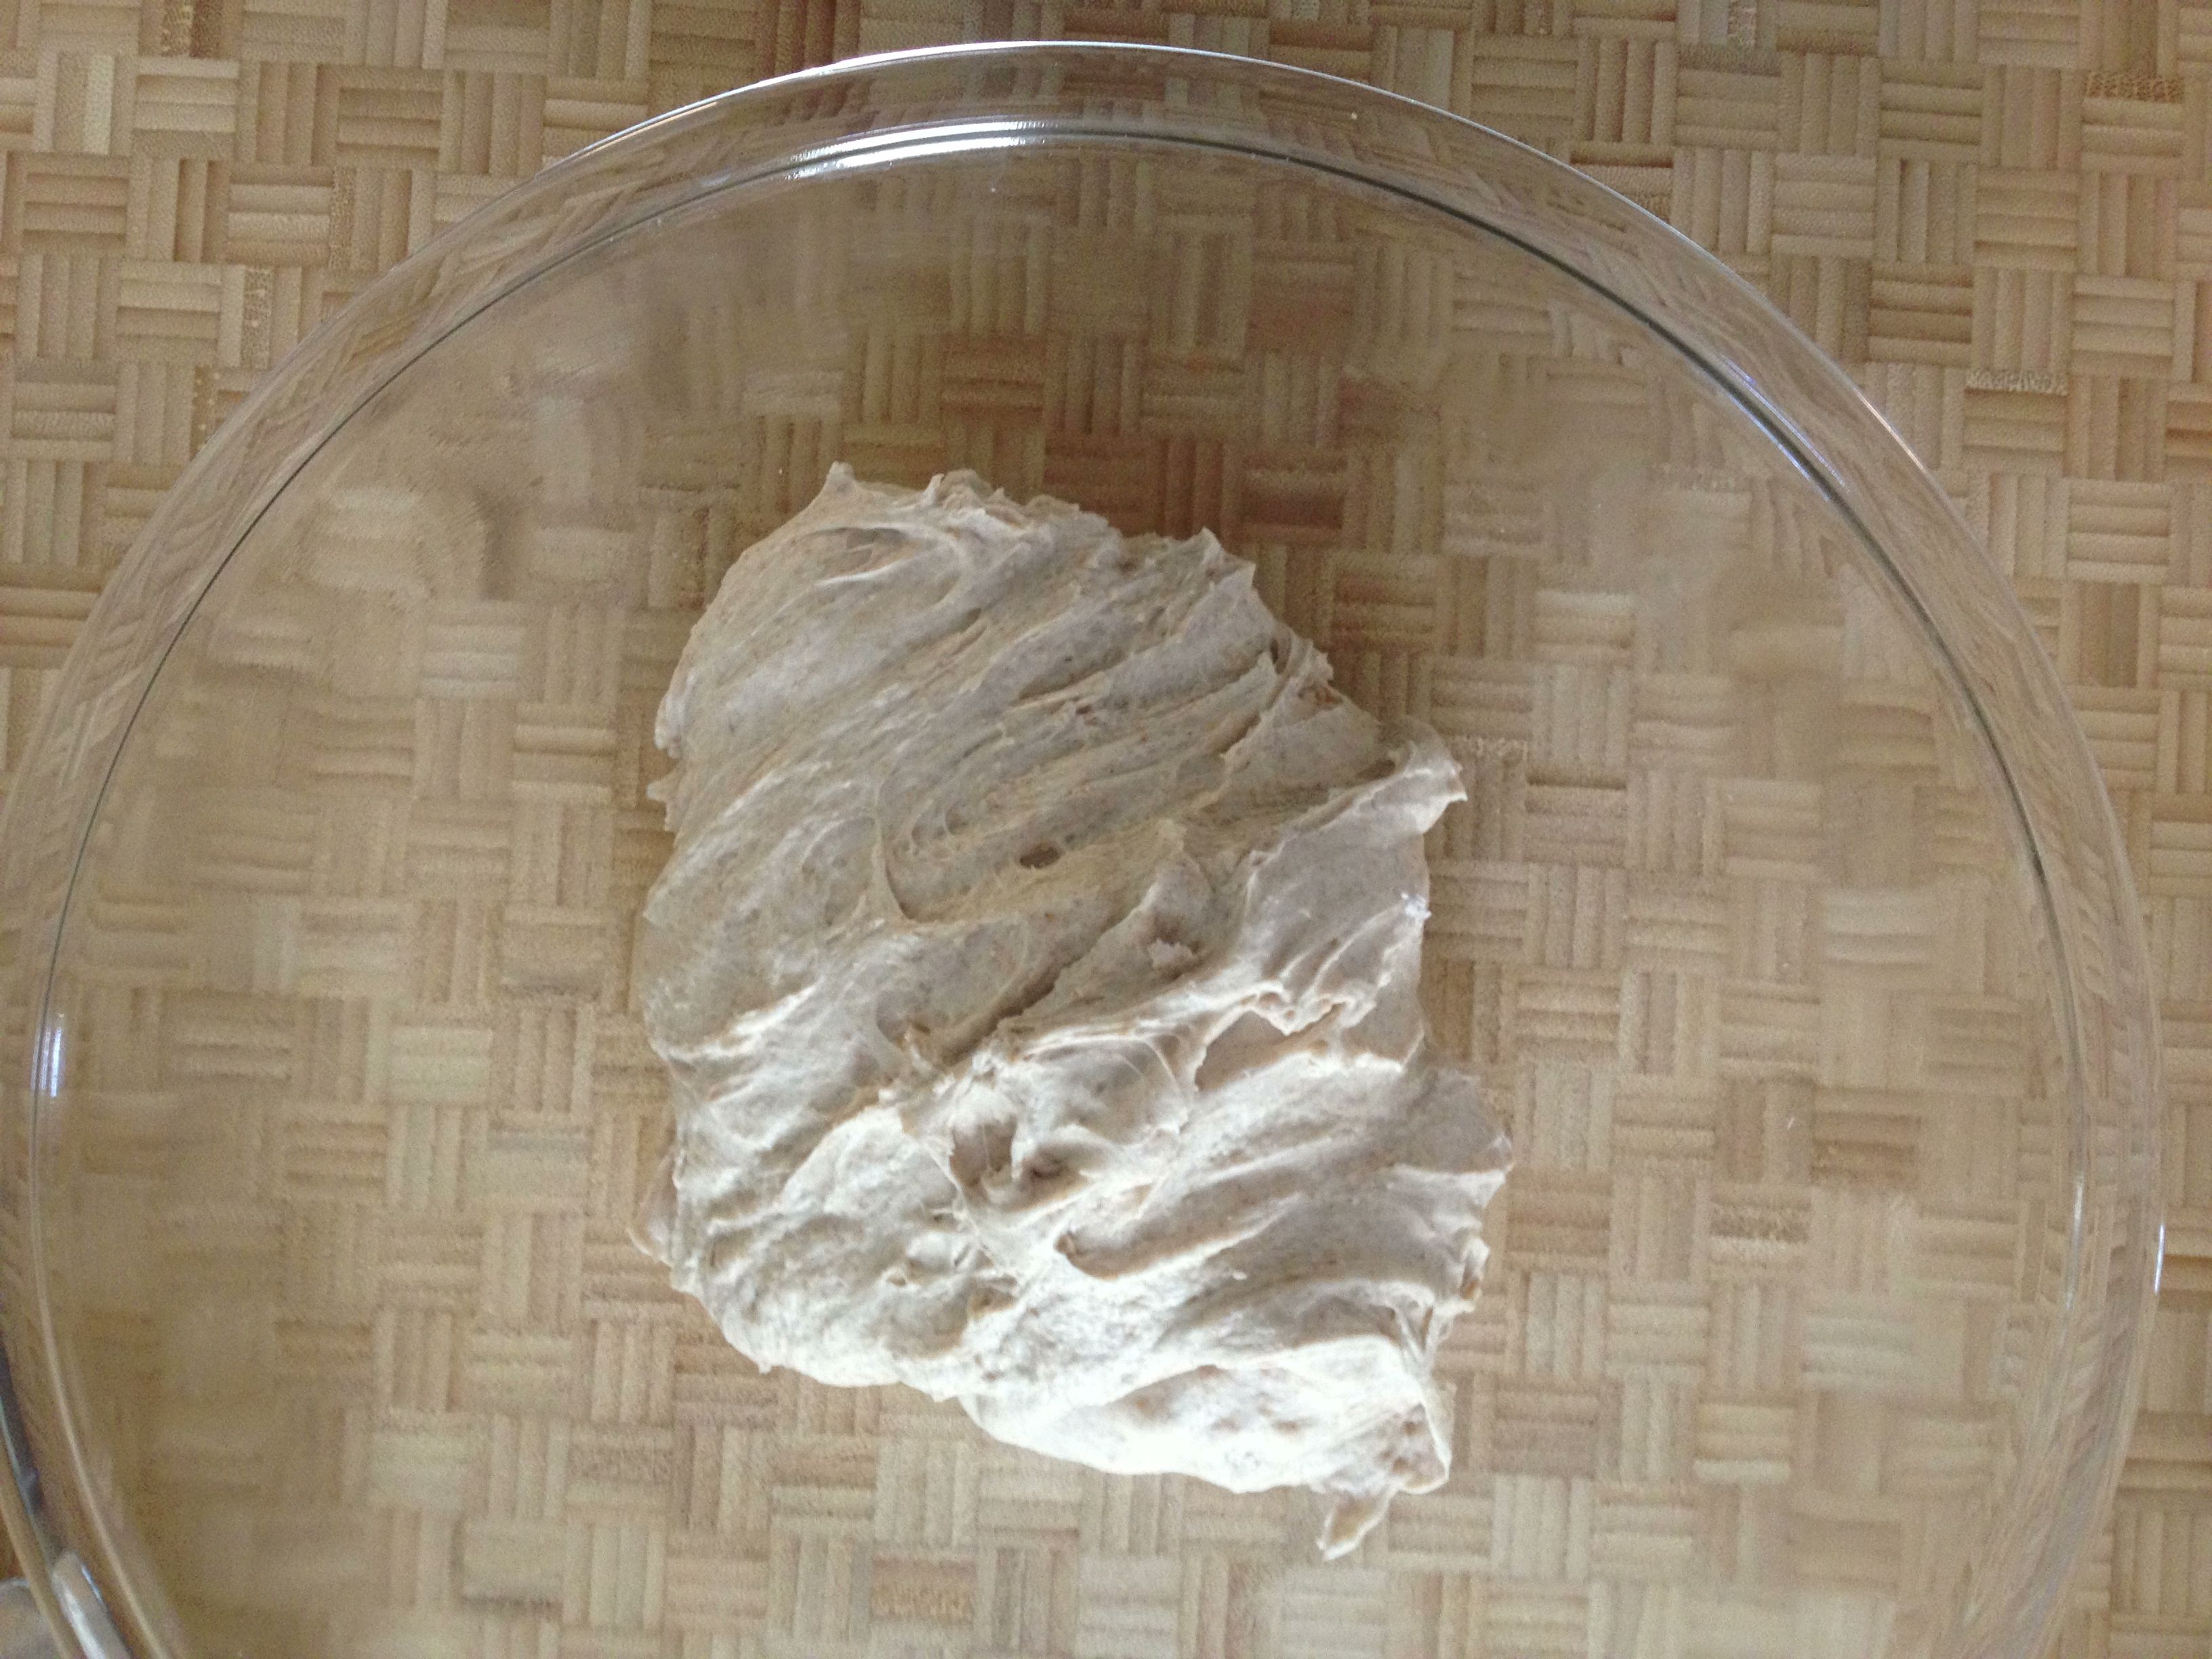
1. Combine dry ingredients in a food processor. Turn machine on and while it’s whirring, add about 1.5 cups of water slowly over a 30-sec. period. Keep machine running for another 45 sec. or so. Dough will be held together nicely and tacky, not wet. Turn dough into a large bowl (I lightly oil mine just in case), cover with plastic wrap, and let it rise. It should take 2-3 hours. I let it go for the whole 3 hours and it’s risen quite nicely.
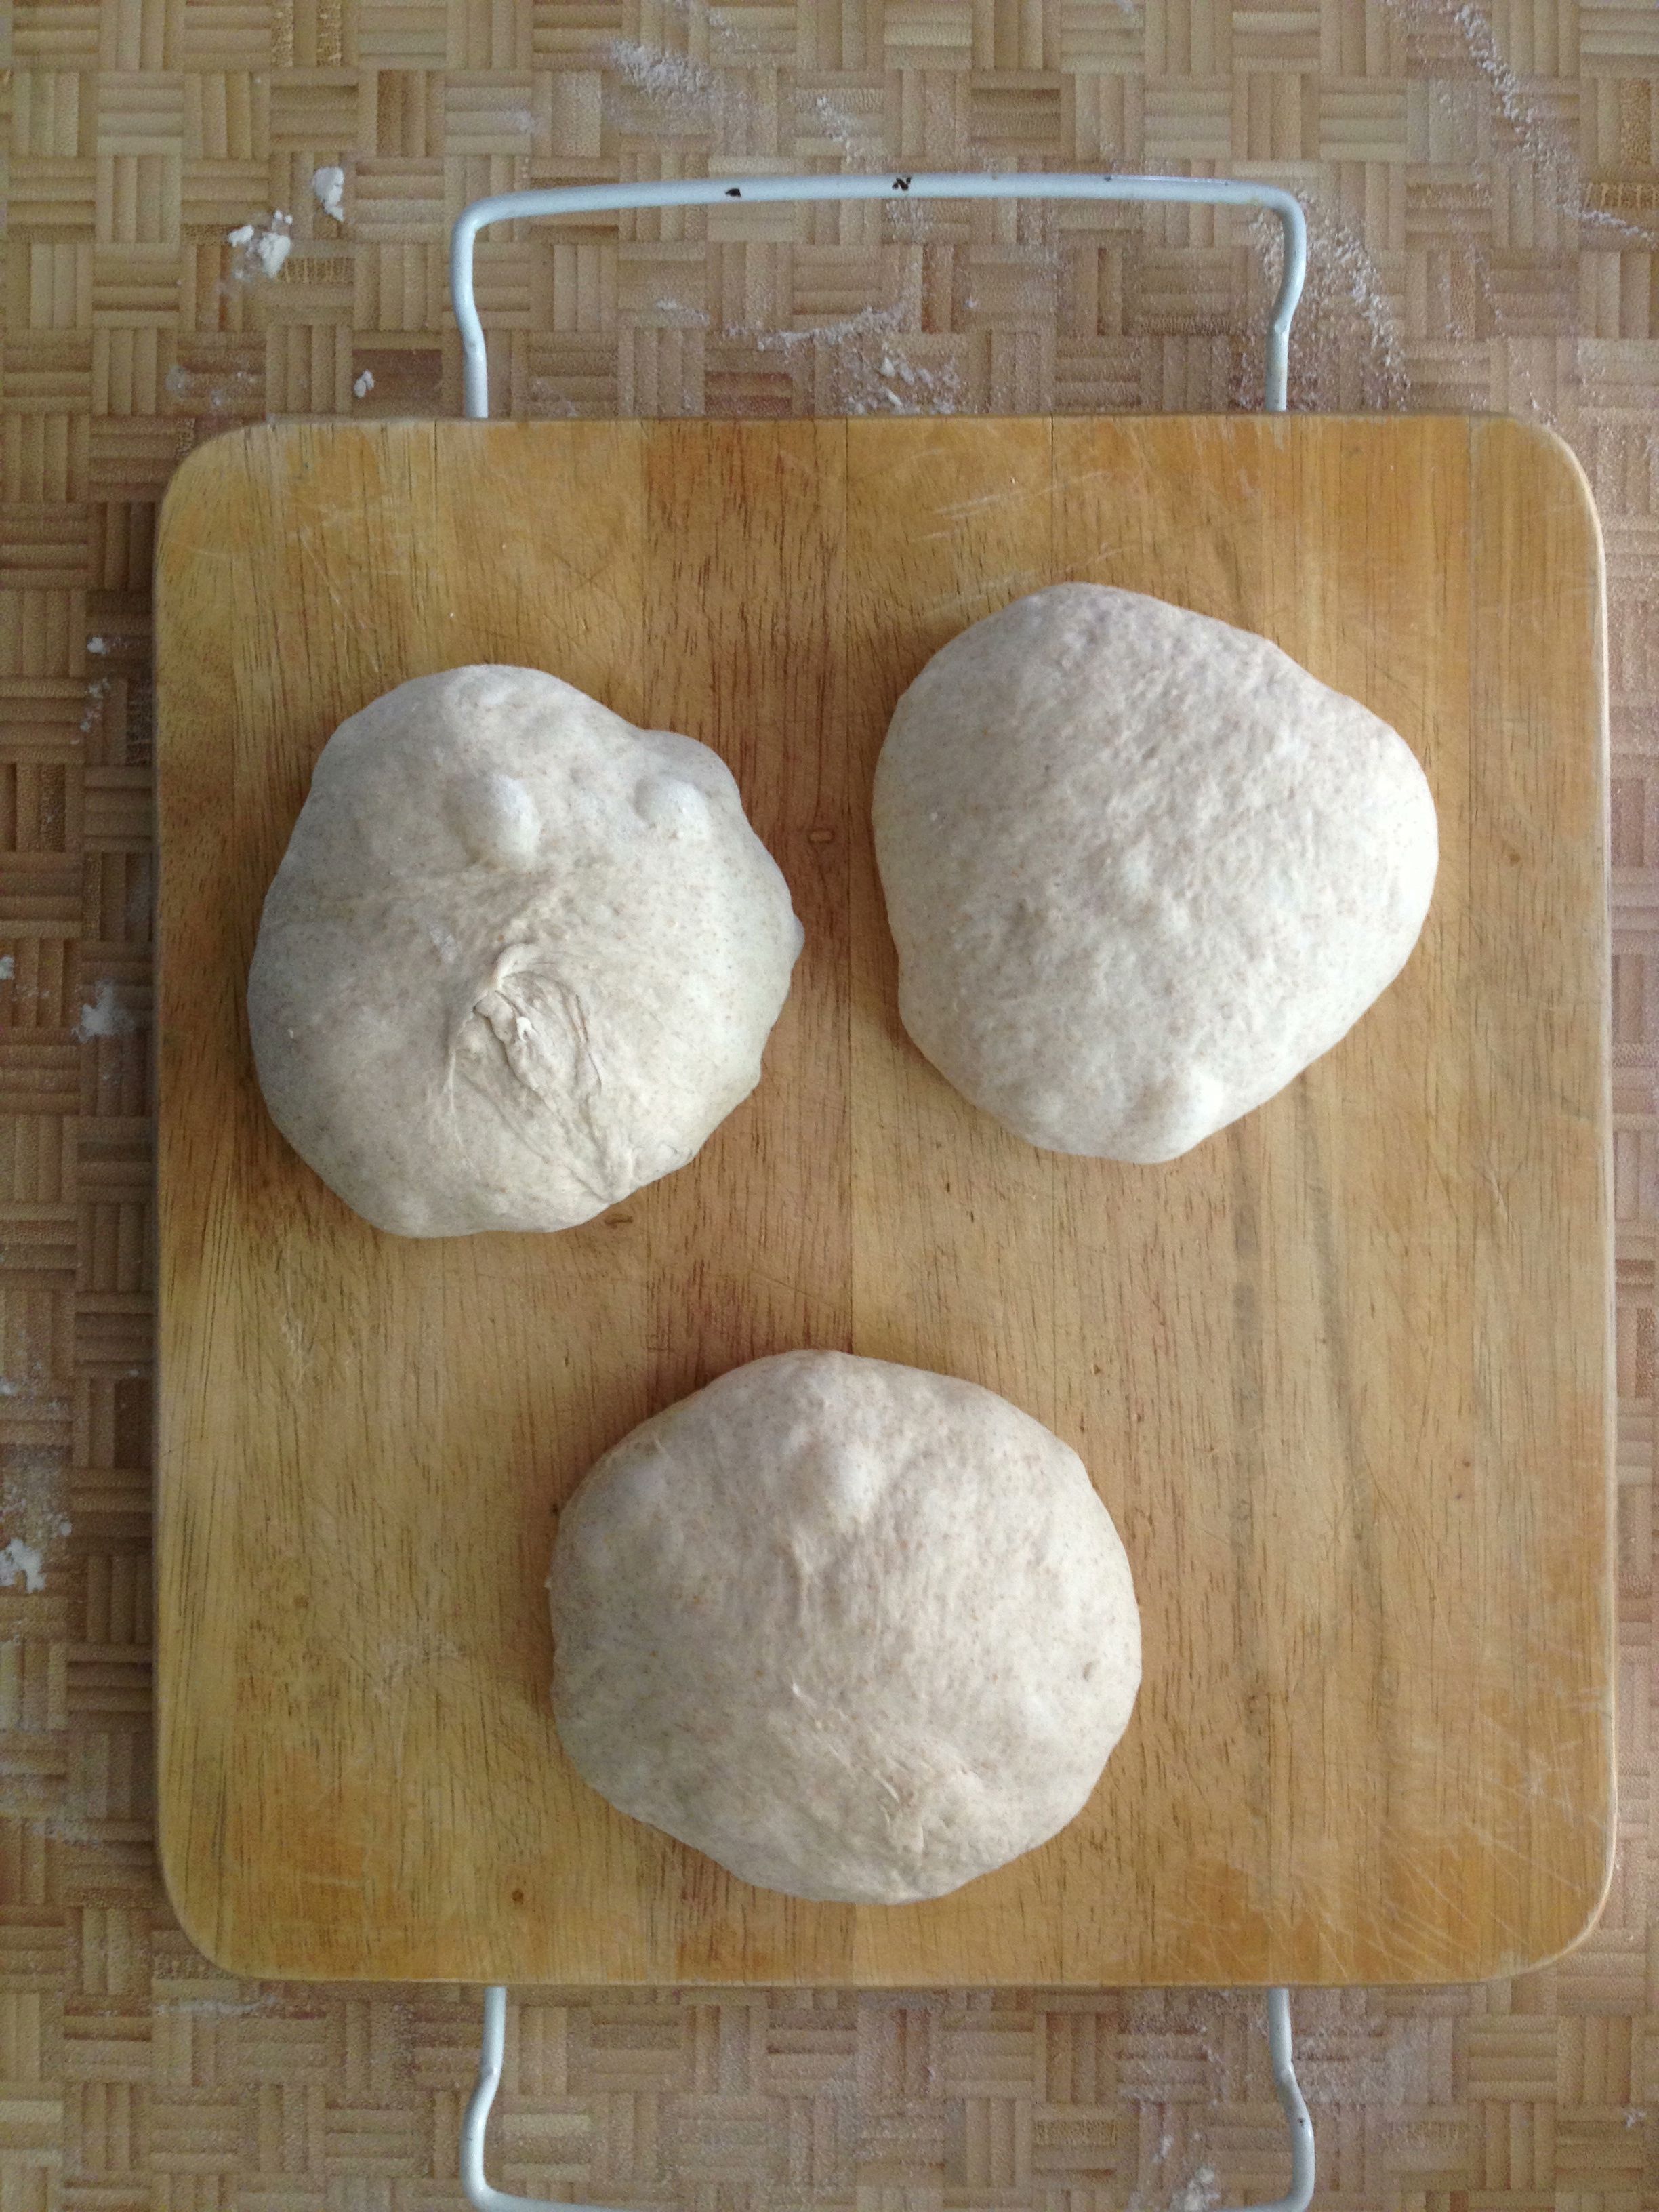
2. Turn the dough out onto a minimally floured surface, pat lightly, and cut into 3 equal pieces. Recipe says to form into a log, but I form into small round boules. Cover with a tea towel (or plastic wrap) and let it sit for 20 minutes.
3. Now shape each dough round into a baguette. I am SO not the expert at this but … This is how I do it:
-pat dough into a rectangle, kinda the size of a small 8.5×5 notebook. The following will work best if the corners are as square as possible (yes, getting dough to be exactly square is impossible but give it your best try).
-Position the long side down. Fold the bottom end up about a 1/3 of the way, and then fold the top end down over it so it looks like an envelope. Take the heel of your hand or your thumb and press and seal that seam together. Lightly flatten the dough.
-Next, fold the top down about a 1/3 of the way and seal the seam again. Lightly flatten. Repeat this process another two to three times.
-Starting from the center of the dough, place your hands over the top of the dough and slowly and lightly roll the dough up and down, pressing outward to lengthen it. Don’t go all that far. The longer it is, the thinner it is. And … that’s it.
4. Once the baguette is formed, put the baguettes into something like a baguette pan. Or, use a lightly floured swatch of canvas (or a heavy tea towel) and shape the canvas around the long sides of each baguette. You want the canvas to cradle the dough and help keep the dough’s shape. Let the dough rise for about 30 minutes.
5. Meanwhile, get your oven heated to at least 450F (Bittman’s recipe says 465F, but my oven only goes to 450F). A few minutes before the dough is ready to go in the oven, open the oven door and spray some water around the side walls and close it back up. Just before putting the loaves in, put them on a piece of parchment on a sheet pan and slash the tops with quick movements of a very sharp knife. Slide it in the oven, give the loaves a quick squirt with was water and close the door. Repeat the squirting with water about a minute later. Keep them in the oven for about 25-30 minutes, or until the loaf sounds hollow when you thump the bottom of it with your thumb. Cool on a wire rack.
Now, why are we spraying with water? To create a bit of moisture in the oven and around the loaves. This moisture helps to create that light and crisp exterior on the loaf. It works, so give it a go.
You likely have your own favorite bread recipe. Let me know what it is in the comments below.
Red Pepper Hummus
February 26, 2013 § 4 Comments
We haven’t bought a can of beans in, oh gosh…I’d say six months. This weekend we used our last stray can of black beans for a chili—and I remember moving to our new house with it and packing it away on an upper kitchen shelf. Cooking up dried beans in a pressure cooker is super easy and super cheap, and here’s the bonus: You get several cups of flavorful bean broth to add to whatever dish needs a little tasty liquid. (See how easy it is here.)
And if we’re cooking up our own beans, we might as well make our own favorite bean-based spread, right? I’m speaking of hummus, of course, made with those funny looking little chickpeas (aka garbanzo beans). I’ve written about hummus here before, but after making several batches of the stuff, I was left disappointed. Too thick. I wanted the creaminess you’d find in the off-the-shelf brands.
Jennifer found the solution—or very nearly—with a recipe from The New Moosewood Cookbook. Not completely creamy as we had hoped, she adjusted and tasted and made batch after batch until finally, she made the perfect consistency. The secret? Adding in some of that aforementioned bean broth and reducing the amount of tahini. Oh, and adding in a roasted red pepper.
Red Pepper Hummus (adapted from The New Moosewood Cookbook)

red pepper hummus
- 2-3 cloves garlic, sliced
- large handful parsley
- 2 scallions, chopped into 1-in. pieces
- 3 cups cooked chickpeas (nearly a 1-lb. bag of dry beans cooked, reserve cooking liquid)
- 4 tbs. tahini
- Juice of one lemon juice (or more, depending on said lemon’s juiciness)
- 3/4-1 tsp. salt
- 1/2 tsp. cumin
- 1/4 – 1/2 sumac to taste (optional if you can find it at your local Middle Eastern grocer)
- 1/4 tsp. paprika
- 1 red pepper, roasted at 425F for 30 min., cooled and skin removed, and cut into strips
1. In a food processor combine the garlic, parsley and scallions, and whir up into a mince.
2. Add chickpeas, tahini, lemon and salt. Puree into a paste.
3. Add the cumin, sumac and paprika as you add some of that reserved bean cooking liquid—try about 1/4 cup—and process. Add more liquid by the tablespoon until you find the consistency right for you. Careful with the sumac—you may like just a tad, so taste before adding any more than a 1/4 tsp.
4. Add the red pepper at the very end and pulse the food processor until it breaks down the red pepper. We’re not looking for a completely pureeing of the pepper. We just want it broken down into bits.
It’s great on a chip, on this awesome cracker we made last week, or—my favorite use—schmeared on a Roasted Eggplant on Whole Wheat Sandwich.
Quick Crackers
February 22, 2013 § 3 Comments
Sometimes after dinner you’re just hungry all over again. It happens. And it’s understandable if, say, you’ve been on a 12-consecutive-day yoga binge.
Open the cabinets. Raisins: Nope, not substantial enough. Almonds: It’s got the crunch but they aren’t gonna cut it. Not tonight. The bag of chips (healthy chips, of course) disappeared last night. There’s a nice hunk of Jarlsberg in the fridge…where’d the crackers go? Oh, they went away as a quick pre-yoga snack the other afternoon.
Bummer. I. Am. HONGRY. Hongry, by the way, is when you are very, very hungry.
But wait. I’m a baker. I’m not going to complain. I have the power to make my own crispy-crunchy goodness. And quickly, too.
I recalled I had found a super-good and super-quick herbed flatbread recipe on the Shutterbean blog not long ago. It was within my power to make these quick crackers – quackers? – before I became HANGRY, which means to be angry due to hunger. And since I had made them once previously, I new the tricks and adaptations to get these in and out of the oven in less than 20 minutes.
So, if you suddenly have guests or are ravenously empty-stomached and have nothing in the house, don’t complain. Put your baking cap on.

Quite complaining. Make your own crackers.
Quick Herbed Crackers (adapted from a recipe on Shutterbean)
- 1 3/4 cup all-purpose flour
- 1 tsp dried rosemary
- 1 tsp baking powder
- 3/4 tsp kosher salt
- 1/2 cup water
- 1/3 cup olive oil – keep the bottle handy
- Some fancy salt if you have it
1. Preheat oven to 450F. Really, this will be the longest step in the whole process.
2. Combine dry ingredients in a bowl and give it a quick stir to mix.
3. Make a well in the middle of the dry ingredients and add in the water and oil. Fold in the flour mixture with a spoon or large fork until its nicely incorporated.
4. Turn out the dough onto a work surface. No need for additional flour—this dough will not stick! Amazing and true. It’s the olive oil. Give it a really quick knead – a 5 or 6 times maybe – to make sure the dough is all snug together. Cut the dough ball into 3 chunks.
5. Roll out one dough ball until it’s super thin. You can roll it on the work surface or on a piece of parchment. Just be sure if you roll it out on the work surface that you can get it onto parchment with no problem. Roll into into whatever shape you want – it doesn’t have to be round. Color outside the lines with this.
6. Once on the parchment, experience has shown me to use a fork to prick the dough surface. Otherwise I ended up with super-big air bubbles in the finished cracker. Looked kinda cool and rustic, but not what I was looking for. After pricking, brush a tiny bit of olive oil on the dough surface and sprinkle some fancy schmancy salt on top. I happened to have some pink Himalayan sea salt on hand. Tasty.
7. Pop it into the oven. The recipe says 8-10 minutes. For crispy, keep it in 10 min, or even more. I’d say keep an eye on it and pull it out once it looks darker than you’d like. It all depends on your oven, really.
8. Let cool on a wire rack. Or not if you can’t resist.
9. While one is cooking you can roll out the other and put on new parchment. Recipe says to hold off on the oil and salt until just before popping into the oven, but I forgot for one of them and it was fine.

A few notes:
- The recipe called for fresh rosemary. I didn’t have any on hand, but recalled that if using dried herbs in place of fresh that one should use 1/3 the amount. So, if you’re using fresh rosemary, use 1 tbs of finely chopped herb.
- Try it with other herbs, too. Sage, for instance. But use less since sage is mighty powerful.
- It’s a throw-it-together kinda recipe, but be precise with the oil and water measurements. I used too much of one of them last night and the dough came out sticky enough to actually stick to the work surface. Lesson learned—I’ll never eyeball a 1/3 cup of liquid again.
Roasted Eggplant on Whole Wheat Baguette
February 21, 2013 § 3 Comments
The way I understand it, Paula Deen’s first food-for-money venture was preparing bagged lunches for the locals, which her sons  would then deliver. What those lunches were, I do not know. I imagine a typical lunch included a sandwich (or sammy). Maybe some chips. And there had to have been a decadent, butter-loaded dessert in that bag, too.
Anyone who follows me on Instagram has seen what I concoct for my own lunches, usually from leftovers or stuff just sitting in the veggie bowl. The Sweet Potato Sandwich has become a standby. The Salad Pizza is still one of my proudest moments. Avocados and boiled eggs smeared on toast are regulars, as well.
My latest sammy, Roasted Eggplant on Whole Wheat, has got me thinking about Paula Deen and her bagged-lunch business. This sammy, I’m tellin’ you, it’s good. Real good. People would want to eat it. And they might even pay real money for it—and for me to make and deliver it. Is something like this even feasible here in Boston? And I’m sure there’s some proper and official channels to go through to make sure I’m not serving thoroughly rotten food, too. I mean, someone’s got to make sure the cats and I are wearing hair nets, right?
The thought is on my mind. Who knows, maybe I’ll even give it a try, “underground catering” style (I didn’t really say that, if anyone official is reading this). Meanwhile I’ll keep putting various spreads and veg and cheese and such onto different sorts of breads and doughs. Keep up with them on Instagram and let me know which ones appeal to you most.
Roasted Eggplant on Whole Wheat Baguette
It’s simple, really:
Slice an eggplant into 1/2-in. slices. Place on a sheet pan. Sprinkle each slice with some olive oil, using a brush to spread it over the surface. Eggplants are like sponges—they soak up a lot of oil. That’s why it’s important to brush. Then sprinkle each slice with kosher salt, and give each slice a small twist from the pepper mill. Put in a 420F oven for about 20 min. Remove from oven and let cool. You’ll have extras—always a good thing.
Roasted eggplant
If I’m roasting, why not throw a red pepper in there, too, right? Slice lengthwise, cutting in two, and remove seeds and pith. Flatten each half as best as possible. Find room on the sheet pan in amongst the eggplant. The peppers will take about 5-8 minutes longer than the eggplant—look for it to be dark around the edges. When done, place the halves into a small bowl and cover with plastic wrap. Remove from bowl 10 minutes later and peel off the skin.
Take a segment of homemade Whole Wheat Baguette (recipe is coming, I promise) and slice lengthwise.

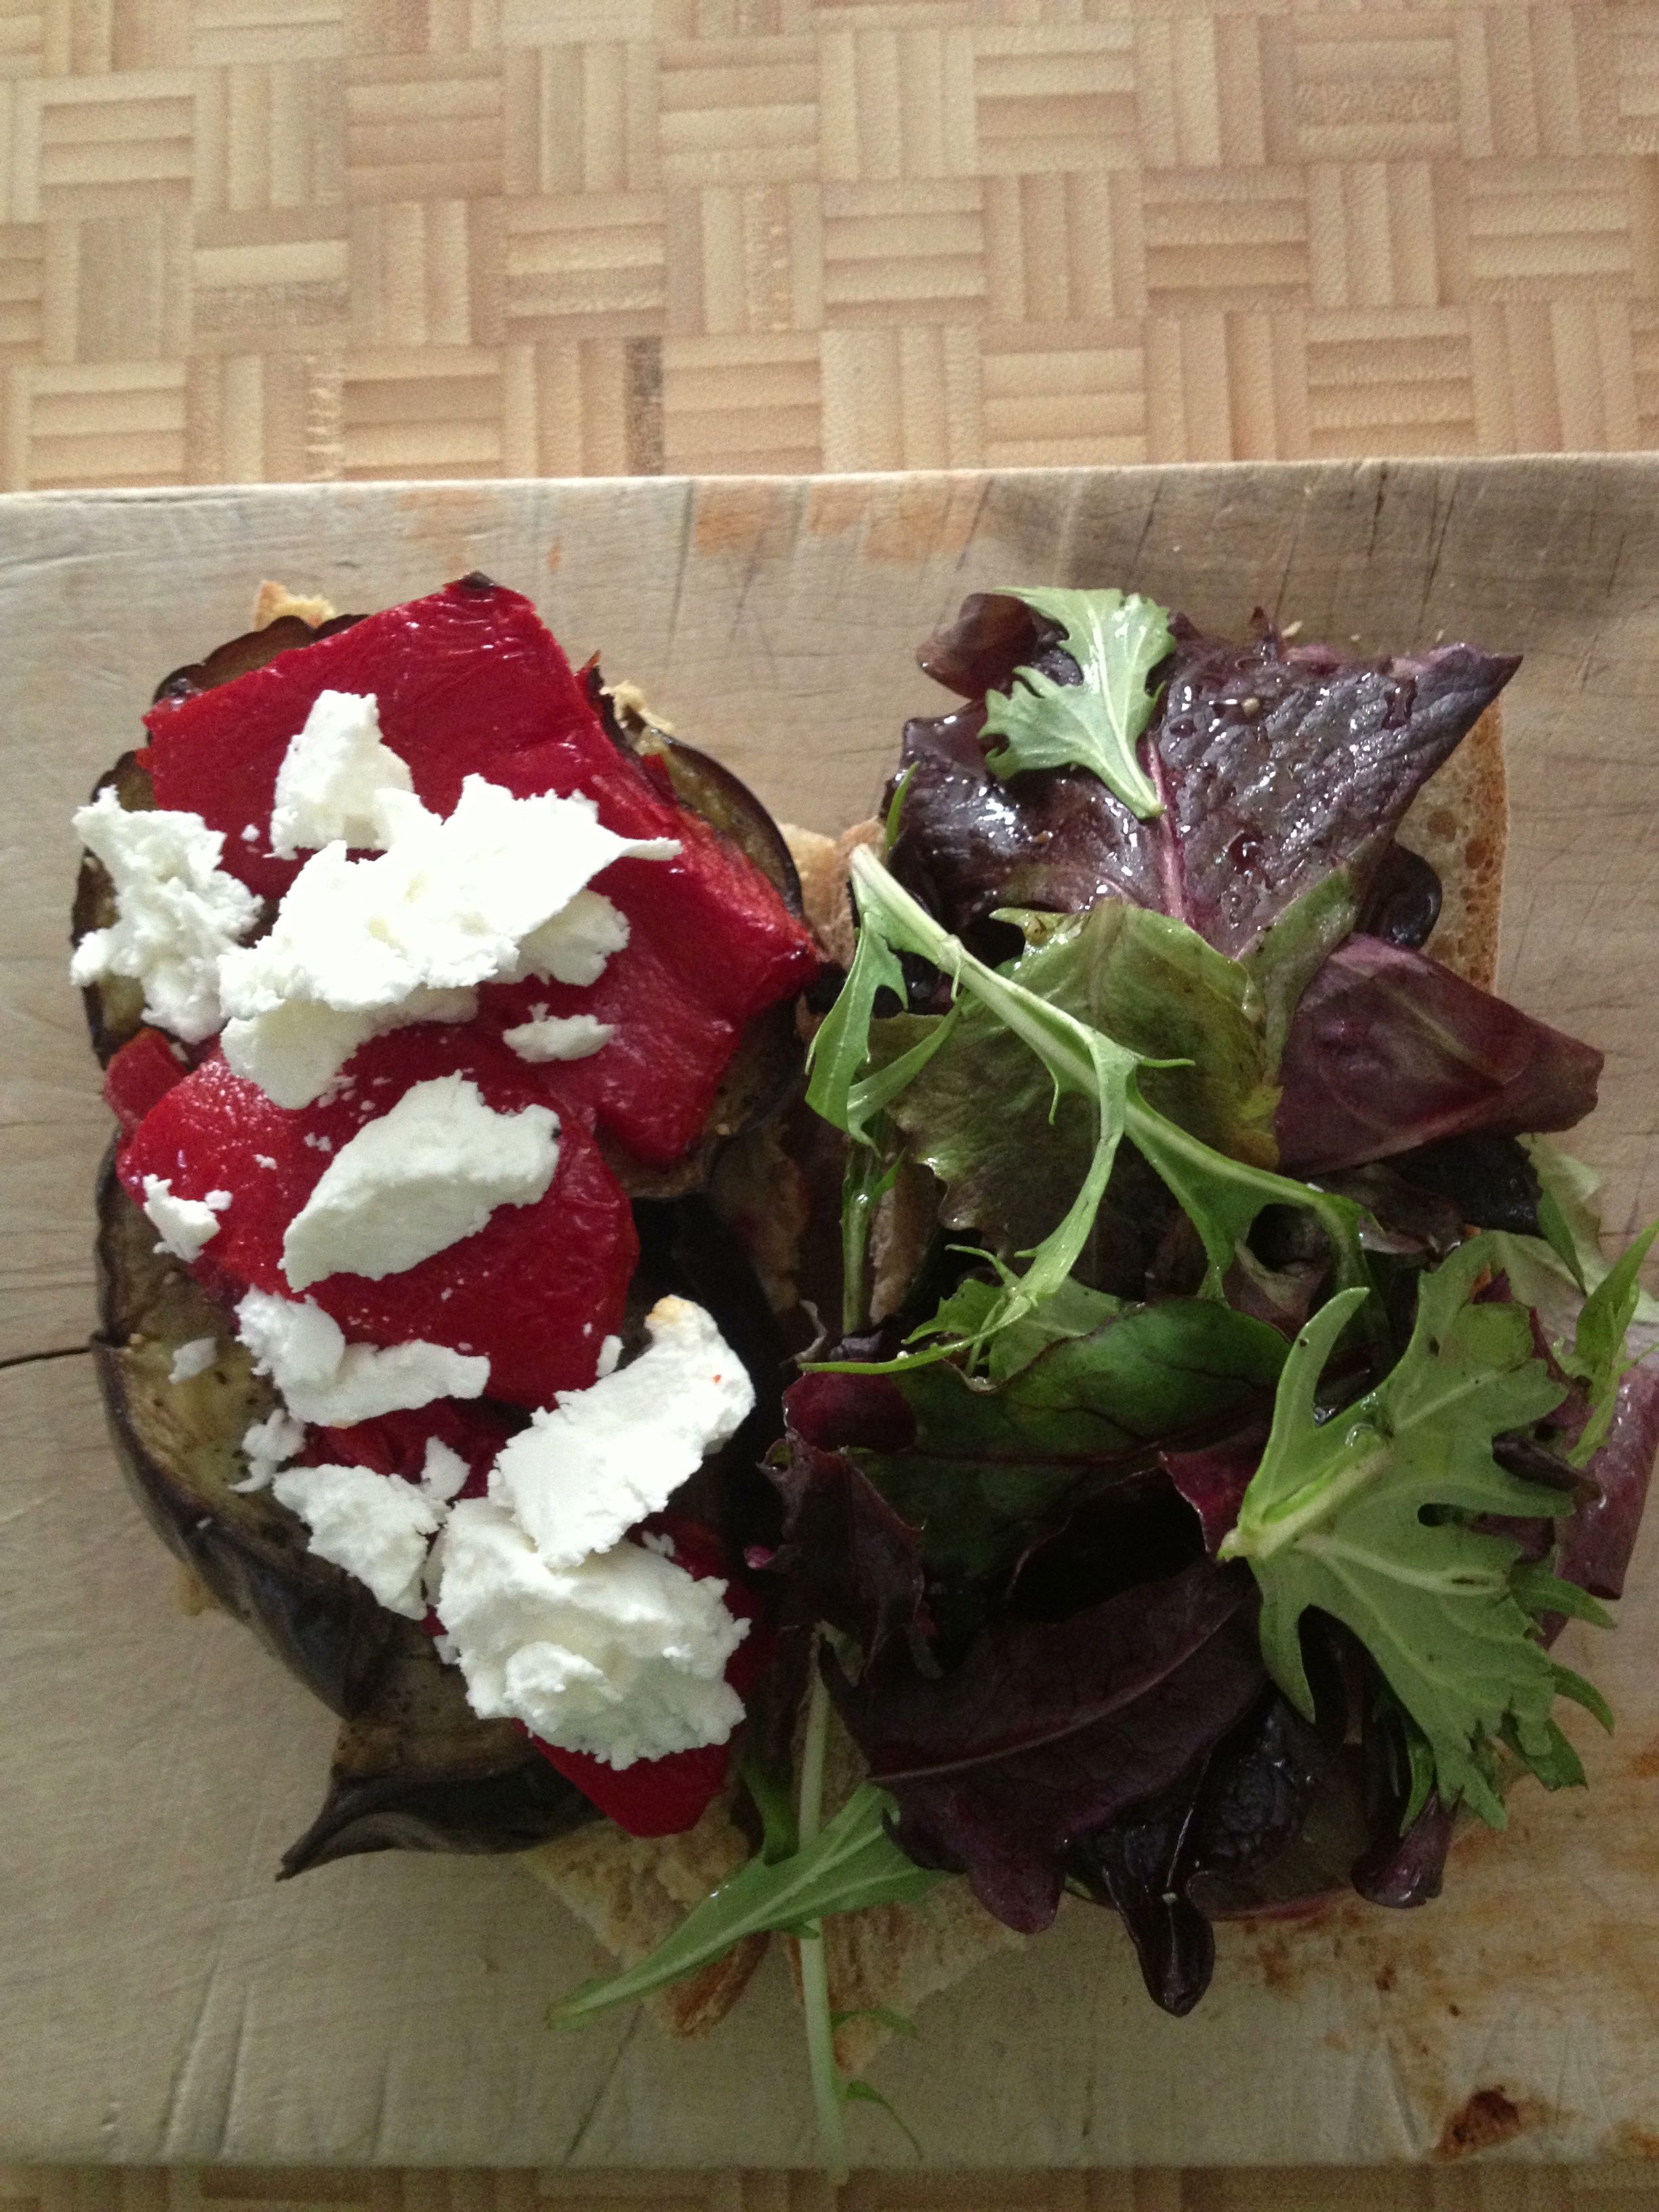
Smear one side with homemade red pepper hummus (courtesy of Jennifer!).
Top with however many slices of roasted eggplant you can fit on there. You may have to cut them in half and pretend it’s a puzzle.
Top the eggplant with roasted red pepper.
And top the pepper with goat cheese. What’s not good about anything I just mentioned? Really?
On the other side of the baguette, lay down some baby salad greens lightly dressed with something. I used Lemony Vinaigrette, which is always in a jar at the ready for good times.
Put one half on top of the other. Warning: Goat cheese crumbles may try to escape. That’s ok—they won’t get far.
Proceed to eat. Enjoy.
My question to you is this: Do you want to eat this? And how much would you pay to have it made for you? Add a pear and a cookie and you’ve got yourself a lunch.
Tofu Noodle Soup
January 29, 2013 § 3 Comments

Tofu Noodle Soup
I’m a fan of tofu. Not a crazy fan, but a fan nonetheless. And I’m not sure how it happened. Omitting red meat and poultry from my diet accounts for some of my fandom, I guess. Quite honestly, I am just going to let me fondness of tofu exist for what it is. Why bother explaining, right?
The best tofu I ever had was in a take-out dish from a Chinese restaurant in Ithaca, New York, about 18 years ago. The name, the flavorings, the accompaniments all escape me now. The one piece of the dish that remains in my memory is the tofu. Crispy on the outside. Soft on the inside. The closest thing to a McDonald’s french fry this side of the Golden Arches. I want that. I crave that even.
In the absence of that crispy tofu dish, I’ll take this tofu noodle soup. Soy sauce is in there, but it’s not too salty. And the hoisin gives it that … umami. There, I said it. Umami, that fifth and most flavorable of the basic tastes. A bowl of this broth will satisfy me for lunch. The tofu and noodles make it a real deal meal.
I’ve adapted this recipe – and I keep adapting each rendition of it – from a VegNews Magazine newsletter. I found that the original recipe had too little broth and way too many noodles. A halving of this and a doubling of that with on-the-fly adjustments takes care of that problem.
Ingredients
1 thinly sliced yellow onion
4 garlic cloves, minced
1 tbs grated fresh ginger (about an inch or less)
4 tbs hoisin sauce
4 tbs soy sauce
9 cups vegetable broth (or water)
1 15-oz. package extra-firm tofu, cut into 2-inch cubes
1 8-oz. package rice noodles, cooked and drained
4 tbs rice vinegar
4 tsp Asian hot sauce
Scallions, bean sprouts and cilantro to sprinkle, if desired
- In a large pot, saute the onion in about 1 tbs of oil over medium-high heat until translucent, about 5 minutes. Add the garlic and ginger and saute for another 30 seconds or so.
- Stir in hoisin, soy and broth. Bring to a boil. Lower heat to a simmer and let cook for 15 minutes.
- Stir in tofu, noodles, vinegar and hot sauce. Now, here’s an embarrassing thing: I have JUST NOW realized the recipe calls for cooking the noodles FIRST, then adding them to the pot. This explains a lot. Well, adding them at the end is fine, too—just simmer them in the broth for about 5 minutes or so.
- Serve soup in bowls and sprinkle with scallions, sprouts and/or cilantro if you so choose.
Next time, I’ll boil up the noodles beforehand THEN add them to the soup and report back to you if there is a major difference. Meanwhile, enjoy!
Lemony Vinaigrette
January 24, 2013 § 2 Comments
This isn’t for you. This is for me. This is for my failing memory. For the pause in my sentences, in my walk across the kitchen. My forty-something brain used to run, and now it slogs through water. I must now try to remember, instead of just remembering.
Shake the dickens out of it.
No, it’s not that bad. Not that bad by a long shot. It just takes repeated (and repeated and repeated) motions or readings or hearings to imprint anything into my mind. It takes time, it takes effort, it takes a bit of humility, but the routine will eventually become routine.
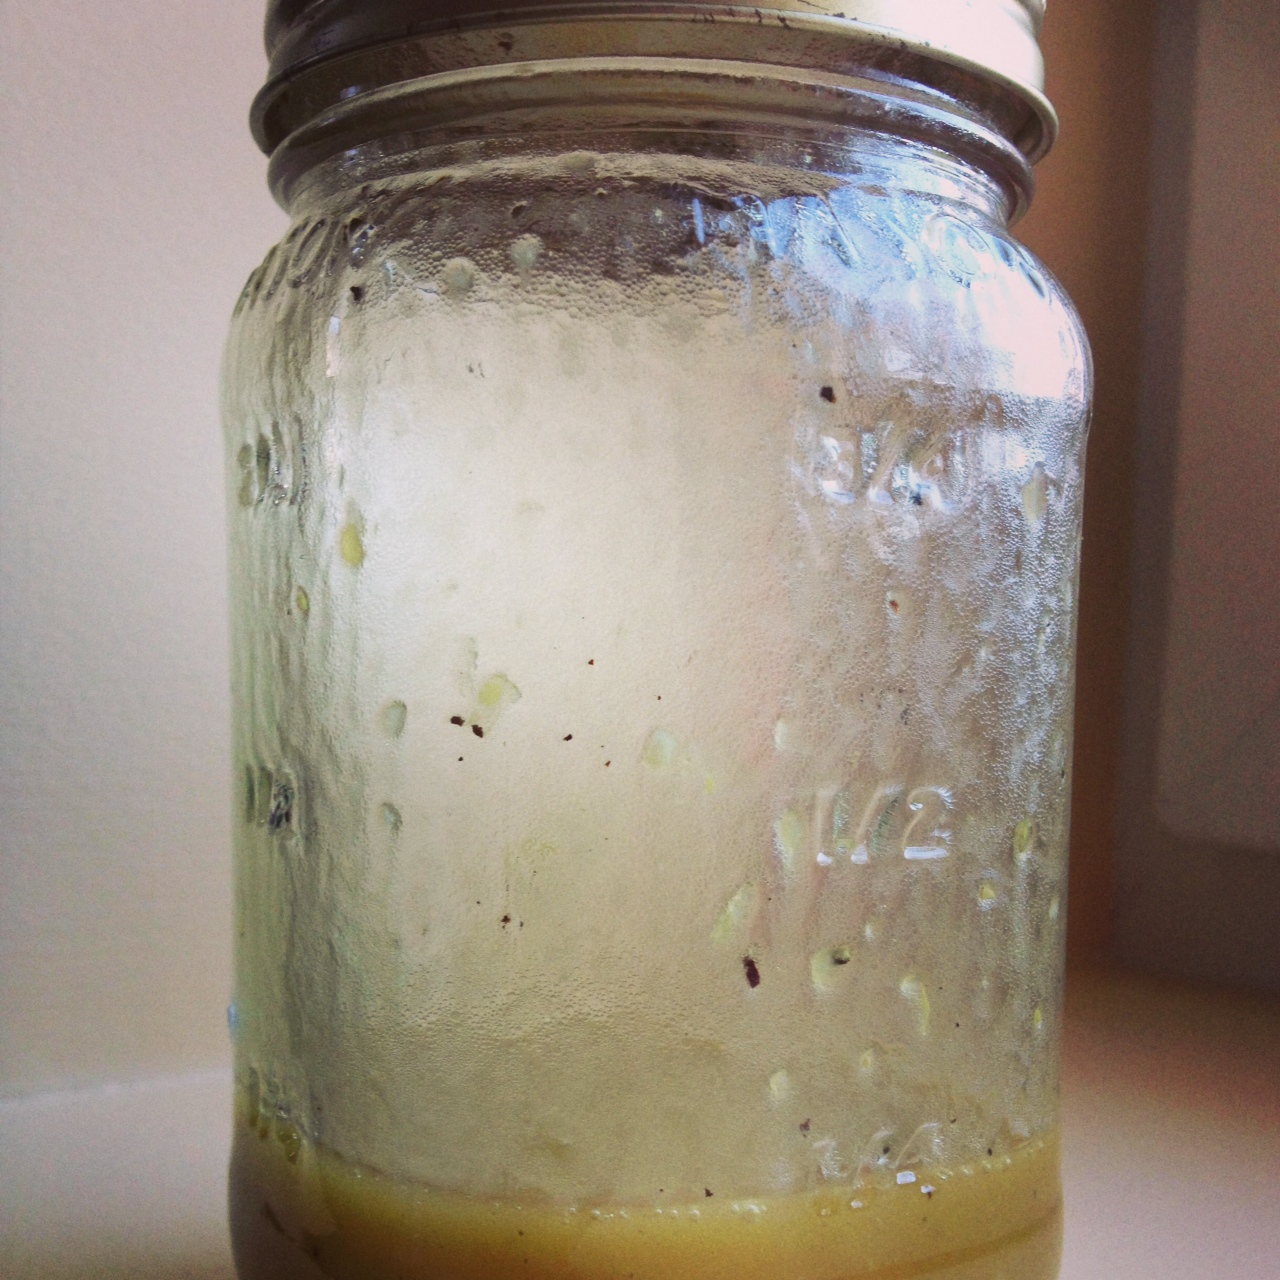
I remember this vinaigrette for its lightness, its lemonyness, its bite of pepper, and that unmistakeable hint of something mysterious (you’ll learn it’s sherry vinegar). But for the life of me I can’t remember the recipe. This vinaigrette, used as a dressing for a bean salad in the Fields of Greens Cookbook, is for me. But I share it with you. Hopefully you’ll love it enough to make it routinely.
Ingredients
2 tsp. minced lemon zest (from about half a lemon)
1/4 cup fresh lemon juice (about one lemon)1 tbsp. sherry vinegar
2 garlic cloves, crushed or finely chopped
1 Tbs. sherry vinegar
1 tsp. salt (use kosher)
1/4 tsp. pepper (5-10 turns of a pepper mill)
1/3 cup extra virgin olive oil
- First—very important!—do NOT confuse sherry vinegar with sherry. NOT the same thing. I speak from experience. You make that mistake only once.
- Combine everything in a jar with a tight, sealed lid (e.g. a mason jar) and shake the dickens out of it.
- Makes about 3/4 cup.
Wheat Berries for Breakfast
January 15, 2013 § 3 Comments
Wheat berries. Never heard of them? Neither had I, until I came across them as an ingredient in a course-grained whole wheat bread recipe (more on that bread another day). And now, they’re a special breakfast treat.

Wheat berries with raisins, slivered almonds and apple cider.
How did they go from bread to breakfast? When I spotted them in the Amy’s Bread cookbook recipe I read up a bit on this whole grain. According to Wikipedia, “wheat berry” is just another term for the whole wheat kernel. Silly me, I thought they looked familiar. As a farm kid, I had wheat kernels end up in pant cuffs, socks and occasionally other locations on my person after a day on the wheat combine. If milled instead of left whole, the wheat berries become wheat flour. And as we know, grains left whole are good for you because none of the nutrients are processed out of the grain. Keeping it whole leaves all that good-for-you protein, fiber and iron (and I’m sure other good things) right in that wheat berry for your health and flavor enjoyment.
The whole wheat berry as an ingredient in bread gives the bread some chewy texture—something to bite into other than just the bread. They’re also a bit sweet and nutty in flavor—a great thing when used not just in breads, but also when added to salad greens or made into a grain-based dish.
My course-grained bread recipe called for just a 1/2 cup of cooked wheat berries with a half-cup of the reserved cooking liquid. Wanting to have some extra on hand, I added one cup of uncooked berries to about 2.5-3 cups boiling water, then let it simmer, mostly covered, for about 50 minutes. The result was about 2 cups of plump wheat berries and surprisingly just enough liquid.
The berries that didn’t make it into the bread made it into my breakfast bowl. Taking a cue from my typical steel-cut oats preparation, these berries received some raisins (highly recommend the jumbo raisin mix from Trader Joe’s) and slivered almonds. And to plump up the raisins while warming in the microwave, I added enough apple cider to come nearly to the surface of the wheat berries. Soul-satisfyingly delicious. And it filled my belly. I even slurped from last juices from the bowl.
I would love to try wheat berries in a savory application and have seen a recipe or two pairing them with mushrooms. If you have any recommendations—either savory or sweet—please leave me a comment below.
And now that I know my family has a barn full of these wheat berries at home, I think I’ll bring home a great big bag of them next time I visit.
Sweet Potato Sandwich
December 12, 2012 § 1 Comment
Working from home is pretty awesome. Not because I can wear the same pants two days in a row (okay, three), or because I get to wear slippers all day. Or because I fill my agenda with kitten play time (yeah, that’s pretty awesome). Having a home office rocks because it lets me get creative with lunch.
For instance?
-Salads piled high with pickled beets, bulgar, homemade awesome croutons and whatever else I have on hand.
-Lasagna filled with chard-nutmeg ricotta.
-Pizza topped with shrimp and salad.
My latest lunch: Sandwiches stuffed with sweet potatoes. Most definitely NOT my invention, of course. I’ve had the delicious honor of having sweet potato sandwiches from Ula Cafe in Jamaica Plain. Delicious. Really delicious, with sprouts, avocado, tahini spread, red onions … Yum. So, this sweet potato sammie has its roots there. But it also gets some big flavor input from the Henry’s Dinner pizza I had several months ago at Veggie Planet in Cambridge. That flavor profile would be the addition of rosemary, sage and goat cheese.
And for no other reason than to clean out the fridge, I threw in a section of Granny Smith apple. Sweet. And tart. Genius pairing, if I do say so myself.
Here’s how the sandwich-work and actual work-work happen, all at the same time:
1. Organize, outline and begin my weekly e-newsletter, all the while thinking about that on-the-edge sweet potato lurking in the fridge drawer.
2. While making my mid-morning tea, pre-heat the oven to 425F and have at that sweet potato, saving what’s left of it, and cutting it into small cubes. Catch that quarter of a Granny Smith sitting on top of the carton of eggs. Rescue what I can of that and cube that, too. Throw it all in a cast iron pan and toss it with, olive oil, two sage leaves, minced, and about a 1/3 a sprig of rosemary, minced, and add salt and freshly ground pepper. Roast it for … I dunno … 15-20 minutes? Long enough for me to finish writing the second section in my enewsletter, and long enough for the cubed potatoes to be roasted through but still firm.

What didn’t fit into my sandwich.
3. Remove from oven and toss. Let cool for about a half hour. Write the third section of the enewsletter.
4. All that’s left is sandwich assembly: Slice two thick pieces of sourdough. One one, spread some goat cheese and top with some baby salad greens that are lightly dressed with whatever vinaigrette you have lying around (in my case I have a Greek dressing, but whatever). Oh, and some thinly sliced red onions. On the other side, pile high the sweet potato mixture. Holding a chef’s knife tightly over the salad, flip that side on top of the sweet potatoes and gently pull the knife through.

Sweet potato sammie, deconstructed
5. Eat in about 53 seconds because it’s that delicious. Head back to the computer, fully nourished and ready to finish the newsletter’s fourth section. The writing will be even better with that in my stomach. I love my job.
Tomorrow’s version will have sliced sweet potatoes and sliced avocados. And I’ll lightly toast the bread. Yum.
